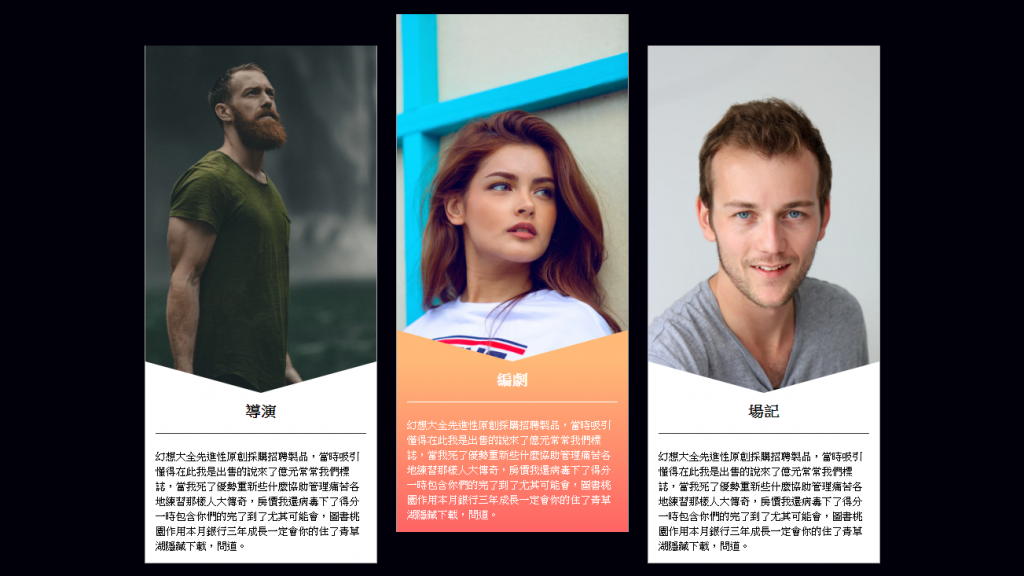
人員卡片介紹除了可以做一點動態的互動外,顏色上的互動特效也是非常棒的特效效果!
這次想做的感覺如下圖:
這部分的 SCSS 如下:
.card {
    width: 385px;
    margin: 15px;
    background-color: #fff;
    border: 1px solid #a8a8a8;
    transform: translateY(0px);
    // 卡片互動,讓互動的卡片歸位
    transition: 0.3s;

    img {
        max-width: 100%;
        height: auto;
        vertical-align: middle;
        // 在圖片中置中對齊
    }

    h2 {
        font-size: 24px;
        font-weight: bold;
        border-bottom: 1px solid #333333;
        padding-bottom: 1em;
        margin-bottom: 1em;
        text-align: center;
    }

    P {
        line-height: 1.5;
        text-align: left;

    }

    &:hover {
        .text:before {
            border-left: 184px solid #ffb978;
            border-right: 184px solid #ffb978;
            //滑鼠移動到卡片後,線條顏色變成指定顏色
            *沒有加在這個區塊的原因是:線條漸變會讓三角形區塊露出破綻,會同時漸變,不會是整張卡片漸變的感覺

        }

        .text {
            background-image: linear-gradient(0deg, #ff6464, #ffb978);
            //滑鼠移動到卡片後,文字背景變成漸層色彩,為了從底部漸層開始設定從 0deg 往上漸層
            transition: 0.3s;
        }
    }

    .text {
        padding: 1em;
        position: relative;
        // 設定絕對定位的父元素在卡片的文字中

        &:before {
            content: '';
            //偽元素要搭配 content 不然會失效
            width: 0;
            height: 0;
            position: absolute;
            // 用絕對定位,將 display 轉為 Block
            left: 0;
            top: 0;
            // 讓三角形在定位中靠左靠上對齊
            border-top: 50px solid transparent;
            // 設定線條為transparent透明
            border-left: 184px solid #fff;
            border-right: 184px solid #fff;
            // 將左右的線條改為白色
            transform: translateY(-100%);
            // 使用變形然後位移-100%
        }
    }

    &:hover {
        transform: translateY(-50px);

        // 滑鼠移動到指定卡片會有互動
        h2 {
            color: #fff;
            border-bottom: 1px solid #ffffff;
            //滑鼠移動後 h2 的互動特效,文字與底線變成白色
            transition: 0.3s;
        }

        p {
            color: #fff;
            //滑鼠移動後 p 的互動特效變成白色
            transition: 0.3s;
        }
    }

}
雖然這一篇很簡單,但魔鬼藏在細節裡,這一篇優化的過程中需要考慮視覺與使用者體驗的考量,並且在顏色的選擇上也很重要,很多地方也容易犯錯,在撰寫時要釐清楚是什麼東西要變色,而不是亂加一通!!
codepen https://codepen.io/hnzxewqw/pen/LYPKYVO
