本文同步刊載於Andy's Blog
這兩天介紹完Vue第一種元件之間的溝通方式,props in ,emit out,並且針對props使用上也做了用法上的提醒如:單向資料流、型別驗證、動態載入屬性Vs靜態載入屬性、Non-Prop Attributes。若想了解這些內容,我也把連結附在下方。
1.Day16 Vue Component(元件) props、emit介紹
2.Day17 Vue Component(元件) - props使用注意細項(1)
2.Day18 Vue Component(元件)-props使用注意細項(2)
而我們今天要認識另一種元件與元件之間溝通方式,$parent、$children。(雖然介紹這種方法,但開發上還是建議少用XD),那我們就開始吧!
子元件可以透過this.$parent,來存取父層組件。這種方法用起來就是爽XD,不用在子元件中發送$emit事件,來呼叫父元件。
使用時機:通常使用情境都是在debug上,開發上還是不建議透過子元素來覆寫父層元素。
原因:直接透過子元素來覆寫父層元素,
會造成父元件跟子元件耦合過深重,日後無法單獨把這個子元件拉出來使用。
連結
HTML部分
<div id="app">
    <my-component  ref="comp1" :parent-msg="msg"></my-component>
</div>
JavaScript部分
Vue.component('my-component',{
  template:`<div>{{parentMsg}}</div>`,
  props: ["parentMsg"],
  mounted(){
    console.log("$parent",this.$parent.msg);

    window.setTimeout(() =>{
          this.$parent.msg="Hello"
    },2000)
  },
})


new Vue({
  el:'#app',
  data:{
    msg:'Msg of Parent'
  }
})
說明:我們在兩秒過後,把父層msgMsg of Parent,更改為Hello
父元件可以透過this.$children,來存取子組件(陣列)。至於為何是陣列,我們可以來複習一下這張圖。圖片中可以發現每個子元件都只會有一個父元素,但是父元素就不同摟,他可能會有0~無限個子元素。這也就是為何取出來是陣列原因!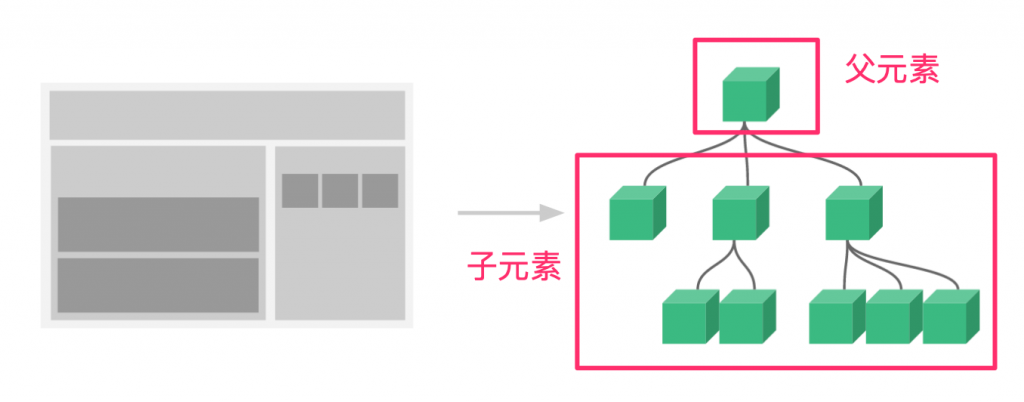
為了不讓v-if影響子元件顯示順序,我們可以透過幫子組件設定別名ref,來確保組件順序不受影響。
練習連結
HTML部分
<div id="app">
    <my-component2 ref="comp2"></my-component2>
    <my-component3 ref="comp3"></my-component3>

    <hr>
    <div> {{ msg }}</div>
  </div>
JavaScript部分
new Vue({
  el: '#app',
  data: {
    msg: 'Msg of Parent!'
  },
  mounted() {
   console.log(this.$children[0]) // VueComponent,my-component3
   console.log('$children2: ', this.$refs.comp2.msg);   //Hi COMP2
   console.log('$children3: ', this.$refs.comp3.msg);  //Hi COMP3
      }
  });

