在前面的文章中有提到兩個外掛:disqus及webpack。本篇文章將說明如何安裝、讀取、以及基本外掛使用。
安裝方式有兩種,第一個是直接在.lektorproject中輸入外的名稱及版本:
[packages]
lektor-disqus-comments = 0.4.1
lektor-webpack-support = 0.5
另一種則是透過指令新增,最終也會在.lektorproject的檔案中加入外掛。
$ lektor plugin add lektor-disqus-comments
若是有在.lektorproject輸入名稱,Lektor就會讀取外掛,但如果是正在開發中的外掛,可以在專案中建立package資料夾,並在資料夾中建立放入外掛,1個外掛1個資料夾。
在開發前需要先設定LEKTOR_DEV=1。
$ export LEKTOR_DEV=1
$ lektor server
如同前面說明,在package資料夾中建立外掛的資料夾,即可開始進行開發。Lektor也有提供指令,幫你建立外掛資料夾,通常命名為lektor-xxxx。像是前面提到的disqus,其外掛名稱為lektor-disqus-comments。以下用lektor-hello-world為例介紹外掛開發流程,首先執行指令,或是在package資料夾中建立lektor-hello-world資料夾:
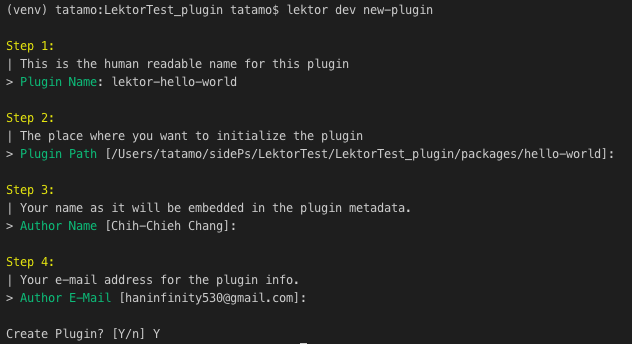
$ lektor dev new-plugin
執行上述命令後,lektor會問你一些問題,並根據的你回答建立外掛資料夾:
以下是剛建立的外掛資料夾架構
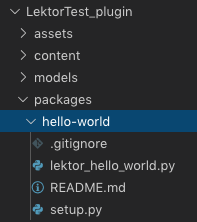
裡面包含README.md,setup.py,及lektor_hello_world.py檔案,並幫你建立.gitignore,避免之後要push時不小心也把執行過程的檔案也上傳上去,真的是非常貼心呢!
看一下自動建立的setup.py長什麼樣子:
import ast
import io
import re

from setuptools import setup, find_packages

with io.open('README.md', 'rt', encoding="utf8") as f:
    readme = f.read()

_description_re = re.compile(r'description\s+=\s+(?P<description>.*)')

with open('lektor_hello_world.py', 'rb') as f:
    description = str(ast.literal_eval(_description_re.search(
        f.read().decode('utf-8')).group(1)))

setup(
    author='Chih-Chieh Chang',
    author_email='haninfinity530@gmail.com',
    description=description,
    keywords='Lektor plugin',
    license='MIT',
    long_description=readme,
    long_description_content_type='text/markdown',
    name='lektor-hello-world',
    packages=find_packages(),
    py_modules=['lektor_hello_world'],
    # url='[link to your repository]',
    version='0.1',
    classifiers=[
        'Framework :: Lektor',
        'Environment :: Plugins',
    ],
    entry_points={
        'lektor.plugins': [
            'hello-world = lektor_hello_world:HelloWorldPlugin',
        ]
    }
)
setup.py提供lektor這個外掛要執行的資訊,讓lektor知道要怎麼樣執行這個外掛。再來看自動建立的lektor_hello_world.py裡面長什麼樣子吧!
這個文件為外掛的執行程式,外掛的開發程式就是寫在這裡面:
# -*- coding: utf-8 -*-
from lektor.pluginsystem import Plugin

class HelloWorldPlugin(Plugin):
    name = 'lektor-hello-world'
    description = u'Add your description here.'

    def on_process_template_context(self, context, **extra):
        def test_function():
            return 'Value from plugin %s' % self.name
        context['test_function'] = test_function
此時執行lektor serve就會看到命令列在幫你安裝外掛,你也可以用lektor plugins list檢視目前已經安裝的外掛資訊:

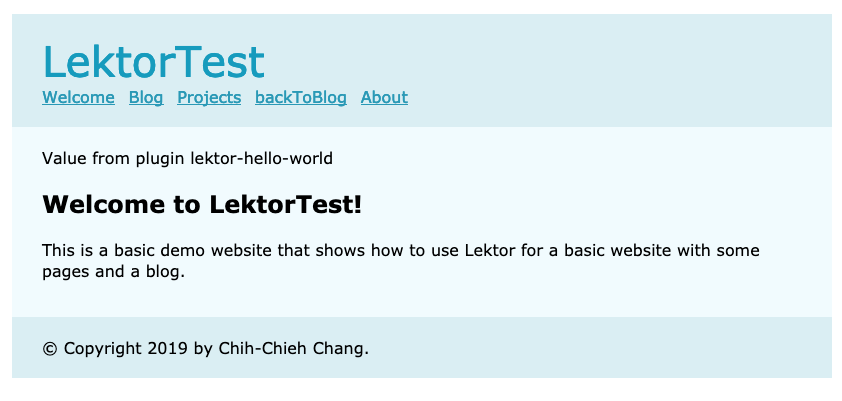
lektor中的外掛執行方式以事件監聽為主,在外掛中設定的事件觸發時,啟動外掛並執行動作。例如上面建立的外掛,有設定test_function(),其動作會回傳一個字串:'Value from plugin %s' % self.name,轉換後就是Value from plugin lektor-hello-world。所以當我在網頁的template中加入test_function() ,就會在我要的位置收到回傳的資訊。如下,我在layout.html中加入,位置放在page的div區塊中,並在block上方,因此預期Value from plugin lektor-hello-world這一串文字會出現在所有頁面的內容上方的位置。
<!doctype html>
<meta charset="utf-8">
<link rel="stylesheet" href="{{ '/static/style.css'|url }}">
<title>{% block title %}Welcome{% endblock %} — LektorTest</title>
<body>
  <header>
    <h1>LektorTest</h1>
    <nav>...</nav>
  </header>
  <div class="page">
    {{ test_function() }}
    {% block body %}{% endblock %}
  </div>
  <footer>
    © Copyright 2019 by Chih-Chieh Chang.
  </footer>
</body>
成功了!!!
lektor中已經建置了一些常用的API,提供外掛開發使用,相關資訊可參考這裡
CSScoke - 金魚都能懂的這個網頁畫面怎麼切 - 金魚都能懂了你還怕學不會嗎
King Tzeng - IoT沒那麼難!新手用JavaScript入門做自己的玩具~
Hina Hina - 陣列大亂鬥
阿斬 - Python 程式交易 30 天新手入門
Clarence - LINE bot 好好玩 30 天玩轉 LINE API
塔塔默 - 用Python開發的網頁不能放到Github上?Lektor說可以!!
Vita Ora - 好 Js 不學嗎 !? JavaScript 入門中的入門。


 iThome鐵人賽