準備好NFV MANO VIM、http_client、http_server,接下來要來介紹如何使用Tacker建立VNF,及使用VNFFG建立service function chain(SFC)
想了解專有名詞要往前看呦
$ vim tosca-vnffg-vnfd1.yaml
tosca_definitions_version: tosca_simple_profile_for_nfv_1_0_0

description: Demo example

metadata:
  template_name: sample-tosca-vnfd1

topology_template:
  node_templates:
    VDU1:
      type: tosca.nodes.nfv.VDU.Tacker
      capabilities:
        nfv_compute:
          properties:
            num_cpus: 1
            mem_size: 512 MB
            disk_size: 1 GB
      properties:
        image: cirros
        availability_zone: nova
        mgmt_driver: noop
        config: |
          param0: key1
          param1: key2
        user_data_format: RAW
        user_data: |
          #!/bin/sh
          echo 1 > /proc/sys/net/ipv4/ip_forward
          cat << EOF >> /etc/network/interfaces
          auto eth1
          iface eth1 inet dhcp
          auto eth2
          iface eth2 inet dhcp
          EOF
          ifup eth1
          ifup eth2
    CP11:
      type: tosca.nodes.nfv.CP.Tacker
      properties:
        management: true
        order: 0
        anti_spoofing_protection: false
      requirements:
        - virtualLink:
            node: VL11
        - virtualBinding:
            node: VDU1

    CP12:
      type: tosca.nodes.nfv.CP.Tacker
      properties:
        order: 1
        anti_spoofing_protection: false
      requirements:
        - virtualLink:
            node: VL12
        - virtualBinding:
            node: VDU1

    CP13:
      type: tosca.nodes.nfv.CP.Tacker
      properties:
        order: 2
        anti_spoofing_protection: false
      requirements:
        - virtualLink:
            node: VL13
        - virtualBinding:
            node: VDU1

    VL11:
      type: tosca.nodes.nfv.VL
      properties:
        network_name: net_mgmt
        vendor: Tacker

    VL12:
      type: tosca.nodes.nfv.VL
      properties:
        network_name: net0
        vendor: Tacker

    VL13:
      type: tosca.nodes.nfv.VL
      properties:
        network_name: net1
        vendor: Tacker
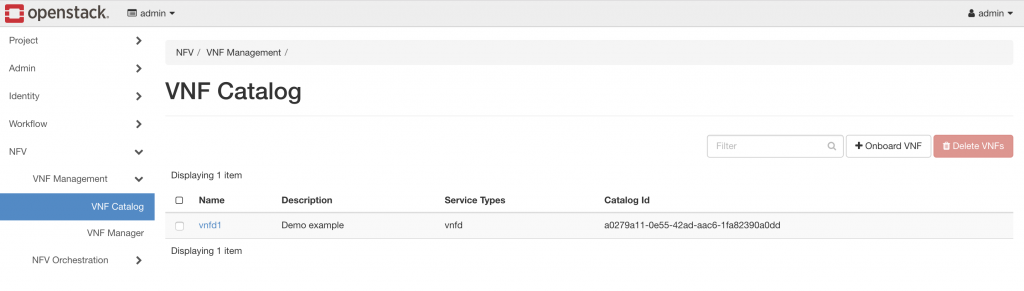
$ openstack vnf descriptor create --vnfd-file tosca-vnffg-vnfd1.yaml vnfd1
此時可以發現Dashboard出現剛剛新增的VNFFD
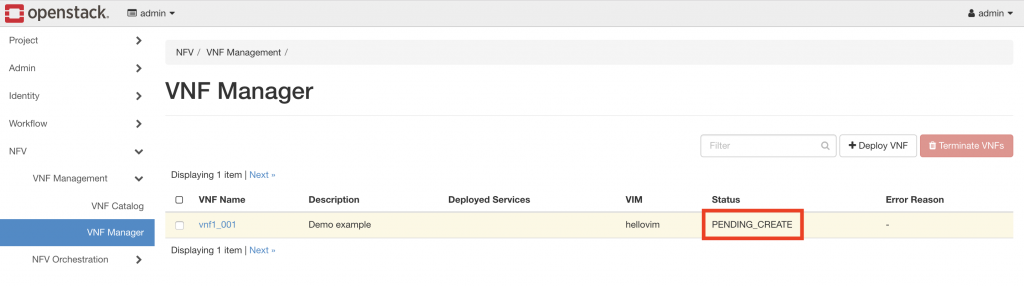
$ openstack vnf create --vnfd-name vnfd1 vnf1_001
VNF狀態為PENDING_CREATE,代表在建立我們VNFD描述的VNF
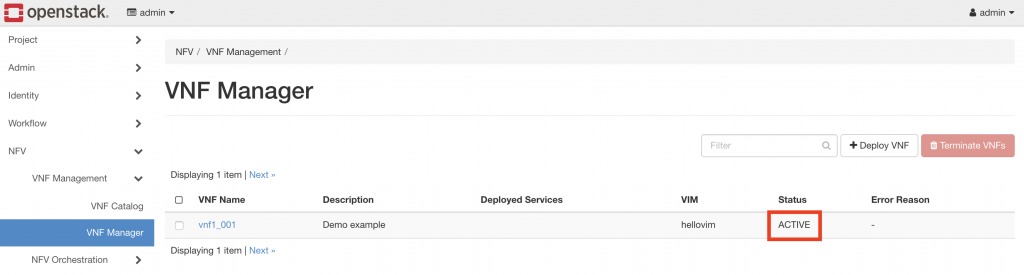
VNF狀態為ACTIVE時代表建立完成
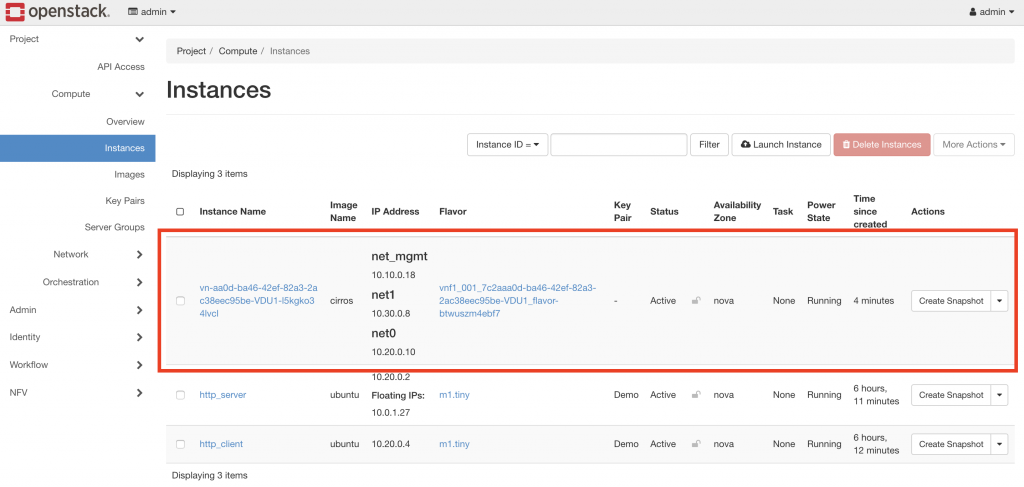
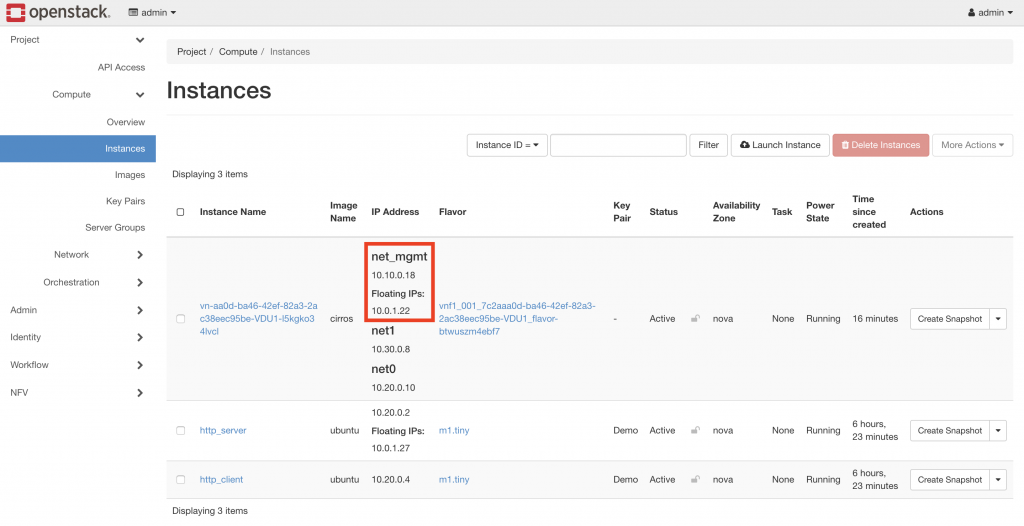
此時可以查看VM列表會發現成功建立一台VNF
擁有三個network interface
(1) 在Router連接至net_mgmt
$ openstack router add subnet testRouter net_mgmt
(2) 為vnf1_001添加Floating IP
可用Dashboard操作,需添加在net_mgmt port上面
(3) 進入vnf1_001
使用者:cirros
密碼:gocubsgo
$ ssh cirros@10.0.1.22
可以看到vnf1_001中有三個interface可以使用,即建立成功
實驗中會建立兩個VNF,並強制從http_client對http_server執行TCP 3000 Port request時經過VNFFGD所描述的flow,完成SFC實驗
$ vim tosca-vnffg-vnfd1.yaml
tosca_definitions_version: tosca_simple_profile_for_nfv_1_0_0

description: Demo example

metadata:
  template_name: sample-tosca-vnfd1

topology_template:
  node_templates:
    VDU1:
      type: tosca.nodes.nfv.VDU.Tacker
      capabilities:
        nfv_compute:
          properties:
            num_cpus: 2
            mem_size: 2048 MB
            disk_size: 96 GB
      properties:
        image: ubuntu
        availability_zone: nova
        mgmt_driver: noop
        key_name: Demo
        config: |
          param0: key1
          param1: key2
        user_data_format: RAW
        user_data: |
          #!/bin/sh
          cat << EOF >> /etc/network/interfaces.d/50-cloud-init.cfg
          auto ens4
          iface ens4 inet dhcp
          auto ens5
          iface ens5 inet dhcp
          EOF
          sudo ifconfig ens4 up
          sudo ifconfig ens5 up
          sudo sysctl -p
          sudo /etc/init.d/networking restart
          echo 1 > /proc/sys/net/ipv4/ip_forward
    CP11:
      type: tosca.nodes.nfv.CP.Tacker
      properties:
        management: true
        order: 0
        anti_spoofing_protection: false
      requirements:
        - virtualLink:
            node: VL11
        - virtualBinding:
            node: VDU1

    CP12:
      type: tosca.nodes.nfv.CP.Tacker
      properties:
        order: 1
        anti_spoofing_protection: false
      requirements:
        - virtualLink:
            node: VL12
        - virtualBinding:
            node: VDU1

    CP13:
      type: tosca.nodes.nfv.CP.Tacker
      properties:
        order: 2
        anti_spoofing_protection: false
      requirements:
        - virtualLink:
            node: VL13
        - virtualBinding:
            node: VDU1

    VL11:
      type: tosca.nodes.nfv.VL
      properties:
        network_name: net_mgmt
        vendor: Tacker

    VL12:
      type: tosca.nodes.nfv.VL
      properties:
        network_name: net0
        vendor: Tacker

    VL13:
      type: tosca.nodes.nfv.VL
      properties:
        network_name: net1
        vendor: Tacker
$ vim tosca-vnffg-vnfd2.yaml
tosca_definitions_version: tosca_simple_profile_for_nfv_1_0_0

description: Demo example

metadata:
  template_name: sample-tosca-vnfd2

topology_template:
  node_templates:
    VDU1:
      type: tosca.nodes.nfv.VDU.Tacker
      capabilities:
        nfv_compute:
          properties:
            num_cpus: 2
            mem_size: 2048 MB
            disk_size: 96 GB
      properties:
        image: ubuntu
        availability_zone: nova
        mgmt_driver: noop
        key_name: Demo
        config: |
          param0: key1
          param1: key2
        user_data_format: RAW
        user_data: |
          #!/bin/sh
          cat << EOF >> /etc/network/interfaces.d/50-cloud-init.cfg
          auto ens4
          iface ens4 inet dhcp
          auto ens5
          iface ens5 inet dhcp
          EOF
          sudo ifconfig ens4 up
          sudo ifconfig ens5 up
          sudo sysctl -p
          sudo /etc/init.d/networking restart
          echo 1 > /proc/sys/net/ipv4/ip_forward
    CP21:
      type: tosca.nodes.nfv.CP.Tacker
      properties:
        management: true
        order: 0
        anti_spoofing_protection: false
      requirements:
        - virtualLink:
            node: VL21
        - virtualBinding:
            node: VDU1

    CP22:
      type: tosca.nodes.nfv.CP.Tacker
      properties:
        order: 1
        anti_spoofing_protection: false
      requirements:
        - virtualLink:
            node: VL22
        - virtualBinding:
            node: VDU1

    CP23:
      type: tosca.nodes.nfv.CP.Tacker
      properties:
        order: 2
        anti_spoofing_protection: false
      requirements:
        - virtualLink:
            node: VL23
        - virtualBinding:
            node: VDU1

    VL21:
      type: tosca.nodes.nfv.VL
      properties:
        network_name: net_mgmt
        vendor: Tacker

    VL22:
      type: tosca.nodes.nfv.VL
      properties:
        network_name: net0
        vendor: Tacker

    VL23:
      type: tosca.nodes.nfv.VL
      properties:
        network_name: net1
        vendor: Tacker
$ openstack vnf descriptor create --vnfd-file tosca-vnffg-vnfd1.yaml vnfd1
$ openstack vnf descriptor create --vnfd-file tosca-vnffg-vnfd2.yaml vnfd2
$ openstack vnf create --vnfd-name vnfd1 vnf1_001
$ openstack vnf create --vnfd-name vnfd2 vnf2_001

需要指定SFC的來源Port,也就是http_client(IP:10.20.0.4)
$ openstack port list | grep 10.20.0.4
# ID
d0f4f11e-d4e1-43fc-900d-d65533133f17
需要指定SFC的目標Port,也就是http_server(IP:10.20.0.2)
$ openstack port list | grep 10.20.0.2
# ID
3316010b-d7a2-4a8b-a80a-1a915066260f
需更改network_src_port_id、network_dst_port_id、ip_dst_prefix
$ vim tosca-vnffgd-sample.yaml
tosca_definitions_version: tosca_simple_profile_for_nfv_1_0_0

description: Sample symmetrical VNFFG template (network_dst_port_id and ip_dst_prefix must be set)

topology_template:

  node_templates:

    Forwarding_path1:
      type: tosca.nodes.nfv.FP.TackerV2
      description: creates path (CP12->CP22)
      properties:
        id: 96
        policy:
          type: ACL
          criteria:
            - name: block_tcp
              classifier:
                network_src_port_id: d0f4f11e-d4e1-43fc-900d-d65533133f17
                network_dst_port_id: 3316010b-d7a2-4a8b-a80a-1a915066260f
                ip_dst_prefix: 10.20.0.2/24
                destination_port_range: 3000-3000
                ip_proto: 6
        path:
          - forwarder: VNFD1
            capability: CP12
          - forwarder: VNFD2
            capability: CP22

  groups:
    VNFFG1:
      type: tosca.groups.nfv.VNFFG
      description: HTTP to Corporate Net
      properties:
        vendor: tacker
        version: 1.0
        number_of_endpoints: 2
        dependent_virtual_link: [VL12,VL22]
        connection_point: [CP12,CP22]
        constituent_vnfs: [VNFD1,VNFD2]
      members: [Forwarding_path1]
# Create VNFFGD
$ openstack vnf graph descriptor create --vnffgd-file tosca-vnffgd-sample.yaml tosca-vnffgd-sample

# 查看VNF列表
$ openstack vnf list
+--------------------------------------+----------+-----------------+--------+--------------------------------------+--------------------------------------+
| ID                                   | Name     | Mgmt Ip Address | Status | VIM ID                               | VNFD ID                              |
+--------------------------------------+----------+-----------------+--------+--------------------------------------+--------------------------------------+
| 5d5f1b33-67a7-4391-9b12-6a0558538bcc | vnf2_001 |                 | ACTIVE | 68a063c6-f55a-499b-a6a1-9e6dfd4ccb51 | c405d073-c452-4e88-924e-ad4d5f6c7ae1 |
| b6a99291-a6ab-4df3-bd86-257330ee6e91 | vnf1_001 |                 | ACTIVE | 68a063c6-f55a-499b-a6a1-9e6dfd4ccb51 | e9fa1ae0-7714-4591-a3d5-48eb0b92a74a |
+--------------------------------------+----------+-----------------+--------+--------------------------------------+--------------------------------------+

# Create VNFFG並指定VNF
$ openstack vnf graph create --vnffgd-name tosca-vnffgd-sample --vnf-mapping VNFD1:'b6a99291-a6ab-4df3-bd86-257330ee6e91',VNFD2:'5d5f1b33-67a7-4391-9b12-6a0558538bcc' tosca-vnffgd-sample
(1) 給http_client、VNF1、VNF2 Floating IP
(2) ssh進入http_client
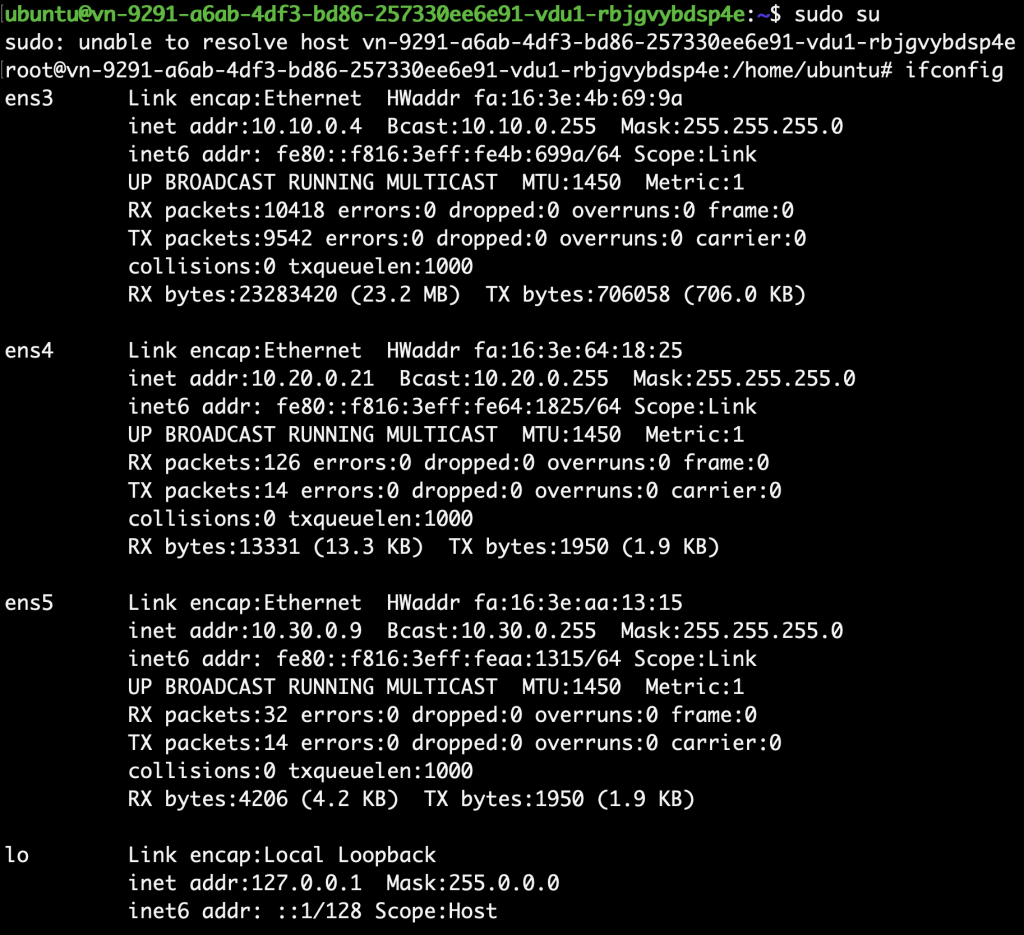
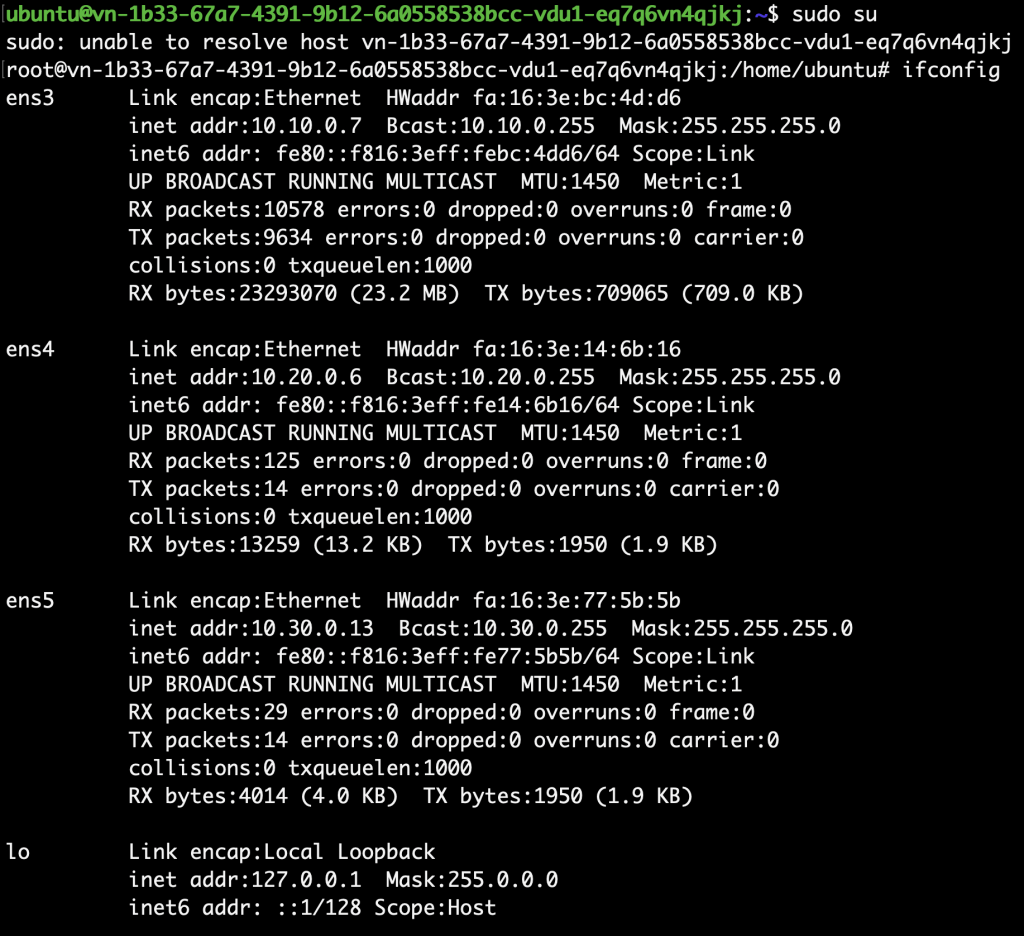
(3) ssh進入VNF1、VNF2
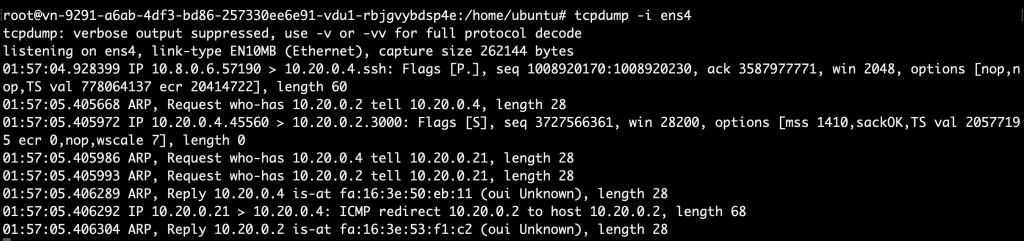
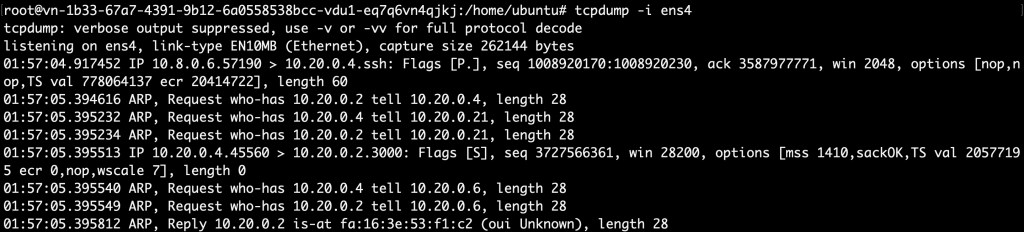
(4) 使用tcpdump檢測網卡封包VNF1
要檢測的interface為ens4
使用tcpdump抓取封包
(5) 使用tcpdump檢測網卡封包VNF2
要檢測的interface為ens4
使用tcpdump抓取封包
(6) 進入http_client對http_server(IP:10.20.0.2)執行request
$ curl 10.20.0.2:3000
(7) 查看執行結果
http_client
VNF1
VNF2
可看到封包經過指定的VNF代表成功完成SFC實驗
https://github.com/openstack/tacker