
今天這篇會來認識一個剛創建完的專案的資料夾結構
認識專案結構很重要,認識後才知道如何整理分類檔案,才不會亂亂塞
在創建完專案之後,專案資料夾裡面會長這樣: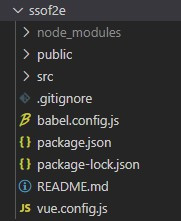
src 是最常用到的地方,展開後長這樣: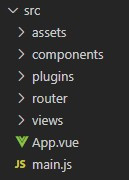
在 components資料夾與 views資料夾中還有 App.vue 都可以看到 .vue 檔,這邊來分析一下它的組成方式
.vue 檔的結構分為三個部分
組合起來像這樣:
<template>
  <div class="main">
    {{ message }}
  </div>
</template>
<script>
export default {
  name: "HelloVue",
  data: () => ({ message: "Hello Vue!!" }),
};
</script>
<style scoped>
.main {
  text-align: center;
}
</style>
可以看到上面程式碼中,style 的部分有加上 scoped 屬性,作用是 css 只會在當下元件有效
相反的,如果 scoped 拿掉,則全域都會有作用
如果有的class是要全域作用的,有的是當下元件作用的,那就可以放兩個 style ,其中一個加上 scoped:
<style>
  //全域有效
</style>
<style scoped>
  //當下元件有效
</style>
專案中會用到 Vue Router 路由套件
如果一開始沒有安裝到,可以使用這個指令來做安裝:
npm install vue-router
安裝完要在 main.js 中引用:
import VueRouter from 'vue-router'
Vue.use(VueRouter)
const router = new VueRouter({
  ...
})
如果一開始有裝好,上述步驟就可以跳過,因為Vue Cli都幫你做完了
接著來分析一下 router 的設定檔內容
開啟 /router/index.js,這支就是router設定檔:
import Vue from 'vue'
import VueRouter from 'vue-router'
import Home from '../views/Home.vue'

Vue.use(VueRouter)

const routes = [
  {
    path: '/',
    name: 'Home',
    component: Home
  },
  {
    path: '/about',
    name: 'About',
    component: () => import('../views/About.vue')
  }
]

const router = new VueRouter({
  mode: 'history',
  base: process.env.BASE_URL,
  routes
})

export default router
安裝完預設會幫妳寫好這些程式碼
開發時基本上只會動到中間的 routes 設定路由切換
設定route的步驟為:
import 頁面元件import HelloVue from '../views/HelloVue.vue'
const routes = [
  {
    path: '/hellovue',
    name: 'HelloVue',
    component: HelloVue
  }
]
兩步驟就完成了~
當然也可以像 About 頁面直接在路由設定裡面引用元件,省了一行程式碼,看狀況及個人習慣使用
另外,路由設定還有其他的設定項目,例如子分頁- children 等等,其他設定或用法可以參考Vue Router官網
今日重點:
scoped 則其中的css只會在當下元件有效今天介紹專案的資料夾結構,看起來不重要實則相反
如果不好好的分類,自己開發就算了,團隊開發的話還不被電爆,接手你系統的人絕對把你祖宗18代X爆
我就是接過想X爆對方的專案感同身受,發誓我絕對不要被別人X爆(!物理)
共勉之xD