
這篇文章會根據昨天講到的firebase作為延伸~ 希望你可以先讀一下昨天那篇*(除非你會firebase了XD)* https://ithelp.ithome.com.tw/articles/10240573
我們昨天創了一個firebase的專案,也應該創立好了一個Cloud Firestore~
那今天的目的就是讓我們的專案可以把blog post到firebase上面~
首先我們要先去昨天創好的那個forestore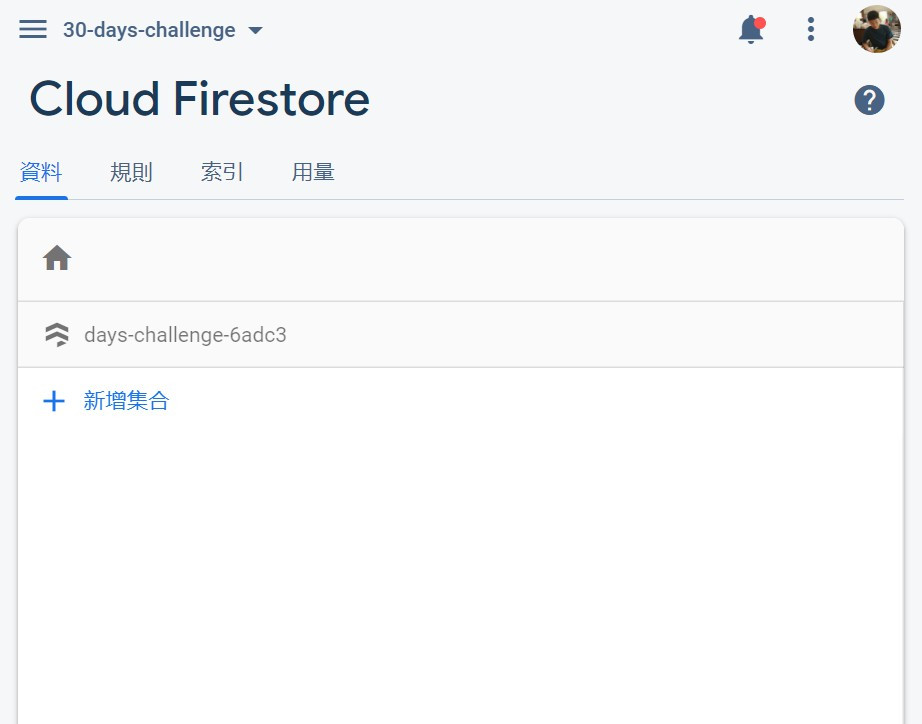
然後我們要選擇新增一個集合,集合在database裡面的意思就相當於一表格,裡面存放著單筆或是多筆的相同屬性資料,屬性就可以想像成是一個物品的特質,譬如說:
我們有一個車庫 ( = 集合)
車庫裡面有很多車子 ( = 資料/ 文件)
車子的屬性有: 廠牌,大小,馬力... ( = 屬性)
那現在我們先給這個集合一個ID~ 之後要在code裡面呼叫這個ID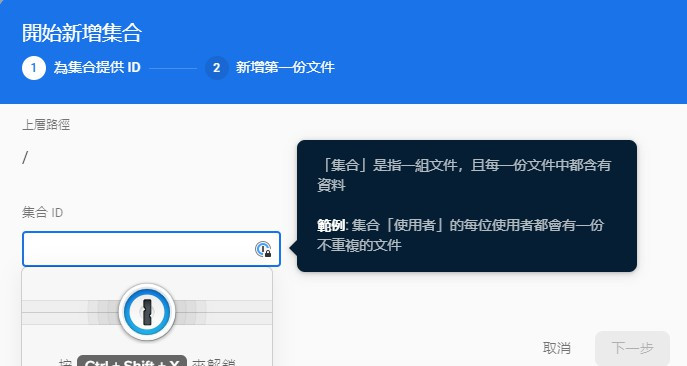
有了車庫,可以開始買車啦XD~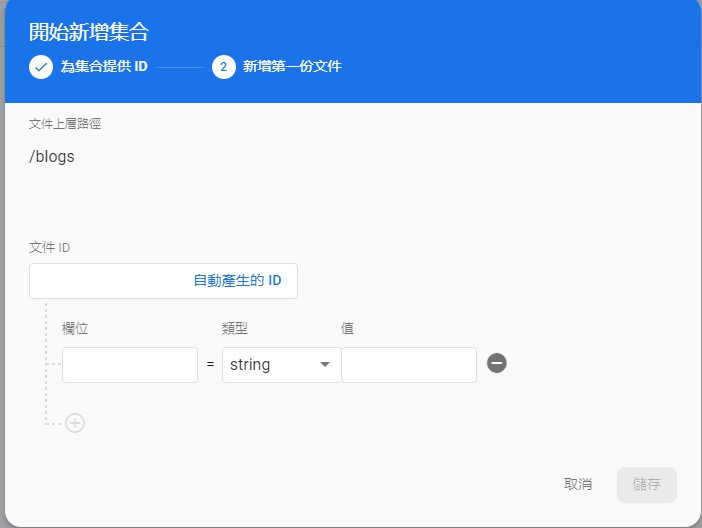
這邊可以看到欄位就是指這個車子要顯示甚麼樣的屬性~ 我們這邊總共加上這幾樣:\
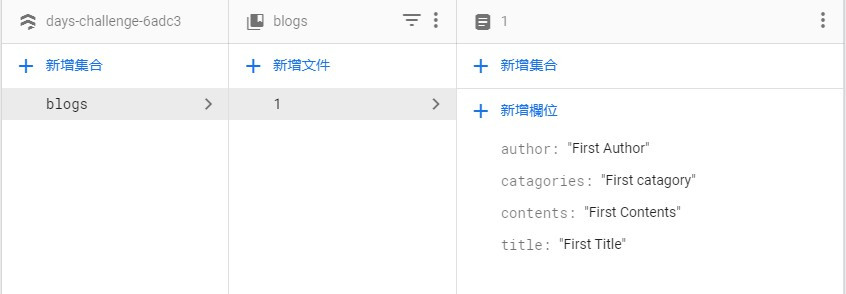
那現在我們就有一個 (由大到小)
Firestore -> Collection -> Document -> columns(attributes)
 import addBlog from "./components/addBlog.vue";

 export default [
   { path: "/addBlog", component: addBlog },
 ];
router-view
<b-nav-item><router-link to="/blogs" exact>Blog Post</router-link></b-nav-item>
\\ 加在這裡~
    <b-nav-item><router-link to="/addBlog" exact>Add Blog Post</router-link></b-nav-item>
我們要做一個可以讓user增加Blog的 頁面,那就是要有一些form的元素 (這邊指的是HTML裡面要求user input 的這類元素都會在一個form 裡面)。那我們可以先想一下有甚麼~
data(){}可以拿來儲存資料!v-model是專門來handle user input的喔!template)<template>
<div id="add-blog">
<h2>Add a New Blog Post</h2>
<form v-if="!submitted">
<label>Blog Title:</label>
<input type="text" v-model.lazy="blog.title" required />
<label>Blog Content:</label>
<textarea v-model.lazy.trim="blog.content"></textarea>
<div id="checkboxes">
<p>Blog Hashtags:</p>
<label>#love</label>
<input type="checkbox" value="ninjas" v-model="blog.hashTags" />
<label>#memes</label>
<input type="checkbox" value="wizards" v-model="blog.hashTags" />
<label>#funny</label>
<input type="checkbox" value="mario" v-model="blog.hashTags" />
<label>#food</label>
<input type="checkbox" value="cheese" v-model="blog.hashTags" />
</div>
<label>Author:</label>
<select v-model="blog.author">
<option v-for="author in authors" :key="author.id">{{ author }}</option>
</select>
<hr />
<button v-on:click.prevent="post">Add Blog</button>
</form>
<div v-if="submitted">
<h3>Thanks for adding your post</h3>
</div>
<div id="preview">
<h3>Preview blog</h3>
<p>Blog title: {{ blog.title }}</p>
<p>Blog content:</p>
<p style="white-space: pre">{{ blog.content }}</p>
<p>Blog hashTags:</p>
<ul>
<li v-for="category in blog.hashTags" :key="category.id">
{{ category }}
</li>
</ul>
<p>Author: {{ blog.author }}</p>
</div>
</div>
</template>
這邊也要注意幾個點~ 我們可以看到其實這段code分為兩大段! 第一段是拿來處理 form也就是 user input,另外一段是叫做 preview,可以即時看到我們用了哪些資料~
v-model: 這個就是我剛剛說的可以拿來綁定user input到等等下面script裡會寫到的 data(){}
這邊我們要首先有一個data拿來對應到上面有使用到v-model的東西~ 你可以看到上面都是 blog.title, blog.content...那這樣就代表blog是一個object,裡面有title, content 這些屬性~
<script>
export default {
  data() {
    return {
      blog: {
        title: "",
        content: "",
        hashTags: [],
        author: "",
      },
      authors: ["Ryan Yen", "Vue Master", "YOUR NAME"],
      submitted: false,
    };
  },
};
</script>
這邊有一個submitted可以對應到上面的 v-if,來處理表格是否submitted的情形 (所以當sumitted = true, form就會自動不見囉~)
首先要import我們的firebase config~ 還記得我們昨天在那個firebaseConfig.js最後的地方有一個export 嗎?
export const db = firebase.firestore();
這就是代表我們要把firebase裡面的forestore資料拿出來~ 現在回到addBlog.vue的script裡面,在export default上方先引入進來
import { db } from "@/config/firebaseConfig.js";
之後就可以使用這個 db啦~ 它代表的就是所有firestore裡面的資料結構,但我們只要其中一個collection,所以要做一個篩選跟提取!
methods: {
    async post() {
      if (this.blog.title && this.blog.content) {
        await db.collection("blogs").add({
          title: this.blog.title,
          content: this.blog.content,
          hashTags: this.blog.hashTags,
          author: this.blog.author,
        });
      } else {
          alert('Please fill in the title & content');
      }
    },
  },
這裡又不小心牽扯到一個概念了~ 甚麼事async, await? 明天來跟各位好好聊聊這有趣的玩意兒XD
這個 post funciton對應到上面的onClick事件:
<button v-on:click.prevent="post">Add Blog</button>
然後你可以看到其實我只要寫一個 db.collection()就對應到所有的集合,接下來specify "blogs"這個集合,之後做一個add({}),把剛剛v-model綁定的user input,也就是目前存在 data(){}裡面的資料增加到database裡面~
當你把資料都輸入好了~ 按下add blog!!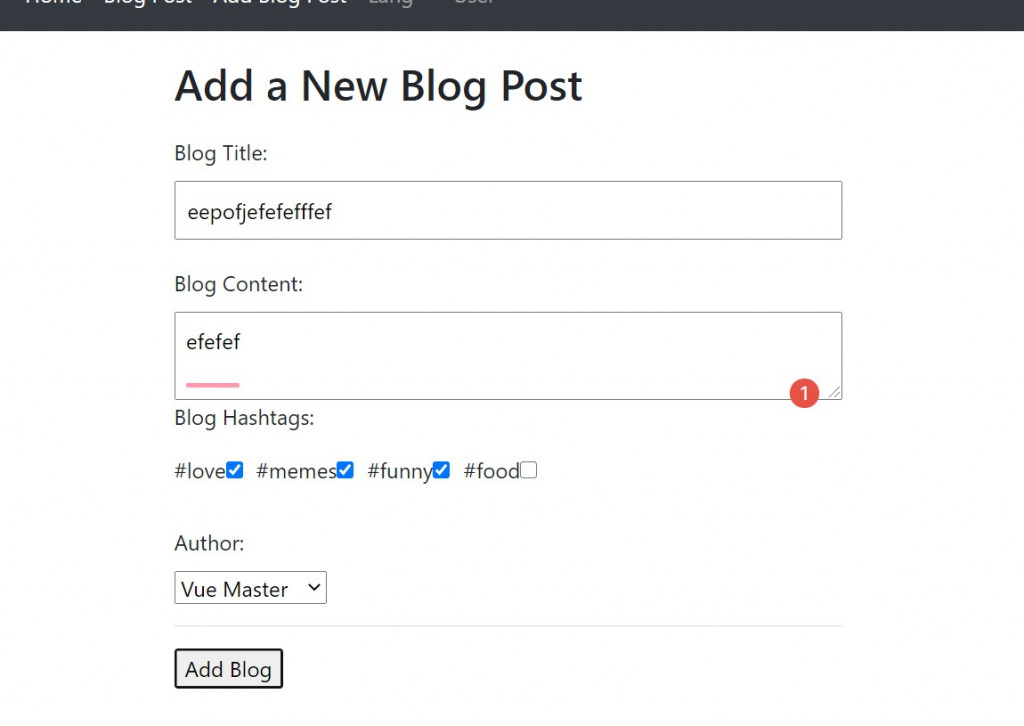
去一下firebase就會看到: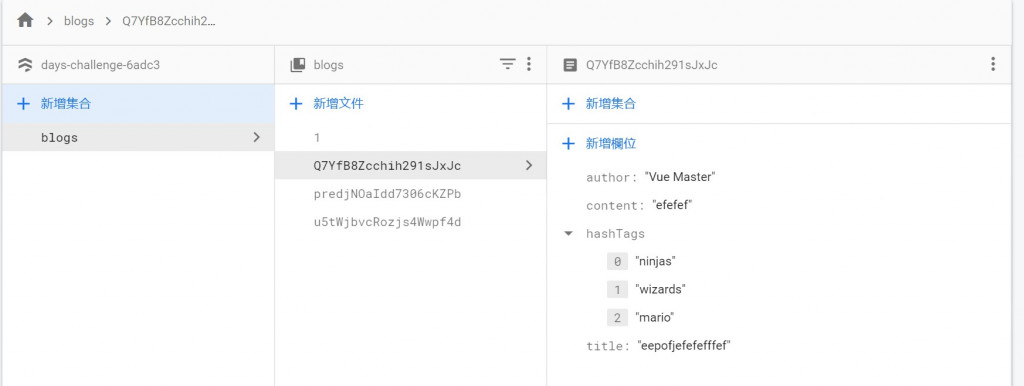
今天打了六千多字啊...也辛苦各位讀完啦~
除此之外又在附贈一下剛剛上面的CSS!
<style>
#add-blog * {
  box-sizing: border-box;
}
#add-blog {
  margin: 20px auto;
  max-width: 500px;
}
label {
  display: block;
  margin: 20px 0 10px;
}
input[type="text"],
textarea {
  display: block;
  width: 100%;
  padding: 8px;
}
#preview {
  padding: 10px 20px;
  border: 1px dotted #ccc;
  margin: 30px 0;
}
h3 {
  margin-top: 10px;
}
#checkboxes input {
  display: inline-block;
  margin-right: 10px;
}
#checkboxes label {
  display: inline-block;
  margin-top: 0;
}
</style>
在d21抓firebase的時候 因為版本不同所以會發生錯誤
請到package.json 檔案中尋找dependencies中的firebase並將其改成"firebase": "^7.21.0",
之後在終端機執行npm install,安裝舊版本即可正常運作

 iThome鐵人賽