
同步發表到驢形筆記
現在要來拆解LineBot範例伺服器的程式碼了,會一段一段進行講解並慢慢拆解。請跟著一起慢慢前進吧!
範例程式檔
'use strict';
// 這是說要使用嚴格模式,請google

const line = require('@line/bot-sdk');
// line套件喔!


const express = require('express');

// create LINE SDK config from env variables
const config = {
  channelAccessToken: process.env.CHANNEL_ACCESS_TOKEN,
  channelSecret: process.env.CHANNEL_SECRET,
};
// line參數,等下會到網站複製過來

// create LINE SDK client
const client = new line.Client(config);
// line建立用戶端client

// create Express app
// about Express itself: https://expressjs.com/
const app = express();

// register a webhook handler with middleware
// about the middleware, please refer to doc
// 這邊是使用line.middleware當中間層先處理過接到的資訊,前面說過中間層非常複雜。這邊有興趣的可以看源碼...
app.post('/callback', line.middleware(config), (req, res) => {
  Promise
    .all(req.body.events.map(handleEvent))
    // 然後利用handleEvent去處理理面的資料
    .then((result) => res.json(result))
    // 跟line伺服器說結果用
    .catch((err) => {
      console.error(err);
      res.status(500).end();
    });
});


// event handler
// 處理事件
function handleEvent(event) {
  if (event.type !== 'message' || event.message.type !== 'text') {
    // ignore non-text-message event
    return Promise.resolve(null);
  }
  // 這邊是用來判斷line近來的訊息的type類型

  // create a echoing text message
  const echo = { type: 'text', text: event.message.text };

  // use reply API
  return client.replyMessage(event.replyToken, echo);
  // 這邊就是吐出去了
}
// listen on port
const port = process.env.PORT || 3000;
app.listen(port, () => {
  console.log(`listening on ${port}`);
});
這樣程式碼的解析就全部完成了!開始重構到自己的伺服器吧。
首先建立linewebhook進來的路由,這邊有的隱藏的雷請見line文件
app.js
略
var indexRouter = require('./routes/index');
var usersRouter = require('./routes/users');
var testRouter = require('./routes/test');
var linebotRouter = require('./routes/linebot');
略
var app = express();
app.use('/linebot', linebotRouter);
// 他必須要在伺服器解析請求之前使用,因為line的中間層會去解析"原始版本資料"
略
app.use('/', indexRouter);
app.use('/users', usersRouter);
app.use('/test', testRouter);
略
routes\linebot.js
var express = require('express');
var router = express.Router();
router.post('/callback', function(req, res, next) {
  res.send('Hello API');
});
module.exports = router;
程式到這邊,路線就算建立成功了。接著把中間層和line的事件處理加進去,一樣在"routes\linebot.js"實作(先說這樣是壞習慣,"routes"不應該有其他邏輯)
routes\linebot.js
var express = require('express');
var router = express.Router();
const line = require('@line/bot-sdk');
const config = {
  channelAccessToken: process.env.CHANNEL_ACCESS_TOKEN,
  channelSecret: process.env.CHANNEL_SECRET,
};
const client = new line.Client(config);
router.post('/callback', line.middleware(config), function (req, res, next) {
  Promise
    .all(req.body.events.map(handleEvent))
    .then((result) => res.json(result))
    .catch((err) => {
      console.error(err);
      res.status(500).end();
    });
});
function handleEvent(event) {
  if (event.type !== 'message' || event.message.type !== 'text') {
    // ignore non-text-message event
    return Promise.resolve(null);
  }
  // create a echoing text message
  const echo = { type: 'text', text: event.message.text };
  // use reply API
  return client.replyMessage(event.replyToken, echo);
}
module.exports = router;
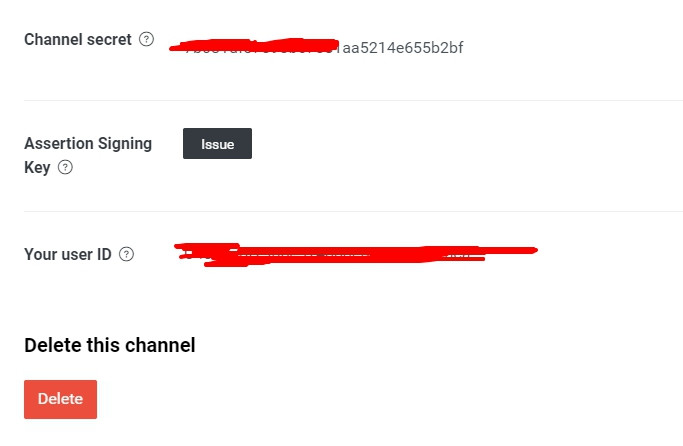
接著前往line頁面登入(https://developers.line.biz/en/)進到這個自己的頻道

滾動到最底部可以拿到 CHANNEL_SECRET 回程式碼把 process.env.CHANNEL_SECRET 替換掉
然後點擊 Messaging API
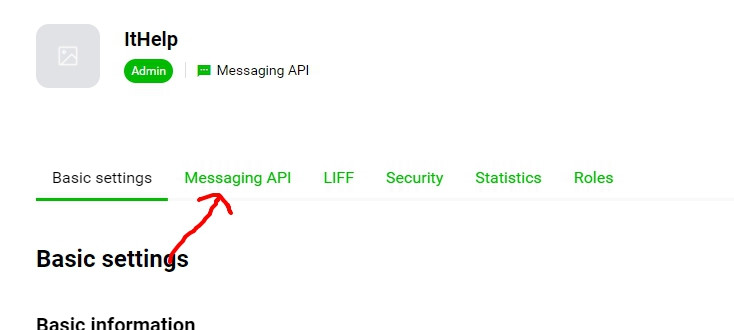
滾動到底部可以拿到 CHANNEL_ACCESS_TOKEN 回程式碼把 process.env.CHANNEL_ACCESS_TOKEN 替換掉

最後同一個畫面上面設定網址
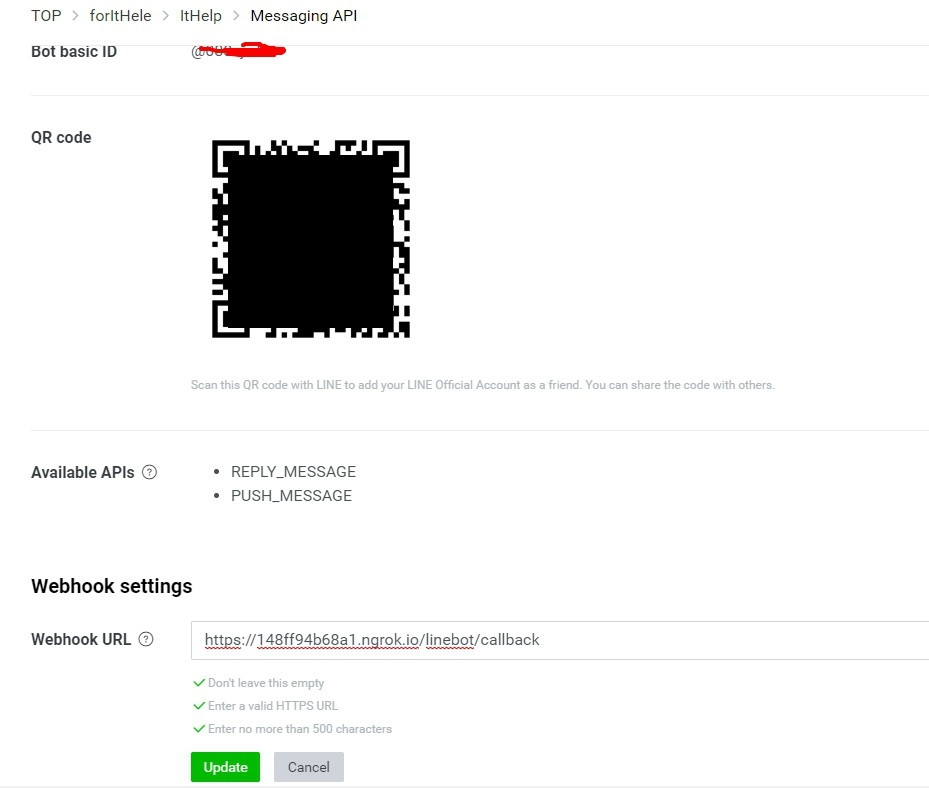
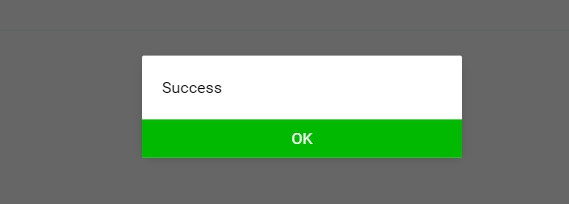
然後按下確認,之後跳出成功
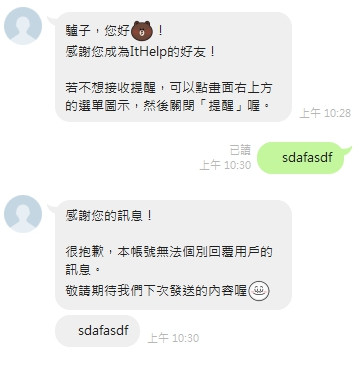
然後拿出手機掃瞄QRcode成為好友他會跟你打招呼然後隨便打幾個字,他就會回傳了
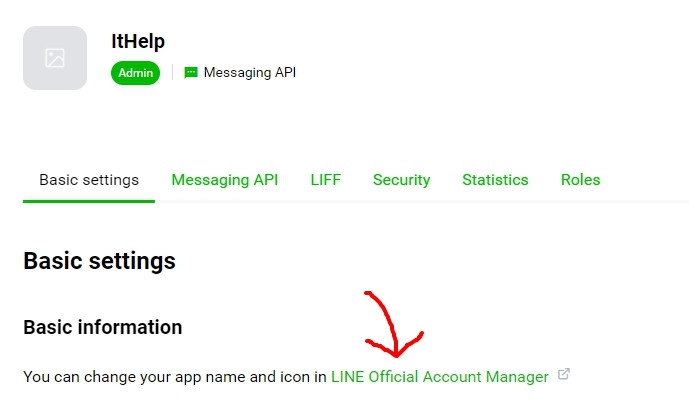
接下來處理line內建的回覆訊息,回到Basic settings點擊功能
進回應設定關掉兩個line送的回應訊息
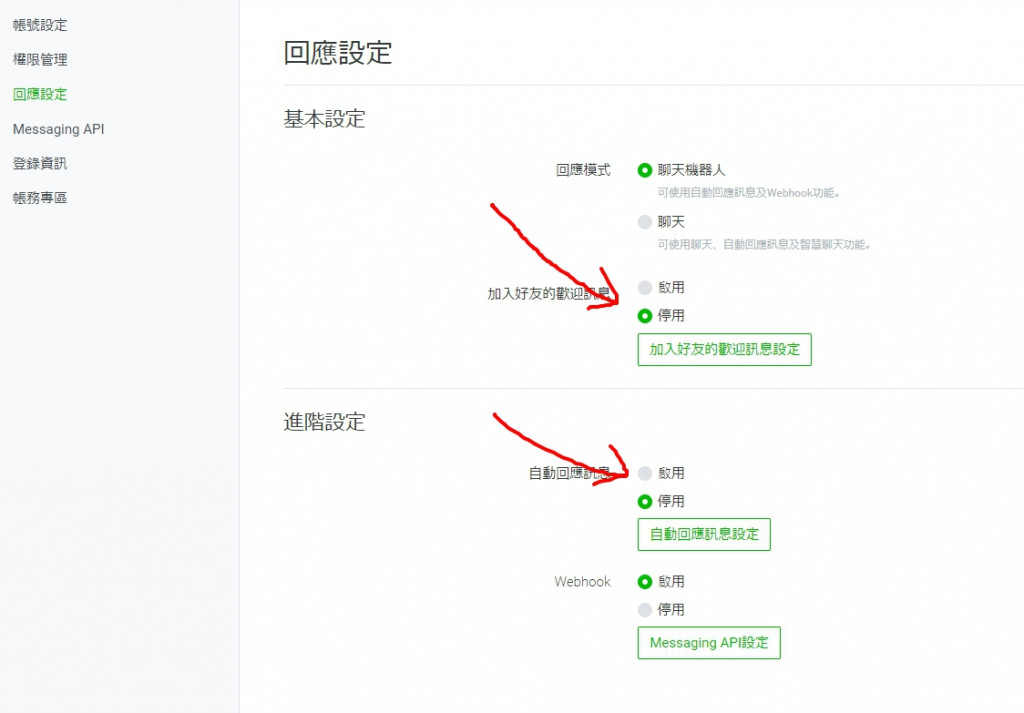
之後會在利用webhook重建歡迎訊息等等功能
有興趣的可以先參考30 天教你如何玩弄 Line bot API,鐵人邦真的可以幫助每個人在走歪的道路上越走越遠阿
現在API和lineBot都有了,離一個完整可佈署的網站已經非常接近了。接著讓我們串接資料庫mongoDB
