今天我們要來學如何建立Web API,並利用Postman進行API的測試,最後安裝Swagger套件來產生API的說明文件。
與WebService相比,API可以在header帶token進行驗證、並鎖CORS、限制IP或domain,較WebService有較多的防護。
不過對於資安的議題除了在前端可以做第一層防護限制格式的輸入、上傳檔案重新命名存檔、驗證從API接進來的資料格式,在程式撰寫部分最基本的就是不要造成 SQL Injection,並做第二次的輸入格式驗證;軟硬體要做好 內外網分離 將網站放在DMZ區、系統更新、弱點掃描、異地備份、災難復原演練 等方式,資安議題一定會一直存在,只能把該做的事情做好,對於最差的情況就是能快速復原系統 (不考慮資料洩漏的部分)。
講太多廢話了,我們回來開始學如何建立Web API!
Web API不是像我們網頁使用的Webfrom模式,而是類似MVC架構(Model-View–Controller),只是沒有View而已。
參考維基百科,MVC架構說明如下:
模型(Model)- 程式設計師編寫程式應有的功能(實現演算法等等)、資料庫專家進行資料管理和資料庫設計(可以實現具體的功能)。視圖(View)- 介面設計人員進行圖形介面設計。控制器(Controller)- 負責轉發請求,對請求進行處理。
參考微軟官方文件:ASP.NET Identity 簡介
STEP 1. 首先,先建立一個ASP.NET Web應用程式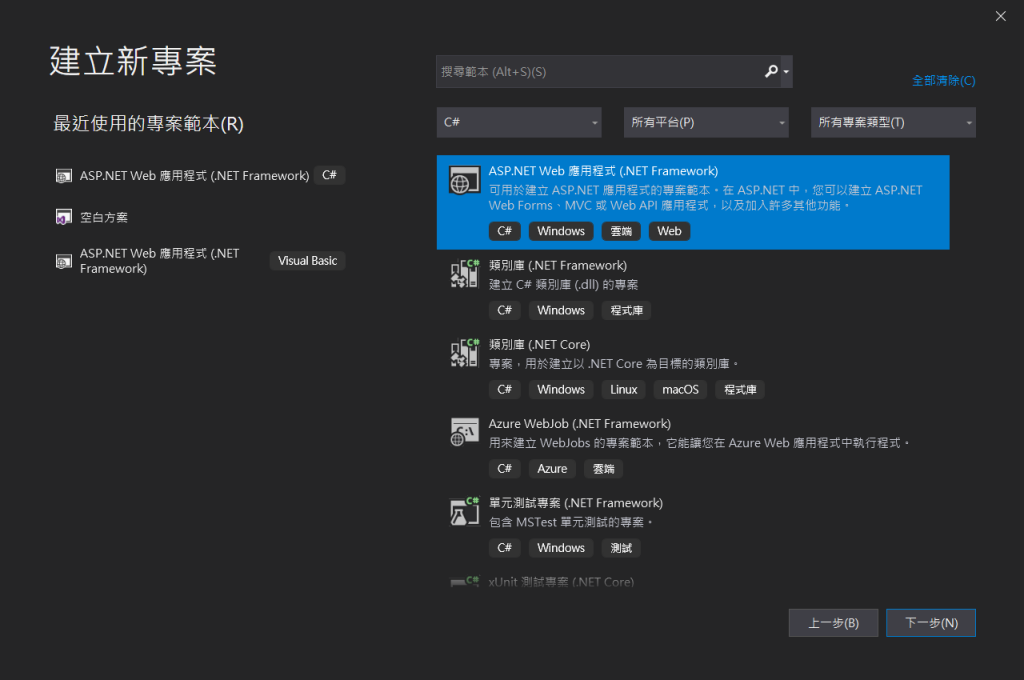
STEP 2. 設定專案名稱OLMapAPI和路徑,選擇.NET版本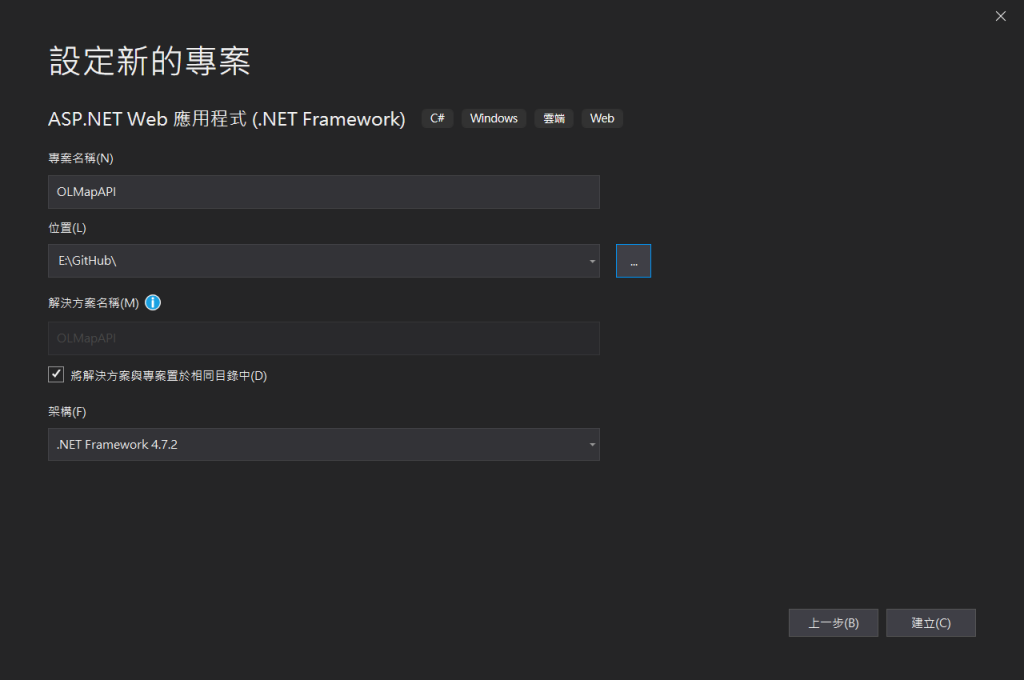
STEP 3. 選擇建立Web API,並於右上角的 驗證 選擇 個別使用者帳戶 驗證,這種驗證方法可以藉由Register 來進行個別帳號的註冊,並透過 ASP.NET Identity 將帳號與加密後的密碼儲存在SQL Server資料表當中。
STEP 4. 更改Web.config內的資料庫連線字串,這部分我們在 Day 11 建立WebService時有學過。
<add name="DefaultConnection" connectionString="Data Source=localhost\SQLEXPRESS;Initial Catalog=OLDemo; user id=資料庫帳號;password=資料庫密碼" providerName="System.Data.SqlClient" />
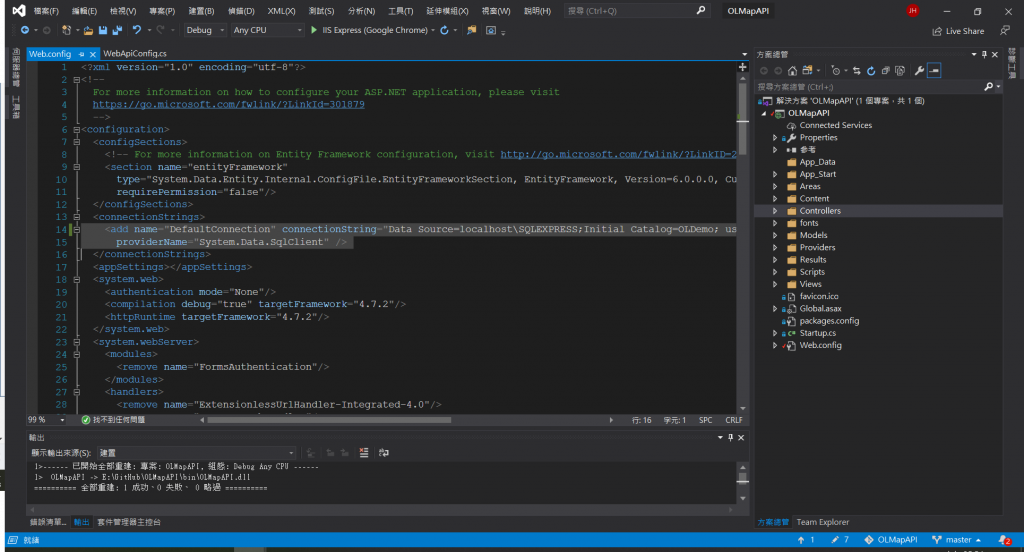
這邊可以將 name="DefaultConnection" 改掉,但由於我們使用 Identity.EntityFramework 來進行帳號的儲存,因此若要將Default改掉,則在 IdentityModels.cs 這個頁面 的base("DefaultConnection", throwIfV1Schema: false) 字串也要改掉。 (本系列講解API的部分暫時維持 "DefaultConnection")
public class ApplicationDbContext : IdentityDbContext<ApplicationUser>
{
    public ApplicationDbContext()
        : base("DefaultConnection", throwIfV1Schema: false)
    {
    }
    public static ApplicationDbContext Create()
    {
        return new ApplicationDbContext();
    }
}
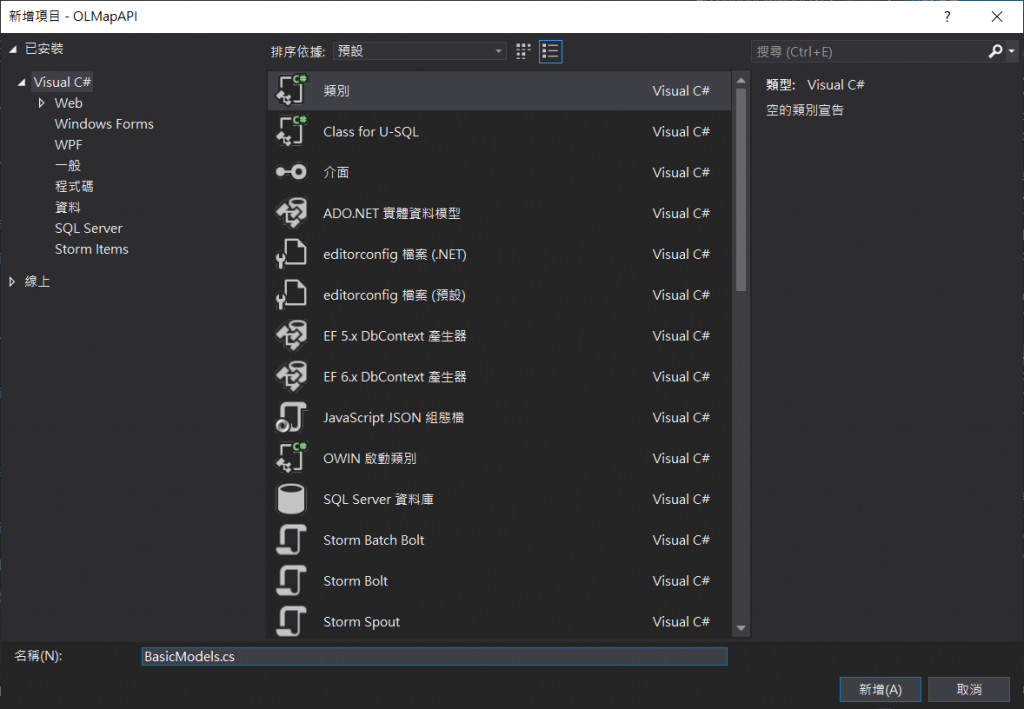
STEP 5. 在Models下新增 BasicModels.cs 程式碼頁面
STEP 6. 在 BasicModels.cs 內新增 LayerResourceList 的類別,為圖層資料的輸出類別。
public class LayerResourceList
    {
        public string ID { get; set; }
        public string GroupID { get; set; }
        public string GroupName { get; set; }
        public string LayerID { get; set; }
        public string LayerOrder { get; set; }
        public string LayerQueryable { get; set; }
        public string LayerTitle { get; set; }
        public string LayerType { get; set; }
        public string DataType { get; set; }
        public string DataURL { get; set; }
        public string LayerVisibleCode { get; set; }
        public string OpenOpacity { get; set; }
    }
STEP 5. (新增) Infrastructure\BasicInfo 資料夾底下新增BasicInfoFunc.cs,並將從資料庫撈取資料的程式碼 getLayerResourceList() 寫在這支裡面:
using System;
using System.Collections.Generic;
using OLMapAPI.Models;
using System.Data;
using System.Configuration;
using System.Data.SqlClient;
using OLMapAPI.Models.auth;
using System.Threading.Tasks;

namespace OLMapAPI.Infrastructure.BasicInfo
{
    public class BasicInfoFunc
    {
        public static async Task<List<LayerResourceList>> getLayerResourceList()
        {
            SqlDataReader dr = null;
            SqlConnection myConnection = new SqlConnection();
            string Constr = ConfigurationManager.ConnectionStrings["DefaultConnection"].ConnectionString;
            myConnection.ConnectionString = Constr;
            SqlCommand sqlCmd = new SqlCommand();
            string sqlStr;
            sqlStr = "SELECT [ID] ,[GroupID] ,[GroupName] ,[LayerID] ,[LayerOrder] ,[LayerQueryable] ,[LayerTitle] ,[LayerType],[DataType] ,[DataURL] ,[LayerVisibleCode] ,[OpenOpacity]  FROM [OLDemo].[dbo].[LayerResource]  order by [GroupID], [LayerOrder], [LayerType]";
            sqlCmd.CommandText = sqlStr;
            sqlCmd.CommandType = CommandType.Text;
            sqlCmd.Connection = myConnection;
            List<LayerResourceList> arrList = new List<LayerResourceList>();
            try
            {
                myConnection.Open();
                dr = sqlCmd.ExecuteReader();

                while (dr.Read())
                {
                    arrList.Add(new LayerResourceList()
                    {
                        ID = dr["ID"].ToString(),
                        GroupID = dr["GroupID"].ToString(),
                        GroupName = dr["GroupName"].ToString(),
                        LayerID = dr["LayerID"].ToString(),
                        LayerOrder = dr["LayerOrder"].ToString(),
                        LayerQueryable = dr["LayerQueryable"].ToString(),
                        LayerTitle = dr["LayerTitle"].ToString(),
                        LayerType = dr["LayerType"].ToString(),
                        DataType = dr["DataType"].ToString(),
                        DataURL = dr["DataURL"].ToString(),
                        LayerVisibleCode = dr["LayerVisibleCode"].ToString(),
                        OpenOpacity = dr["OpenOpacity"].ToString()
                    });
                }
                myConnection.Close();
                myConnection.Dispose();
                return arrList;
            }
            catch (Exception ex)
            {
                throw;
            }
        }
    };
}
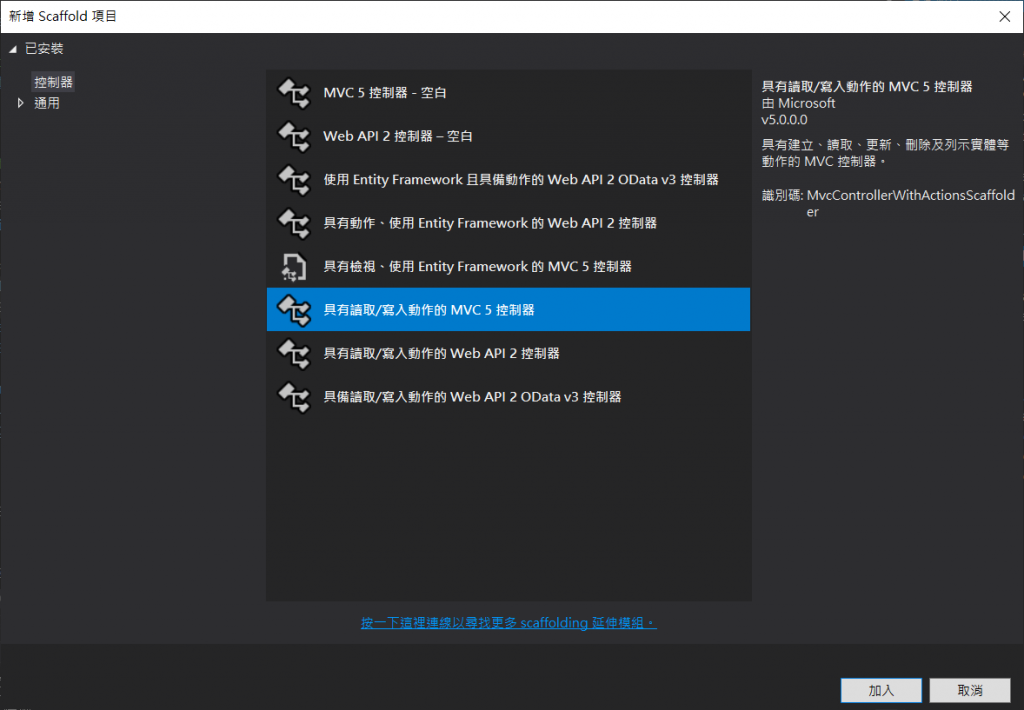
STEP 6. 在Controllers資料夾底下新增LayersController.cs,具有讀取/寫入動作的MVC 5 控制器,也可以新增空白的自己刻。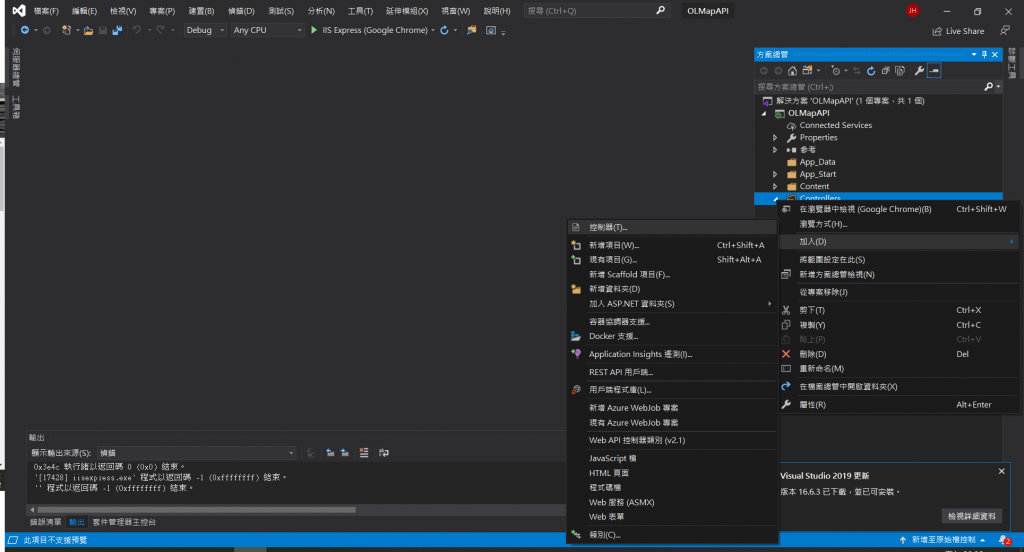
STEP 7. 在Controller內新增 getLayerResource() 功能
using OLMapAPI.Infrastructure.BasicInfo;
using OLMapAPI.Models;
using Swashbuckle.Swagger.Annotations;
using System;
using System.Collections.Generic;
using System.Linq;
using System.Net;
using System.Net.Http;
using System.Threading.Tasks;
using System.Web.Http;

namespace OLMapAPI.Controllers
{
    //[Authorize]
    [RoutePrefix("api/Layers")]
    public class LayersController : ApiController
    {
        [Route("getLayerResource")]
        [HttpGet]
        public async Task<HttpResponseMessage> getLayerResource()
        {
            try
            {
                return Request.CreateResponse(HttpStatusCode.OK, await BasicInfoFunc.getLayerResourceList());
            }
            catch (Exception SqlException)
            {
                return Request.CreateResponse(HttpStatusCode.InternalServerError, "Internal Server Error");
            }
        }
    }
}
將api架在IIS上:http://localhost/OLMapAPI
STEP 1. 安裝 postman
STEP 2. 輸入API資料:

輸出 (截部分)
[
    {
        "ID": "1",
        "GroupID": "nlsc",
        "GroupName": "國土測繪中心",
        "LayerID": "nlsc_school",
        "LayerOrder": "1",
        "LayerQueryable": "False",
        "LayerTitle": "各級學校範圍圖",
        "LayerType": "Tile",
        "DataType": "WMS",
        "DataURL": "https://wms.nlsc.gov.tw/wms",
        "LayerVisibleCode": "SCHOOL",
        "OpenOpacity": "0"
    },
    {
        "ID": "5",
        "GroupID": "opendata",
        "GroupName": "OpenData",
        "LayerID": "DebrisArea_geojson",
        "LayerOrder": "1",
        "LayerQueryable": "False",
        "LayerTitle": "土石流潛勢溪流影響範圍圖",
        "LayerType": "Vector",
        "DataType": "GeoJSON",
        "DataURL": "data/GeoJSON",
        "LayerVisibleCode": "DebrisArea.Geojson",
        "OpenOpacity": "0"
    }
]
STEP 3. 圖台部分於 init.js 新增Api路徑
var config_OLMapWebAPI = "http://localhost/OLMapAPI/api";
STEP 4. 修正 jTOC.js 的介接ajax內容,修正後:
//修正後
$.ajax({
    //type: "POST",
    //url: config_WSLayerResource + "/getLayerResource",
    type: "GET",
    url: config_OLMapWebAPI + "/Layers/getLayerResource",
    dataType: "json",
    contentType: "application/json; charset=utf-8",
    success: function (d) {
        //var data = $.parseJSON(d.d);
        var data = d;
        console.log(data);
        var layerlisthtml = "";
        TOCArray = [];
        $.each(data, function (index, item) {
            loadLayer(item);
            if (typehasExtent.includes(item.DataType)) {
                layerlisthtml += '<div class="item"><div class="ui checkbox"><input type="checkbox" name="example" onclick="toc.toggleTocLayer(\'' + item.LayerID + '\', this)"><label></label></div><div class="content"><a class="header">' + item.LayerTitle + '</a><div class="description">' + item.DataType + '</div><img class="layerBtns info" src="images/TOCpage/info.png" title="點擊定位圖層" onclick="toc.zoomTocLayer(\'' + item.LayerID + '\')"></div></div>';
            } else {
                layerlisthtml += '<div class="item"><div class="ui checkbox"><input type="checkbox" name="example" onclick="toc.toggleTocLayer(\'' + item.LayerID + '\', this)"><label></label></div><div class="content"><a class="header">' + item.LayerTitle + '</a><div class="description">' + item.DataType + '</div></div></div>';
            }
            TOCArray.push(item);
        });
        $("#layerlist").html(layerlisthtml);
    },
    error: function (jqXHR, exception) {
        ajaxError(jqXHR, exception);
    }
});
STEP 5. 測試網站執行
測試成功!!
STEP 1. 使用 工具> NuGet套件管理員> 管理方案的NuGet套件下 安裝 Swashbuckle 套件。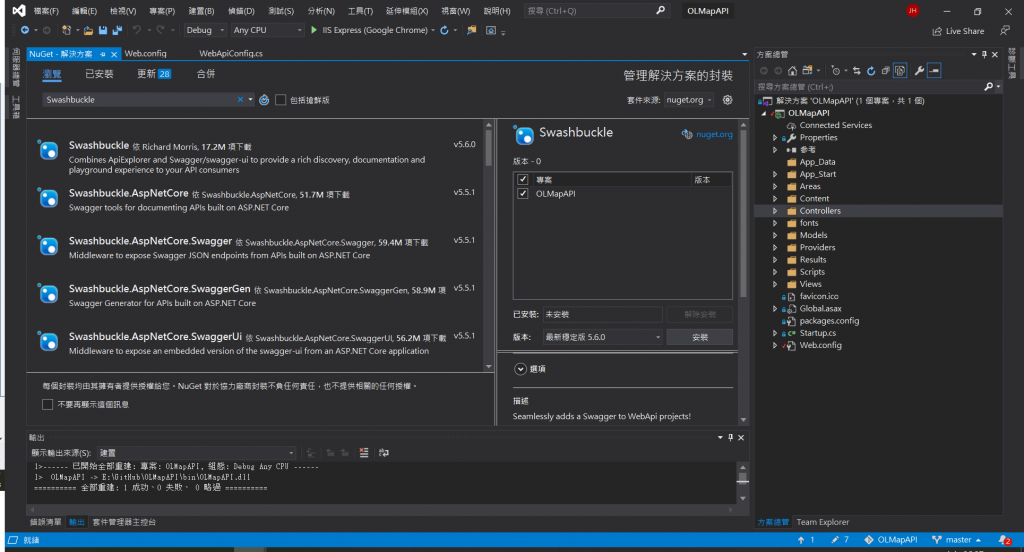
STEP 2. 進行專案 XML 註解設定,會在 App_Data 資料夾下產生XML文件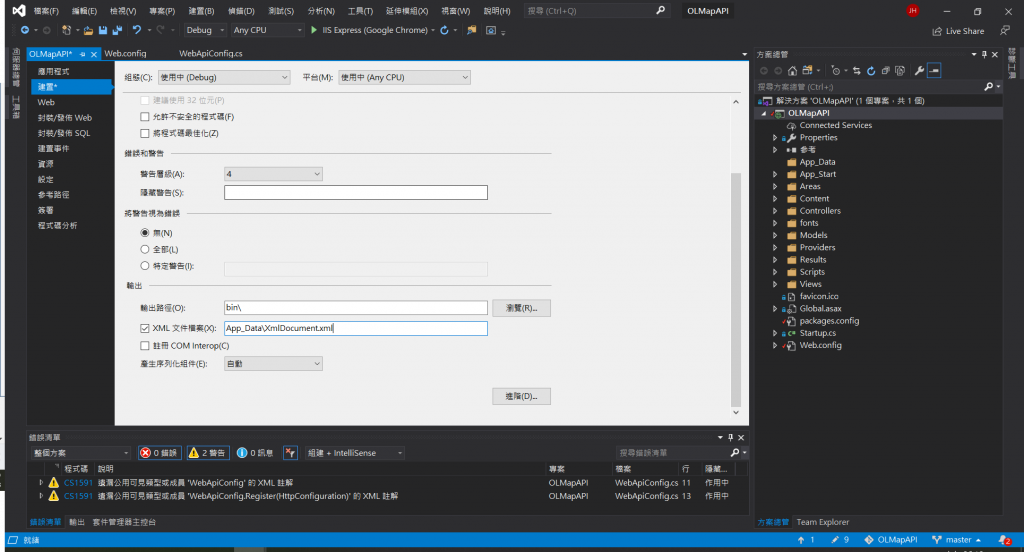
STEP 3. 在 Controller 方法加上註解,按下 "///" 會自動產生 Comment
/// <summary>
/// 查詢所有圖層資料
/// </summary>
/// <returns></returns>
[Route("getLayerResource")]
[HttpGet]
[SwaggerResponse(HttpStatusCode.OK, "OK", typeof(List<LayerResourceList>))]
public async Task<HttpResponseMessage> getLayerResource()
{
    try
    {
        return Request.CreateResponse(HttpStatusCode.OK, await BasicInfoFunc.getLayerResourceList());
    }
    catch (Exception SqlException)
    {
        return Request.CreateResponse(HttpStatusCode.InternalServerError, "Internal Server Error");
    }
}
STEP 4. 設定 SwaggerConfig.cs 搜尋 IncludeXmlComments > 將此行反註解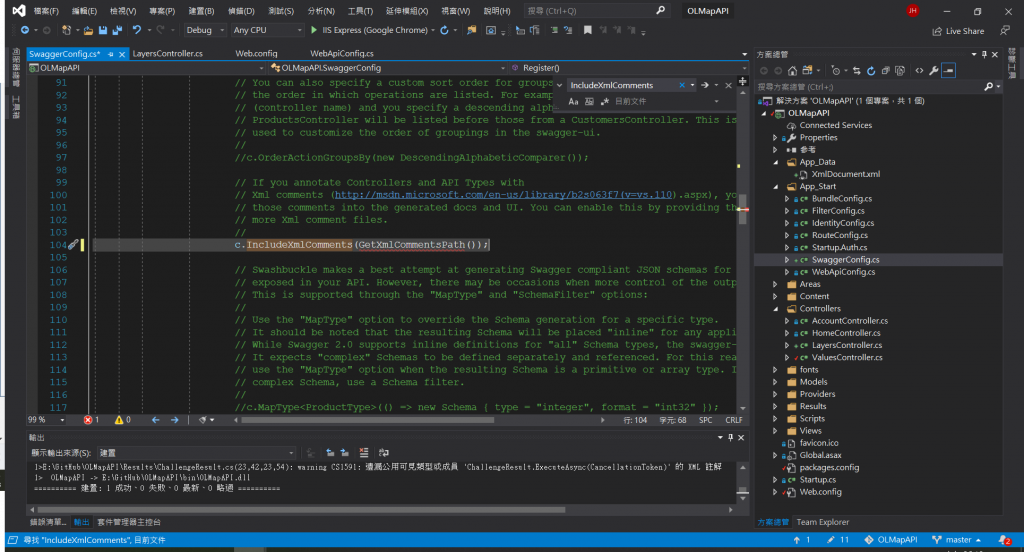
STEP 5. 註解拿掉後會發現缺少 GetXmlCommentsPath 方法,也就是專案檔設定的 XML 路徑
直接在底下新增下面幾行:
private static string GetXmlCommentsPath() {
    return String.Format(
         @ "{0}\App_Data\XmlDocument.xml",
        AppDomain.CurrentDomain.BaseDirectory);
}
STEP 6. 將專案起始頁指定為swagger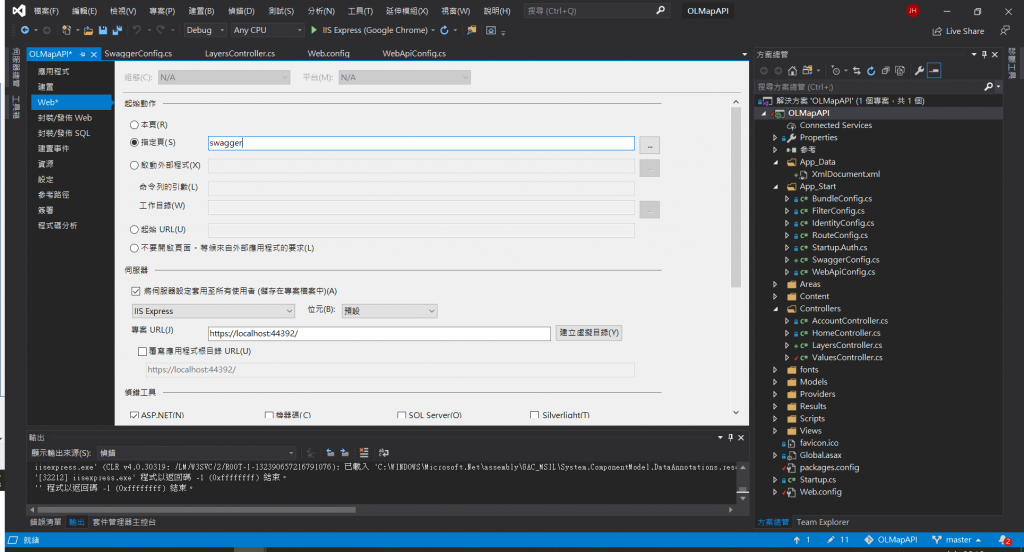
STEP 7. 建置後IIS架站,看到swagger頁面就完成拉!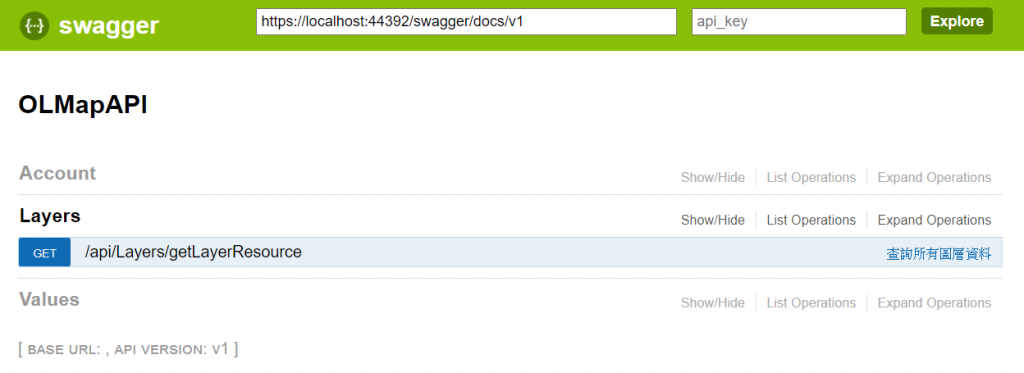
參考文章:https://marcus116.blogspot.com/2019/01/how-to-add-api-document-using-swagger-in-webapi.html
如同標題所說,我們今天學會了怎麼建Web API、學會了怎麼用Postman測試,最後學會了怎麼套用Swagger產生api說明文件,也就是說一個簡單的API就這樣完成拉!!!
但身為一個API只有這些功能還不夠,只少要能夠進行帳號驗證、權限控管,讓有權限的人才可以使用這個圖台,並在每次撈取檔案的時候就再進行一次身分確認,增加系統的安全性,所以後面的幾天我們就要來講 Web API的權限控管機制的建立 ,可能會稍微複雜,要有心理準備!