介紹完子傳父、父傳子的組件(component)溝通方式外,
我們也會很常遇到,父子組件的雙向溝通,
或是有時甚至會需要用到兄弟組件(在同樣父組件底下的組件)的溝通。
這篇我們就來介紹如何進行這類的雙向溝通。
Event bus(事件總線),就像是公車一樣他會穿梭在各個component之間,將事件送往各處。
通過創建一個全域的物件new Vue(),幫我們來發送及接收事件。
不過...很不巧的~~~這台公車其實在Vue 3.0之後被移除了。
原文:
In Vue 2, the most common usage of the event emitter API is using an empty Vue instance as an >event hub. This can be replaced by using an external library implementing the event emitter >interface, for example mitt.
These methods can also be supported in compatibility builds.
刪除了$on$off的事件,讓我們無法透過這個方式來完成。
順帶一提,認真的小夥伴可能會記得我在前面曾經丟了一個小坑fillter,
當時如果有嘗試實作這個小夥伴,可能會發現,網上各種教學怎麼樣也無法正常運作。
沒錯,其實在Day 12中,的fillter也慘遭移除了。
當然要達到雙向溝通的方式還是有的,
雖然官方有提供一些其他套件的解決方案,不過我們這邊先介紹原生提供的方式來完成。
待往後有機會的話會在介紹官方所提到的mitt或是vuex...等套件。
還記得前面教的v-model實踐雙向綁定嗎?
我們這邊一樣要透過v-model來完成 父子的雙向綁定。
不過,一般來說v-model功能僅對原生地html tag有效用,
所以我們必須透過自訂的規則來實踐v-model。
src/components 上右鍵 新增檔案customCom.vue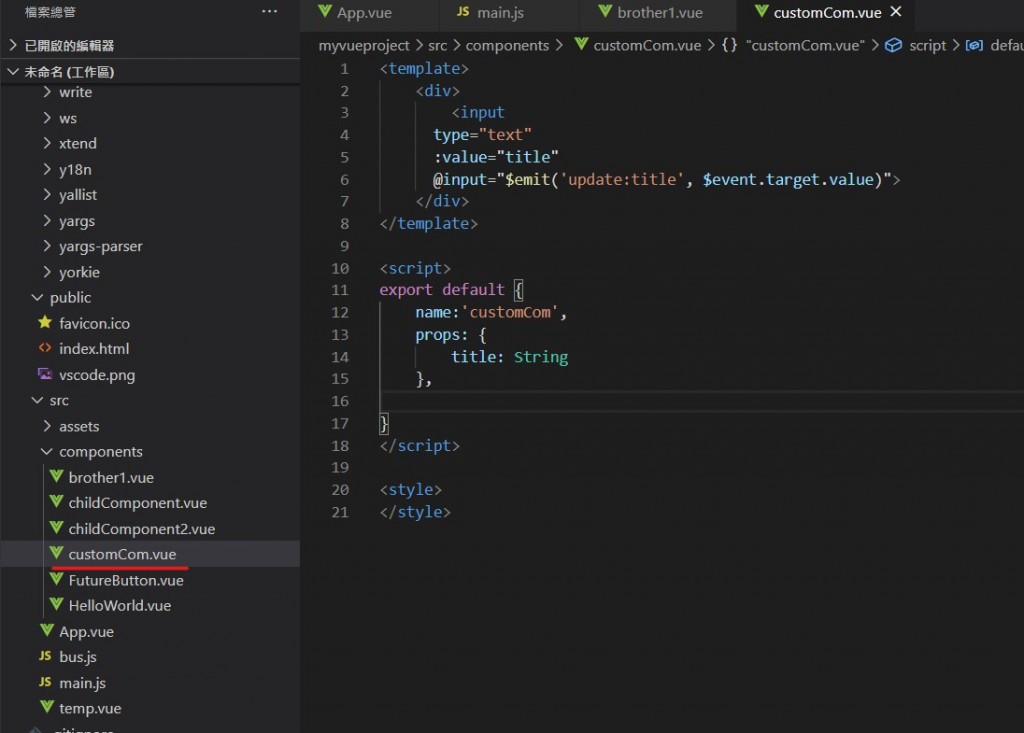
customCom.vue輸入下方程式碼:template:
<template>
    <div>
        <input
      type="text"
      :value="title"
      @input="$emit('update:title', $event.target.value)">
    </div>
</template>
這邊做了一個文字輸入方塊,綁定傳入的title,
當每次輸入數值的時候拋送回去給上層(父組件)綁定的變數。
script:
<script>
export default {
    name:'customCom',
    props: {
        title: String
    },

}
</script>
接收外層(父組件)傳進來的title變數
App.vue(父組件):template:
<template>
  <img alt="Vue logo" src="./assets/logo.png">
  <p>title: {{AppTitle}}</p>

  <custom v-model:title="AppTitle"></custom>
</template>
做一個文字段落<p>來顯示我們的AppTitle的內容;
和一個自訂的組件 custom(剛剛做的 customCom)用內部組件修改外部數值。
script:
<script>
import customCom from './components/customCom'
export default {
  name: 'App',
  components: {
    custom:customCom,
  },
  data:function(){
    return{
      AppTitle:"this is my title",
    }
  },
}
</script>
給予 AppTitle 初始值。
npm run serve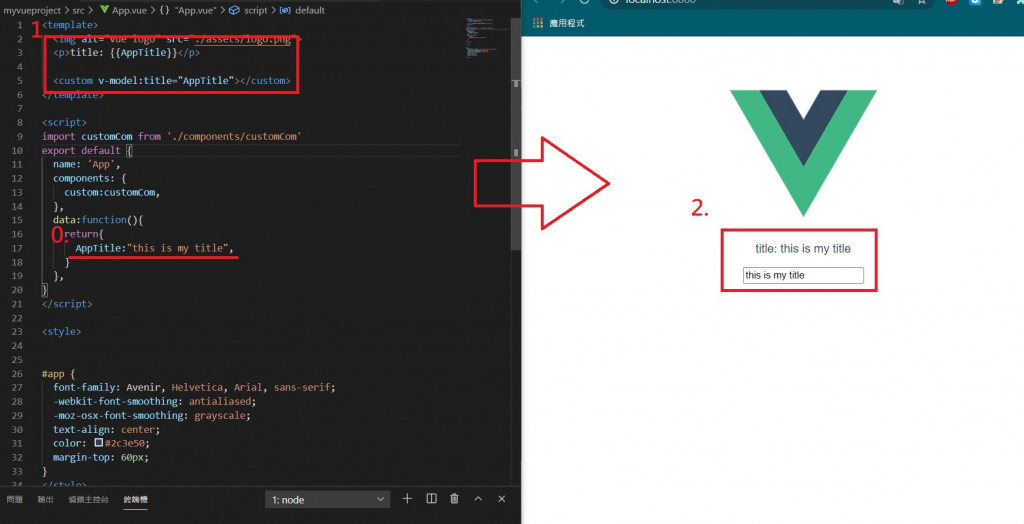
AppTitle的文字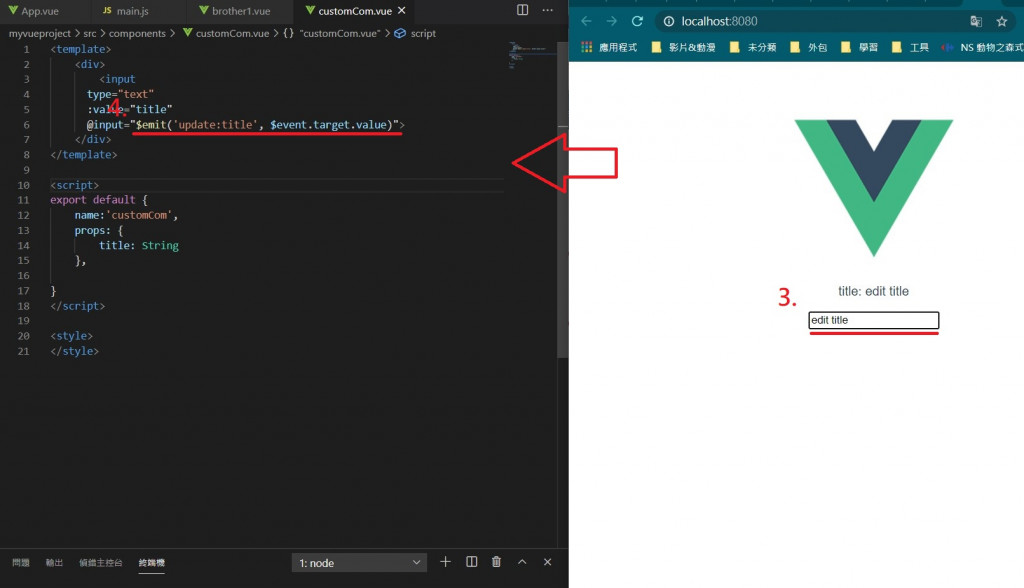
當你修改文字的時候,會透過 @input事件,
將title的資料帶回去給App(父組件)

其實在做這些自訂的雙向溝通時有很多的小細節要注意。
如果在之後的開發,其實有些時候能用套件千萬不要省。
會幫助你加速完成不少事情(除非你是苦行僧)。