iT邦幫忙

第 12 屆 iThome 鐵人賽

DAY 21
0
Mobile Development

Andriod Studio 菜鳥的學習分享系列 第 21

[Android Studio菜鳥的學習分享]UI分享(二) - BottomNavigationView

  • 分享至 

  • xImage
  •  

有別於昨天分享的TabLayout & TabItem選單,
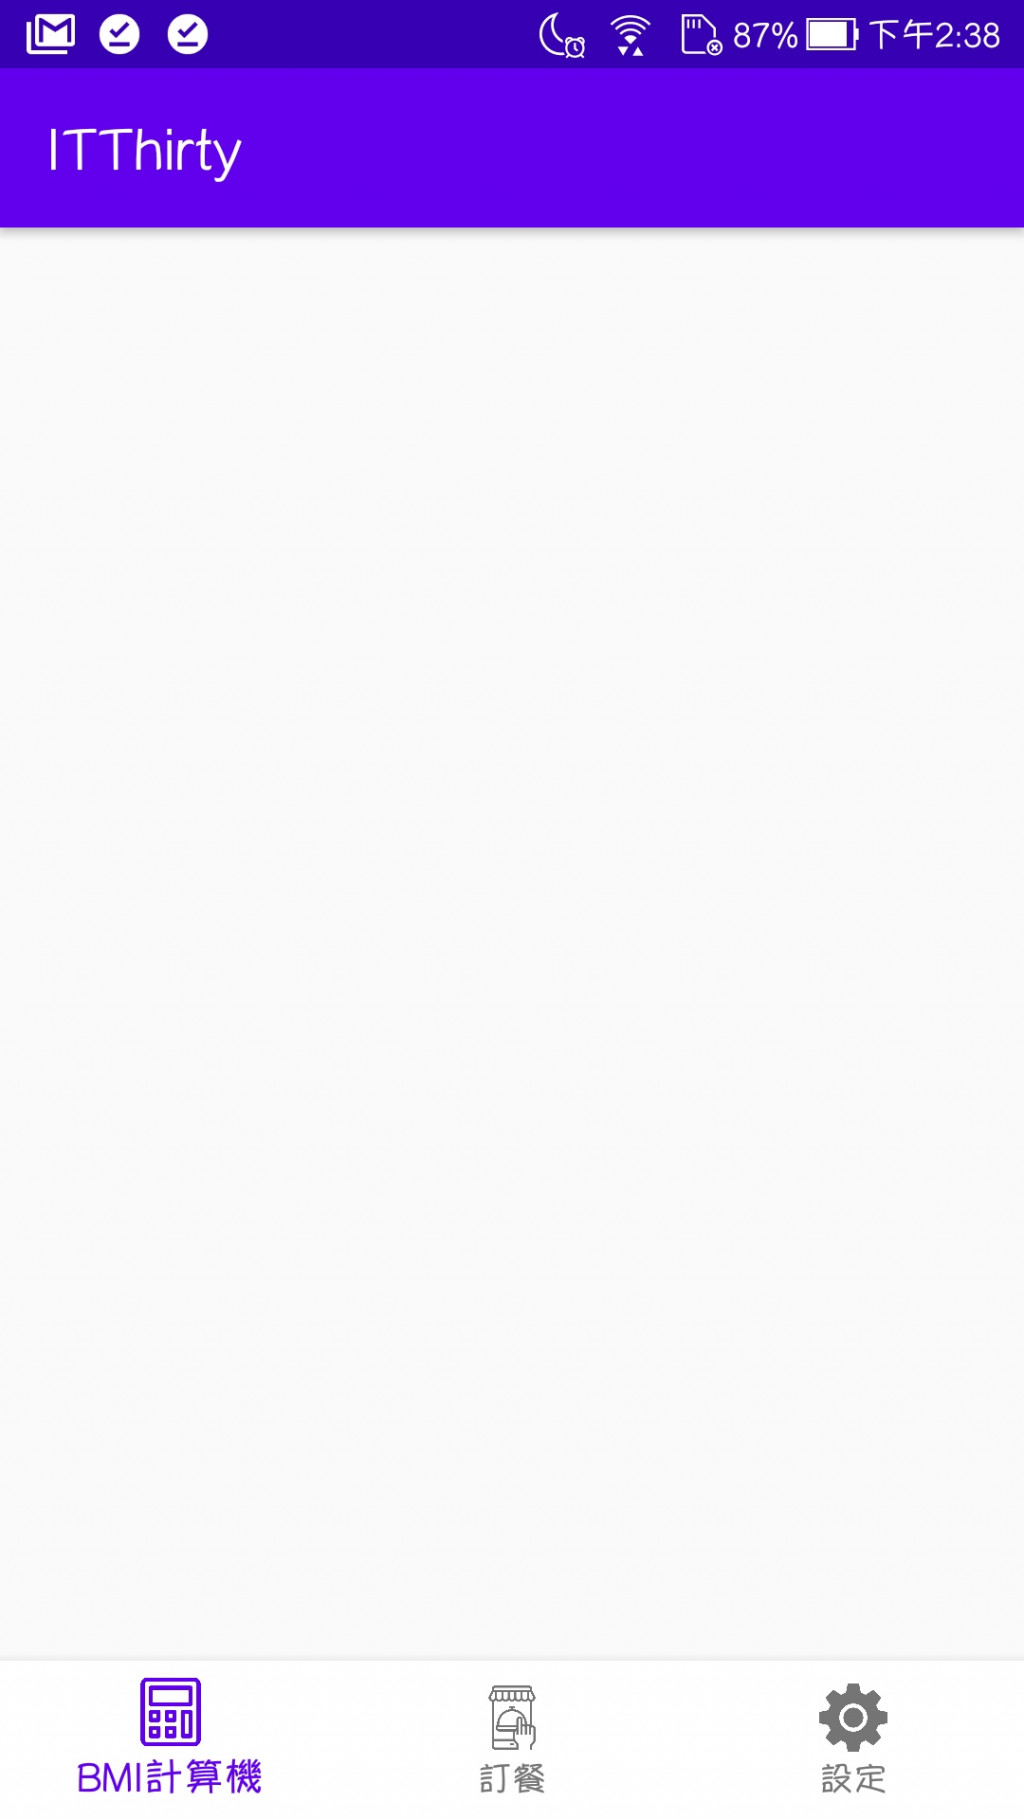
今天要分享的BottomNavigationView比較常用於底部的選單,
實作起來可以像Line下方的選單大致相同。
內建icon著色~
https://ithelp.ithome.com.tw/upload/images/20200924/20129524bvlUdkEiga.jpg


結果預覽:

https://ithelp.ithome.com.tw/upload/images/20200924/20129524TzLZZfJqdR.jpg


Gradle Scripts

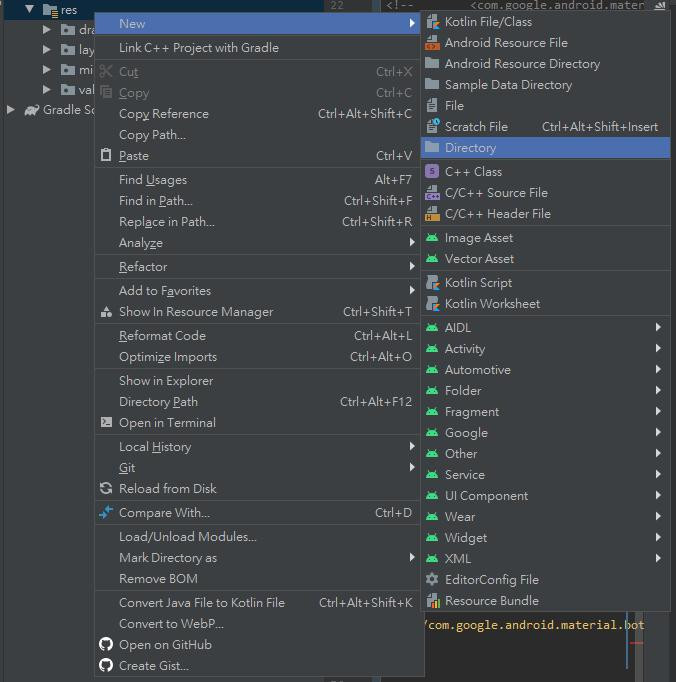
加入google matariel套件,
跟昨天使用TabLayout & TabItem的一樣,
但我學習時是採用較新的版本,
如果使用昨天的1.0.0版還是可以使用~
Material Components For Android 各版本選擇

implementation 'com.google.android.material:material:1.3.0-alpha01'
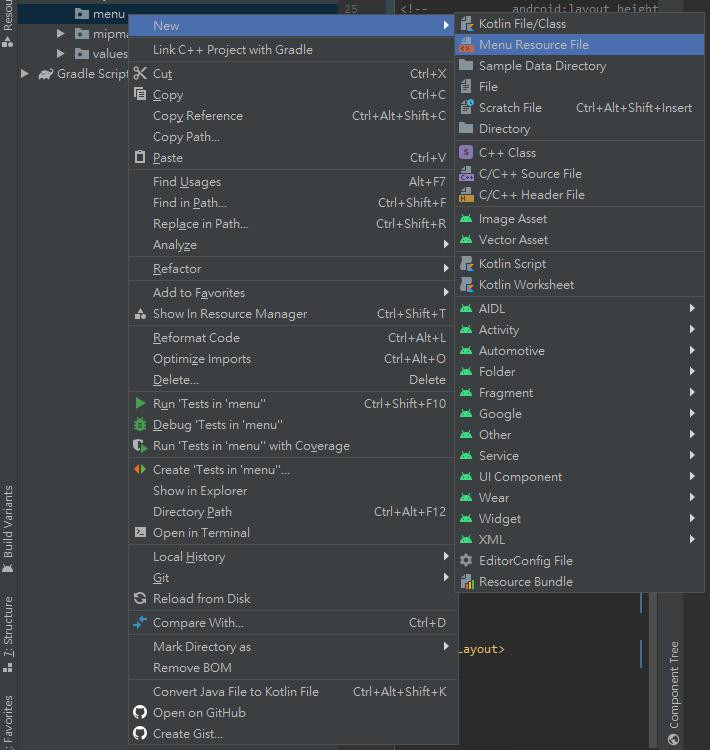
Menu-選單內容建置

Step01-新建menu資料夾:

https://ithelp.ithome.com.tw/upload/images/20200924/2012952475MZ2DYIgT.jpg

Step02-新建menu選單內容檔:

https://ithelp.ithome.com.tw/upload/images/20200924/20129524hQJEtcSEWw.jpg

我的檔案取名為menulist
https://ithelp.ithome.com.tw/upload/images/20200924/20129524xdjBXaU99g.jpg

Step03-加入項目item:

請注意: BottomNavigationView 最多只支援5個項目

https://ithelp.ithome.com.tw/upload/images/20200924/20129524zQI5inuv8I.jpg

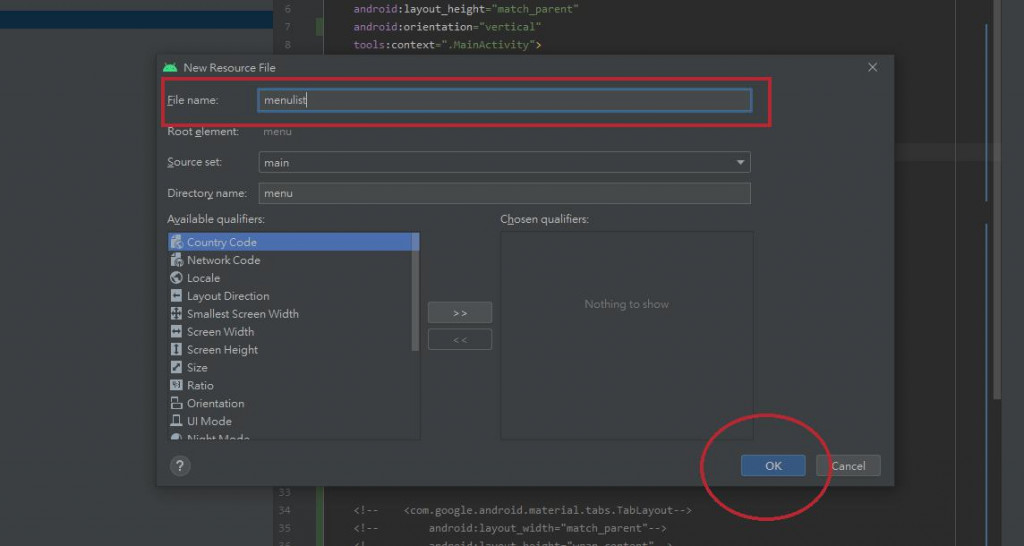
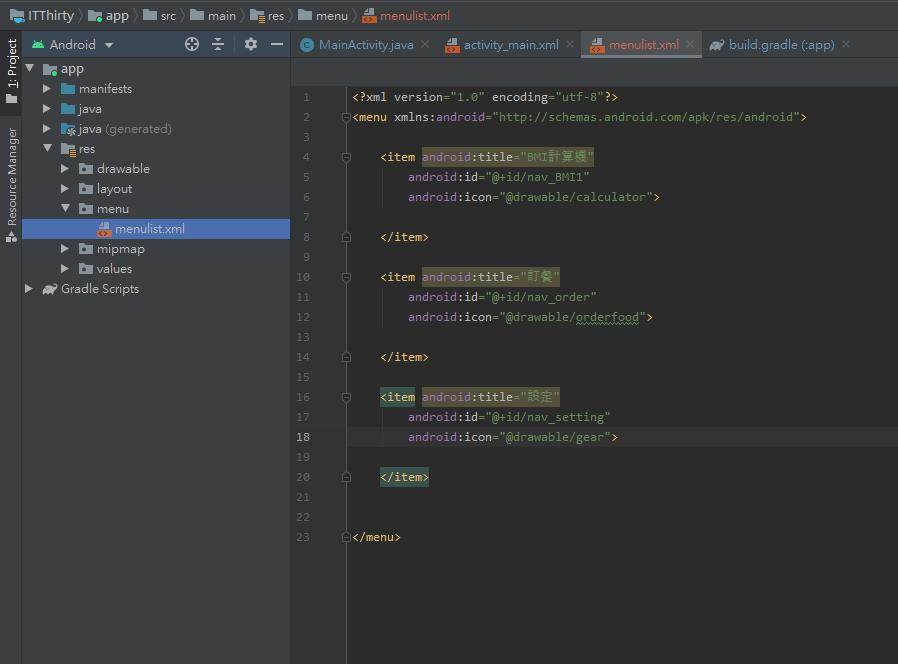
<item android:title="BMI計算機"
        android:id="@+id/nav_BMI1"
        android:icon="@drawable/calculator">

</item>

<item android:title="訂餐"
    android:id="@+id/nav_order"
    android:icon="@drawable/orderfood">

</item>

<item android:title="設定"
    android:id="@+id/nav_setting"
    android:icon="@drawable/gear">

</item>

activity_main.xml

https://ithelp.ithome.com.tw/upload/images/20200924/201295241b4dLeXY0b.jpg

Step01-使用ConstraintLayout版面配置:

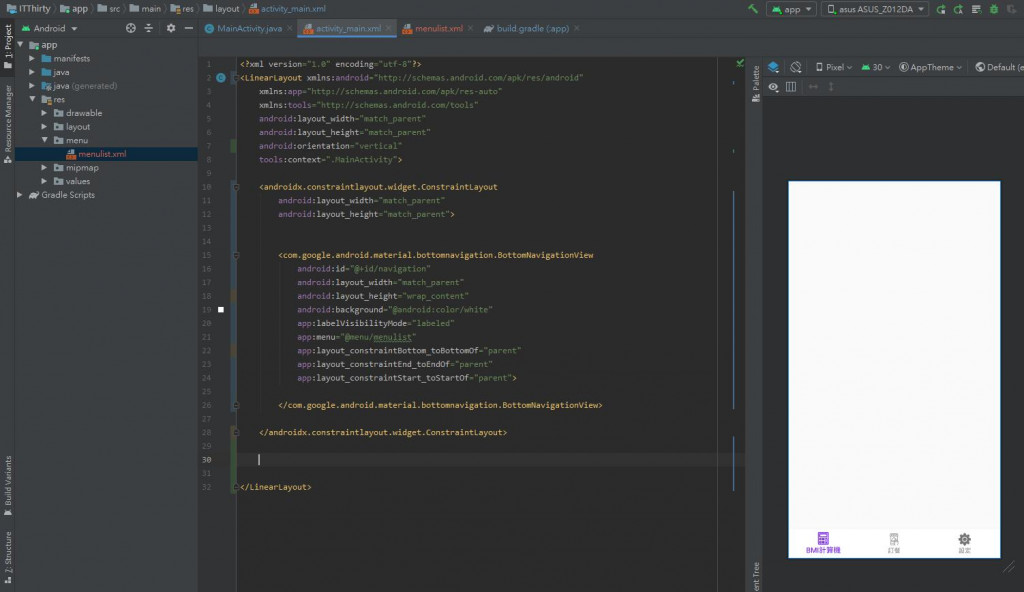
<androidx.constraintlayout.widget.ConstraintLayout
        android:layout_width="match_parent"
        android:layout_height="match_parent">

</androidx.constraintlayout.widget.ConstraintLayout>

Step02-加入BottomNavigationView:

  1. android:background -> 背景顏色
  2. app:labelVisibilityMode -> 顯示模式
  3. app:menu -> menu選擇(剛剛製作的選單檔案)
  4. app:layout_constraintBottom_toBottomOf -> ConstraintLayout版面黏結底部
  5. app:layout_constraintEnd_toEndOf -> ConstraintLayout版面黏結右側
  6. app:layout_constraintStart_toStartOf -> ConstraintLayout版面黏結左側
<com.google.android.material.bottomnavigation.BottomNavigationView
    android:id="@+id/navigation"
    android:layout_width="match_parent"
    android:layout_height="wrap_content"
    android:background="@android:color/white"
    app:labelVisibilityMode="labeled"
    app:menu="@menu/menulist"
    app:layout_constraintBottom_toBottomOf="parent"
    app:layout_constraintEnd_toEndOf="parent"
    app:layout_constraintStart_toStartOf="parent">

</com.google.android.material.bottomnavigation.BottomNavigationView>

幾天後會分享如何製作內容頁面~


上一篇
[Android Studio菜鳥的學習分享]UI分享(一) - TabLayout & TabItem
下一篇
[Android Studio菜鳥的學習分享]Fragment介紹
系列文
Andriod Studio 菜鳥的學習分享30
圖片
  直播研討會
圖片
{{ item.channelVendor }} {{ item.webinarstarted }} |
{{ formatDate(item.duration) }}
直播中

尚未有邦友留言

立即登入留言