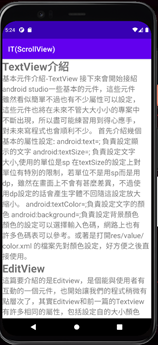
今天要介紹的元件,當介面的內容開始變多時就派上用場了,畢竟手機螢幕或著各類3c顯示的大小都相當有限,在有大量內容或者製作類似電子書的樣式時,可以透過ScrollView來製造滑動螢幕的效果,彌補螢幕不足的問題,使用方式也很簡單,把需要滑動的內容放置ScrollView的標籤之中即可,簡單的示範配置如下。
<androidx.constraintlayout.widget.ConstraintLayout xmlns:android="http://schemas.android.com/apk/res/android"
    xmlns:app="http://schemas.android.com/apk/res-auto"
    xmlns:tools="http://schemas.android.com/tools"
    android:layout_width="match_parent"
    android:layout_height="match_parent"
    tools:context=".MainActivity">

    <ScrollView
        android:layout_width="match_parent"
        android:layout_height="match_parent"
        tools:layout_editor_absoluteX="159dp"
        tools:layout_editor_absoluteY="99dp"
        android:scrollbarStyle="insideInset">

        <LinearLayout
            android:layout_width="match_parent"
            android:layout_height="wrap_content"
            android:orientation="vertical">

            <TextView
                android:id="@+id/textView"
                android:layout_width="match_parent"
                android:layout_height="wrap_content"
                android:text="TextView介紹"
                android:textSize="30sp"
                android:textStyle="bold" />

            <TextView
                android:layout_width="wrap_content"
                android:layout_height="wrap_content"
                android:text="@string/textview"
                android:textSize="20sp"
                app:layout_constraintBottom_toBottomOf="parent"
                app:layout_constraintLeft_toLeftOf="parent"
                app:layout_constraintRight_toRightOf="parent"
                app:layout_constraintTop_toTopOf="parent" />

            <TextView
                android:id="@+id/EditText"
                android:layout_width="match_parent"
                android:layout_height="wrap_content"
                android:text="EditView"
                android:textSize="30sp"
                android:textStyle="bold" />

            <TextView
                android:id="@+id/textView3"
                android:layout_width="match_parent"
                android:layout_height="wrap_content"
                android:text="@string/edittext"
                android:textSize="20sp" />
        </LinearLayout>
    </ScrollView>
</androidx.constraintlayout.widget.ConstraintLayout>
這裡介紹一下ScrollView的屬性
android:scrollbarStyle 此屬性是設定滑動的樣式,包括以下四種:


 iThome鐵人賽