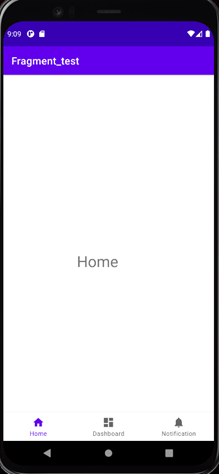
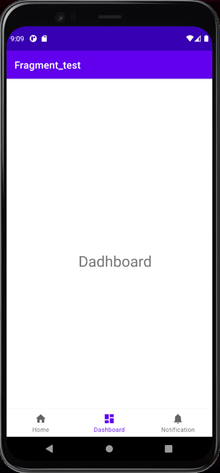
BottomNavigationView為底部導覽按鈕,及類似於LINE裡最底下的那一排(首頁、聊天等),今天就來介紹BottomNavigationView的用法並和前一篇的Fragment做結合。
首先,先引用此套件並sync now
implementation 'com.google.android.material:material:1.3.0-alpha01'
在res的資料夾中新增menu資料夾,如同ToolBar時的流程,忘記的同學可以回頭看看。
創建完並在此資料夾中新增一xml檔
<RelativeLayout xmlns:android="http://schemas.android.com/apk/res/android"
    xmlns:app="http://schemas.android.com/apk/res-auto"
    xmlns:tools="http://schemas.android.com/tools"
    android:layout_width="match_parent"
    android:layout_height="match_parent"
    tools:context=".MainActivity">

    <FrameLayout
        android:id="@+id/fl_container"
        android:layout_width="match_parent"
        android:layout_height="match_parent"
        android:layout_above="@+id/navigation"
        android:layout_marginBottom="0dp"
        tools:layout_editor_absoluteX="0dp" />

    <com.google.android.material.bottomnavigation.BottomNavigationView
        android:id="@+id/navigation"
        android:layout_width="match_parent"
        android:layout_height="wrap_content"
        android:layout_alignParentLeft="true"
        android:layout_alignParentBottom="true"
        android:layout_marginLeft="0dp"
        android:layout_marginBottom="0dp"
        android:background="?android:attr/windowBackground"
        app:menu="@menu/buttonlist" />
</RelativeLayout>
Fragment的部分大致與前幾篇中的內容相同,就不多做講解,不清楚怎麼設定的可以去前幾天的Fragment回顧一下。BottomNavigationView比較需要注意的是app:menu屬性,這裡要把剛才menu檔中的xml檔放進來做綁定,最後來做轉換Fragment的設定吧。
public class MainActivity extends AppCompatActivity {
    private AFragment aFragment;
    private BFragment bFragment;
    private CFragment cFragment;
    private Button bt1;
    @Override
    protected void onCreate(Bundle savedInstanceState) {
        super.onCreate(savedInstanceState);
        setContentView(R.layout.activity_main);

        aFragment = new AFragment();
        getSupportFragmentManager().beginTransaction().add(R.id.fl_container,aFragment,"A")
                                                      .commitAllowingStateLoss();
        BottomNavigationView bottomNavigationView =
                            (BottomNavigationView)findViewById(R.id.navigation);
        //BottomNavigationView的監聽事件設定
        bottomNavigationView.setOnNavigationItemSelectedListener(new
                        BottomNavigationView.OnNavigationItemSelectedListener() {
            @Override
            //檢測哪個項目被選擇
            public boolean onNavigationItemSelected(@NonNull MenuItem item) {
                switch (item.getItemId()) {
                    case R.id.navigation_home:
                        if(aFragment==null)
                            aFragment=new AFragment();
       getSupportFragmentManager().beginTransaction().replace(R.id.fl_container,aFragment,"A")
                                                     .commitAllowingStateLoss();
                        break;
                    case R.id.dashboard:
                        if(bFragment==null)
                            bFragment=new BFragment();
        getSupportFragmentManager().beginTransaction().replace(R.id.fl_container,bFragment,"B")
                                                      .commitAllowingStateLoss();
                        break;
                    case R.id.notify:
                        if(cFragment==null)
                            cFragment=new CFragment();
        getSupportFragmentManager().beginTransaction().replace(R.id.fl_container,cFragment,"C")
                                                      .commitAllowingStateLoss();
                        break;
                }
                return true;
            }
        });
    }
}
Fragment的切換就如之前一樣,依樣畫葫蘆地加入監聽事件內設定就完成了,跟之前的toolbar有點像,可以回頭複習看看它們的相似之處。


今天BottomNavigationView就講解到這,謝謝大家~![]()
