今天要完成的工作是將搜集到的影片或是照片轉換成 YOLOV3 可以接受的格式,所以要完成的工作如下:
建立目錄結構
將 github 上所下載的影片放在 video 文件夾,而 utils 文件夾放資料預處理的程式,如今天需要用到的將影片轉成圖片,images 用來放處理後的圖片,labels 是用來存放標籤文件,如下圖所示。
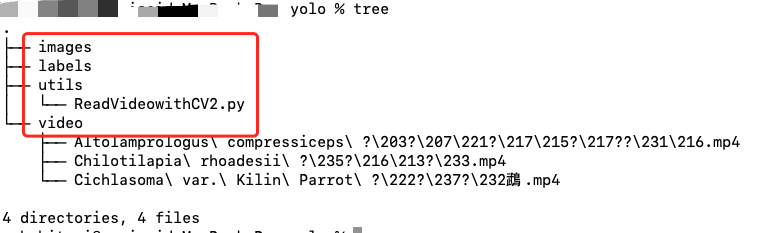
圖 1、 YOLOV3 資料預處理文件夾
安裝需要的套件
將影片轉換成圖片的程式中需要用到 OpenCV 套件,所以需要安裝 OpenCV。打開終端機,輸入以下指令進行安裝。
pip3 install opencv-python
python3
進入 Python 的交互畫面,輸入以下指令,確認是否可以正常使用 OpenCV,如果無法正常使用,那代表系統中安裝多個 Python 版本,而環境變數 PYTHONPATH 沒有設定正確,以至於進行匯入 (import) 時,會無法匯入 cv2,可以透過 sys.path 這個 Python 語法檢查目前的設定。
import cv2
cv2.__version__
import sys
sys.path
下圖是安裝與確認畫面,第一個方框顯示套件下載的網站,第二個是套件所安裝的目錄,第三個方框是安裝套件以及版本名稱,第四個方框則是進入 Python 交互模式,第五個方框則是運行 Python 語法。
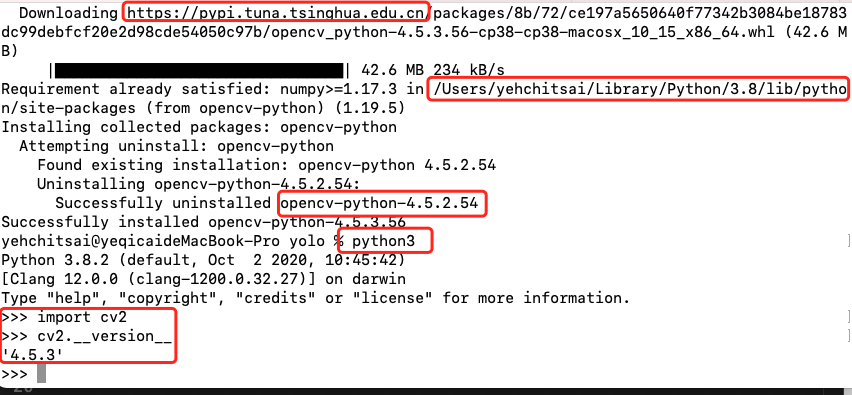
圖 2、OpenCV 安裝與匯入畫面
撰寫程式
撰寫這個程式主要需考慮以下三點
import cv2
import glob
import os

# 變更到指定尺寸,長寬邊不足者補黑色
def process_image(img, min_side = 608):
    size = img.shape
    h, w = size[0], size[1]
    scale = max(w, h) / float(min_side)
    new_w, new_h = int(w/scale), int(h/scale)
    resize_img = cv2.resize(img, (new_w, new_h),cv2.INTER_AREA) # 變更尺寸
    if new_w % 2 != 0 and new_h % 2 == 0:
        top, bottom, left, right = (min_side-new_h)//2, (min_side-new_h)//2, (min_side-new_w)//2 + 1, (min_side-new_w)//2
    elif new_h % 2 != 0 and new_w % 2 == 0:
        top, bottom, left, right = (min_side-new_h)//2 + 1, (min_side-new_h)//2, (min_side-new_w)//2, (min_side-new_w)//2
    elif new_h % 2 == 0 and new_w % 2 == 0:
        top, bottom, left, right = (min_side-new_h)//2, (min_side-new_h)//2, (min_side-new_w)//2, (min_side-new_w)//2
    else:
        top, bottom, left, right = (min_side-new_h)//2 + 1, (min_side-new_h)//2, (min_side-new_w)//2 + 1, (min_side-new_w)//2
    pad_img = cv2.copyMakeBorder(resize_img, top, bottom, left, right, cv2.BORDER_CONSTANT, value=[0,0,0])
    return pad_img

# 讀寫目錄
inputPath = '../video'
outputPath = '../images'

files = os.path.join(inputPath,'*.mp4')
files_grabbed = []
files_grabbed.extend(sorted(glob.iglob(files)))

for videoId in range(len(files_grabbed)):
	print(files_grabbed[videoId])
	raw = cv2.VideoCapture(files_grabbed[videoId])
	fIndex = 1
	fCount = 0

	while 1:
    # 影片轉圖片
	    ret,frame = raw.read()
	    fCount += 1
	    if (ret == True) :
	    	if (fCount % 5) == 0:
		    	img_pad = process_image(frame, min_side = 608)
		    	cv2.imwrite('%s/%02d-frame-608x608-%04d.jpg' % (outputPath, videoId,fIndex), img_pad)
		    	fIndex += 1
	    else:
	    	break
下圖顯示在 VS Code 中的運行結果,顯示處理了 video 目錄下的三個影片,記得這個順序很重要,因為會給予編號,第一個檔案編號為 00 ,以此類推。

圖 3、在 VS Code 中的運行結果
下圖顯示 images 文件夾內的圖片訊息,00-frame-608x608-0036.jpg 表示的是標號為00 (黃金珍珠虎), frame-608x608 表示圖片的尺寸,而 0036 則是第幾張圖片,從圖片資訊中也的確看到這樣的訊息,並且上下被填入黑色框。
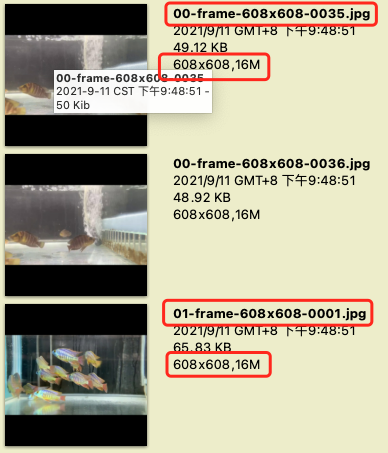
圖 4、處理完的圖片
下圖是原始的影片資訊,尺寸為 960x540 且長寬比為 16:9 ,每秒的禎片為 30。
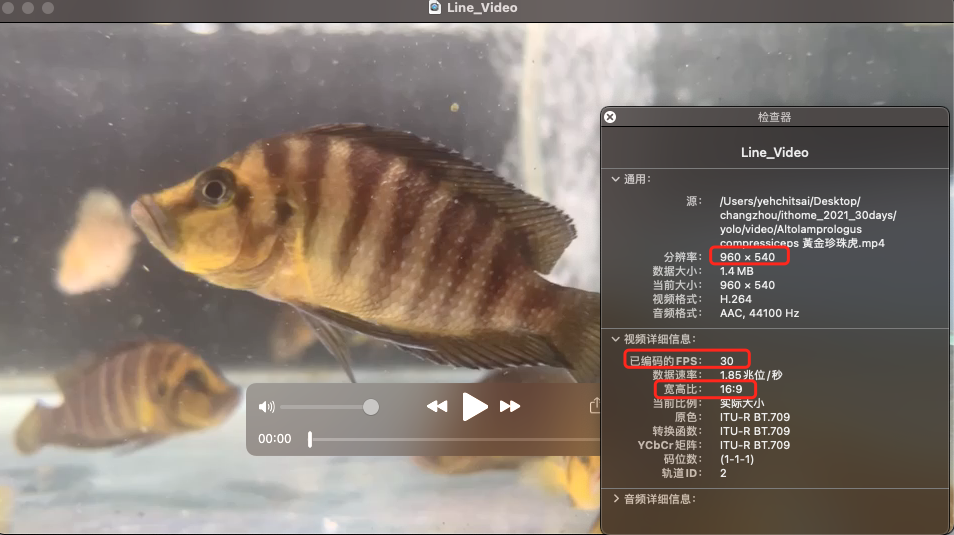
圖 5、原始影片資訊