資料增量 (Data Augmentation) 的部份因為 YOLOV3 可以透過 cfg 檔的設定來自動進行資料增量,所以我們就不在這邊進行資料增量的前置處理。
接著進行的是圖片標籤 (Labeling/Annotation) 的動作,這是一個很乏味的動作,主要就是把原始圖片中要訓練的圖片標示出來,並說明標示物件標籤,而把這些資訊存成文字檔。光是標籤就可以分成三類需要考慮的因素:
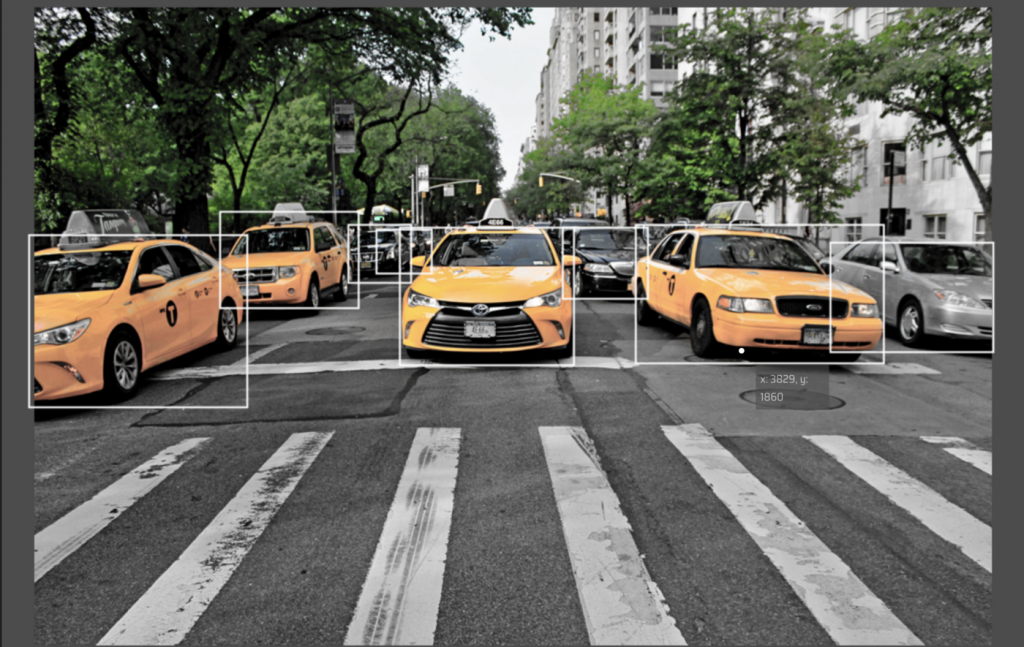
圖 1、 使用邊界框來標註物件 (Original Photo by Patricia Jekki on Unsplash)
很明顯的,使用關鍵點和界標的標註對於檢測面部特徵、面部表情、情緒、人體部位和姿勢很有用。
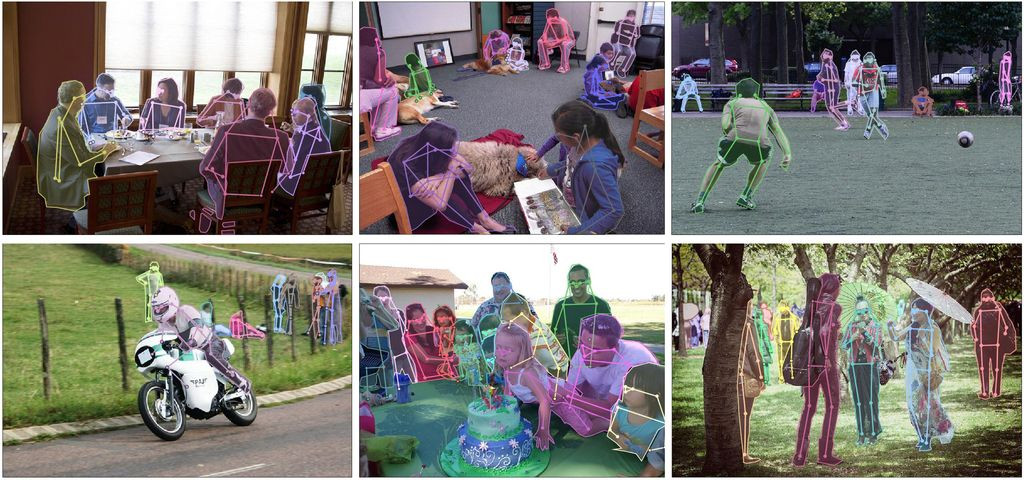
圖 2、 使用關鍵點和界標來標註物件 (Original Photo from COCO dataset)
COCO format
annotation{
"id" : int,
"image_id": int,
"category_id": int,
"segmentation": RLE or [polygon],
"area": float,
"bbox": [x,y,width,height],
"iscrowd": 0 or 1,
}
categories[{
"id": int,
"name": str,
"supercategory": str,
}]
Pascal VOC
<annotation>
  <folder>Train</folder>
  <filename>01.png</filename>
  <path>/path/Train/01.png</path>
  <source>
    <database>Unknown</database>
  </source>
  <size>
    <width>224</width>
    <height>224</height>
    <depth>3</depth>
  </size>
  <segmented>0</segmented>
  <object>
    <name>36</name>
    <pose>Frontal</pose>
    <truncated>0</truncated>
    <difficult>0</difficult>
    <occluded>0</occluded>
    <bndbox>
      <xmin>90</xmin>
      <xmax>190</xmax>
      <ymin>54</ymin>
      <ymax>70</ymax>
    </bndbox>
  </object>
</annotation>
而 YOLO 的格式如下所示,每一行代表一個物件,分別表示物件名稱 (object-class),物件中心 x 位在整張圖片寬 (image_width) 的比例,物件中心 y 位在整張圖片高 (image_height) 的比例,物件寬度 (target_width) 佔整張圖片寬度 (image_width) 的比例,物件長度 (target_height) 佔整張圖片長度 (image_height) 的比例。物件中心點座標 (x,y),物件的
<object-class> <x_iw_ratio> <y_ih_ratio> <tw_iw_ratio> <th_ih_ratio>
兩者的換算公式如下:
# Pascal VOC
ymin, xmin, ymax, xmax, image_w, image_h = PascalVOC

# 將 Pascal VOC 中的資料轉換成 YOLO 格式
(x_iw_ratio, y_ih_ratio) = ( ( (xmin + xmax) * 0.5 ) / image_w, ((ymin + ymax) * 0.5 ) / image_h)
tw_iw_ratio = (xmax - xmin) * 1. / image_w
th_ih_ratio = (ymax - ymin) * 1. / image_h
這邊就不介紹如何使用 labelImg,可以參閱 目标检测使用LabelImg标注VOC数据格式和YOLO数据格式——LabelImg使用详细教程,這邊先測試當取得標籤檔時,如何確認標籤檔是否可以正確的在圖片上生成邊界框。
下圖是我們標籤了下方的兩隻魚,而 YOLO 標籤內容如下,通常我們不會把物件名稱直接打出來,因為這只是對應之用,所以我們給定標籤為 0。
00-frame-0001.txt
0 0.962963 0.447917 0.414815 0.137500
0 0.263889 0.422917 0.416667 0.122917
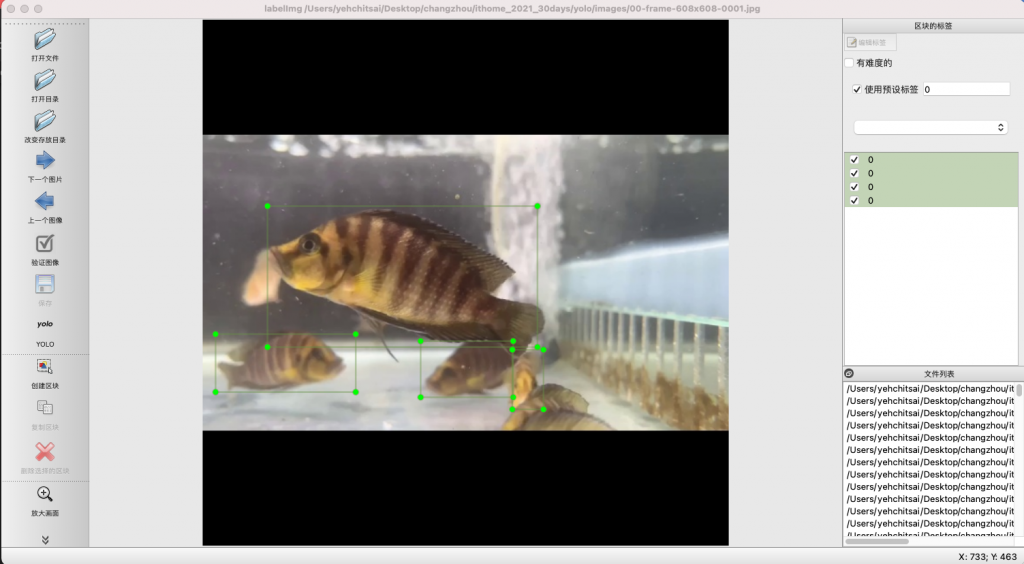
圖 3、標籤後的圖片
接著我們試著根據 YOLO 的標籤內容,將 YOLO 格式轉換成邊界框的左上角 (min_x, min_y) 和右下角 (max_x, max_y),重新畫上邊界框,以確保標籤內容的正確性。
./utils/yoloDrawLabel.py
import cv2

# 設定輸入與輸出
inputLabelPath = '../labels/00-frame-0001.txt'
inputImgPath = '../images/00-frame-608x608-0001.jpg'
outputImgPath = '../labels/00-frame-608x608-0001.jpg'
# 圖片大小固定為 608*608
img_w= img_h = 608
# 載入圖片
cv2image = cv2.imread(inputImgPath)

with open(inputLabelPath) as f:
  for line in f:
    line = line.strip() # 刪除多餘的空白
    data = line.split() # 將 YOLO 一列的內容轉成一維陣列
    # 將 YOLO 格式轉換為邊界框的左上角和右下角座標
    bbox_width = float(data[3]) * img_w
    bbox_height = float(data[4]) * img_h
    center_x = float(data[1]) * img_w
    center_y = float(data[2]) * img_h
    min_x, min_y = center_x - (bbox_width / 2), center_y - (bbox_height / 2)
    max_x, max_y = center_x + (bbox_width / 2), center_y + (bbox_height / 2)
    print(min_x,min_y,max_x,max_y)
    # 在圖片上寫上物件名稱
    cv2.putText(cv2image, 'Altolamprologus compressiceps', (int(min_x), int(min_y-6)), cv2.FONT_HERSHEY_SIMPLEX, 0.6, (255, 255, 255), 1, cv2.LINE_AA)
    # 畫出邊界框
    cv2.rectangle(cv2image, (int(min_x),int(min_y)), (int(max_x),int(max_y)), (0,255,255), 2)
    # 將檔案另存新圖片檔
    cv2.imwrite(r'{}'.format(outputImgPath), cv2image)
  f.close()
下圖為輸出結果,可以確認 YOLO 文字檔中的內容是正確的。
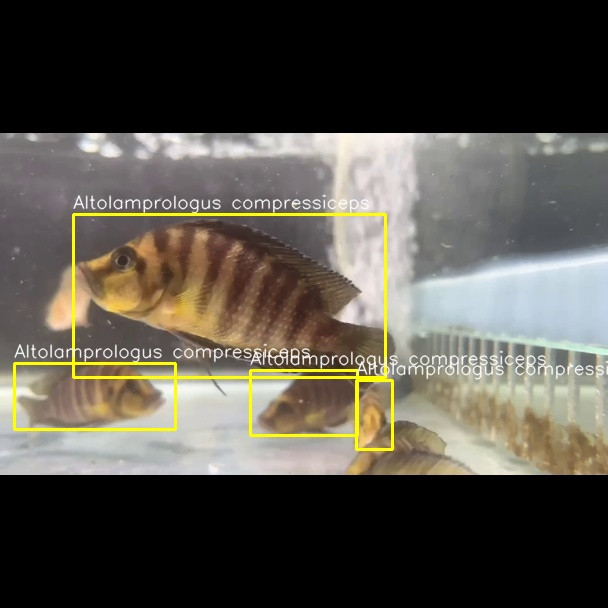
圖 4、讀取 YOLO 文件檔驗證標籤是否正確的圖片