今天主要要來談談兩個功能:onTouch(點擊事件)、SharePreferences(用於儲存資料),不要問我為什麼會把這兩個應用合在一天講(X,首先布局的部分我放了一個TextView來顯示點擊的次數、而按鈕用來清空次數,那麼就先從onTouch開始講,首先來讓主程式實作(implements)View.OnTouchListener的介面(interface)。
而在實作這個介面的時候會產生紅字,是因為這個介面裡有個onTouch方法需要去定義,接著就按alt+enter->implements methods。
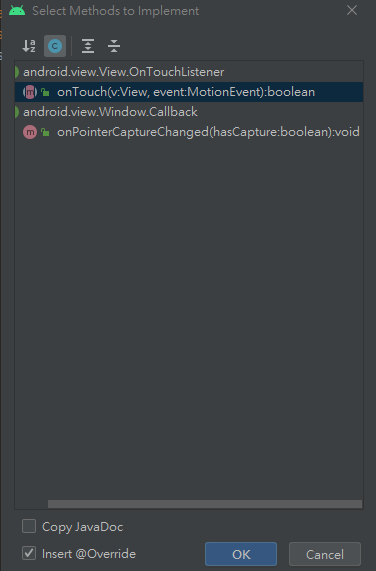
實作onTouch方法,點選OK就會實作出以下的程式。
@Override
    public boolean onTouch(View v, MotionEvent event) {
        return false;
    }
這個地方等等會做比較多操作的是event,view只需要在onCreate內設定setOnTouchListener用onTouch這個方法,MotionEvent主要是存放了觸控動作、和一些觸控的方法,舉幾個常用的:
當然還有其他更廣的應用,像是滑鼠的滾輪等,更多請參考:Android Developers/MotionEvent
那麼接著來做設計的部分:
public class MainActivity extends AppCompatActivity implements View.OnTouchListener {
//此為宣告的部分
    TextView textView;//顯示按下次數
    Button button;//清零按鈕
    int i;//按下次數
    SharedPreferences save;//存值
    SharedPreferences.Editor editor;//存值的方法
//實作介面的onTouch方法
public boolean onTouch(View v, MotionEvent event)
    {
        //Vibrator宣告,Vibrator為震動器
        Vibrator vibrator = (Vibrator) getSystemService(Context.VIBRATOR_SERVICE);

        if(event.getAction() == MotionEvent.ACTION_DOWN){ //取得動作==檢測到觸點時(點擊螢幕)
            vibrator.vibrate(1000); //震動多久(ms)
            i=i+1;//點擊次數
            return true;
        }
        else if(event.getAction() == MotionEvent.ACTION_UP){ //取得動作==放開觸點時(放開螢幕)
            vibrator.cancel(); //停止震動
            return false;
        }
        textView.setText(""+i);//顯示(此findViewById寫在onCreate內)
        return false;
    }
    //onCreate...
這邊我設計了一個變數i來儲存我按了多少下(會放進SharePreferences存)、以及震動器Vibrator的使用,那麼接著就往下看,以及SharePreferences怎麼進行儲存值及取值的部分:
//...
@Override
    protected void onCreate(Bundle savedInstanceState) {
        super.onCreate(savedInstanceState);
        setContentView(R.layout.activity_main);
        button=findViewById(R.id.button);
        save = getSharedPreferences("saveName",MODE_PRIVATE);
        i = save.getInt("i",0);//取得editor放進去的i資料
        textView = findViewById(R.id.textview);
        if(i>0){
            textView.setText(""+i);
        }
        View view = findViewById(R.id.activity);//在最外層佈局中加入的id來綁定
        view.setOnTouchListener(this::onTouch);//設定setOnTouchListener使用onTouch方法
    }
    public void click(View v){
        i=0;//清零
    }
    @Override
    protected void onStop()
    {
        super.onStop();
        Log.d("Tag_stop",""+i);//檢測關閉時是否有寫入數值
        save = getSharedPreferences("saveName",MODE_PRIVATE);
        editor = save.edit();//編輯save物件
        editor.putInt("i", i);//放入i值至"i"這個標籤中
        editor.commit();//儲存
    }
<?xml version="1.0" encoding="utf-8"?>
<androidx.constraintlayout.widget.ConstraintLayout xmlns:android="http://schemas.android.com/apk/res/android"
    xmlns:app="http://schemas.android.com/apk/res-auto"
    xmlns:tools="http://schemas.android.com/tools"
    android:layout_width="match_parent"
    android:layout_height="match_parent"
    android:id="@+id/activity"
    tools:context=".MainActivity">
<!--在最外層布局透過android:id加入id值以綁定-->
    <TextView
        android:id="@+id/textview"
        android:layout_width="wrap_content"
        android:layout_height="wrap_content"
        android:text=""
        app:layout_constraintBottom_toBottomOf="parent"
        app:layout_constraintLeft_toLeftOf="parent"
        app:layout_constraintRight_toRightOf="parent"
        app:layout_constraintTop_toTopOf="parent" />

    <Button
        android:id="@+id/button"
        android:layout_width="wrap_content"
        android:layout_height="wrap_content"
        android:layout_marginTop="528dp"
        android:text="RESET"
        android:onClick="click"
        app:layout_constraintEnd_toEndOf="parent"
        app:layout_constraintHorizontal_bias="0.498"
        app:layout_constraintStart_toStartOf="parent"
        app:layout_constraintTop_toTopOf="parent" />

</androidx.constraintlayout.widget.ConstraintLayout>
這樣就完成了!


 iThome鐵人賽