iT邦幫忙

2021 iThome 鐵人賽

DAY 28
0
Mobile Development

Android 新手入門學習系列 第 28

Day28 Android - tablayout+fragment

今天主要要來使用tablayout和fragment的結合,我認為和之前講的ButtomNavigationView+fragment的應用差不多,一樣都是利用按鈕做fragment切換的動作,傳送門:Android day15,那麼今天主要要來講tablayout與fragment的結合,首先一樣先加入三個Fragment(Blank)。
https://ithelp.ithome.com.tw/upload/images/20210909/20139259YfEntwTc8o.png

布局

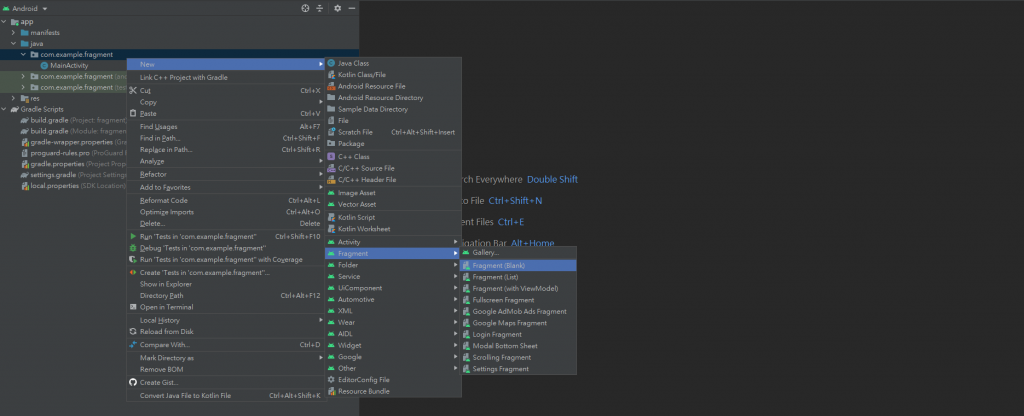
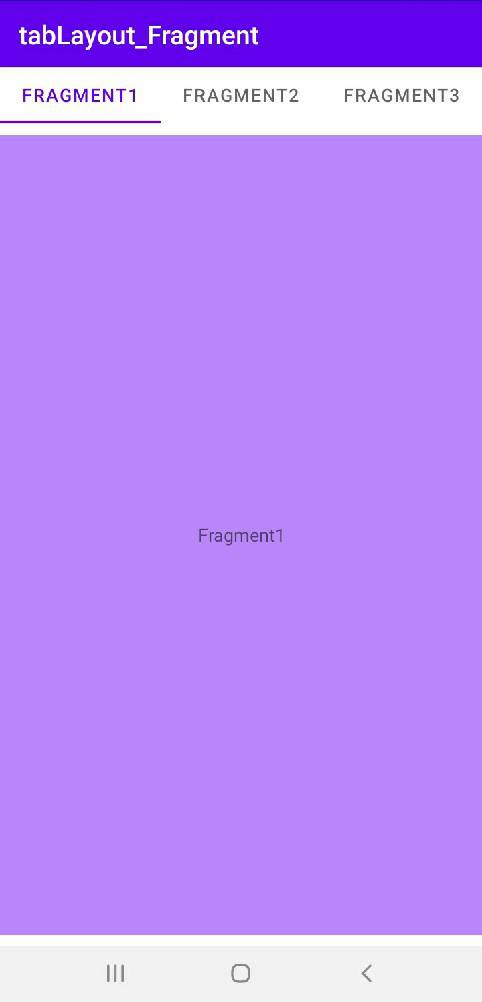
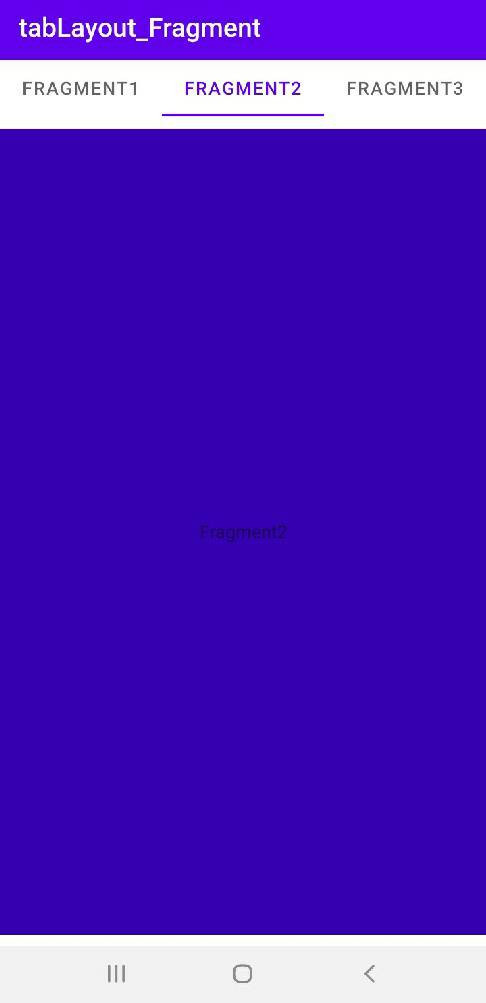
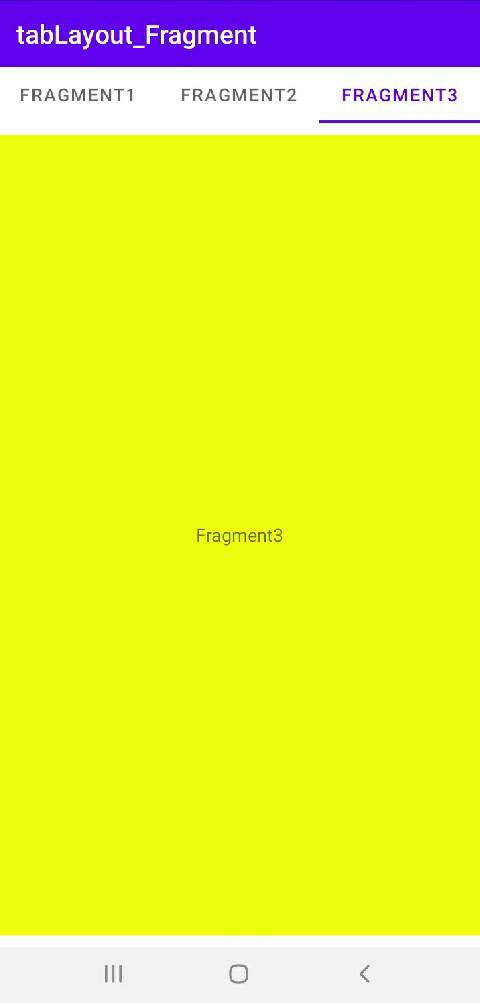
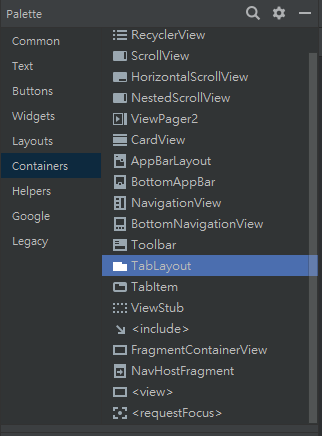
首先拉入一個tabLayout和FragmentContainerView至佈局中(改了一下標題)。
![https://ithelp.ithome.com.tw/upload/images/20210909/20139259vAfXDsCOrO.png](https://ithelp.ithome.com.tw/upload/images/20210909/20139259vAfXDsCOrO.png

<?xml version="1.0" encoding="utf-8"?>
<androidx.constraintlayout.widget.ConstraintLayout xmlns:android="http://schemas.android.com/apk/res/android"
    xmlns:app="http://schemas.android.com/apk/res-auto"
    xmlns:tools="http://schemas.android.com/tools"
    android:layout_width="match_parent"
    android:layout_height="match_parent"
    tools:context=".MainActivity">

    <com.google.android.material.tabs.TabLayout
        android:id="@+id/tabLayout"
        android:layout_width="match_parent"
        android:layout_height="wrap_content"
        app:layout_constraintEnd_toEndOf="parent"
        app:layout_constraintStart_toStartOf="parent"
        app:layout_constraintTop_toTopOf="parent">

        <com.google.android.material.tabs.TabItem
            android:layout_width="wrap_content"
            android:layout_height="wrap_content"
            android:text="Fragment1" />

        <com.google.android.material.tabs.TabItem
            android:layout_width="wrap_content"
            android:layout_height="wrap_content"
            android:text="Fragment2" />

        <com.google.android.material.tabs.TabItem
            android:layout_width="wrap_content"
            android:layout_height="wrap_content"
            android:text="Fragment3" />
    </com.google.android.material.tabs.TabLayout>

    <androidx.fragment.app.FragmentContainerView
        android:id="@+id/fragmentContainerView"
        android:name="com.example.tablayout_fragment.BlankFragment"
        android:layout_width="414dp"
        android:layout_height="682dp"
        app:layout_constraintBottom_toBottomOf="parent"
        app:layout_constraintEnd_toEndOf="parent"
        app:layout_constraintStart_toStartOf="parent"
        app:layout_constraintTop_toBottomOf="@+id/tabLayout" />

</androidx.constraintlayout.widget.ConstraintLayout>

那其他布局的擺設就依照自己的喜好設計哦!接著看到Activity的部分。


Acitvity

TabLayout tabLayout;
FragmentManager fragmentManager;
@Override
    protected void onCreate(Bundle savedInstanceState) {
        super.onCreate(savedInstanceState);
        setContentView(R.layout.activity_main);
        fragmentManager = getSupportFragmentManager();
        tabLayout=findViewById(R.id.tabLayout);
        tabLayout.addOnTabSelectedListener(new TabLayout.OnTabSelectedListener() {
            @Override
            public void onTabSelected(TabLayout.Tab tab) {
                //通常會在這邊設計,tab.getPosition()可取得目前按下哪個按鈕(值從0開始)
                fragmentChange(tab.getPosition());//使用自己宣告的fragmentChange函數
            }

            @Override
            public void onTabUnselected(TabLayout.Tab tab) {

            }

            @Override
            public void onTabReselected(TabLayout.Tab tab) {

            }
        });
    }

fragment函數(切換)

這邊的部分與之前的部分挺雷同的,只是這次適用tablayout的tab來取要顯示第幾個fragment。

public void fragmentChange(int position){
        FragmentTransaction fragmentTransaction = fragmentManager.beginTransaction();
        switch (position){
            case 0:
                BlankFragment Fragment = new BlankFragment();//新增Fragment
                fragmentTransaction.replace(R.id.fragmentContainerView,Fragment);//套用這個Fragment(覆蓋上去)
                fragmentTransaction.commit();//啟用
                break;
            case 1:
                BlankFragment2 Fragment2 = new BlankFragment2();//新增Fragment
                fragmentTransaction.replace(R.id.fragmentContainerView,Fragment2);//套用這個Fragment(覆蓋上去)
                fragmentTransaction.commit();//啟用
                break;
            case 2:
                BlankFragment3 Fragment3 = new BlankFragment3();//新增Fragment
                fragmentTransaction.replace(R.id.fragmentContainerView,Fragment3);//套用這個Fragment(覆蓋上去)
                fragmentTransaction.commit();//啟用
                break;
        }
    }

成果

https://ithelp.ithome.com.tw/upload/images/20210909/20139259VrGhVKF8Nv.jpg


https://ithelp.ithome.com.tw/upload/images/20210909/20139259T2vZ388rbo.jpg


https://ithelp.ithome.com.tw/upload/images/20210909/20139259tezUfC5uUc.jpg


上一篇
Day27 Android - onTouch+SharePreferences
下一篇
Day29 Android - 簡易內嵌網頁(webview)
系列文
Android 新手入門學習30
圖片
  直播研討會
圖片
{{ item.channelVendor }} {{ item.webinarstarted }} |
{{ formatDate(item.duration) }}
直播中

尚未有邦友留言

立即登入留言