設計UI總共有三種方法去定位個元件在視窗內的位置,分別是pack方法、grid方法跟place方法,我會分成三篇文章來跟大家做介紹,今天就先來聊聊pack方法。
♠♣今天的文章大綱♥♦
pack() 為流水式排版,是最常使用到的方法,利用相對位置的概念去做控件的配置,這些參數並不一定要加,沒有傳入參數時會以預設值排版,常用參數有side、fill、expand、padx/pady、ipadx/ipady跟anchor
❗❗❗ 要注意一個視窗中不能同時使用pack與grid排版,但place卻可以與pack或grid同時使用 ❗❗❗
import tkinter as tk
root = tk.Tk()

root.title('cuteluluWindow')
root.configure(bg="#7AFEC6")
root.iconbitmap('heart_green.ico')

L1=tk.Label(root,text='I am Label',bg='#DDA0DD',fg="#8B008B",
            font=("Viner Hand ITC",18,"bold"))
L2=tk.Label(root,text='Welcome',bg='#6495ED',fg="#AFEEEE",
            font=("Blackadder ITC",18,"bold"))
L3=tk.Label(root,text='Thank you',bg='#FFFACD',fg="#DAA520",
            font=("Algerian",18,"bold"))

L1.pack()#pack方法
L2.pack()#pack方法
L3.pack()#pack方法

root.mainloop()
這邊的pack方法預設是TOP排列,也就是由上往下排
以下為執行結果⬇⬇⬇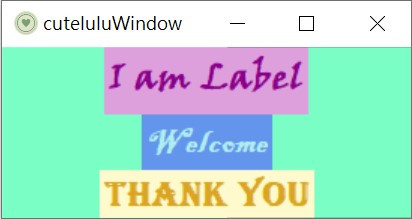
pack方法有四種side參數值
L1.pack(side='bottom')#pack方法
L2.pack(side='bottom')#pack方法
L3.pack(side='bottom')#pack方法
此為由下往上的bottom排列,明顯看出與程式碼寫的順序是相反的
執行結果⬇⬇⬇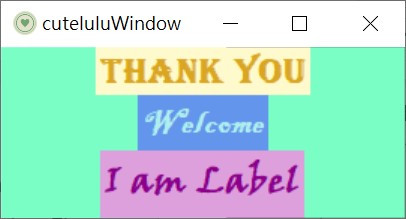
L1.pack(side='left')#pack方法
L2.pack(side='left')#pack方法
L3.pack(side='left')#pack方法
這邊是用left由左到右的排列
執行結果如下⬇⬇⬇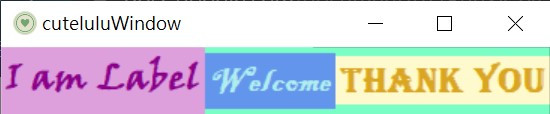
L1.pack(side='right')#pack方法
L2.pack(side='right')#pack方法
L3.pack(side='right')#pack方法
此為由又到左排列的right
下圖為執行結果⬇⬇⬇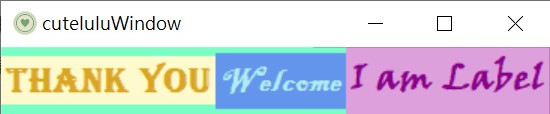
這些參數也可以混合使用,下面就舉一個範例
L1.pack(side='bottom')#下往上排
L2.pack(side='right')#右往左排
L3.pack(side='left')#左往右排
將'I am Label'由下往上排,因此會在最下面;'Welcome'由右往左,因此排在右側;而'Thank you'在最左,因為是由左往右排列
下圖為執行結果⬇⬇⬇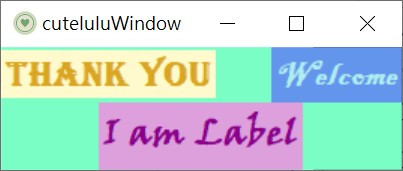
L1.pack(side='right',fill='y')#由右排到左,填滿Y軸空間
L2.pack(side='right',padx='10')#由右排到左,跟左右兩邊距離10
L3.pack(side='right',fill='y')#由右排到左,填滿Y軸空間
將'I am Label'由右往左排,填滿此標籤的分配空間;'Welcome'由右往左,與另外兩個標籤間隔10;而'Thank you'由右往左排,填滿此標籤的分配空間
下圖為執行結果⬇⬇⬇
接下來是加上ipadx/ipady參數的範例
L1.pack(side='right',padx='10',ipadx='20')#由右排到左,左右間隔10,文字跟標籤邊界間隔20
L2.pack(side='right',padx='10',ipady='20')#由右排到左,左右間隔10,文字跟標籤邊界間隔20
L3.pack(side='right')#由右排到左
padx/pady參數是會累加的,在'I am Label'後面加上padx=10,會發現在跟'Welcome'之間的間隔更寬了,是因為這裡有兩個10的距離
'I am Label'加上ipdx=20,X軸的文字跟標籤邊界間隔20
'Welcome'加上ipdy=20,Y軸的文字跟標籤邊界間隔20
執行結果如此圖⬇⬇⬇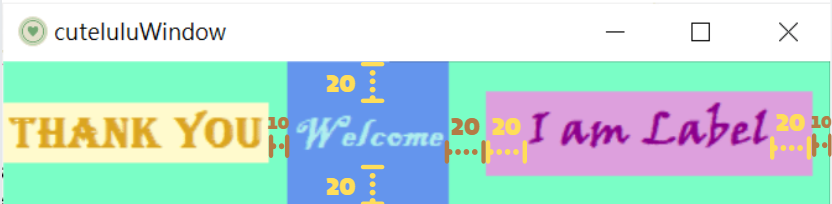
L1.pack(side='left',fill='x')
L2.pack(fill='both',expand=True)
L3.pack()
執行結果⬇⬇⬇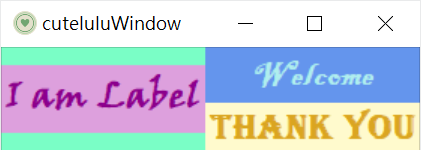
拖曳視窗後⬇⬇⬇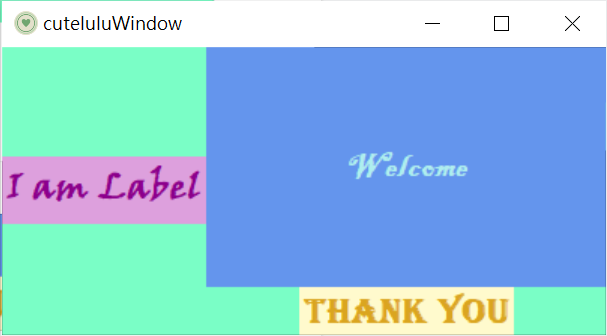
最後來介紹anchor參數,如下圖總共有九個位置可以設定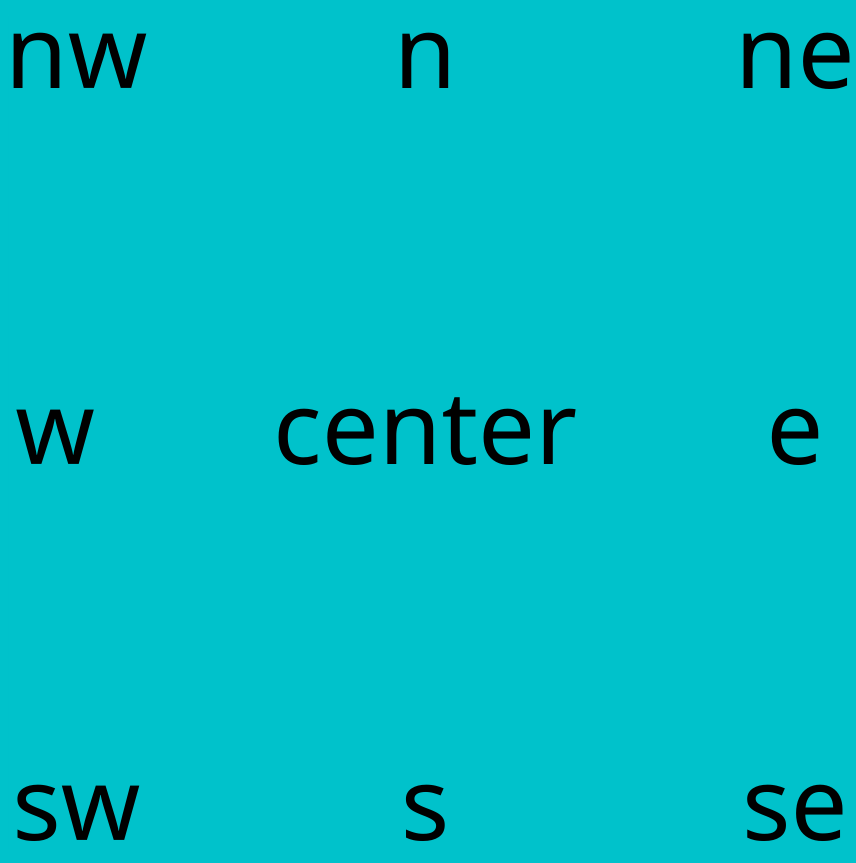
這邊就舉例來解釋
import tkinter as tk
root = tk.Tk()

root.title('cuteluluWindow')
root.configure(bg="#7AFEC6")
root.iconbitmap('heart_green.ico')
root.geometry('400x200')


yesLabel=tk.Label(root,text='YES',bg='#00008B',fg="#00FFFF",
            font=("Castellar",18,"bold"))
noLabel=tk.Label(root,text='NO',bg='#00008B',fg="#00FFFF",
            font=("Castellar",18,"bold"))


noLabel.pack(anchor='s',side='right',padx=10,pady=10)#從右開始南方位置
yesLabel.pack(anchor='s',side='right',pady=10,padx=10)#從右開始南方位置

root.mainloop()
執行結果⬇⬇⬇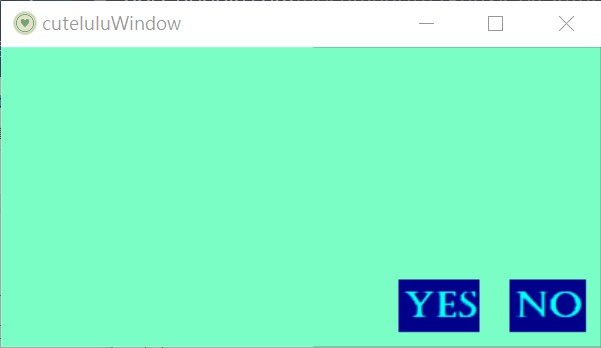
以上就是pack()方法的介紹,有任何問題都歡迎留言討論喔
明天就要來聊聊第二個grid()方法( ゚д゚)つ Bye


 iThome鐵人賽