今天要講到我最喜歡的部分,選項鈕與核取方塊checkbox,覺得做出選項鈕去選很好玩,很像在做測驗。
♠♣今天的文章大綱♥♦
可以將用函數或是方法,讓使用選項鈕時,使選項鈕執行。
語法:Radiobutton( master, options, ... )
| 參數 | 說明 |
|---|---|
| activebackground | 滑鼠游標在選項鈕時的背景顏色。 |
| activeforeground | 滑鼠游標在選項鈕時的前景顏色。 |
| anchor | 如果空間大於所需時,控制選項鈕的位置,預設是 CENTER。 |
| bg | 標籤背景或 indicator 的背景顏色。 |
| bitmap | 位元圖影像物件。 |
| borderwidth或bd | 邊界寬度,預設是2px。 |
| command | 當使用者更改選項時,會自動執行此函數。 |
| cursor | 當滑鼠游標在選項紐時的外形。 |
| fg | 文字的顏色。 |
| font | 字型。 |
| height | 選項鈕的文字有幾行,預設1行。 |
| highlightbackground | 當選項鈕取得焦點時的背景颜色。 |
| highlightcolor | 當選項紐取得焦點時的顏色。 |
| image | 影像物件,如果要建立有影像的選項鈕時,可以使用此參數。 |
| indicatoron | 當此值為0時,可以建立盒子選項鈕。 |
| justify | 當文字多行時,最後一行的對齊方式。 |
| padx/pady | 可設定選項鈕與文字的間隔;可設定選項紐的上下間距。預設是1。 |
| selectcolor | 當選項鈕被選取時的顏色。 |
| selectimage | 設定影像選項鈕時,可由此設定當選項鈕被選取時的不同影像。 |
| state | 預設是state=NORMAL,若是設定 DISABLE 則以灰階顯示選項鈕表示暫時像。無法使用。 |
| text | 選項鈕旁的文字。 |
| textvariable | 以變數方式顯示選項鈕文字。 |
| underline | 可以設定第幾個文字有含底線,從0開始算起,預設是-1 表示不含底線。 |
| value | 選項鈕的值,可以區分所選取的選項鈕。 |
| variable | 設定或取得目前選取的選項按鈕,它的值型態通常是 IntVar 或StringVar。 |
| width | 選項紐的文字區間有幾個字元寛,省略時會自行調整為實際寬度。 |
| wraplength | 限制每行的文字數,預設是0。 |
用矩陣的方式列出所有學歷程度,預設選項值為0,最後建立選項鈕,執行後會將選擇印在python shell中。
import tkinter as tk
root = tk.Tk()
root.geometry("350x400+200+300")
root.title('cuteluluWindow')
root.configure(bg="#7AFEC6")
root.iconbitmap('heart_green.ico')
root.geometry('300x200')
def Selection ():
print(schools [var.get()])
schools = {0:"國小",1:"國中",2:"高中",3:"大學",4:"碩士/博士"}
var = tk.IntVar()
var.set(0)

l = tk.Label(root, text="最高學歷" ,fg="#8B008B", bg="#7AFEC6", width=30)
l.pack()
for val, school in schools.items():
R=tk.Radiobutton (root,text=school,variable=var, value=val,command=Selection)
R.pack()
root.mainloop()
執行結果⬇⬇⬇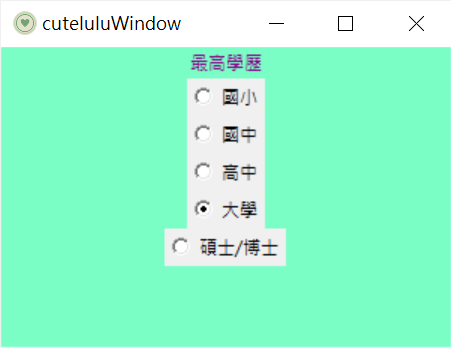
選擇後結果出現python shell
tkinter還有一種選項的樣式,就是盒子選項鈕,在Radiobutton裡面加入indicatoron這邊就用剛剛的程式碼去做調整。
R=tk.Radiobutton (root,text=school,indicatoron=0,variable=var, value=val,command=Selection)
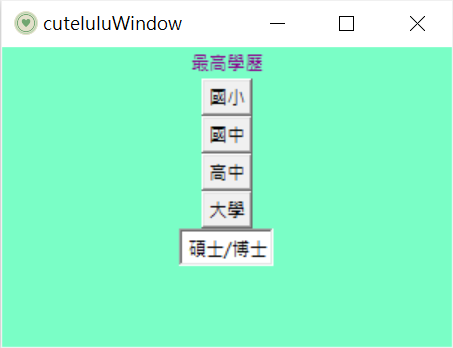
選擇後結果也會出現python shell
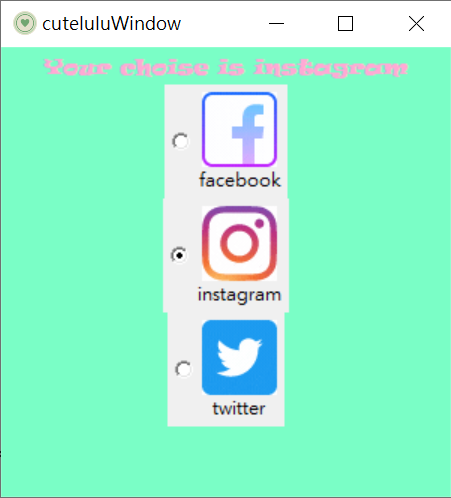
接下來做一個把圖片放進選項鈕的實例,如果想知道更詳細關於圖加進介面或是按鈕的說明,可以去看我Day7跟Day8的介紹喔~~
import tkinter as tk

root = tk.Tk()
root.geometry("350x400+200+300")
root.title('cuteluluWindow')
root.configure(bg="#7AFEC6")
root.iconbitmap('heart_green.ico')
root.geometry('300x300')

def imageSelection ():
    label.config(text="Your choise is "+var.get())

imgF = tk.PhotoImage(file="facebook.gif")#圖一
imgI = tk.PhotoImage(file="instagram.gif")#圖二
imgT = tk.PhotoImage(file="twitter.gif")#圖三

var = tk.StringVar()
var.set("twitter")

label = tk.Label (root, text="Choise one!", bg="#7AFEC6",fg="#FFAAD5",width=30,font=("Ravie",10,"bold"))
label.pack()

rbF=tk.Radiobutton(root, image=imgF,text="facebook", compound="top", variable=var, value="facebook",command=imageSelection)

rbF.pack()
rbI=tk.Radiobutton(root, image=imgI,text="instagram", compound="top", variable=var,value="instagram",command=imageSelection)

rbI.pack()

rbT=tk.Radiobutton (root, image=imgT,text="twitter",compound="top", variable=var,value="twitter",command=imageSelection)
rbT.pack()

root.mainloop()
執行結果⬇⬇⬇
核取方塊checkboxes,是可以複選的選項鈕,跟選項鈕一樣的是都是用函數跟方法去讓核取方塊執行。
語法:Checkbutton(master, options, ...)
| 參數 | 說明 |
|---|---|
| activebackground | 滑鼠游標在選項鈕時的背景顏色。 |
| activeforeground | 滑鼠游標在選項鈕時的前景顏色。 |
| disableforeground | 無法操作時的顏色。 |
| bg | 標籤背景或 indicator 的背景顏色。 |
| bitmap | 位元圖影像物件。 |
| borderwidth或bd | 邊界寬度,預設是2px。 |
| command | 當使用者更改選項時,會自動執行此函數。 |
| cursor | 當滑鼠游標在選項紐時的外形。 |
| fg | 文字的顏色。 |
| font | 字型。 |
| height | 選項鈕的文字有幾行,預設1行。 |
| highlightbackground | 當選項鈕取得焦點時的背景颜色。 |
| highlightcolor | 當選項紐取得焦點時的顏色。 |
| image | 影像物件,如果要建立有影像的選項鈕時,可以使用此參數。 |
| offvalue | 控制變數,預設為選取值為0。 |
| onvalue | 控制變數,預設為選取值為1。 |
| justify | 當文字多行時,最後一行的對齊方式。 |
| padx/pady | 可設定選項鈕與文字的間隔;可設定選項紐的上下間距。預設是1。 |
| selectcolor | 當選項紐被選取時的顏色。 |
| selectimage | 設定影像選項鈕時,可由此設定當選項鈕被選取時的不同影像。 |
| state | 預設是state=NORMAL,若是設定 DISABLE 則以灰階顯示選項鈕表示暫時像。無法使用。 |
| text | 選項鈕旁的文字。 |
| relief | 預設為FLAT,控制核取方塊外框。 |
| underline | 可以設定第幾個文字有含底線,從0開始算起,預設是-1 表示不含底線。 |
| width | 選項紐的文字區間有幾個字元寛,省略時會自行調整為實際寬度。 |
| wraplength | 限制每行的文字數,預設是0。 |
做一個可以選喜歡的水果的介面,可以複選,選完後按下按鈕結果會在python shell出現
import tkinter as tk

root = tk.Tk()
root.geometry("350x400+200+300")
root.title('cuteluluWindow')
root.configure(bg="#7AFEC6")
root.iconbitmap('heart_green.ico')
root.geometry('350x200')

def fruitselect():
    selection = " "
    for i in checkboxes:
        if checkboxes[i].get() ==True:
            selection = selection + fruits[i] + "\t"
        print (selection)

l=tk.Label (root, text="Choise your favirot fruit. ", fg="#FFAAD5", bg="#7AFEC6",font=("Ravie",10,"bold"),width=30)
l.grid(row=0)

fruits = {0:"Strawberry",1: "Peach",2:"mango",3:"Cherry"}#矩陣內的內容

checkboxes = {}

for i in range (len (fruits)):
    checkboxes[i] = tk.BooleanVar()#布林值變數
    Cb = tk.Checkbutton(root, text=fruits[i], variable=checkboxes[i])
    Cb.grid (row=i+1)

btn = tk.Button (root, text="DOWN" ,width=10, command=fruitselect)

btn.grid(row=i+2)

root.mainloop()
執行結果⬇⬇⬇

以上是今天的部分,今天的內容感覺有點長,不過都不是很難,只要了解如何使用參數或方法去讓按鈕執行就可以了。
明天會進入Frame這個主題喔~~


 iThome鐵人賽