昨天的文章中已將 navigation 安裝完成
今天就要開始當導覽王了!
一起來轉頁吧吧吧~
   .src
   ├── assets
   │   └── icons
   │   └── icon-winning.png
   │   └── actionPrimary.png
   ├── common
   ├── components
   │   └── Flex1.js
   ├── constants
   │   ├── assets.js
   │   ├── index.js
   │   └── style.js
   ├── screens /// 在這裡
   │   └── IconScreen.js // 我使用了上次的 IconScreen 頁面 XD
   └── utils
懶得寫的人可以直接沿用我之前的 code XD
import React from 'react';
import {Image, View, Text} from 'react-native';
import {assets, SIZE, fonts} from '@src/constants';

const IconScreen = () => {
  return (
    <View style={{flex: 1, justifyContent: 'center', alignItems: 'center'}}>
      {/* <Flex1 /> */}
      <Text style={fonts.h3}>我是h3</Text>
      <View
        style={{
          justifyContent: 'center',
          alignItems: 'center',
          backgroundColor: 'black',
        }}>
        {console.log('height:', SIZE.height, 'width:', SIZE.width)}
        <Image style={{width: 30, height: 30}} source={assets.winIcon} />
      </View>
    </View>
  );
};
export default IconScreen;
在這邊我只列出基本常用的,詳細的請參考網址
在這邊我只列出基本常用的,詳細的請參考網址
import 'react-native-gesture-handler';
import React from 'react';
import {NavigationContainer} from '@react-navigation/native';
import {createStackNavigator} from '@react-navigation/stack';
import {Text, View} from 'react-native';
import IconScreen from '@screens/IconScreen'; // 引入 IconScreen

const Stack = createStackNavigator();


// Home 為首頁, 也是可以自己開一個 screen 檔案
const Home = ({navigation}) => {
  return (
    <View style={{flex: 1, justifyContent: 'center', alignItems: 'center'}}>
      <Text>Home Screen</Text>
    </View>
  );
};

const App = () => {
  return (
    <NavigationContainer>
      <Stack.Navigator initialRouteName="Home"> // initialRouteName 設定初始的頁面我指向 Home
        <Stack.Screen name="Home" component={Home} /> // name 就像是頁面的id ; component 為指定的component頁面
        <Stack.Screen name="IconScreen" component={IconScreen} />  // Stack 新加入頁面
      </Stack.Navigator>
    </NavigationContainer>
  );
};

export default App;
基本上倘若每個畫面的 header opetions 類似,我會先把它寫成一個 constant 帶入
來給大家一個例子包含:
const headerOptions = ({ route, navigation }) => ({
    title: route.params ? route.params.title : props.title ? props.title : "",
    // 路由的參數判斷
    headerTintColor: "black",
    // 字體顏色
    headerTitleStyle: { alignSelf: "center", fontSize: 16 }, // header 樣式
    headerStyle: {
      height: Platform.OS === "ios" ? 88 : 44,
    },
    // 使用裝置來判斷 header 的高度
    headerRight: () => (
      <Image source={assets.actionPrimary} style={[styles.actionPrimary]} />
    ),
    // 右邊放入圖
    headerLeft: () => (
     <TouchableOpacity
      onPress={() => {
        navigation.goBack();
      }}>
      <Image
        source={assets.actionPrimary}
        style={[styles.actionPrimary]}
        onPress={() => {
          navigation.goBack();
        }}
      />
    </TouchableOpacity>
    ),
    // 左邊放入圖並使用 navigation.goBack()  回上一頁
   =
  });
再放入 App.js
const App = () => {
  return (
    <NavigationContainer>
      <Stack.Navigator initialRouteName="Home" >
        <Stack.Screen name="Home" component={Home} options={headerOptions} /> // 放!
        <Stack.Screen name="IconScreen" component={IconScreen} options={headerOptions} /> // 放!
      </Stack.Navigator>
    </NavigationContainer>
  );
};
下指令
npm run ios
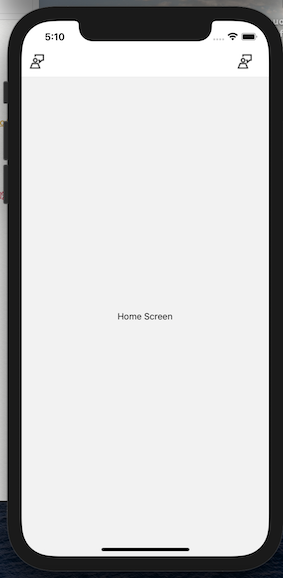
表頭!!!出現了~~
Day 14 done!!! 下一篇是跳轉頁面跟回上一頁的教學