iT邦幫忙

2021 iThome 鐵人賽

DAY 29
0
Mobile Development

卡卡30天學 React Native系列 第 29

[ 卡卡 DAY 29 ] - React Native iOS 打包步驟及離線 jsbundle產生

  • 分享至 

  • twitterImage
  •  

因為實在有太多東西想分享了,但已經 29 天了
我們先來個 iOS 打包步驟
完成開發後再來就是要如何打包及送審發佈
今天來嘗試分享這部分吧!

打包前情提要

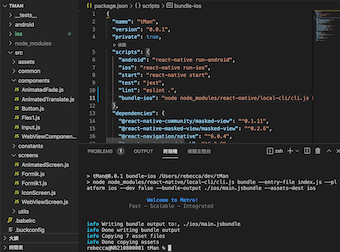
基本上我們會在 iOS 的目錄裡放 main.jsbundle,和打包 React Native Android 不同的地方是我們無法一個步驟就打包玩 iOS。我们需要將 JS 代碼及圖檔打包導出,再通過 XCode 放入 iOS 目錄裡。

如何導出 js bundle 呢?

react-native bundle
--platform ios --dev false // 哪個裝置 iOS/android
--entry-file index.js // iOS/android 入口的 js 名稱
--bundle-output ./ios/main.jsbundle  // 生成 jsbundle 的名稱
--assets-dest ./ios // 圖片資源生成的路徑

因為要時常打包而我會在 package.json 中增加編字的指令

  "scripts": {
    "bundle-ios": "node node_modules/react-native/local-cli/cli.js bundle --entry-file index.js --platform ios --dev false --bundle-output ./ios/main.jsbundle --assets-dest ios"
   },

下指令即可打包生成離線資源

npm run bundle-ios

https://ithelp.ithome.com.tw/upload/images/20211011/20142011a2kCnElscg.png

開始

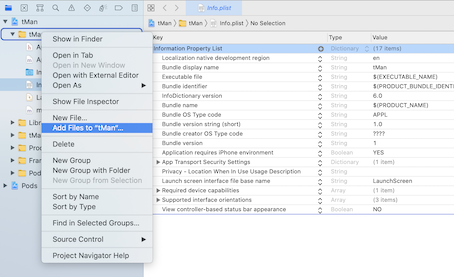
  1. 打開 xcode 開起 {檔名}.xcodeProj 檔案

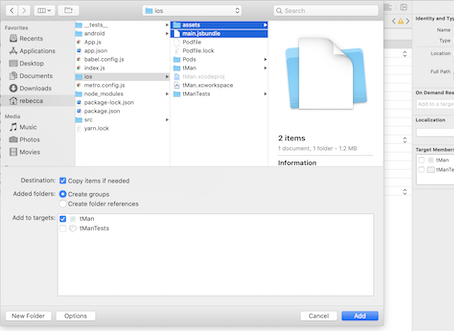
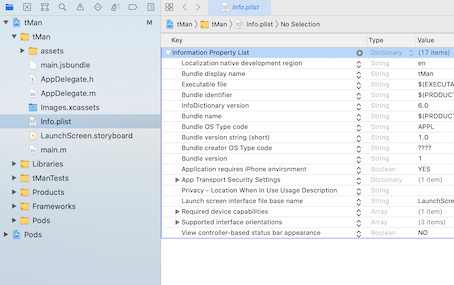
  2. 參照以下步驟加入檔案 main.jsbundle and asset folder 選擇 create folder reference,參照下圖

https://ithelp.ithome.com.tw/upload/images/20211011/20142011HNZjthol74.png
https://ithelp.ithome.com.tw/upload/images/20211011/20142011IHThziCc8N.png
https://ithelp.ithome.com.tw/upload/images/20211011/20142011fsAeDi1FBX.png

  1. 設定 AppDelegate.m 檔案
- (NSURL *)sourceURLForBridge:(RCTBridge *)bridge
{
#if DEBUG // 測試 debug
  return [[RCTBundleURLProvider sharedSettings] jsBundleURLForBundleRoot:@"index" fallbackResource:nil];
#else 
  // 如果妹有使用CodePush正式 release,使用A:
  return [[NSBundle mainBundle] URLForResource:@"main" withExtension:@"jsbundle"];
  
  //如果有使用CodePush那我們就可以直接透過CodePush來讀取本地的jsbundle,使用B:
  return [CodePush bundleURL];
#endif }
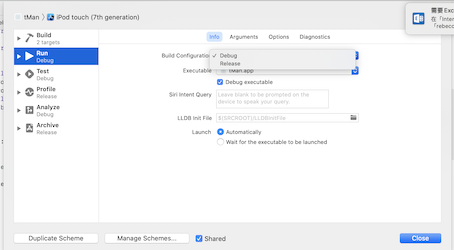
  1. 如何控制 debug / release 呢?
    https://ithelp.ithome.com.tw/upload/images/20211011/20142011fou4cyyCP9.png
    https://ithelp.ithome.com.tw/upload/images/20211011/20142011NhJTFNP4hK.png

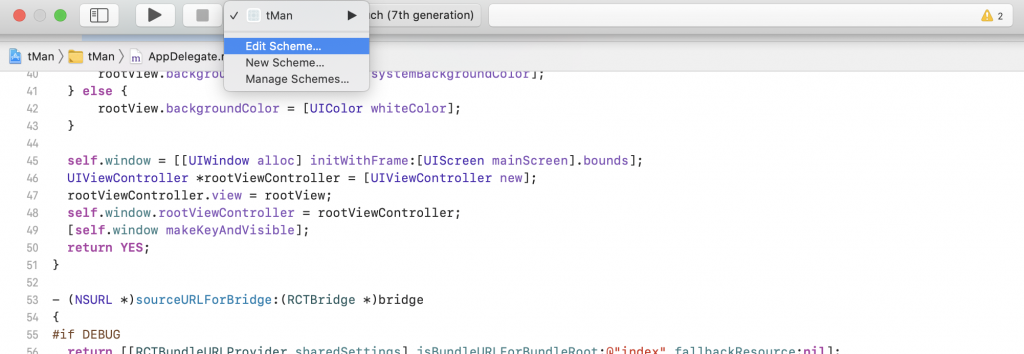
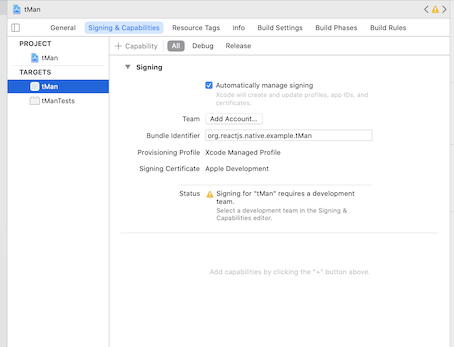
  2. General / Signing & Capabilities 設定
    修改 Version 和 Buildk 版好,寫入 bundle Identifier,選擇 Provisioning profile 為此專案的敘述文件
    https://ithelp.ithome.com.tw/upload/images/20211011/20142011NqDEd0RJc1.pnghttps://ithelp.ithome.com.tw/upload/images/20211011/20142011cYxPGuI4Gm.png

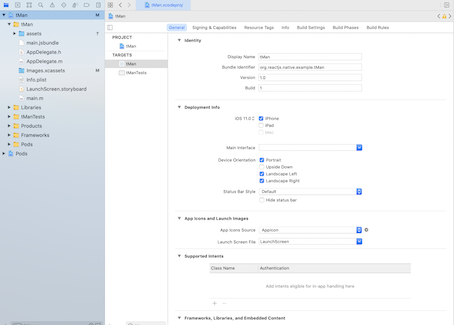
  3. 與 iOS 一樣需要一個 AppStore account
    iOS 開發者帳號申請實錄

  4. 打包及部署

    • 先將設備設定成 build only device / ios device
    • 點擊 Product Archive 開始打包
    • 按 dustribute App
    • 選擇部署方式
      https://ithelp.ithome.com.tw/upload/images/20211011/20142011MJCGgcHZsg.png
    • 在 iotApp.app 選擇安装的證書,按 “next”。
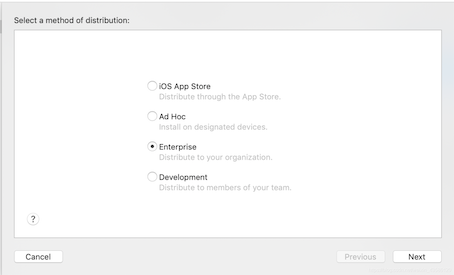
  5. 接著按 export ,會彈出文件夹,選擇一個自己好找的目錄即可。 ipa 就會存放在這裡。

  6. 將生成的 ipa 上傳到 itunes 連接帳戶,且提交審核即可。

Day 29 done ~~ 請多多指教


上一篇
[ 卡卡 DAY 28 ] - React Native 自製 radio button + textarea
下一篇
[ 卡卡 DAY 30 ] - React Native codepush iOS 熱更新
系列文
卡卡30天學 React Native31
圖片
  直播研討會
圖片
{{ item.channelVendor }} {{ item.webinarstarted }} |
{{ formatDate(item.duration) }}
直播中

尚未有邦友留言

立即登入留言