SharedPreference常被使用於資料儲存,很適合做一些簡單的資料存取
先配置按鈕-因為是要輸入所以選Plain Text + button要綁onClick
兩個是一組的~
SharedPreferences shared; //紀錄偏好設定
SharedPreferences.Editor editor //利用編輯器去寫入資料
package com.huang.my_sharedpreference;
import androidx.appcompat.app.AppCompatActivity;
import android.content.SharedPreferences;
import android.os.Bundle;
import android.view.View;
import android.widget.EditText;
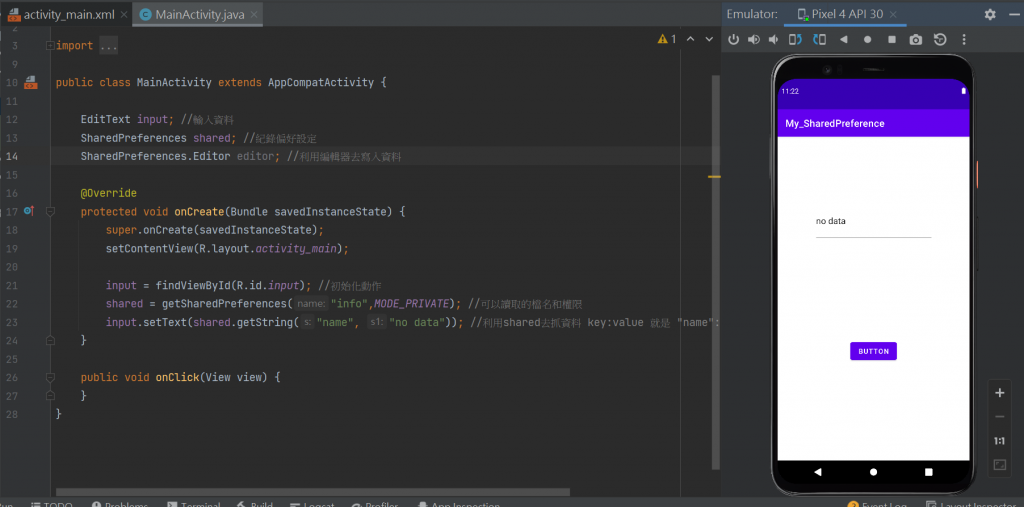
public class MainActivity extends AppCompatActivity {
EditText input; //輸入資料
SharedPreferences shared; //紀錄偏好設定
SharedPreferences.Editor editor; //利用編輯器去寫入資料
@Override
protected void onCreate(Bundle savedInstanceState) {
super.onCreate(savedInstanceState);
setContentView(R.layout.activity_main);
input = findViewById(R.id.input); //初始化動作
shared = getSharedPreferences("info",MODE_PRIVATE); //可以讀取的檔名和權限
input.setText(shared.getString("name", "no data")); //利用shared去抓資料 key:value 就是 "name":" ".no data是預設值 若無
}
public void onClick(View view) {
}
}
來寫button-
package com.huang.my_sharedpreference;

import androidx.appcompat.app.AppCompatActivity;

import android.content.SharedPreferences;
import android.os.Bundle;
import android.view.View;
import android.widget.EditText;

public class MainActivity extends AppCompatActivity {

    EditText input; //輸入資料
    SharedPreferences shared; //紀錄偏好設定
    SharedPreferences.Editor editor; //利用編輯器去寫入資料

    @Override
    protected void onCreate(Bundle savedInstanceState) {
        super.onCreate(savedInstanceState);
        setContentView(R.layout.activity_main);

        input = findViewById(R.id.input); //初始化動作
        shared = getSharedPreferences("info",MODE_PRIVATE); //可以讀取的檔名和權限
        input.setText(shared.getString("name", "no data")); //利用shared去抓資料 key:value 就是 "name":" ".no data是預設值 若無
    }

    public void onClick(View view) {
        editor = shared.edit();

        String s1 = input.getText().toString().trim();//trim()是把前後的空白拿掉

        editor.putString("name",s1);//拿到資料
        editor.commit();//送出儲存.原來輸入的東西還是在
    }

    //清除資料button


}
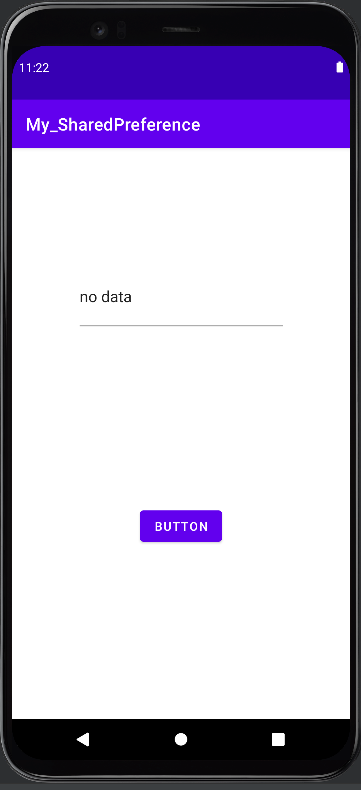
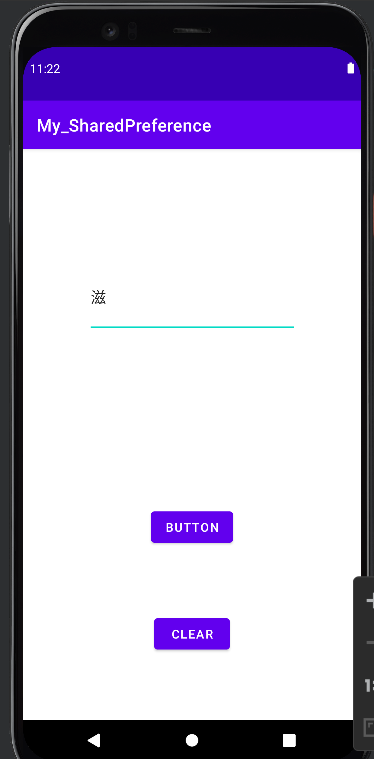
目前模擬器的樣子
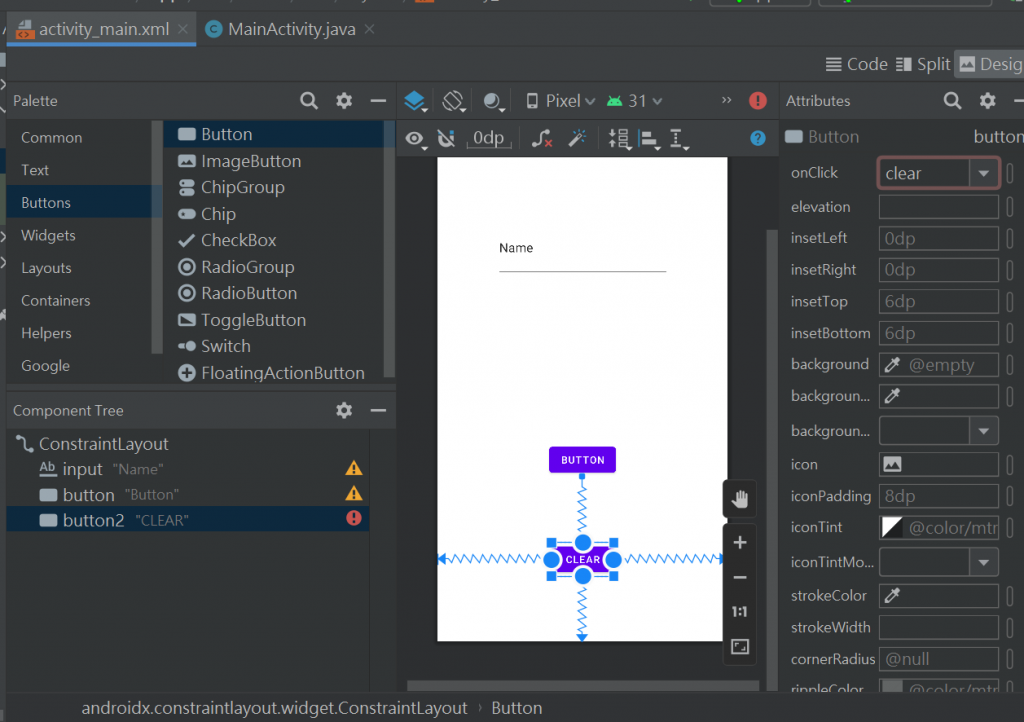
加入清除的資料-
onClick是綁clear

package com.huang.my_sharedpreference;

import androidx.appcompat.app.AppCompatActivity;

import android.content.SharedPreferences;
import android.os.Bundle;
import android.view.View;
import android.widget.EditText;

public class MainActivity extends AppCompatActivity {

    EditText input; //輸入資料
    SharedPreferences shared; //紀錄偏好設定
    SharedPreferences.Editor editor; //利用編輯器去寫入資料

    @Override
    protected void onCreate(Bundle savedInstanceState) {
        super.onCreate(savedInstanceState);
        setContentView(R.layout.activity_main);

        input = findViewById(R.id.input); //初始化動作
        shared = getSharedPreferences("info",MODE_PRIVATE); //可以讀取的檔名和權限
        input.setText(shared.getString("name", "no data")); //利用shared去抓資料 key:value 就是 "name":" ".no data是預設值 若無
    }

    public void onClick(View view) {
        editor = shared.edit();

        String s1 = input.getText().toString().trim();//trim()是把前後的空白拿掉

        editor.putString("name",s1);//拿到資料
        editor.commit();//送出儲存.原來輸入的東西還是在
    }

    //清除資料button

    public void clear(View view) {
       shared.edit().clear().commit(); //清除資料之後重新近來沒資料
        finish();

    }
}
button的code
<?xml version="1.0" encoding="utf-8"?>
<androidx.constraintlayout.widget.ConstraintLayout xmlns:android="http://schemas.android.com/apk/res/android"
    xmlns:app="http://schemas.android.com/apk/res-auto"
    xmlns:tools="http://schemas.android.com/tools"
    android:layout_width="match_parent"
    android:layout_height="match_parent"
    tools:context=".MainActivity">

    <EditText
        android:id="@+id/input"
        android:layout_width="244dp"
        android:layout_height="85dp"
        android:layout_marginTop="130dp"
        android:ems="10"
        android:inputType="textPersonName"
        android:text="Name"
        app:layout_constraintEnd_toEndOf="parent"
        app:layout_constraintStart_toStartOf="parent"
        app:layout_constraintTop_toTopOf="parent" />

    <Button
        android:id="@+id/button"
        android:layout_width="wrap_content"
        android:layout_height="wrap_content"
        android:onClick="onClick"
        android:text="Button"
        app:layout_constraintBottom_toBottomOf="parent"
        app:layout_constraintEnd_toEndOf="parent"
        app:layout_constraintStart_toStartOf="parent"
        app:layout_constraintTop_toBottomOf="@+id/input" />

    <Button
        android:id="@+id/button2"
        android:layout_width="wrap_content"
        android:layout_height="wrap_content"
        android:onClick="clear"
        android:text="CLEAR"
        app:layout_constraintBottom_toBottomOf="parent"
        app:layout_constraintEnd_toEndOf="parent"
        app:layout_constraintStart_toStartOf="parent"
        app:layout_constraintTop_toBottomOf="@+id/button" />
</androidx.constraintlayout.widget.ConstraintLayout>
這裡都是使用到map格式~
後面的json也是
再練一個開新專案-xml檔的布置:
刪掉androidx.constraintlayout.widget.ConstraintLayout改成LinearLayout
也是都要綁onclick
//不要亂註解 不然程式碼會反紅 0.0
package com.huang.myshared2;
import androidx.appcompat.app.AppCompatActivity;
import androidx.appcompat.widget.Toolbar;
import android.content.SharedPreferences;
import android.os.Bundle;
import android.view.View;
public class MainActivity extends AppCompatActivity {
Toolbar toolbar;
SharedPreferences shared;
SharedPreferences.Editor editor;
@Override
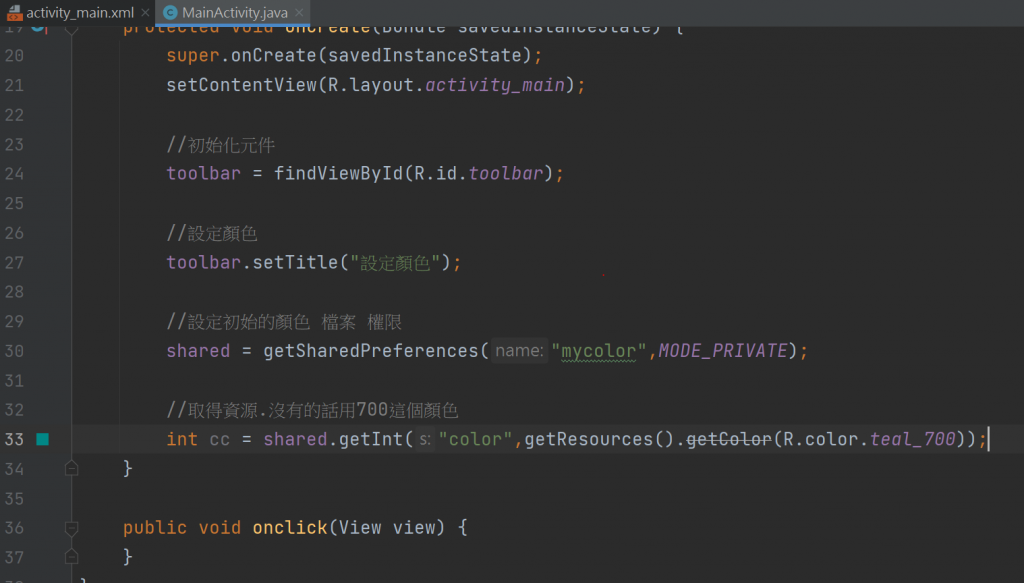
protected void onCreate(Bundle savedInstanceState) {
super.onCreate(savedInstanceState);
setContentView(R.layout.activity_main);
toolbar = findViewById(R.id.toolbar);
toolbar.setTitle("請選顏色");
shared = getSharedPreferences("mycolor", MODE_PRIVATE);
int cc = shared.getInt("color", getResources().getColor(R.color.teal_700));
toolbar.setBackgroundColor(cc);
getWindow().setStatusBarColor(cc);
}
//儲存顏色
void saveColor(int c){
shared = getSharedPreferences("mycolor", MODE_PRIVATE);
//再初始化一次
editor = shared.edit(); //編輯顏色
editor.putInt("color", c); //設定顏色
editor.commit();
}
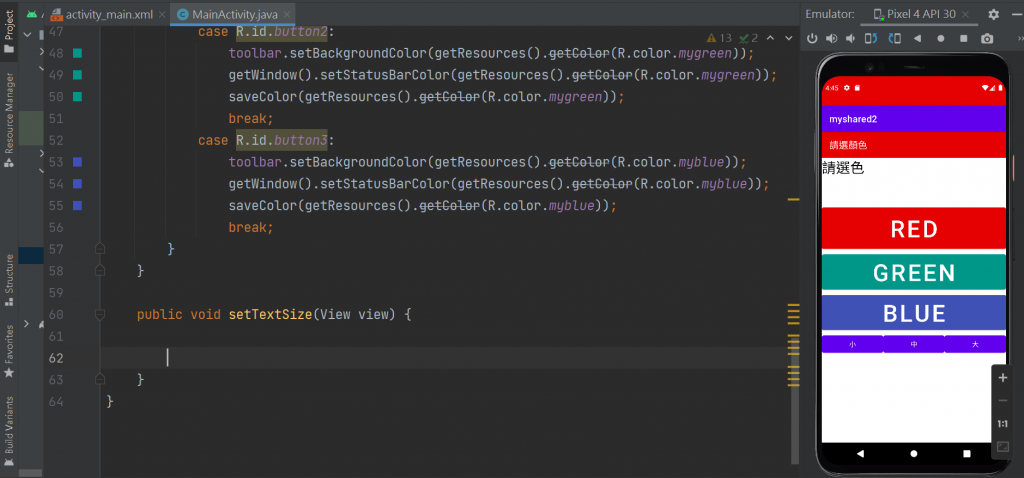
public void onclick(View view) {
switch(view.getId()){
case R.id.button:
toolbar.setBackgroundColor(getResources().getColor(R.color.myred));
getWindow().setStatusBarColor(getResources().getColor(R.color.myred));
saveColor(getResources().getColor(R.color.myred));
break;
case R.id.button2:
toolbar.setBackgroundColor(getResources().getColor(R.color.mygreen));
getWindow().setStatusBarColor(getResources().getColor(R.color.mygreen));
saveColor(getResources().getColor(R.color.mygreen));
break;
case R.id.button3:
toolbar.setBackgroundColor(getResources().getColor(R.color.myblue));
getWindow().setStatusBarColor(getResources().getColor(R.color.myblue));
saveColor(getResources().getColor(R.color.myblue));
break;
}
}
}
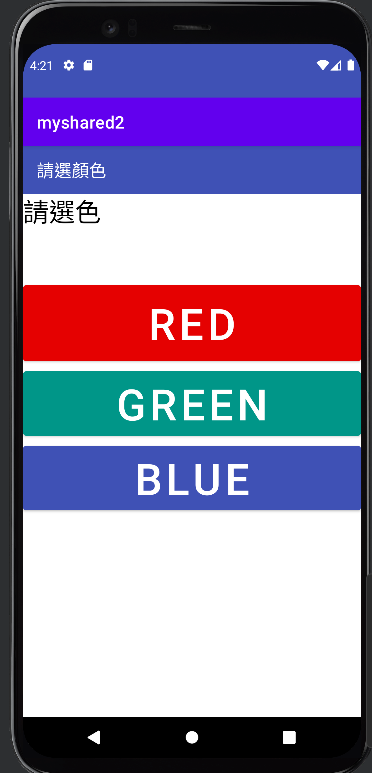
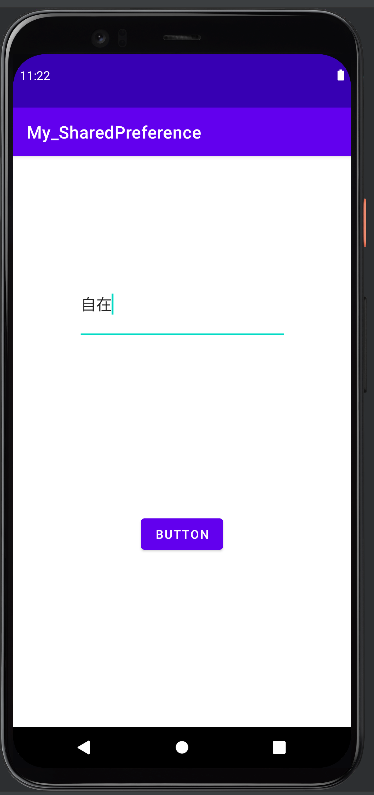
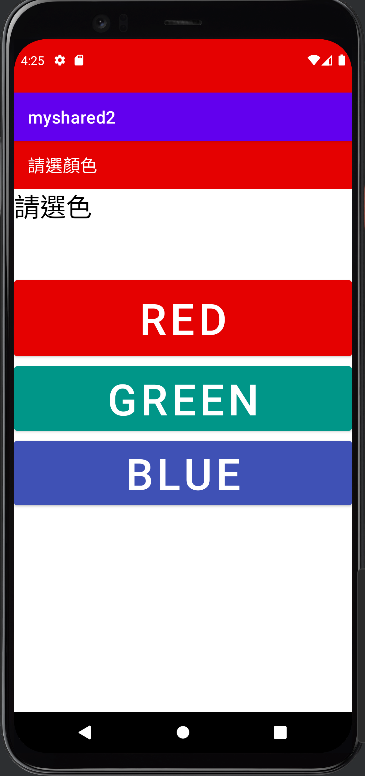
選到顏色
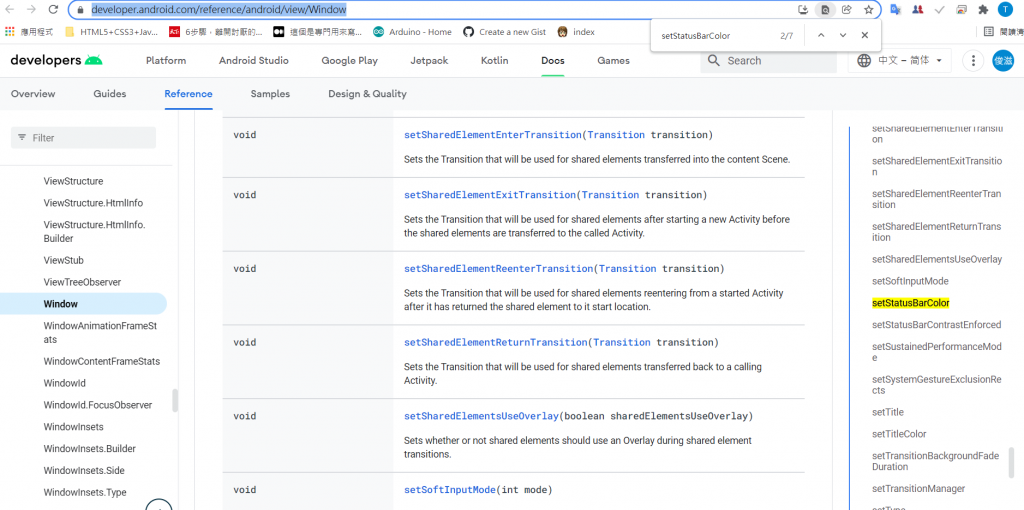
搜尋官網https://developer.android.com/reference/android/view/Window
資料的方法按 ctrl+f -再按入程式碼中的關鍵字
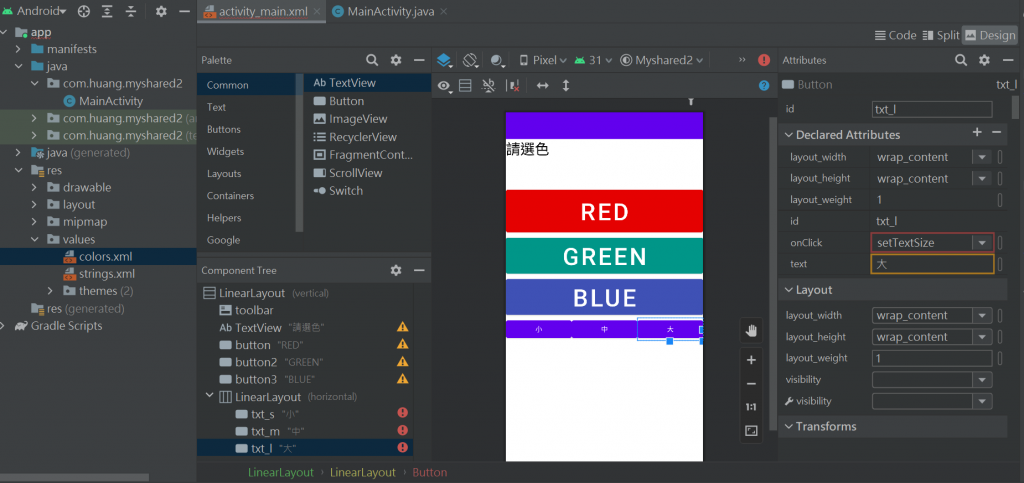
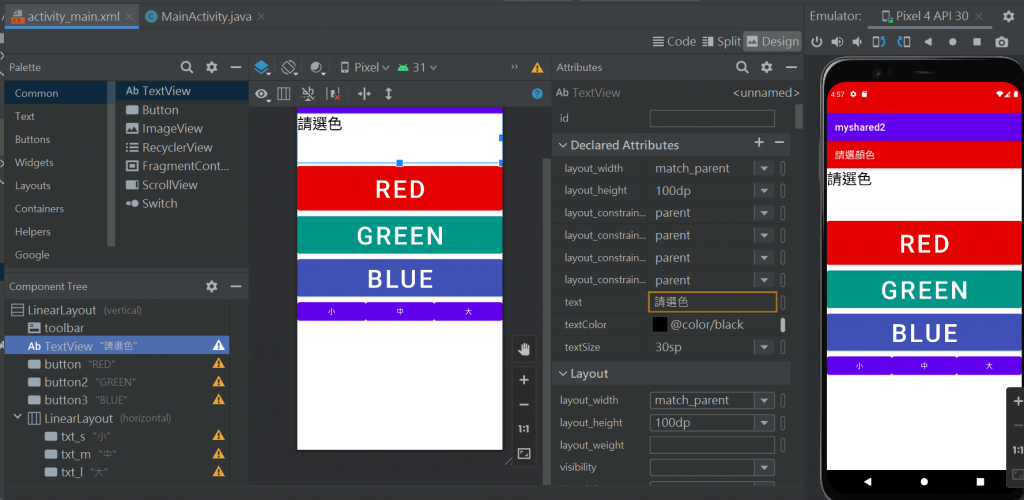
改字的大小~
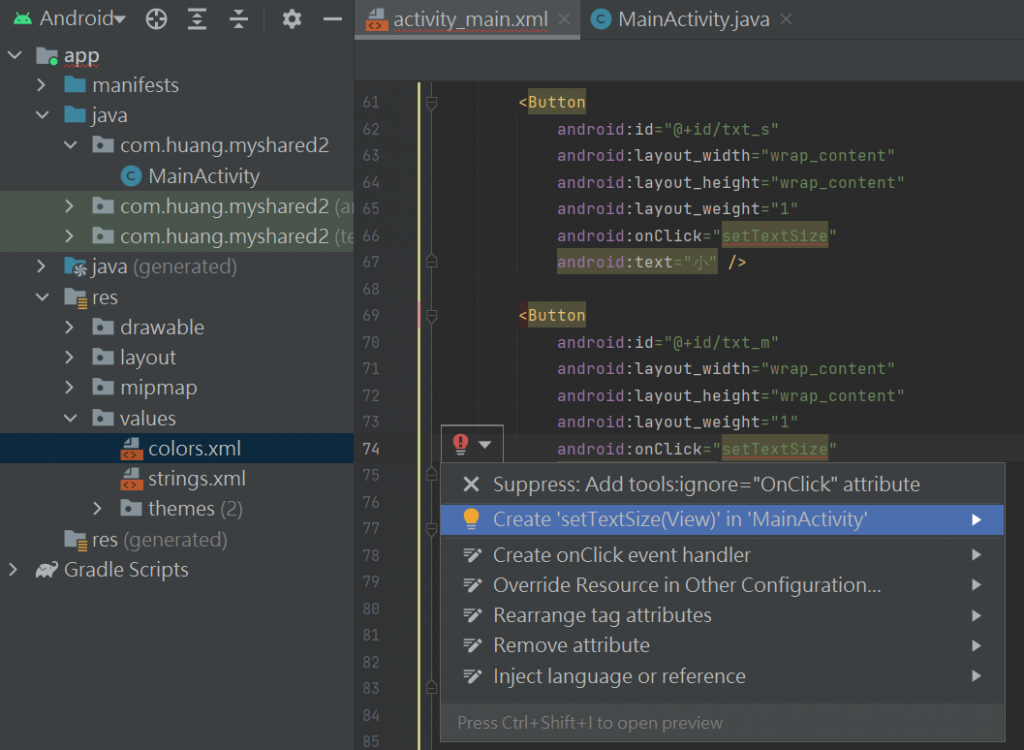
加入按鈕+綁定onclick 這裡設定名字是 setTextSize
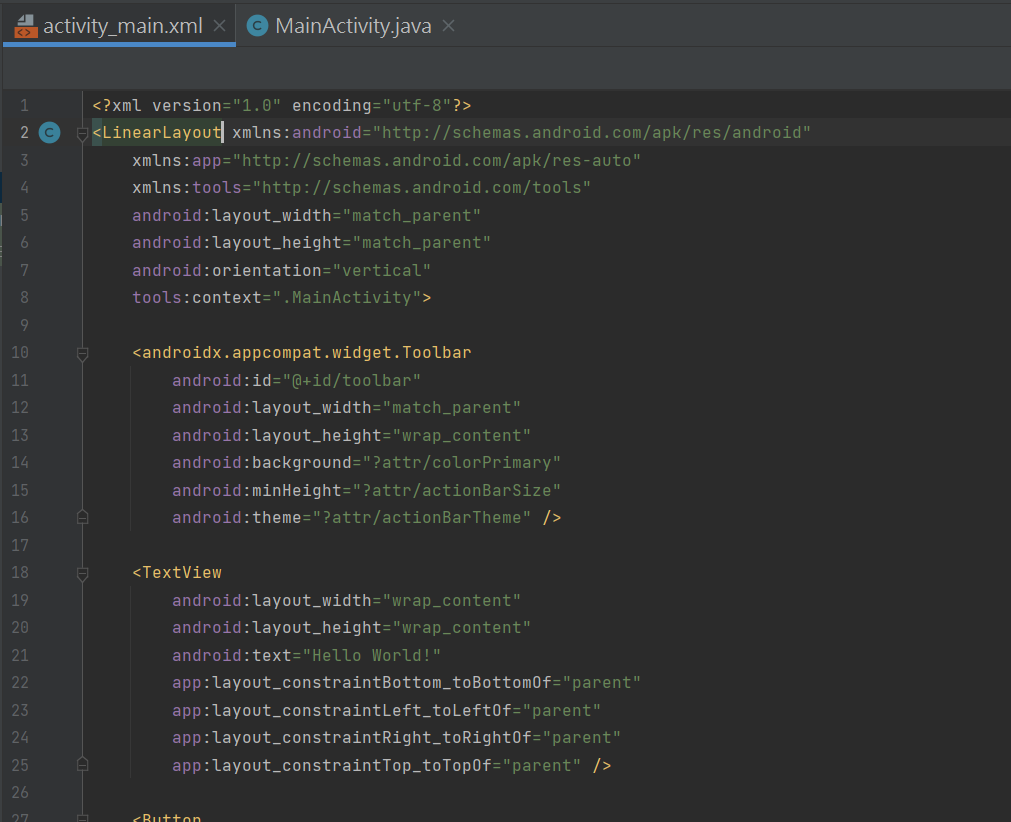
<?xml version="1.0" encoding="utf-8"?>
<LinearLayout xmlns:android="http://schemas.android.com/apk/res/android"
    xmlns:app="http://schemas.android.com/apk/res-auto"
    xmlns:tools="http://schemas.android.com/tools"
    android:layout_width="match_parent"
    android:layout_height="match_parent"
    android:orientation="vertical"
    tools:context=".MainActivity">

    <androidx.appcompat.widget.Toolbar
        android:id="@+id/toolbar"
        android:layout_width="match_parent"
        android:layout_height="wrap_content"
        android:background="?attr/colorPrimary"
        android:minHeight="?attr/actionBarSize"
        android:theme="?attr/actionBarTheme" />

    <TextView
        android:layout_width="match_parent"
        android:layout_height="100dp"
        android:text="請選色"
        android:textColor="@color/black"
        android:textSize="30sp"
        app:layout_constraintBottom_toBottomOf="parent"
        app:layout_constraintLeft_toLeftOf="parent"
        app:layout_constraintRight_toRightOf="parent"
        app:layout_constraintTop_toTopOf="parent" />

    <Button
        android:id="@+id/button"
        android:layout_width="match_parent"
        android:layout_height="100dp"
        android:backgroundTint="@color/myred"
        android:onClick="onclick"
        android:text="RED"
        android:textSize="50dp" />

    <Button
        android:id="@+id/button2"
        android:layout_width="match_parent"
        android:layout_height="wrap_content"
        android:backgroundTint="@color/mygreen"
        android:onClick="onclick"
        android:text="GREEN"
        android:textSize="50dp" />

    <Button
        android:id="@+id/button3"
        android:layout_width="match_parent"
        android:layout_height="wrap_content"
        android:backgroundTint="@color/myblue"
        android:onClick="onclick"
        android:text="BLUE"
        android:textSize="50dp" />

    <LinearLayout
        android:layout_width="match_parent"
        android:layout_height="match_parent"
        android:orientation="horizontal">

        <Button
            android:id="@+id/txt_s"
            android:layout_width="wrap_content"
            android:layout_height="wrap_content"
            android:layout_weight="1"
            android:onClick="setTextSize"
            android:text="小" />

        <Button
            android:id="@+id/txt_m"
            android:layout_width="wrap_content"
            android:layout_height="wrap_content"
            android:layout_weight="1"
            android:onClick="setTextSize"
            android:text="中" />

        <Button
            android:id="@+id/txt_l"
            android:layout_width="wrap_content"
            android:layout_height="wrap_content"
            android:layout_weight="1"
            android:onClick="setTextSize"
            android:text="大" />
    </LinearLayout>

</LinearLayout>
px : 其實就是圖元單位,比如我們通常說的手機分辨清單800*400都是px的單位
sp : 同dp相似,還會根據使用者的字體大小偏好來縮放..文字專用
dp : 虛擬圖元,在不同的圖元密度的設備上會自動適配
onclick 這裡設定名字是 setTextSize
從儲存顏色的程式碼 來改 儲存尺寸
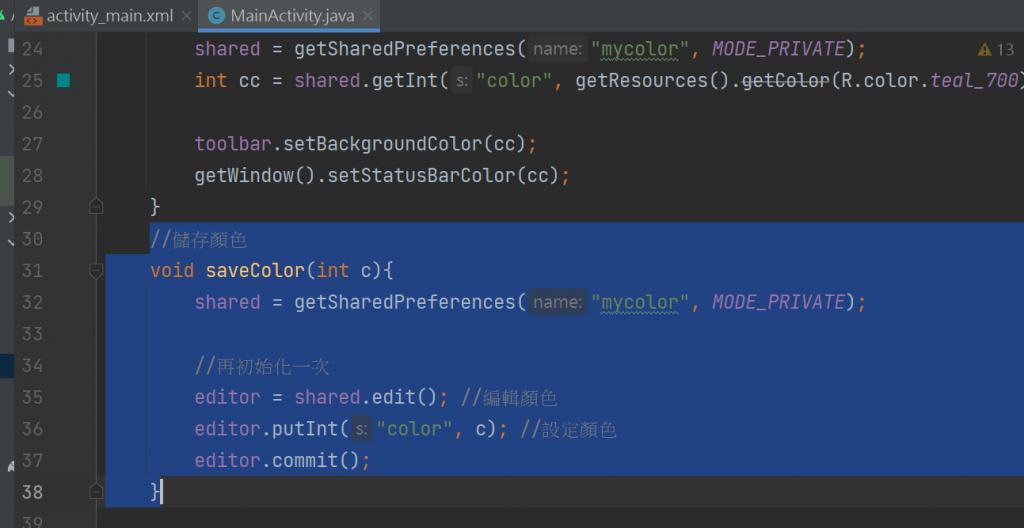
//儲存顏色
    void saveColor(int c){
        shared = getSharedPreferences("mycolor", MODE_PRIVATE);

        //再初始化一次
        editor = shared.edit(); //編輯顏色
        editor.putInt("color", c); //設定顏色
        editor.commit();
    }
繼續改內文
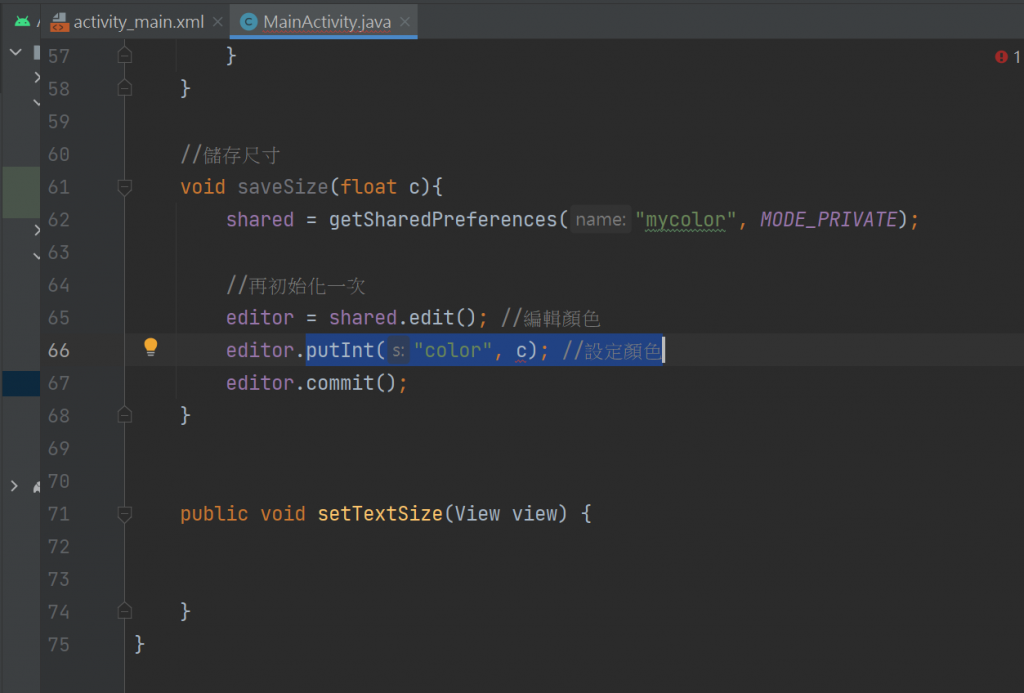
來改 儲存尺寸-18不能寫單位
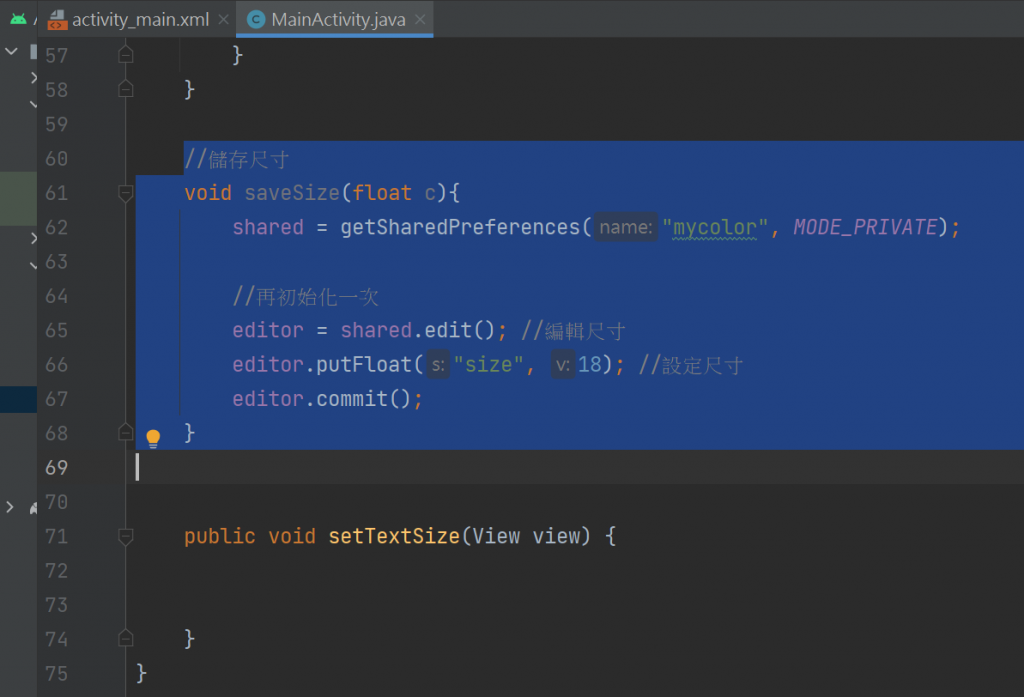
//儲存尺寸
    void saveSize(float c){
        shared = getSharedPreferences("mycolor", MODE_PRIVATE);

        //再初始化一次
        editor = shared.edit(); //編輯尺寸
        editor.putFloat("size", 18); //設定尺寸
        editor.commit();
    }
因為等一下要改的是textView 所以要來寫textView
1-宣告變數
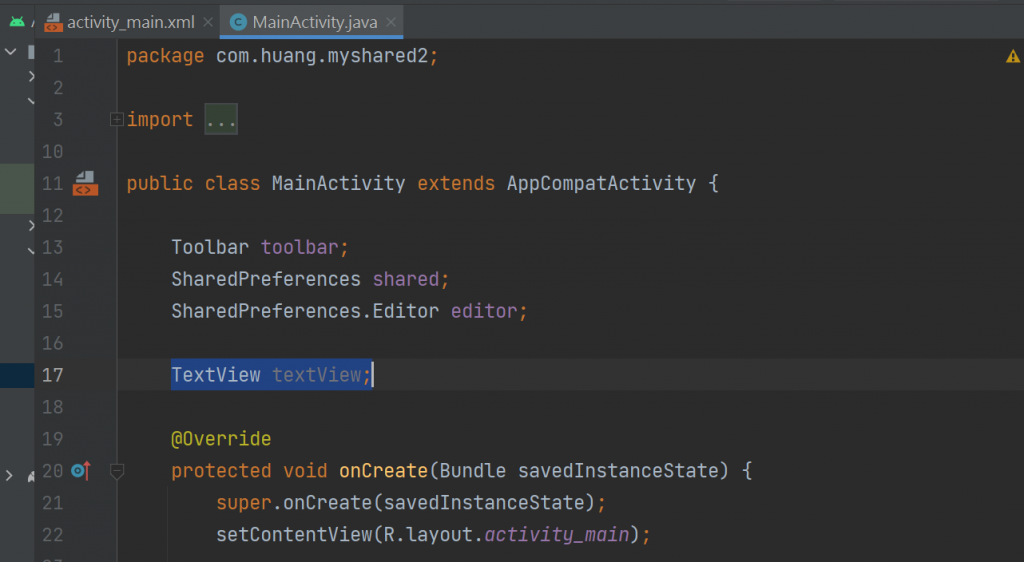
2-初始化元件

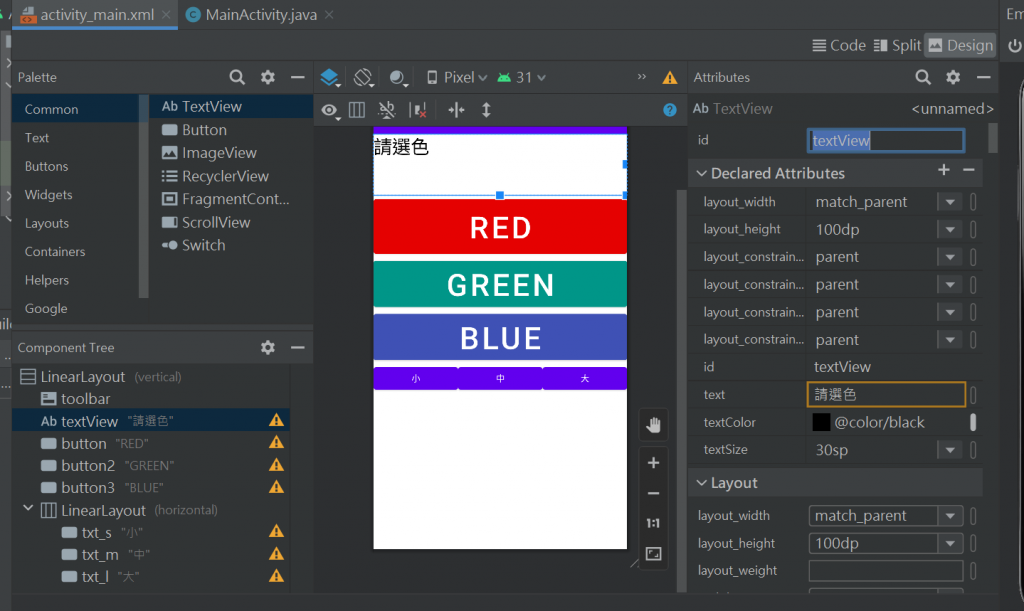
textView要有設定id才可以綁定
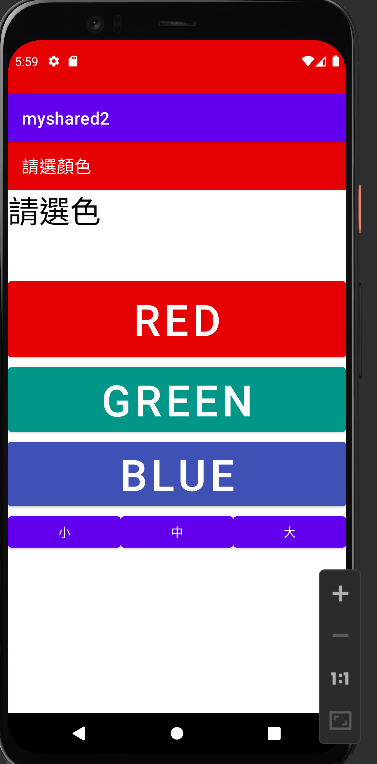
模擬器長這樣-

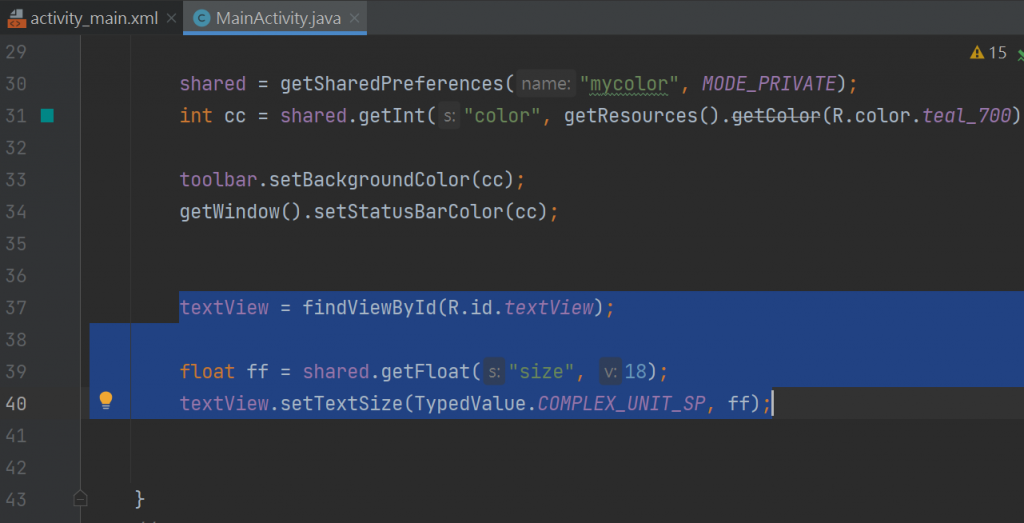
//設定-儲存-丟進去
要標註18.0F因為是float
要改寫成c
editor.putFloat("size", c); //設定尺寸
依序複製-
switch (view.getId()){
            case R.id.txt_s:
                textView.setTextSize(TypedValue.COMPLEX_UNIT_SP,18.0F);
                saveSize(18.0F);
                break;
把CODE排好-
package com.huang.myshared2;

import androidx.appcompat.app.AppCompatActivity;
import androidx.appcompat.widget.Toolbar;

import android.content.SharedPreferences;
import android.os.Bundle;
import android.util.TypedValue;
import android.view.View;
import android.widget.TextView;

public class MainActivity extends AppCompatActivity {

    Toolbar toolbar;
    SharedPreferences shared;
    SharedPreferences.Editor editor;

    TextView textView;

    @Override
    protected void onCreate(Bundle savedInstanceState) {
        super.onCreate(savedInstanceState);
        setContentView(R.layout.activity_main);

        toolbar = findViewById(R.id.toolbar);
        toolbar.setTitle("請選顏色");

        //--------------取得資料如果沒有的話-----------------

        shared = getSharedPreferences("mycolor", MODE_PRIVATE);
        int cc = shared.getInt("color", getResources().getColor(R.color.teal_700));

        toolbar.setBackgroundColor(cc);
        getWindow().setStatusBarColor(cc);


        textView = findViewById(R.id.textView);

        float ff = shared.getFloat("size", 18);
        textView.setTextSize(TypedValue.COMPLEX_UNIT_SP, ff);


    }
    //儲存顏色
    void saveColor(int c){
        shared = getSharedPreferences("mycolor", MODE_PRIVATE);

        //再初始化一次
        editor = shared.edit(); //編輯顏色
        editor.putInt("color", c); //設定顏色
        editor.commit();
    }

    public void onclick(View view) {
        switch(view.getId()){
            case R.id.button:
                toolbar.setBackgroundColor(getResources().getColor(R.color.myred));
                getWindow().setStatusBarColor(getResources().getColor(R.color.myred));
                saveColor(getResources().getColor(R.color.myred));
                break;
            case R.id.button2:
                toolbar.setBackgroundColor(getResources().getColor(R.color.mygreen));
                getWindow().setStatusBarColor(getResources().getColor(R.color.mygreen));
                saveColor(getResources().getColor(R.color.mygreen));
                break;
            case R.id.button3:
                toolbar.setBackgroundColor(getResources().getColor(R.color.myblue));
                getWindow().setStatusBarColor(getResources().getColor(R.color.myblue));
                saveColor(getResources().getColor(R.color.myblue));
                break;
        }
    }

    //儲存尺寸
    void saveSize(float c){
        shared = getSharedPreferences("mycolor", MODE_PRIVATE);

        //再初始化一次
        editor = shared.edit(); //編輯尺寸
        editor.putFloat("size", c); //設定尺寸
        editor.commit();
    }

    //設定-儲存-丟進去
    public void setTextSize(View view) {
        switch (view.getId()){
            case R.id.txt_s:
                textView.setTextSize(TypedValue.COMPLEX_UNIT_SP, 18.0F);
                saveSize(18.0F);
                break;
            case R.id.txt_m:
                textView.setTextSize(TypedValue.COMPLEX_UNIT_SP, 24);
                saveSize(24);
                break;
            case R.id.txt_l:
                textView.setTextSize(TypedValue.COMPLEX_UNIT_SP, 36.0F);
                saveSize(36.0F);
                break;
        }

    }
}


 iThome鐵人賽