ImageView為顯示圖片,
但在圖片顯示前,
必須先了解如何插入圖片:
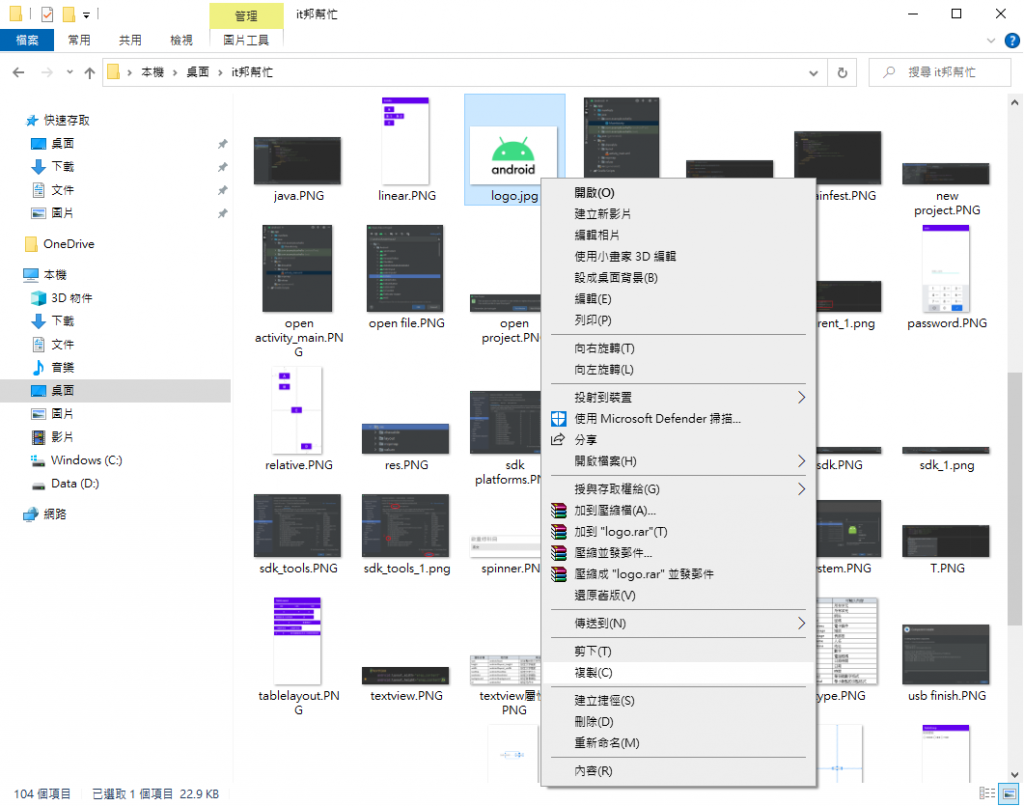
Step1:於資料夾選取想加入APP的圖片右鍵複製或是Ctrl+C
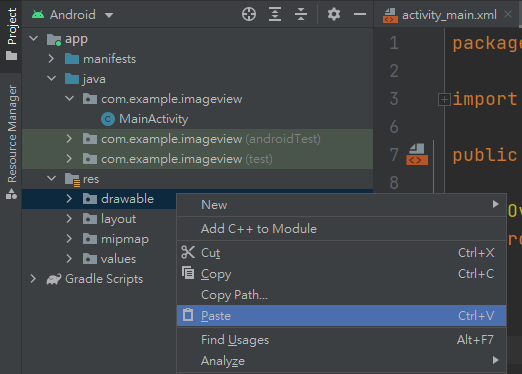
Step2:回到Android Studio,點擊res/drawable右鍵Paste或是Cril+V
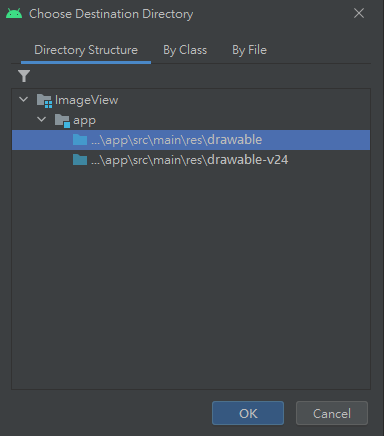
Step3:點選...\app\src\main\res\drawable並按下OK
Step4:於new name設定檔案名稱,預設為原本圖片名稱,按下OK即完成插入
完成插入圖片後,下面示範如何顯示於APP
<?xml version="1.0" encoding="utf-8"?>
<androidx.constraintlayout.widget.ConstraintLayout xmlns:android="http://schemas.android.com/apk/res/android"
    xmlns:app="http://schemas.android.com/apk/res-auto"
    xmlns:tools="http://schemas.android.com/tools"
    android:layout_width="match_parent"
    android:layout_height="match_parent"
    tools:context=".MainActivity">

    <ImageView
        android:id="@+id/loogo"
        android:layout_width="300dp"
        android:layout_height="200dp"
        android:src="@drawable/logo"
        app:layout_constraintBottom_toBottomOf="parent"
        app:layout_constraintEnd_toEndOf="parent"
        app:layout_constraintStart_toStartOf="parent"
        app:layout_constraintTop_toTopOf="parent" />

</androidx.constraintlayout.widget.ConstraintLayout>
於xml中加入ImageView,
並為其添加id、width、heigh等屬性,
src則是設定圖片來源,
這裡設定的來源即是剛剛所插入的圖片,
畫面如下圖所示。
