SwiftUI 的資料流,建議使用 Apple 的 action → state → view 的方向。所以,我們先設計出「狀態(State)」。
這個單一方向資料流的概念,在 D3 有提到,詳細可以再回去 D3 的文章看。
D3 - 用 SwiftUI 讓有趣的點子變成 Apps{SwiftUI Apple 文件介紹的資料流}
依目前的狀態,要設計的是三根針的角度,然後讓 HandShape 的 roationEffect 能依照 Angle 變化而改變角度。
在 SwiftUI,使用 @State 就可以讓這個變數被 View 觀察,只要操縱這個變數,就可以讓 View 依照上面講的資料流,進行變化。
  @State var hourDegree: Double = 0
  @State var minuteDegree: Double = 0
  @State var secondDegree: Double = 0
整個 ClockContainerView 的程式碼如下
struct ClockContainerView: View {

  var width: CGFloat = 200
  var height: CGFloat = 200

  @State var hourDegree: Double = 0
  @State var minuteDegree: Double = 0
  @State var secondDegree: Double = 0

  var body: some View {
    ZStack {
      ClockDialView()
      HandShape(handLength: .hour)
        .fill(Color.blue)
        .rotationEffect(Angle(degrees: hourDegree))
      HandShape(handLength: .minute)
        .fill(Color.cyan)
        .rotationEffect(Angle(degrees: minuteDegree))
      HandShape(handLength: .second)
        .fill(Color.red)
        .rotationEffect(Angle(degrees: secondDegree))
    }
    .frame(width: width, height: height, alignment: .center)
  }
}
state 和 view 的連接完成之後,開始寫能讓 state 變化的 action。
在 Foundation 裡面,可以不斷定時發送訊號的元件,就是 timer。現階段,先在 View 裡面生成一個 timer,讓 timer 不斷的發出訊號,讓程式不斷的算出當下三根針的角度,然後更新下面三個 property,而 View 就會更新了。在 SwiftUI 裡面,做好 State 和 View 的綁定後,只要關注程式如何讓 State 變化,接下來 SwiftUI 框架,就會幫你處理剩下的事情。
  @State var hourDegree: Double = 0
  @State var minuteDegree: Double = 0
  @State var secondDegree: Double = 0
  // 加上 Timer, 每 0.1 秒,就會在 main Q 上面發送訊號
  private let timer = Timer.publish(every: 0.1, on: .main, in: .common).autoconnect()
接收訊號的物件,就寫在 body 裡面,我們先簡單的 print 出收到訊號當下的 timestamp 就好。這邊先寫在一個 func updateTime() 裡面。
struct ClockContainerView: View {

  var width: CGFloat = 200
  var height: CGFloat = 200

  @State var hourDegree: Double = 0
  @State var minuteDegree: Double = 0
  @State var secondDegree: Double = 0

  private let timer = Timer.publish(every: 0.1, on: .main, in: .common).autoconnect()

  var body: some View {
    ZStack {
      ClockDialView()
      HandShape(handLength: .hour)
        .fill(Color.blue)
        .rotationEffect(Angle(degrees: hourDegree))
      HandShape(handLength: .minute)
        .fill(Color.cyan)
        .rotationEffect(Angle(degrees: minuteDegree))
      HandShape(handLength: .second)
        .fill(Color.red)
        .rotationEffect(Angle(degrees: secondDegree))
    }
    .frame(width: width, height: height, alignment: .center)
    .onReceive(timer) { _ in
      updateTime()
    }
  }

  private func updateTime() {
    let timestamp = Date().timeIntervalSince1970
    print("current timestamp: \(timestamp)")
  }
}
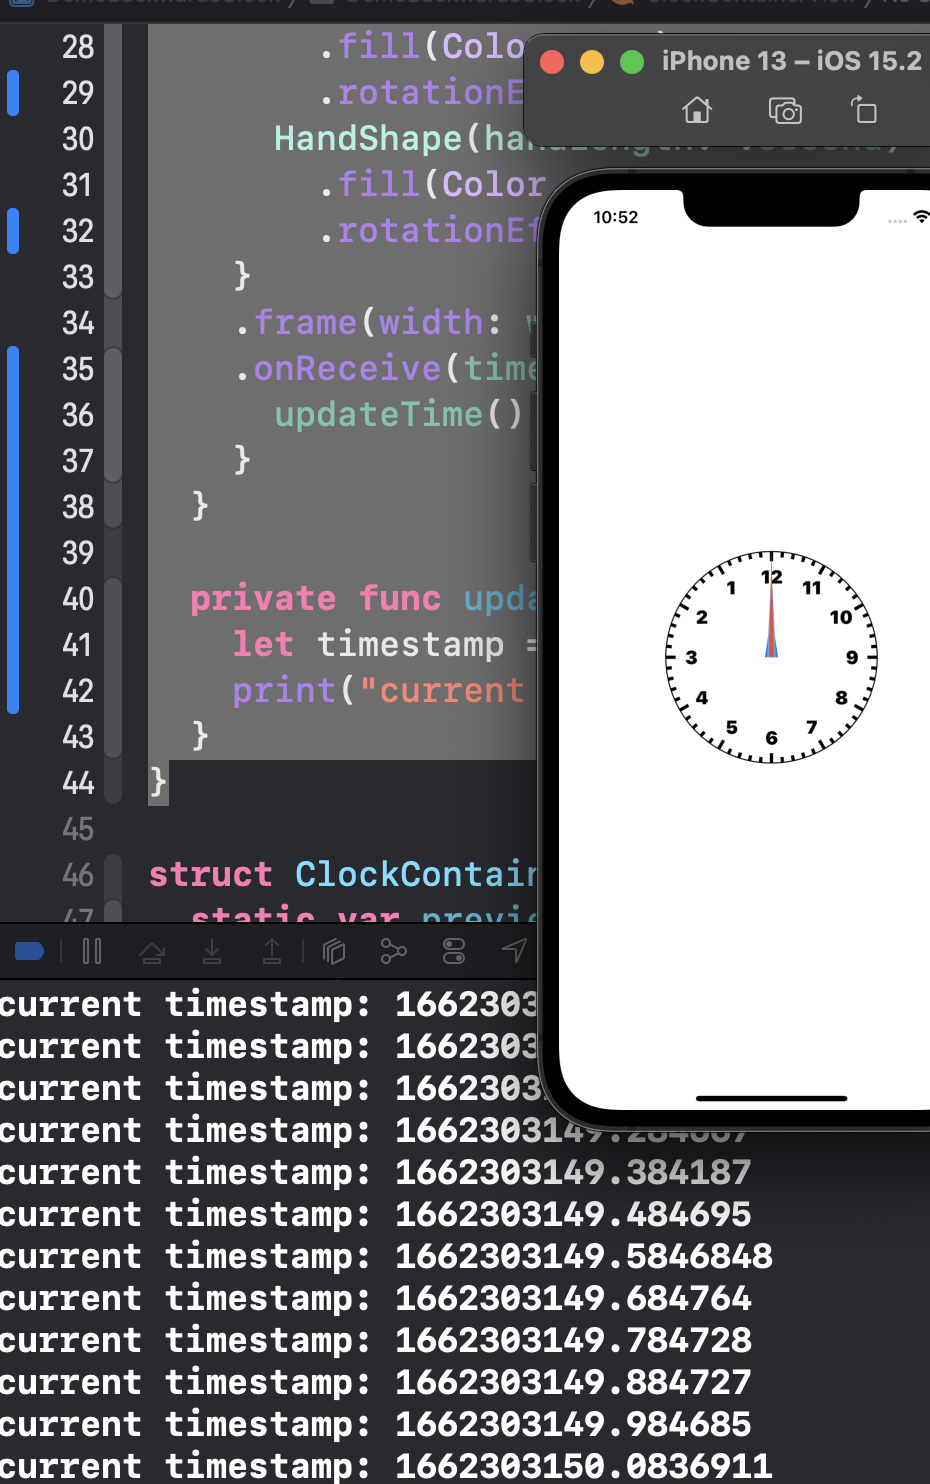
把整個 app build 起來後執行,你會看到 console 不斷的印出 timestamp,間隔大約是 0.1 秒左右。
下一步,就是計算這些 timestamp,和三根針的角度關係。
Apple 的 Timer.Publisher 文件
https://developer.apple.com/documentation/foundation/timer/timerpublisher