
Istio 是個很強大的工具,但同時也有一定的學習成本,若是能將 Istio 駕輕就熟,就可以對 Microservices 流量做到很精細的控管。那我們該如何學習呢,在 Istio Tasks 有很多實驗教學可供參考,本篇我們會介紹 Request Routing,帶你初步了解 Istio 的基本功能。
學會 Istio ,就可以為所欲為的控管 Microservices 流量
在開始實驗之前,請先在 Kubernetes 準備好 Istio 環境,詳細可參考 Day06 教學,接著需要安裝 Bookinfo Application,並開啟 Sidecar 模式讓 Istio 管理,實際要如何操作可參考以下教學。
kubectl delete --all deployment
kubectl delete --all service
kubectl delete --all serviceaccount
istio-injection=enabled Label,允許 Sidecar 注入kubectl label namespace default istio-injection=enabled --overwrite
kubectl get namespace -L istio-injection
kubectl apply -f <file> 部屬 Bookinfo Applicationkubectl apply -f https://raw.githubusercontent.com/istio/istio/release-1.15/samples/bookinfo/platform/kube/bookinfo.yaml
kubectl get pods 查看 Podskubectl get pods
# 等待直到所有 Pods 都建置完成
NAME                              READY   STATUS    RESTARTS   AGE
details-v1-7d4d9d5fcb-qr4cg       2/2     Running   0          42s
productpage-v1-66756cddfd-74bzx   2/2     Running   0          41s
ratings-v1-85cc46b6d4-2kjfc       2/2     Running   0          42s
reviews-v1-777df99c6d-f5gzg       2/2     Running   0          42s
reviews-v2-cdd8fb88b-468mf        2/2     Running   0          42s
reviews-v3-58b6479b-lbtlp         2/2     Running   0          42s
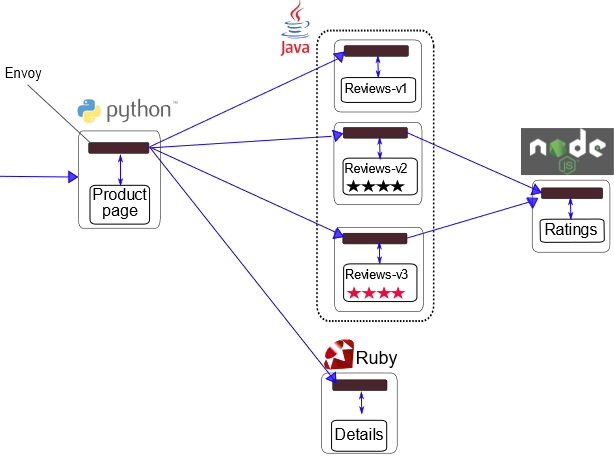
Bookinfo Application 架構圖,與之前不同在於現在每個 Pod 都會部屬 Sidecar
kubectl port-forward 將本機流量轉移到 Productagekubectl port-forward svc/productpage 8080:9080
http://127.0.0.1:8080/productpage

瀏覽器顯示的頁面,重新整理多次會發現 Reviews 會顯示三種不同的版本
Bookinfo Application 預設會部屬三個版本的 Reviews 元件,現在會透過 Service 負載平衡機制將流量分散至不同的版本。在本次 Request Routing 實驗中,希望可以利用 Istio 的 DestinationRule 以及 VirtualService 將流量移轉至特定版本,下面就來實際操作看看。
apiVersion: networking.istio.io/v1alpha3
kind: DestinationRule
metadata:
  name: reviews
spec:
  host: reviews
  subsets:
  - name: v1
    labels:
      version: v1
  - name: v2
    labels:
      version: v2
  - name: v3
    labels:
      version: v3
apiVersion: networking.istio.io/v1alpha3
kind: VirtualService
metadata:
  name: reviews
spec:
  hosts:
  - reviews
  http:
  - route:
    - destination:
        host: reviews
        subset: v2
DestinationRule 與 VirtualService 為 Istio 的元件,完整介紹會在下一章提到,這裡先實際體驗看看使用後的效果如何
kubectl apply -f <file> 部屬 DestinationRule 及 VirtualServicekubectl apply -f destination_rule.yaml
kubectl apply -f virtual_service.yaml
kubectl get <type> 查看 DestinationRule 及 VirtualService 資訊kubectl get destinationRule
kubectl get virtualService
(輸出結果)
# DestinationRule 資訊
NAME      HOST      AGE
reviews   reviews   76s
# VirtualService 資訊
NAME      GATEWAYS   HOSTS         AGE
reviews              ["reviews"]   80s
DestinationRule 與 VirtualService 都建置成功
http://127.0.0.1:8080/productpage
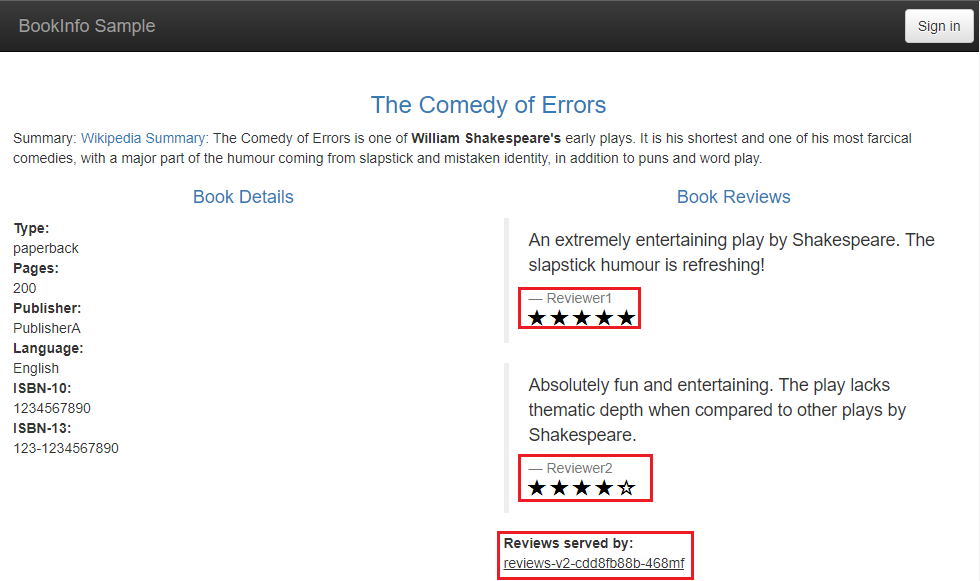
在瀏覽器頁面中,可以看到 Reviews 顯示的皆為 Version 2 的內容
接著我們修改看看 VirtualService,使流量從 v2 切換至 v3 版本
# 修改前
- destination:
    host: reviews
    subset: v2
# 修改後
- destination:
    host: reviews
    subset: v3
apiVersion: networking.istio.io/v1alpha3
kind: VirtualService
metadata:
  name: reviews
spec:
  hosts:
  - reviews
  http:
  - route:
    - destination:
        host: reviews
        subset: v3
kubectl apply -f <file> 部屬修改後的 VirtualService Yaml 檔案kubectl apply -f virtual_service.yaml
http://127.0.0.1:8080/productpage
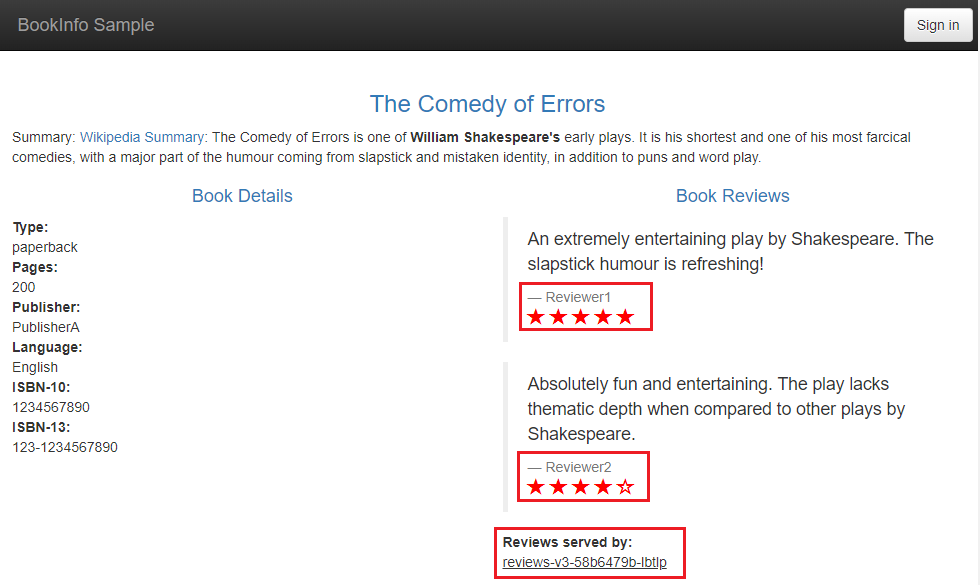
在瀏覽器頁面中,可以看到 Reviews 顯示的皆為 Version 3 的內容
還記得在 Day8 我們做過相同實驗,當時是透過 Service 的 Label Serlector 機制,修改 versions 的 Label 以完成版本的切換。
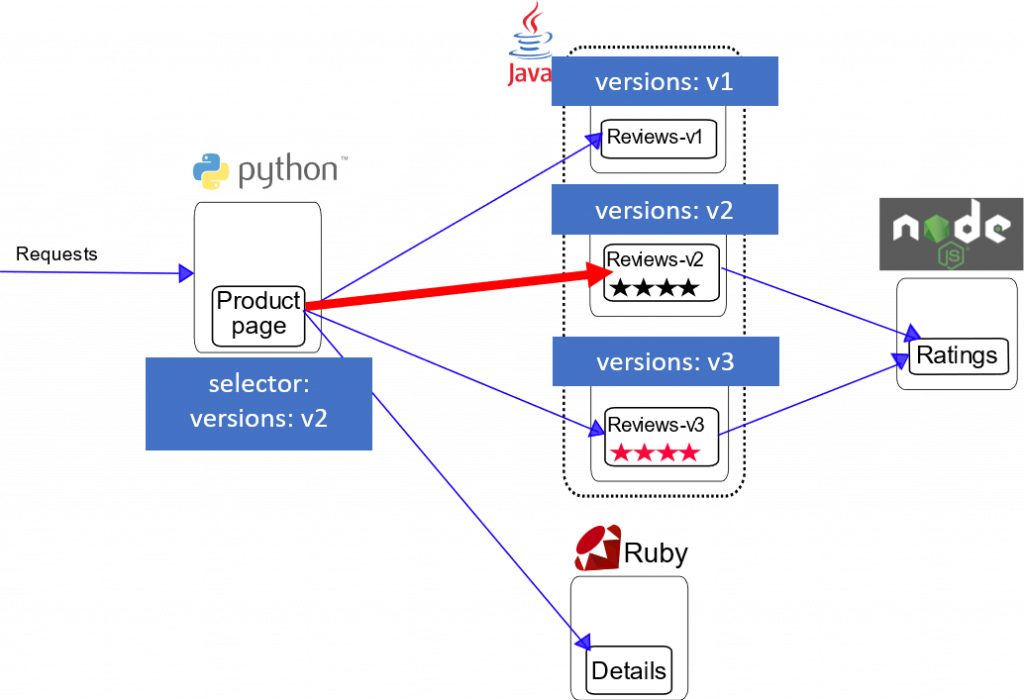
在 Day8 實驗中,使用到 Label Selector 將流量移轉至正確版本
在使用 Istio 後,因為在每個 Pod 上都建置了 Sidecar,此時就能定義 Istio 的相關元件如 DestinationRule 及 VirtualService ,apply 之後 Istio 的 Control Plane 就會對 Sidecar 下達規則,使通往 Reviews 的流量全部移轉至特定版本,藉以完成版本的切換。
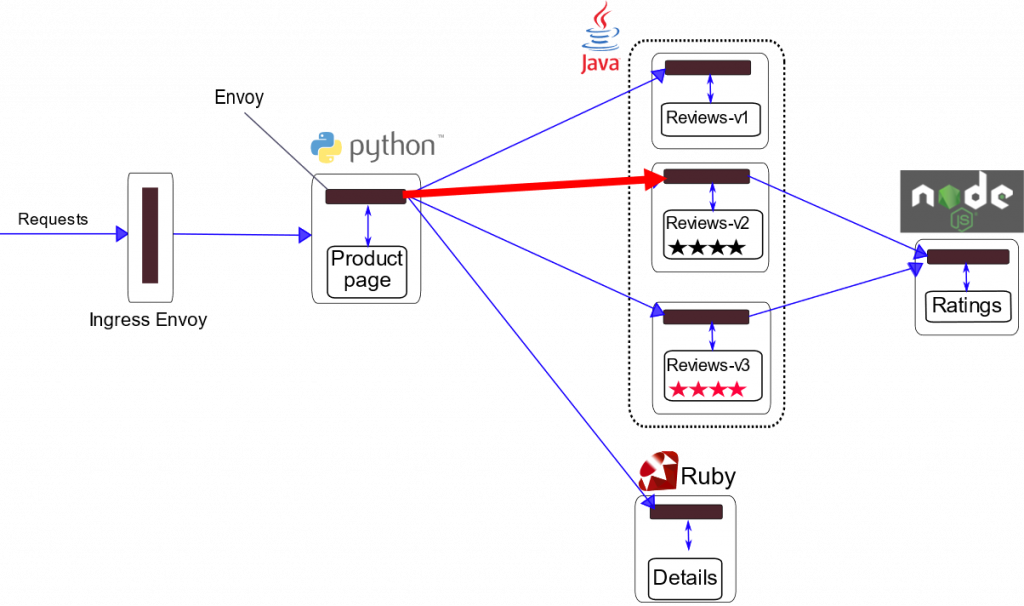
本次實驗有了 Istio 後,就能用 Sidecar 控管 Microservices 之間的流量
本章使用 Istio 的 DestinationRule 及 VirtualService 來實現不同版本的切換,下一章我們將介紹這兩個元件要如何配置,才能實際隨心所欲的控制流量。
