
延續昨日的內容,今日我們要繼續進行即時行情監控的主題。在昨日「上」篇我們已經介紹如何申請使用富果行情 API 與 LINE Notify 服務,並且說明即時行情監控系統的設計和資料處理流程。在今日「下」篇的部分,我們會實際完成即時行情監控系統的開發與實作。
首先,我們要建立一個新的 Nest Application 來實作即時行情監控系統。在我們的專案目錄下,使用 Nest CLI 建立名為 monitor 的 Nest application:
$ nest g app monitor
執行完成後,原本專案結構會轉換為「monorepo」模式:
├── apps/
│   ├── monitor/
│   │   ├── src/
│   │   └── tsconfig.app.json
│   └── scraper/
│       ├── src/
│       └── tsconfig.app.json
├── libs/
├   └── common/
│       ├── src/
│       └── tsconfig.lib.json
├── nest-cli.json
├── package.json
├── tsconfig.json
└── .eslintrc.js
所謂 monorepo 是一種管理程式碼的方法,將所有的應用程式和可共用函式庫都放在同一個 repository 管理。在 Nest 預設的規範下,屬於 Nest 應用程式都會移至 apps 目錄下,每一個應用程式目錄都會新增一個 tsconfig.app.json 檔案。libs 可以存放可供不同應用程式共享的程式碼,例如我們已經建立的 libs/common。
我們最初建立的 scraper 應用程式會成為 Nest 預設的 project,如果要啟動 monitor 應用程式,需要執行:
$ nest start monitor
預設 project 的設定可以在專案目錄下的
nest-cli.json檔案中調整,需要將root、sourceRoot與compilerOptions.tsConfigPath欄位的值更改為對應專案的路徑。
新增 monitor 應用程式後,我們需要將 monitor 的應用程式結構稍作調整。Nest CLI 預設在 apps/monitor/src 目錄下會建立 main.ts、monitor.module.ts、monitor.controller.ts、monitor.controller.spec.ts 與 monitor.service.ts 檔案。我們保留 main.ts 與 monitor.module.ts 檔案,並將 monitor.module.ts 更名為 app.module.ts,然後開啟該檔案,將 MonitorModule 更名為 AppModule,作為 monitor 應用程式的根模組:
import { Module } from '@nestjs/common';

@Module({})
export class AppModule {}
接著開啟 apps/monitor/src/main.ts 檔案,將匯入的模組名稱改為 AppModule:
import { NestFactory } from '@nestjs/core';
import { AppModule } from './app.module';

async function bootstrap() {
  const app = await NestFactory.create(AppModule);
  await app.listen(3000);
}
bootstrap();
為了建立 Redis 連線並使用 Line Notify 服務,我們需要安裝以下套件:
$ npm install --save @liaoliaots/nestjs-redis ioredis nest-line-notify
安裝完成後,我們在專案目錄下開啟 .env 檔案,加入以下環境變數:
MONGODB_URI=
REDIS_URL=
LINE_NOTIFY_ACCESS_TOKEN=
這些環境變數代表的意義如下:
MONGODB_URI:MongoDB 的連線位置。REDIS_URL:Redis 的連線位置。LINE_NOTIFY_ACCESS_TOKEN:LINE Notify Access Token。開啟 apps/monitor/src/app.module.ts 檔案,在 AppModule 匯入 ConfigModule、MongooseModule、RedisModule 及 LineNotifyModule:
import { Module } from '@nestjs/common';
import { ConfigModule } from '@nestjs/config';
import { MongooseModule } from '@nestjs/mongoose';
import { RedisModule } from '@liaoliaots/nestjs-redis';
import { LineNotifyModule } from 'nest-line-notify';

@Module({
  imports: [
    ConfigModule.forRoot(),
    MongooseModule.forRoot(process.env.MONGODB_URI),
    RedisModule.forRoot({
      config: { url: process.env.REDIS_URL },
    }),
    LineNotifyModule.forRoot({
      accessToken: process.env.LINE_NOTIFY_ACCESS_TOKEN,
    }),
  ],
})
export class AppModule {}
為了使用富果行情 API,我們安裝富果提供的 Node.js 客戶端函式庫以及 Nest Module:
$ npm install --save @fugle/realtime @fugle/realtime-nest
安裝完成後,使用 Nest CLI 建立 MonitorModule:
$ nest g module monitor -p monitor
使用
-p選項參數可指定 project,代表在monitor應用程式下建立MonitorModule。
Nest CLI 會在 apps/monitor/src/monitor 目錄下建立 monitor.module.ts 檔案,開啟該檔案並設定 MonitorModule 匯入 FugleRealtimeModule:
import { Module } from '@nestjs/common';
import { FugleRealtimeModule } from '@fugle/realtime-nest';

@Module({
  imports: [
    FugleRealtimeModule.registerAsync({
      useFactory: () => ({
        apiToken: process.env.FUGLE_REALTIME_API_TOKEN,
      }),
    }),
  ],
})
export class MonitorModule {}
透過讀取環境變數 process.env.FUGLE_REALTIME_API_TOKEN 存取富果行情 API Token。為了使用環境變數設定,記得在專案目錄下的 .env 檔案加入:
FUGLE_REALTIME_API_TOKEN=
在 apps/monitor/src/monitor 目錄下新增 monitor.schema.ts 檔案,我們要定義 MonitorSchema,這代表的是一個 Mongoose Schema,定義到價提醒的監控設定:
import { Prop, raw, Schema, SchemaFactory } from '@nestjs/mongoose';
import { Document } from 'mongoose';

export type MonitorDocument = Monitor & Document;

@Schema({ timestamps: true })
export class Monitor {
  @Prop()
  symbol: string;

  @Prop()
  type: string;

  @Prop()
  value: string;

  @Prop(raw({
    title: { type: String },
    message: { type: String }
  }))
  alert: Record<string, string>;

  @Prop({ default: false })
  triggered: boolean;
}

export const MonitorSchema = SchemaFactory.createForClass(Monitor);
在 MonitorSchema 中,各欄位的說明如下:
symbol:股票代號。type: 監控類型。value:監控類型的設定值。alert:代表訊息通知的物件。alert.title:訊息通知的標題。alert.message:訊息通知的內容。triggered:該監控是否已觸發。完成 MonitorSchema 後,我們繼續在 apps/monitor/src/monitor 目錄下建立 monitor.repository.ts 檔案,實作 MonitorRepository 作為對資料庫存取的介面。我們需要在 MonitorRepository 實作以下方法:
getMonitors():取得所有未觸發的監控設定。triggerMonitor():將一個監控設定更新為已觸發。getAlerts():取得所有到價提醒。createAlert():建立一個到價提醒。getAlert():取得一個到價提醒。removeAlert():刪除一個到價提醒。實作 MonitorRepository 程式碼如下:
import { Injectable } from '@nestjs/common';
import { InjectModel } from '@nestjs/mongoose';
import { Model } from 'mongoose';
import { Monitor, MonitorDocument } from './monitor.schema';
import { CreateAlertDto } from './dto/create-alert.dto';

@Injectable()
export class MonitorRepository {
  constructor(
    @InjectModel(Monitor.name) private readonly model: Model<MonitorDocument>,
  ) {}

  async getMonitors(): Promise<MonitorDocument[]> {
    return this.model.find({ triggered: false });
  }

  async triggerMonitor(id: string): Promise<void> {
    await this.model.updateOne({ _id: id }, { triggered: true });
  }

  async getAlerts(): Promise<MonitorDocument[]> {
    return this.model
      .find({ alert: { $exists: true } })
      .select('-__v -createdAt -updatedAt')
      .lean();
  }

  async createAlert(createAlertDto: CreateAlertDto): Promise<MonitorDocument> {
    const { title, message, ...monitorable } = createAlertDto;
    const alert = { title, message };
    const monitor = { ...monitorable, alert }
    return this.model.create(monitor);
  }

  async getAlert(id: string): Promise<MonitorDocument> {
    return this.model
      .findOne({ _id: id, alert: { $exists: true } })
      .select('-__v -createdAt -updatedAt')
      .lean();
  }

  async removeAlert(id: string): Promise<void> {
    await this.model.deleteOne({ _id: id, alert: { $exists: true } });
  }
}
在 createAlert() 方法中,接收參數 CreateAlertDto 是資料傳輸物件(Data Transfer Object)用來建立到價提醒設定。這裡我們需要安裝 class-validator 與 class-transformer 套件來協助做欄位驗證與資料轉換:
$ npm install --save class-validator class-transformer
安裝完成後,在 apps/monitor/src/monitor 目錄下新增 dto 資料夾,並在資料夾下建立 create-alert.dto.ts 檔案,然後開啟該檔案並實作 CreateAlertDto 資料傳輸物件:
import { IsString, IsNumber, IsEnum } from 'class-validator';
import { MonitorType } from '../enums';

export class CreateAlertDto {
  @IsString()
  symbol: string;

  @IsEnum(MonitorType)
  type: MonitorType;

  @IsNumber()
  value: number;

  @IsString()
  title: string;

  @IsString()
  message: string;
}
在 CreateAlertDto 的 type 欄位是一個列舉(enum)型別, MonitorType 表示監控條件的類型。我們所定義監控條件,包含「價格大於或等於」以及「價格小於或等於」。請在 apps/monitor/src/monitor 目錄下新增 enums 資料夾,並在資料夾下建立 monitor-type.enum.ts 檔案,然後開啟該檔案並實作 MonitorType 列舉型別:
export enum MonitorType {
  PriceAbove = 'price:gt',
  PriceBelow = 'price:lt',
}
MonitorType.PriceAbove 表示「價格大於或等於」;MonitorType.PriceBelow 表示「價格小於或等於」。
接著在 apps/monitor/src/monitor/enums 目錄下新增 index.ts 檔案,將 monitor-type.enum.ts 匯出:
export * from './monitor-type.enum';
完成後,開啟 apps/monitor/src/monitor/monitor.module.ts 檔案,在 MonitorModule 加入 MonitorSchema 與 MonitorRepository:
import { Module } from '@nestjs/common';
import { MongooseModule } from '@nestjs/mongoose';
import { FugleRealtimeModule } from '@fugle/realtime-nest';
import { Monitor, MonitorSchema } from './monitor.schema';
import { MonitorRepository } from './monitor.repository';

@Module({
  imports: [
    MongooseModule.forFeature([
      { name: Monitor.name, schema: MonitorSchema },
    ]),
    FugleRealtimeModule.registerAsync({
      useFactory: () => ({
        apiToken: process.env.FUGLE_REALTIME_API_TOKEN,
      }),
    }),
  ],
  providers: [MonitorRepository],
})
export class MonitorModule {}
我們已經在 MonitorSchema 定義監控設定的資料欄位,並且在 MonitorRepository 實作監控設定的資料庫存取方式,下一步要實作 MonitorService,完成監控行情的各項方法。請打開終端機,使用 Nest CLI 建立 MonitorService:
$ nest g service monitor -p monitor --no-spec
執行後,Nest CLI 會在 apps/monitor/src/monitor 目錄下建立 monitor.service.ts 檔案,開啟該檔案在 MonitorService 實作以下可供外部存取的方法:
getAlerts():取得所有到價提醒。createAlert():建立到價提醒。removeAlert():移除到價提醒。實作 MonitorService 程式碼如下:
import { omit } from 'lodash';
import { DateTime } from 'luxon';
import { Redis } from 'ioredis';
import { Injectable, Logger, OnApplicationBootstrap, NotFoundException, ForbiddenException } from '@nestjs/common';
import { InjectRedis } from '@liaoliaots/nestjs-redis';
import { InjectWebSocketClient } from '@fugle/realtime-nest';
import { InjectLineNotify, LineNotify } from 'nest-line-notify';
import { WebSocketClient } from '@fugle/realtime';
import { MonitorRepository } from './monitor.repository';
import { MonitorDocument } from './monitor.schema';
import { CreateAlertDto } from './dto/create-alert.dto';
@Injectable()
export class MonitorService implements OnApplicationBootstrap {
private readonly sockets = new Map<string, WebSocket>();
constructor(
@InjectRedis() private readonly redis: Redis,
@InjectWebSocketClient() private readonly client: WebSocketClient,
@InjectLineNotify() private readonly lineNotify: LineNotify,
private readonly monitorRepository: MonitorRepository,
) {}
async onApplicationBootstrap() {
// 取得所有未觸發的監控設定並進行監控
const monitors = await this.monitorRepository.getMonitors();
await Promise.all(monitors.map(monitor => this.makeMonitoring(monitor)))
}
async getAlerts() {
// 取得所有到價提醒
return this.monitorRepository.getAlerts();
}
async createAlert(createAlertDto: CreateAlertDto) {
// 建立到價提醒並進行監控
const monitor = await this.monitorRepository.createAlert(createAlertDto);
await this.makeMonitoring(monitor);
return omit(monitor.toJSON(), ['__v', 'createdAt', 'updatedAt']);
}
async removeAlert(id: string) {
const monitor = await this.monitorRepository.getAlert(id);
// 若不存在則回傳 404 錯誤
if (!monitor) throw new NotFoundException('alert not found');
// 移除監控設定並刪除到價提醒
await this.removeMonitor(monitor);
return this.monitorRepository.removeAlert(id);
}
private async removeMonitor(monitor: MonitorDocument) {
const { _id, symbol, type } = monitor;
const key = `monitors:${_id}`;
const monitable = `monitors:${symbol}:${type}`;
// 移除監控設定快取
await this.redis.multi()
.zrem(monitable, key)
.del(key)
.exec();
}
private async makeMonitoring(monitor: MonitorDocument) {
const { _id, symbol, type, value } = monitor;
const key = `monitors:${_id}`;
const monitable = `monitors:${symbol}:${type}`;
// 寫入監控設定快取
await this.redis.multi()
.set(key, JSON.stringify(monitor))
.zadd(monitable, value, key)
.exec();
// 監控的股票已存在則不需建立重複的 WebSocket 連線
if (this.sockets.has(symbol)) return;
// 若達 WebSocket 連線數量上限則拋出例外
if (this.sockets.size === 5) {
await this.removeAlert(_id);
throw new ForbiddenException('monitor limit reached');
}
// 建立富果行情 WebSocket 連線
const socket = this.client.intraday.quote({ symbolId: symbol });
socket.onmessage = (message) => this.checkMatches(JSON.parse(message.data));
// 記錄監控的股票
this.sockets.set(symbol, socket);
}
private async checkMatches(message: any) {
// 非整股行情則結束函式
if (message.data.info.type !== 'EQUITY') return;
// 不包含最新成交價則結束函式
if (!message.data.quote.trade) return;
// 取出股票代號與最新成交價
const { symbolId: symbol } = message.data.info;
const { price } = message.data.quote.trade;
// 按股票代號及最新成交價檢查匹配的監控設定 ID
const matches = await Promise.all([
this.redis.zrange(`monitors:${symbol}:price:gt`, '-inf', price, 'BYSCORE'),
this.redis.zrange(`monitors:${symbol}:price:lt`, price, '+inf', 'BYSCORE'),
]).then(members => [].concat.apply([], members));
// 若無滿足條件的監控設定則結束函式
if (!matches.length) return;
// 按監控設定 ID 取出匹配的監控設定
const monitors = await this.redis.mget(matches)
.then(results => results.map(data => JSON.parse(data)));
for (const monitor of monitors) {
await this.removeMonitor(monitor); // 移除匹配的監控設定
// 若監控設定包含 alert 則推播訊息
if (monitor.alert) await this.sendAlert(monitor, message.data.quote);
}
}
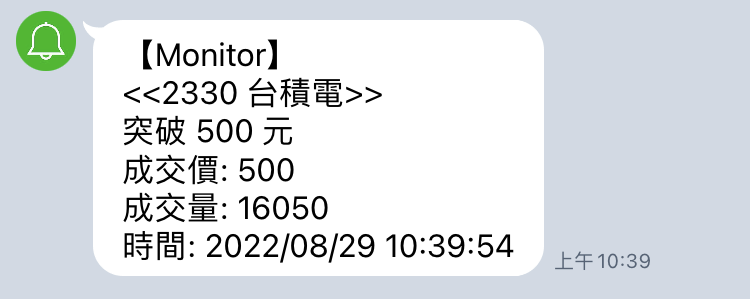
private async sendAlert(monitor: MonitorDocument, quote: any) {
const { _id, alert } = monitor;
const time = DateTime.fromISO(quote.trade.at).toFormat('yyyy/MM/dd HH:mm:ss');
// 設定推播訊息
const message = [
'',
`<<${alert.title}>>`,
`${alert.message}`,
`成交價: ${quote.trade.price}`,
`成交量: ${quote.total.tradeVolume}`,
`時間: ${time}`,
].join('\n');
// 透過 LINE Notify 推播訊息並將監控設定更新為已觸發
await this.lineNotify.send({ message })
.then(() => this.monitorRepository.triggerMonitor(_id))
.catch((err) => Logger.error(err.message, err.stack, MonitorService.name));
}
}
我們在 MonitorService 加入 onApplicationBootstrap() lifecyle hook,應用程式啟動時,會先在 MongoDB 資料庫取得所有未觸發過的監控設定,並呼叫 makeMonitoring() 方法,監控這些股票的即時行情。
在 makeMonitoring() 方法中,未觸發的到價提醒設定會寫入 Redis 快取,以 JSON string 的形式存入 Redis 的字串(String)結構。
關於 Redis 的字串結構的說明可參考 Redis Strings。
除了將未觸發的到價提醒設定會寫入 Redis 快取外,我們應用 Redis 的 zset 結構來儲存每一檔股票的價格條件設定。
zset是 Redis sorted sets,代表 Redis 的有序集合結構。
我們會將一檔股票的監控條件類型寫入一個 zset 結構。以台積電(2330)為例,「價格大於或等於」的監控條件寫入 key 為 monitors:2330:price:gt 的 zset;「價格小於或等於」的監控條件寫入 key 為 monitors:2330:price:lt 的 zset。
每一個 zset 的成員(value)都對應一個分數(score),Redis 就是透過分數來為集合的成員進行排序。我們將 zset 成員名稱設定為 Monitor 監控設定的 ID,zset 成員的分數就是監控股票的價格。
寫入設定後,透過 FugleRealtimeModule 注入的 this.client.intraday.quote() 方法會建立與富果行情的 WebSocket 連線來取得該檔股票的即時報價。需要注意 this.sockets 是用來記錄已建立 WebSocket 連線的數量,因為富果行情 WebSocket API 在一般情況下可以建立 5 個連線,若超出 5 個 WebSocket 連線,我們就拋出 ForbiddenException 的錯誤。
註:目前當下使用的富果行情 API 是
v0.3版,可以查看 官方文件 確認最新版本,並注意最新版本的變化。
當在盤中收到即時行情,會呼叫 checkMatches() 方法來確認監控股票的最新成交價格是否符合條件設定。股價與監控條件的匹配,我們透過 Redis 的 ZRANGE 命令來實現。
關於 Redis 的 ZRANGE 命令說明可參考 ZRANGE。
ZRANGE 會回傳 zset 中的所有元素,並且可以設定分數介於最小值和最大值之間。我們先以 redis-cli 為例,說明是如何實現即時行情監控的方法。打開終端機,輸入:
$ redis-cli
假設我們要查詢符合「台積電(2330)價格大於或等於 500 元」的監控設定:
127.0.0.1:6379> ZRANGE monitors:2330:price:gt -inf 500 BYSCORE
-inf 是表示 負無窮,因此 redis-cli 會回傳所有分數小於 500 的 Monitor ID。當我們接收到台積電最新的股價為 500 元時,這些滿足「台積電(2330)價格大於或等於 500 元」的監控設定就應該被觸發。
假設我們要查詢符合「台積電(2330)價格大於或等於 500 元」的監控設定:
127.0.0.1:6379> ZRANGE monitors:2330:price:lt 500 +inf BYSCORE
+inf 是表示 正無窮,因此 redis-cli 會回傳所有分數大於 500 的 Monitor ID。當我們接收到台積電最新的股價為 500 元時,這些滿足「台積電(2330)價格小於或等於 500 元」的監控設定就應該被觸發。
暸解即時行情監控的運作後,回到 MonitorService。當我們在交易日盤中從富果行情接收到最新股價,在 checkMatches() 判定符合監控設定的條件後,會呼叫 removeMonitor() 方法移除 Redis 快取,避免監控條件被重複觸發。然後呼叫 sendAlert() 方法,透過 LINE Notify 將訊息訊息推播給使用者。當送出 Line Notify 通知後,該筆監控就已經完成了,所以會將該筆的監控設定在 MongoDB 更新為已觸發。
完成 Monitor Service 後,我們要實作 Monitor API,提供使用者透過 HTTP API 請求設定到價提醒。打開終端機,使用 Nest CLI 建立 MonitorController:
$ nest g controller monitor -p monitor --no-spec
在 Nest 中,Controllers 負責處理傳入的請求(request)並將回應(response)傳回給客戶端。
執行後,Nest CLI 會在 apps/monitor/src/monitor 目錄下建立 monitor.controller.ts 檔案,開啟該檔案在 MonitorController 實作以下方法:
getAlerts():取得所有到價提醒。createAlert():建立到價提醒。removeAlert():移除到價提醒。實作 MonitorController 程式碼如下:
import { Controller, Get, Post, Delete, Body, Param, HttpCode } from '@nestjs/common';
import { MonitorService } from './monitor.service';
import { CreateAlertDto } from './dto/create-alert.dto';

@Controller('monitor')
export class MonitorController {
  constructor(private readonly monitorService: MonitorService) {}

  @Get('/alerts')
  async getAlerts() {
    return this.monitorService.getAlerts();
  }

  @Post('/alerts')
  async createAlert(@Body() createAlertDto: CreateAlertDto) {
    return this.monitorService.createAlert(createAlertDto);
  }

  @Delete('/alerts/:id')
  @HttpCode(204)
  async removeAlert(@Param('id') id: string) {
    return this.monitorService.removeAlert(id);
  }
}
我們在 CreateAlertDto 資料傳輸物件已經加入了驗證的設定,為了讓每個路由都通過 ValidationPipe 進行驗證程序,我們在 apps/monitor/src/mian.ts 加入 useGlobalPipes() 方法使其作用為全域範圍:
import { NestFactory } from '@nestjs/core';
import { ValidationPipe } from '@nestjs/common';
import { AppModule } from './app.module';

async function bootstrap() {
  const app = await NestFactory.create(AppModule);

  app.useGlobalPipes(
    new ValidationPipe({
      transform: true,
      transformOptions: {
        enableImplicitConversion: true,
      },
    }),
  );

  await app.listen(3000);
}
bootstrap();
完成 MonitorController 後,就可以測試 Monitor API 了。首先啟動 Monitor 應用程式:
$ npm start monitor
然後在終端機透過 curl 指令來測試以下 API endpoints:
GET /monitor/alerts:建立到價提醒。POST /monitor/alerts:取得所有到價提醒。DELETE /monitor/alerts/:id:刪除到價提醒。使用以下 curl 指令建立一個到價提醒,以當台積電(2330)股價突破 500 元為例:
$ curl --request POST \
    --url http://localhost:3000/monitor/alerts \
    --header 'Content-Type: application/x-www-form-urlencoded' \
    --data symbol=2330 \
    --data type=price:gt \
    --data value=500 \
    --data 'title=2330 台積電' \
    --data 'message=突破 500 元'
成功建立一個到價提醒,以 Monitor ID 632f2c41d7f7a576dfaded93 為例:
{"symbol":"2330","type":"price:gt","value":"500","alert":{"title":"2330 台積電","message":"突破 500 元"},"triggered":false,"_id":"632f2c41d7f7a576dfaded93"}
使用以下 curl 指令取得所有到價提醒:
$ curl --request GET \
    --url http://localhost:3000/monitor/alerts
成功取得所有到價提醒:
[{"_id":"632f2c41d7f7a576dfaded93","symbol":"2330","type":"price:gt","value":"500","alert":{"title":"2330 台積電","message":"突破 500 元"},"triggered":false}]
使用以下 curl 指令刪除一個到價提醒,以 Monitor ID 632f2c41d7f7a576dfaded93 為例:
$ curl --request DELETE \
    --url http://localhost:3000/monitor/alerts/632f2c41d7f7a576dfaded93
當我們設定一檔股票的到價提醒,Monitor 應用伺服器就會與富果行情 API 建立 WebSocket 連線,取得該股票的最新報價。若監控股票的最新價格滿足監控設定的條件,就會收到 LINE Notify 推播訊息的通知。
至此,我們已經完成 Monitor 應用伺服器的實作,透過富果行情 API 結合 LINE Notify 服務,實現股票即時行情監控系統。我們以價格條件為範例,您可以根據自己的需求,自行加入其他監控類型的設定,例如成交量、漲跌幅等,打造屬於自己股票監控程式。
本系列文已正式出版為《Node.js 量化投資全攻略:從資料收集到自動化交易系統建構實戰》。本書新增了全新內容和實用範例,為你提供更深入的學習體驗!歡迎參考選購,開始你的量化投資之旅!
天瓏網路書店連結:https://www.tenlong.com.tw/products/9786263336070


 iThome鐵人賽