在部署網站之前,我們要先來打包我們的網頁前端專案
為什麼要打包呢?什麼是打包呢?這有點像是編譯,如果你寫過 C 應該講到這裡就理解為什麼要這樣做了
在網頁開發中網頁內容最原始就是直接用 html 下去寫,但一個成熟的開發者會善用框架來開發,不論是用 vue 或 react,樣式的部分也會從最基本的 css 到 sass 等進階的樣式寫法,功能的部分現在都往 Typescript 開發,不再是只用 Javascript
但是瀏覽器這邊最後都必須翻譯成最原始 html, css, Javascript 才能使用,所以在 production 部署時,我們需要先編譯打包專案,免得瀏覽器每次開啟網頁都要慢慢的先編譯完才能使用
最簡單的打包方式,直接用 vue CLI,在專案路徑下終端輸入
npm run build
更進階的打包方式可以用 webpack 或 vite,推薦是用 vite,更新、更快,不過我這個技能樹還沒點開,目前還是用 vue CLI 在打包
那來寫網站設定吧!如果你是用 brew 安裝 nginx,那設定檔預設是在 /opt/homebrew/etc/nginx 下的 nginx.conf
在 nginx.conf 中找到 server 設定,改寫如下
server{
    listen       80;
    server_name  your_domain_name;
    location / {
        root   path_of_web_bundle;
        index  index.html index.htm;
    }
}
server_name 是設定你要把網頁架在哪個 ip 或 domainlocation / 是網站根路由會進到哪個頁面root 是剛剛網頁專案打包在哪,如果你是用 vue CLI 打包的話,會在你專案路徑下的 dist
index 是 entry point,就是 dist 內的 index.html,這裡就設定 index.html index.htm 就好了以上的設定還只是建立一個 http server 而已,為了建立一個更安全的網站,我們要建立一個 https server,那在此之前呢,我們要先來獲得安全憑證
大部分的人應該都是用 Let's Encript 來產生安全憑證,Let's Encript 應該是最大的核發安全憑證的組織,而且免費
首先我們要先安裝 Let's Encript 的官方工具 certbot
brew install certbot
然後來獲取憑證
sudo certbot run
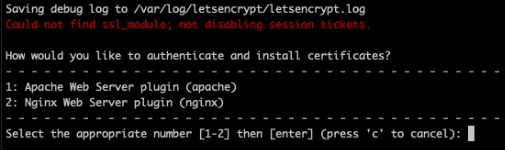
輸入 2 選擇 Nginx,然後他會根據你的 nginx.conf 列出可以頒發憑證的 ip 或 domain,然後就選擇你想頒發憑證給誰,產生完,終端上會列出你的憑證放在哪,要記好喔!用 brew 安裝 certbot 的話,憑證的公私鑰應該會分別放在 /etc/letsencrypt/live/your_domain_name/fullchain.pem, /etc/letsencrypt/live/your_domain_name/privkey
現在改寫一下 nginx.conf 中的 server 設定
server {
    listen 80;
    server_name  your_domain_name;
    return 301 https://your_domain_name;
}

server{
    listen       443 ssl http2;
    server_name  your_domain_name;

    ssl_certificate      /etc/letsencrypt/live/your_domain_name/fullchain.pem;
    ssl_certificate_key  /etc/letsencrypt/live/your_domain_name/privkey.pem;

    location / {
        root   path_of_web_bundle;
        index  index.html index.htm;
    }
}
上面是 http server,下面是 https server,設定 http server 永久導向 https server
憑證的有效時間是 90 天,要在失效前更新憑證
手動更新憑證只要在終端輸入
sudo certbot renew
就可以更新你所有的憑證了
certbot 官網有說明如何自動更新憑證,我之前不知道,所以寫了一個 python 腳本去自動更新憑證,給大家參考
import os, time, datetime

password=your_password
renew_days=10

while True:
    print('\n'*5)
    print(str(datetime.datetime.now())[0:19])
    os.popen("sudo -S %s"%('certbot renew'), 'w').write(password)
    time.sleep(5)
    print('nginx reload')
    os.popen("sudo -S %s"%('nginx -s reload -v'), 'w').write(password)
    print('try to renew the certificate every '+str(renew_days)+' days')
    time.sleep(86400*renew_days)