
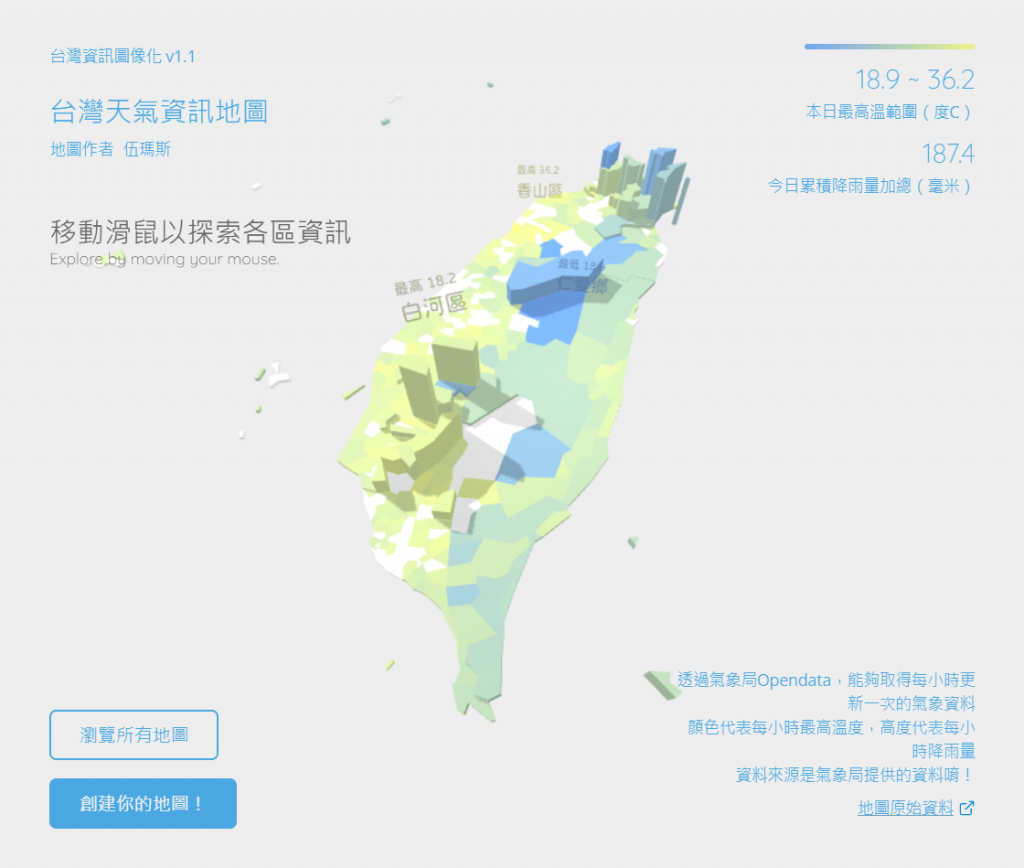
網頁視覺特效有一大塊領域在於GIS。GIS以視覺呈現地理資訊,視覺是不可或缺的元素。透過視覺特效,能夠更快速的釐清地理環境狀況。
例如Districgraphic.tw,就使用鄉鎮市區為最小單位,去呈現資料。
.gif)
而對於GIS類型的專案來說,最重要的工作,不外乎來源資料的格式轉換。來源資料可能有幾種:
多個座標的資料:
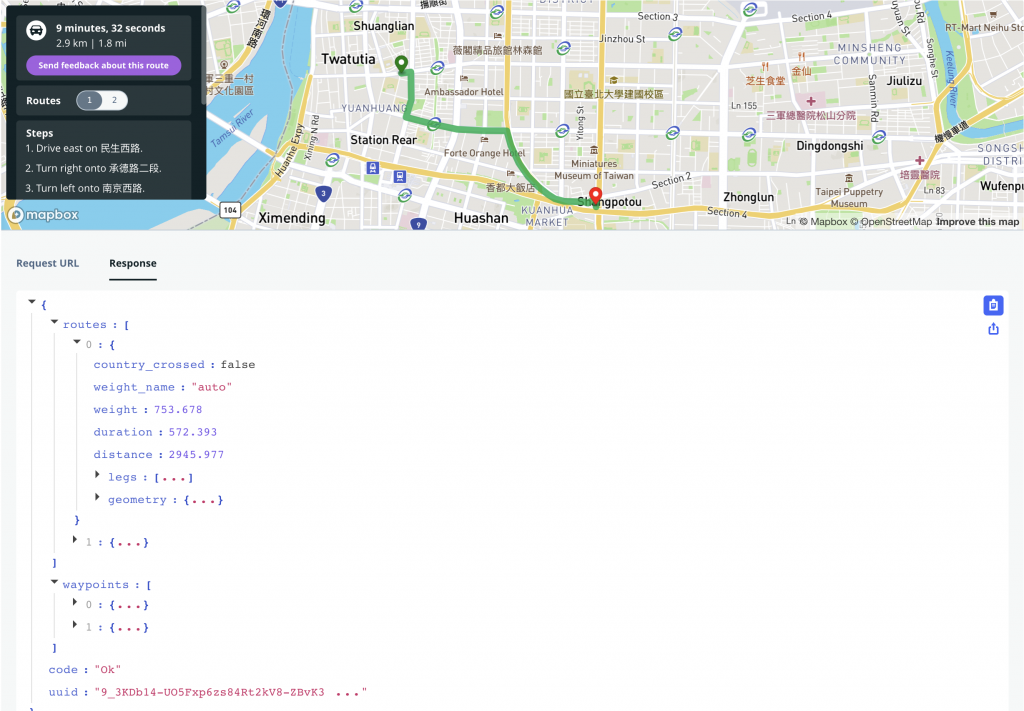
交通資料:
例如:物流公司最佳路線規劃。
常用格式:GeoJson
圖磚:使用地圖圖資(靜態圖磚Static Tile)
.gif)
.gif)
模型資料:
時間、位置跟角度:
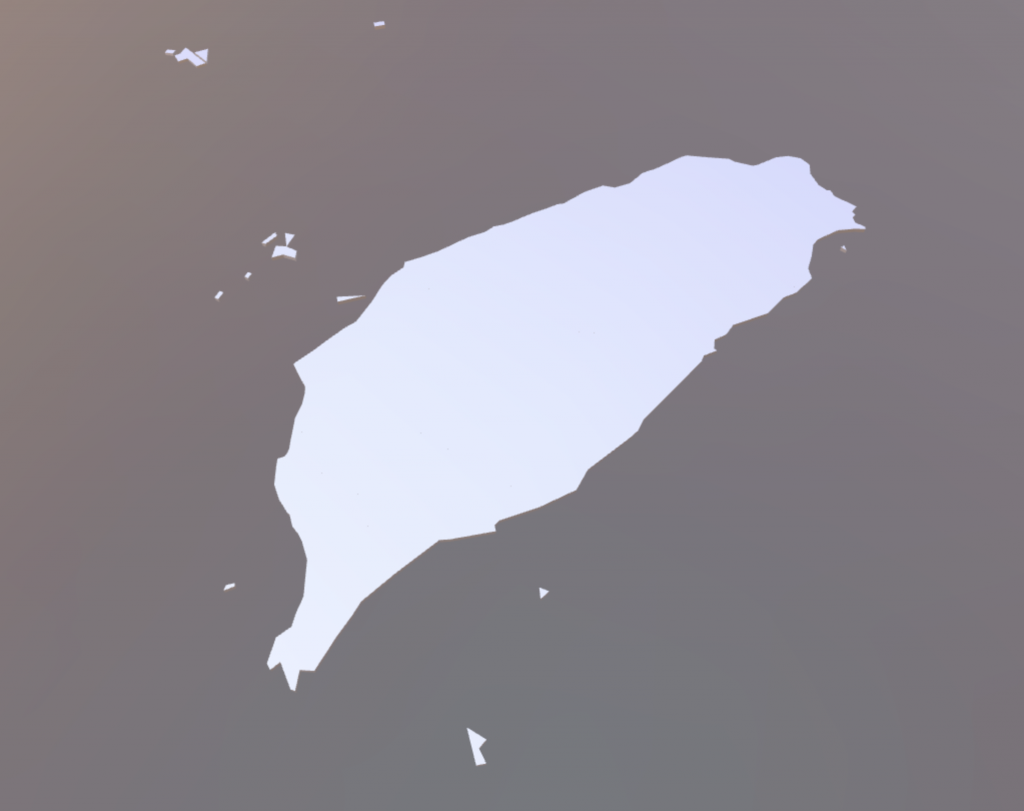
點陣資料:
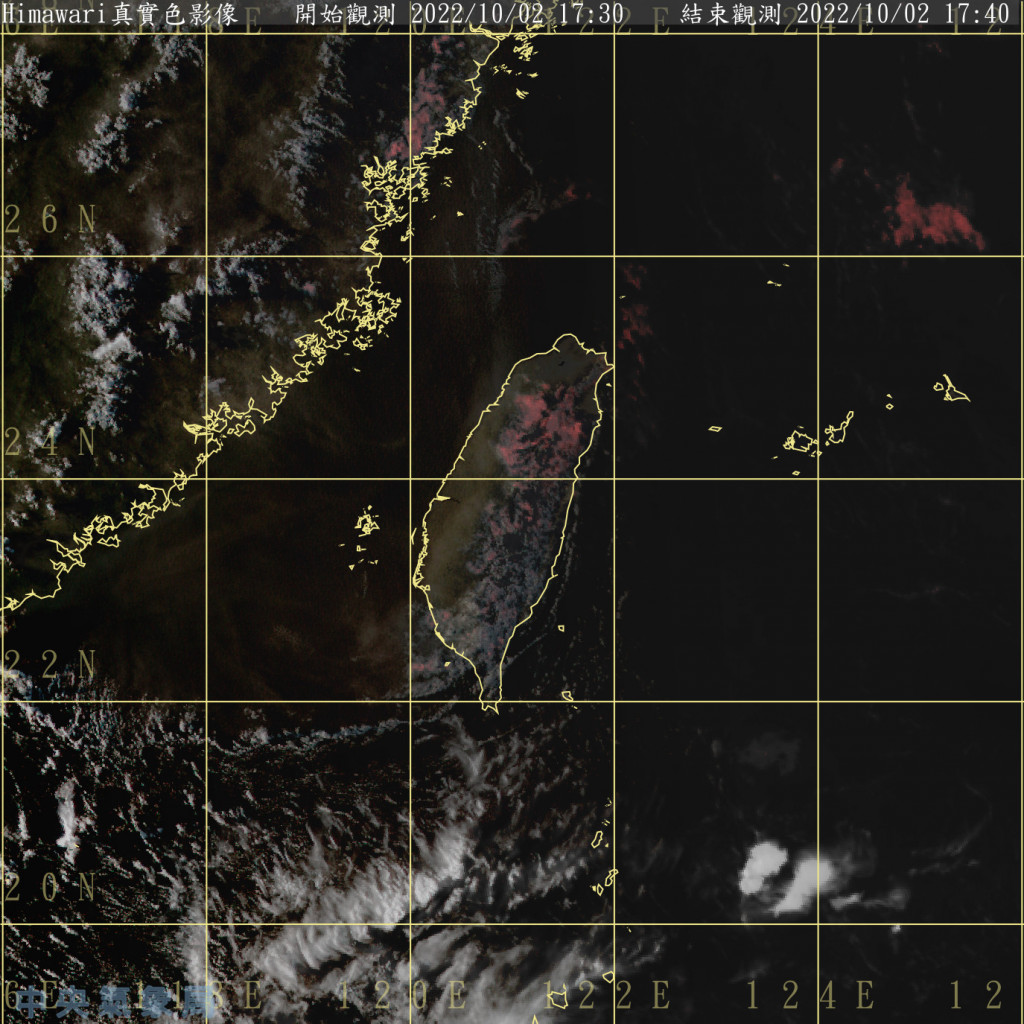
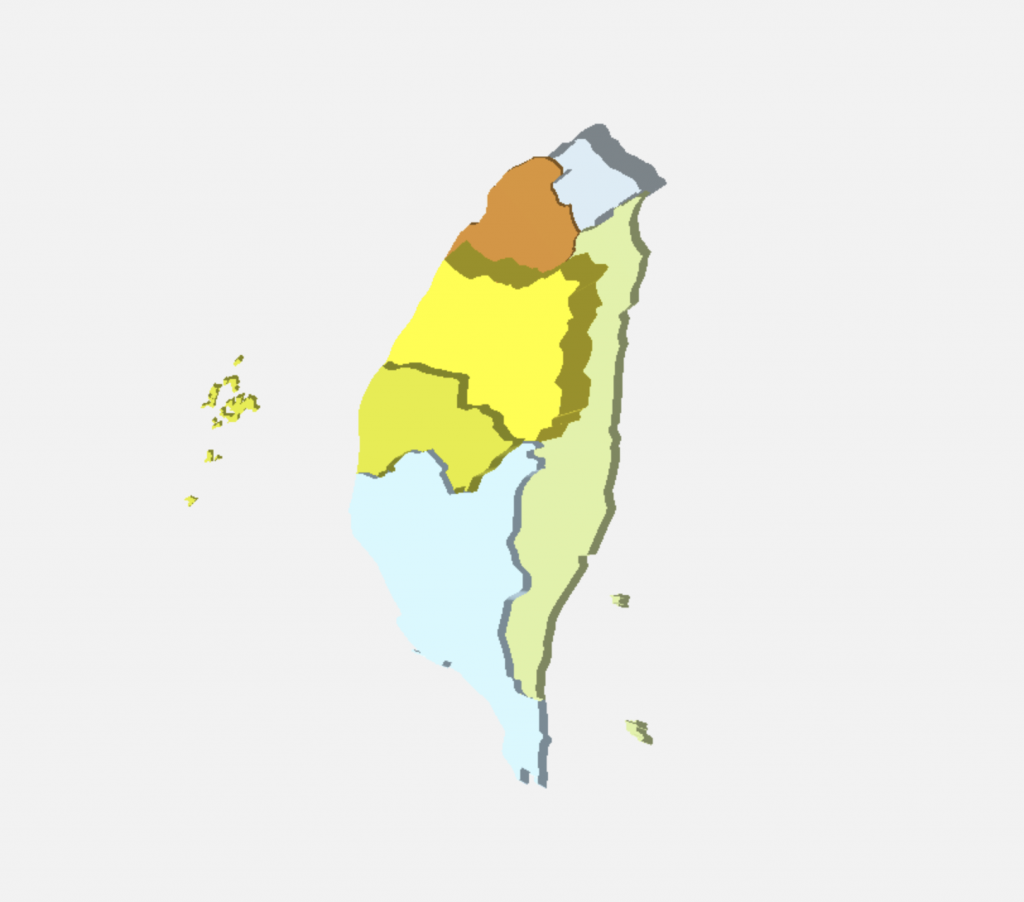
下圖使用上圖作為來源,渲染立體效果。
.gif)
錨點資料:
以及非常多應用方式。
以上這些,three.js都辦得到。我這邊以SVG來生成模型,由於SVG為標籤語言,我們可以看到錨點資料,而且SVG為廣用的格式。雖然如此,SVG在匯入到three.js時仍然有很多眉角需要注意。
我將介紹以下內容:
SVGLoader的使用方法shapePath說明Path轉成3D Mesh時的效能問題前一篇提到extrude,本篇亦同,然而實作的方向不太相同。
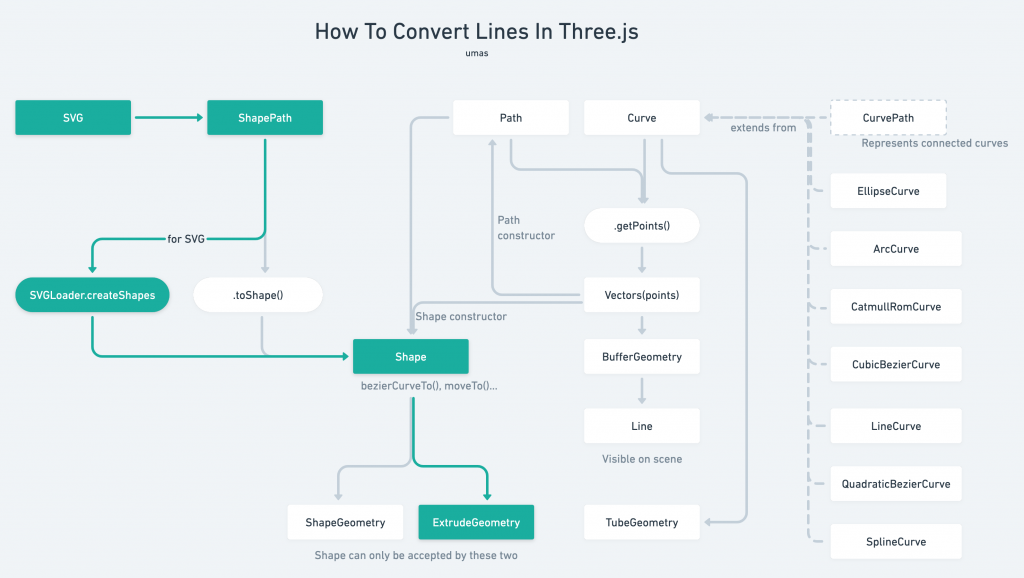
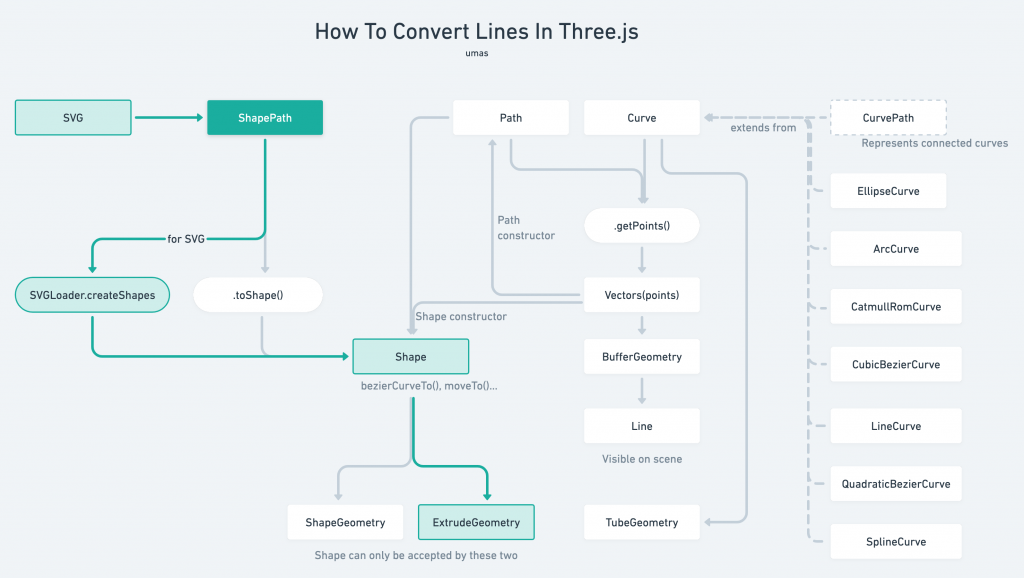
製作圓餅圖時,我們從原始資料轉成角度,再轉成弧度。有了弧度之後,製作出EllipseCurve,再轉成Vector2,再轉成Shape,再轉成ExtrudeGeometry。見圖:
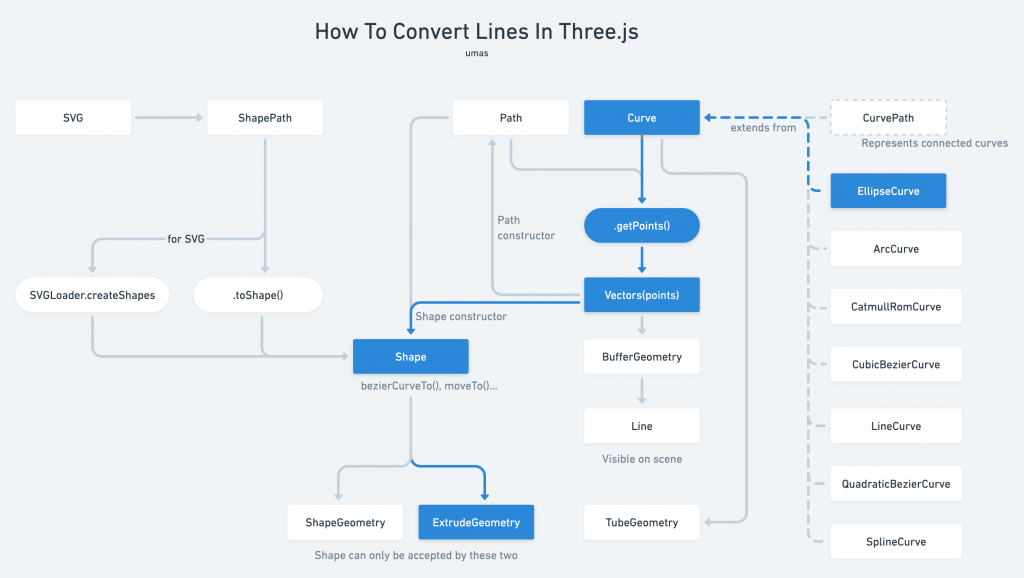
本次實作中,我們由SVG出發,由SVGLoader讀入之後,會是一個ShapePath格式。透過SVGLoader.createShpes()後,就能夠得到shape物件,最終Extrude成物件。
不管是怎樣的讀入方式,如果要渲染到畫面上,就得要挑一個geometry來產生3D物件,在這之前,一切都只是描述形狀資料而已。
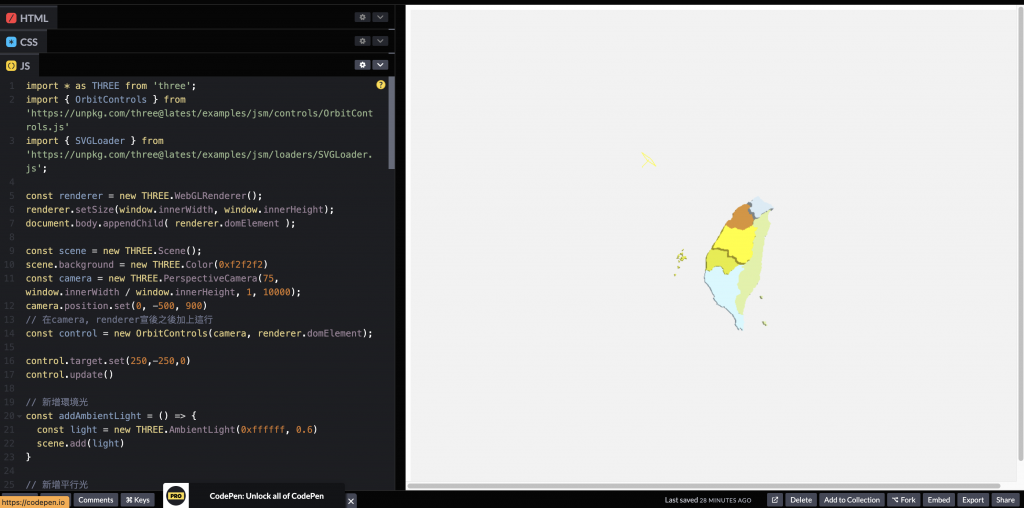
首先,我們先透過three.js範本開一個新的專案。我們直接沿用這個空的three.js範本即可:
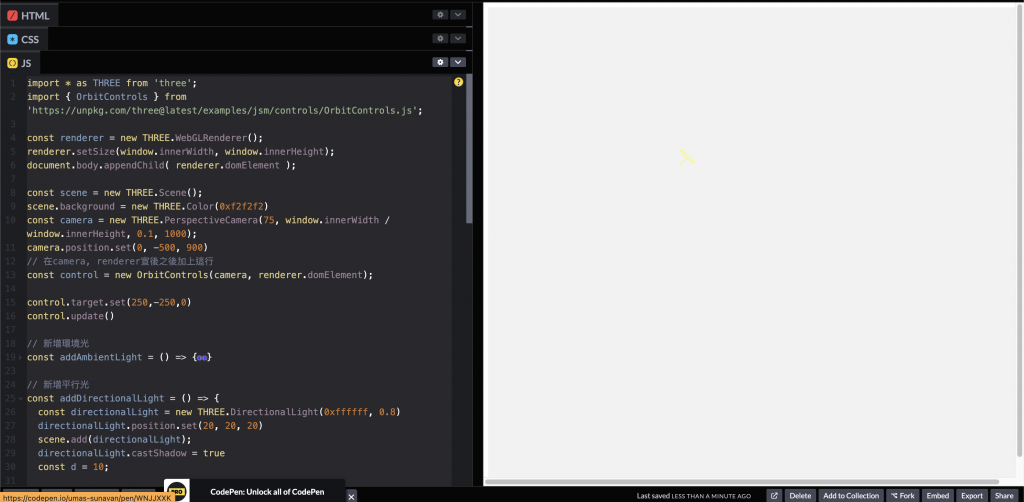
https://codepen.io/umas-sunavan/pen/WNJJXXK?editors=0010
複製貼上的index.js,然後開一個html來引用即可。可以參考Codepen。
import * as THREE from 'three';
import { OrbitControls } from 'https://unpkg.com/three@latest/examples/jsm/controls/OrbitControls.js';

const renderer = new THREE.WebGLRenderer();
renderer.setSize(window.innerWidth, window.innerHeight);
document.body.appendChild( renderer.domElement );

const scene = new THREE.Scene();
scene.background = new THREE.Color(0xf2f2f2)
const camera = new THREE.PerspectiveCamera(75, window.innerWidth / window.innerHeight, 0.1, 1000);
camera.position.set(0, -500, 900)
// 在camera, renderer宣告後之後加上這行
const control = new OrbitControls(camera, renderer.domElement);

control.target.set(250,-250,0)
control.update()

// 新增環境光
const addAmbientLight = () => {
	const light = new THREE.AmbientLight(0xffffff, 0.6)
	scene.add(light)
}

// 新增平行光
const addDirectionalLight = () => {
	const directionalLight = new THREE.DirectionalLight(0xffffff, 0.8)
	directionalLight.position.set(20, 20, 20)
	scene.add(directionalLight);
	directionalLight.castShadow = true
	const d = 10;

	directionalLight.shadow.camera.left = - d;
	directionalLight.shadow.camera.right = d;
	directionalLight.shadow.camera.top = d;
	directionalLight.shadow.camera.bottom = - d;

	// 新增Helper
	const lightHelper = new THREE.DirectionalLightHelper(directionalLight, 20, 0xffff00)
	scene.add(lightHelper);
	// 更新位置
	directionalLight.target.position.set(0, 0, 0);
	directionalLight.target.updateMatrixWorld();
	// 更新Helper
	lightHelper.update();
}

addAmbientLight()
addDirectionalLight()

function animate() {
	requestAnimationFrame( animate );
	renderer.render( scene, camera );
}
animate();
加上原始資料,用來呈現不同區域的高度
// 假設GIS來源資料如下
const data = [
	{ rate: 14.2, name: '雲嘉' },
	{ rate: 32.5, name: '中彰投' },
	{ rate: 9.6, name: '南高屏' },
	{ rate: 9.7, name: '宜花東' },
	{ rate: 21.6, name: '北北基' },
	{ rate: 3.4, name: '桃竹苗' },
	{ rate: 9.0, name: '澎湖' },
]
加入SVGLoader(),使用函式.load() 或.loadAsync()匯入模型檔。
import { SVGLoader } from 'https://unpkg.com/three@latest/examples/jsm/loaders/SVGLoader.js';

const loadPathsFromSvg = () => {
	const loader = new SVGLoader();
	loader.load('taiwan.svg', svgData => {
		console.log(svgData);
	})
}

loadPathsFromSvg()
.loadAsync()與.load()差異到目前為止,我們使用了TextrueLoader, SVGLoader, FontLoader等各種loader。three.js存在各種loader,提供我們多種資料的匯入。
Loader必須手動處理異步嗎?
所有的Loader,提供函式:
Loader.load( path, callback)
其中,path 代表路徑,callback代表讀取完之後的回呼函式。事實上還有失敗的回呼函式、讀取中進度條的回呼函式等多種,依照Loader而定。
這代表如果我們需要讓異步變成同步,必須手動包Promise才行:
const loadPathsFromSvg = async () => {
	const loader = new SVGLoader();
	// 手動用Proise把異步包成同步
	return new Promise( (res, rej) => {
		loader.load('taiwan.svg', svgData => {
			res(svgData)
		})
	})
}
一些網路教學就使用這個方式開發。
但事實上,所有的Loader也都提供loadAsync():
Loader.loadAsync( path )
而回傳的即為一個Promise。所以說,可以loader的函式可以這樣撰寫:
const loadPathsFromSvg = async () => {
	const loader = new SVGLoader();
	const data = await loader.loadAsync('taiwan.svg')
}
甚至一行搞定:
const loadPathsFromSvg = async () => await new SVGLoader().loadAsync('taiwan.svg');
所以說,可以善用loadAsync(),使得異步程式碼更加簡潔
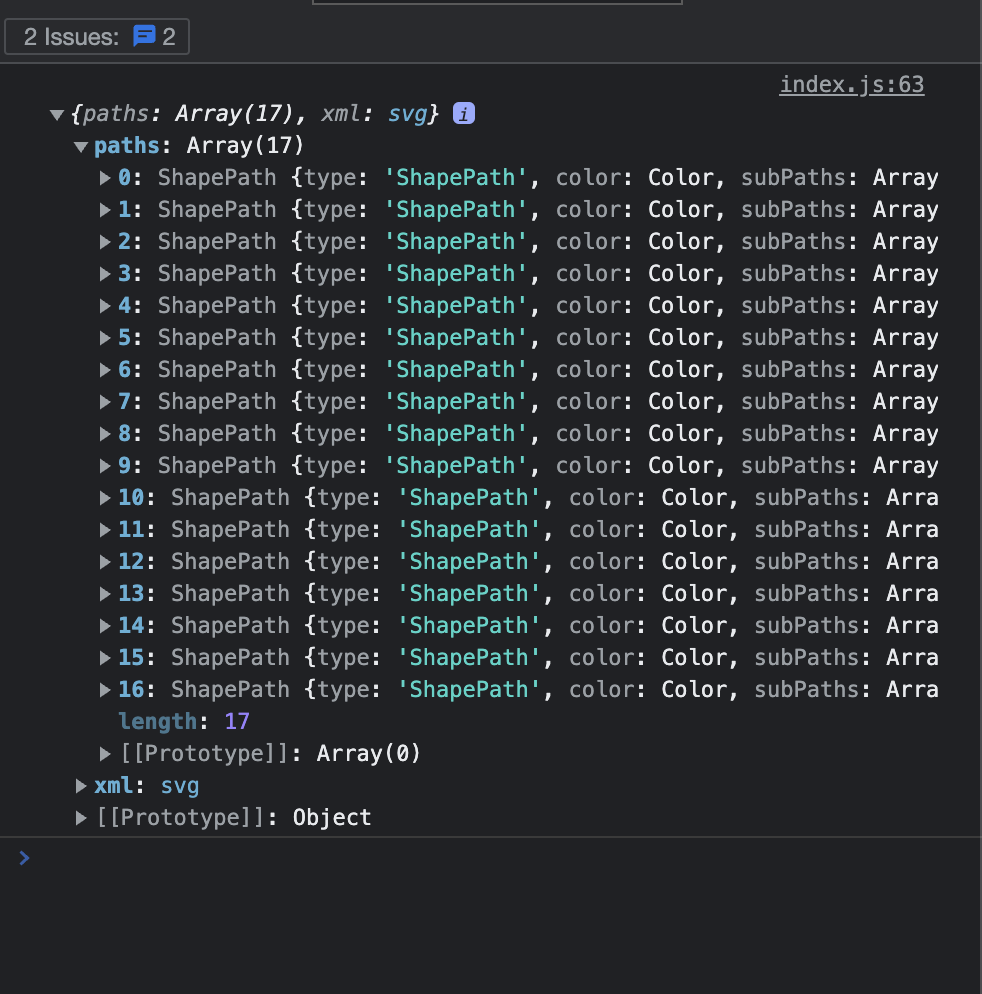
我將load()改成loadAsync(),並且讀取svg資料中的paths:
import { SVGLoader } from 'https://unpkg.com/three@latest/examples/jsm/loaders/SVGLoader.js';
const loadPathsFromSvg = async () => await new SVGLoader().loadAsync('taiwan.svg');
(async () => {
const svgData = await loadPathsFromSvg()
const paths = svgData.paths
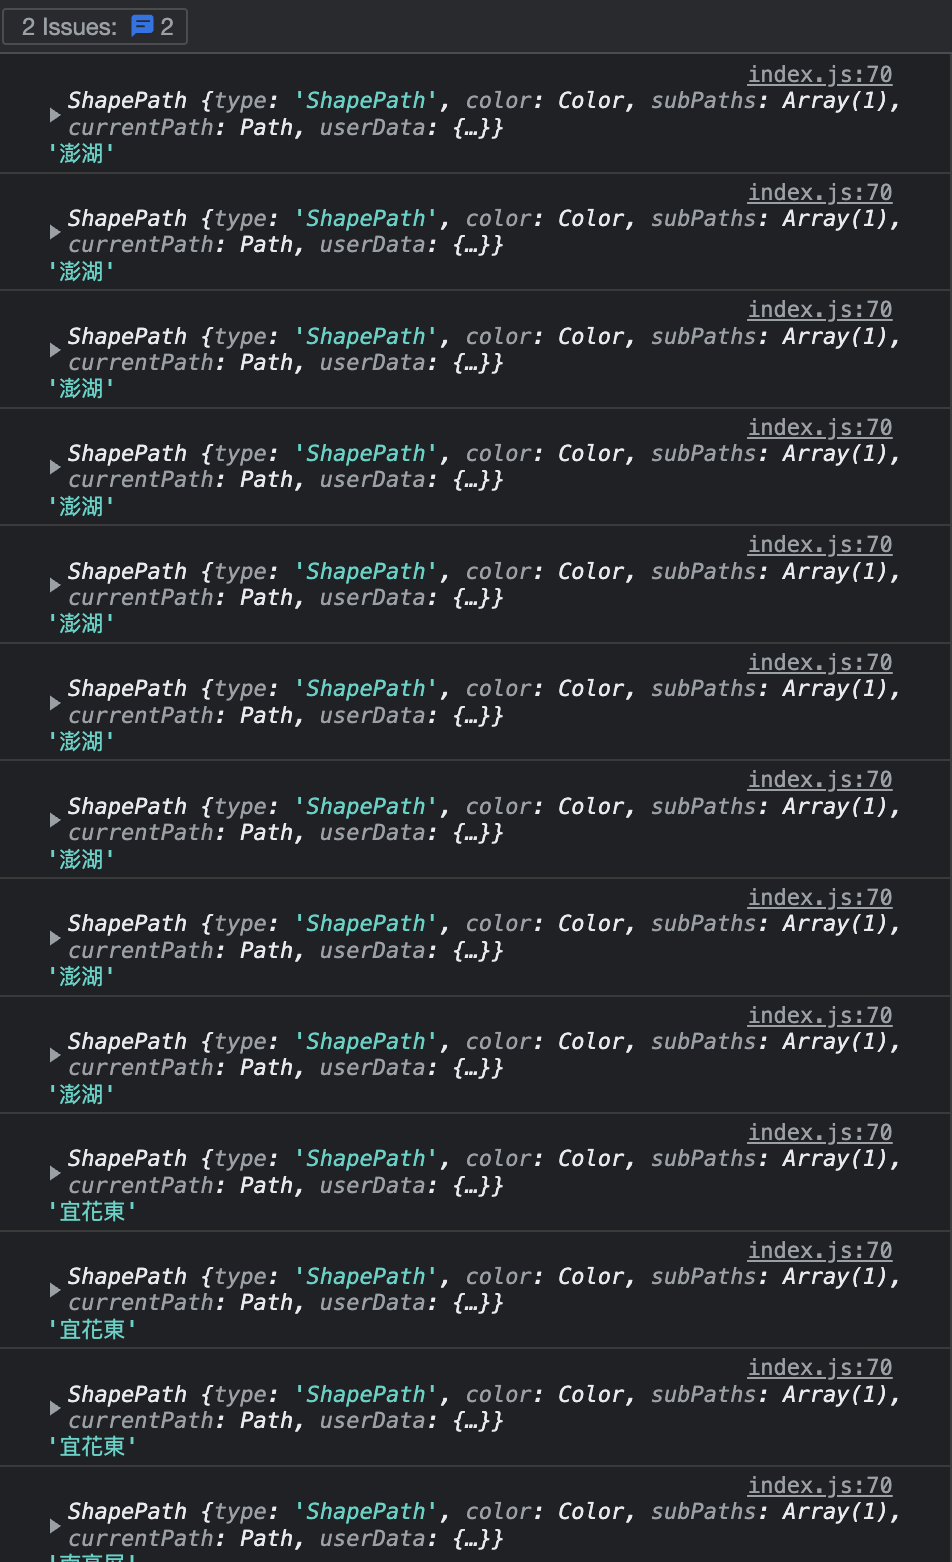
console.log(paths);
})()
可以看到,我們讀取很多的shapePath,而這些shapePath 是什麼?又是從哪來的?
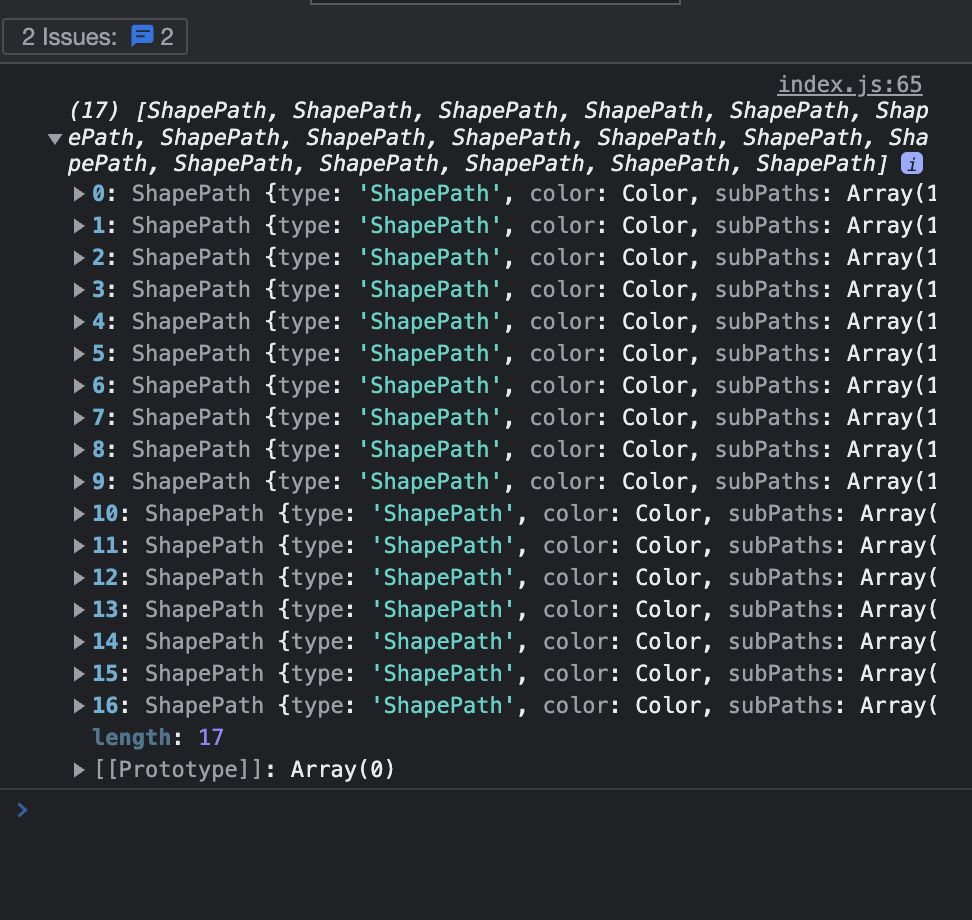
shapePath是什麼?shapePath 是一種能夠儲存多個shape的Path。能透過.toShape() 或是 SVGLoader.createShapes() 來轉成Shape。
shapePath 從哪裡來的?如果我們打開taiwan.svg,會發現有幾個<path>:
<?xml version="1.0" encoding="utf-8"?>
<svg version="1.1" xmlns="http://www.w3.org/2000/svg" xmlns:xlink="http://www.w3.org/1999/xlink" x="0px" y="0px"
	 viewBox="0 0 538 540" style="enable-background:new 0 0 538 540;" xml:space="preserve">
    <g id="澎湖">
        <path d="..."/>
        <path d="..."/>
        <path d="..."/>
        <path d="..."/>
        <path d="..."/>
        <path d="..."/>
        <path d="..."/>
        <path d="..."/>
        <path d="..."/>
        <path d="..."/>
    </g>
    <g id="宜花東">
        <path d="..."/>
        <path d="..."/>
    </g>
    <path id="南高屏" d="..."/>
    <path id="雲嘉" d="..."/>
    <path id="中彰投" d="..."/>
    <path id="桃竹苗" d="..."/>
    <path id="北北基" d="..."/>
</svg>
SVGLoader遍歷所有路徑,並且變成shapePath陣列。同時儲存顏色、Id、class等基本屬性,而這就夠我們使用了。

依照流程圖,我們只要透過SVGLoader.createShape() 即可將ShapePath轉成Shape,然後放到extrudeGeometry 中。
我們遞迴每一個path,透過SVGLoader.createShapes(); 產生出shape,並轉成geometry,最終實例化Shape 成為Mesh,加到場景中
(async () => {
	const svgData = await loadPathsFromSvg()
	const paths = svgData.paths
	const group = new THREE.Group();
	// 遞迴paths
	paths.forEach( path => {
		const shapes = SVGLoader.createShapes(path);
		const material = new THREE.MeshStandardMaterial();
		shapes.forEach( shape => {
			const geometry = new THREE.ExtrudeGeometry(shape);
			const mesh = new THREE.Mesh(geometry, material);
			// 將所有可渲染的Mesh加入成群組物件group
			group.add(mesh);
		})
	})
	// 顯示群組物件,就可以顯示群組底下的物件
	scene.add(group);
})()
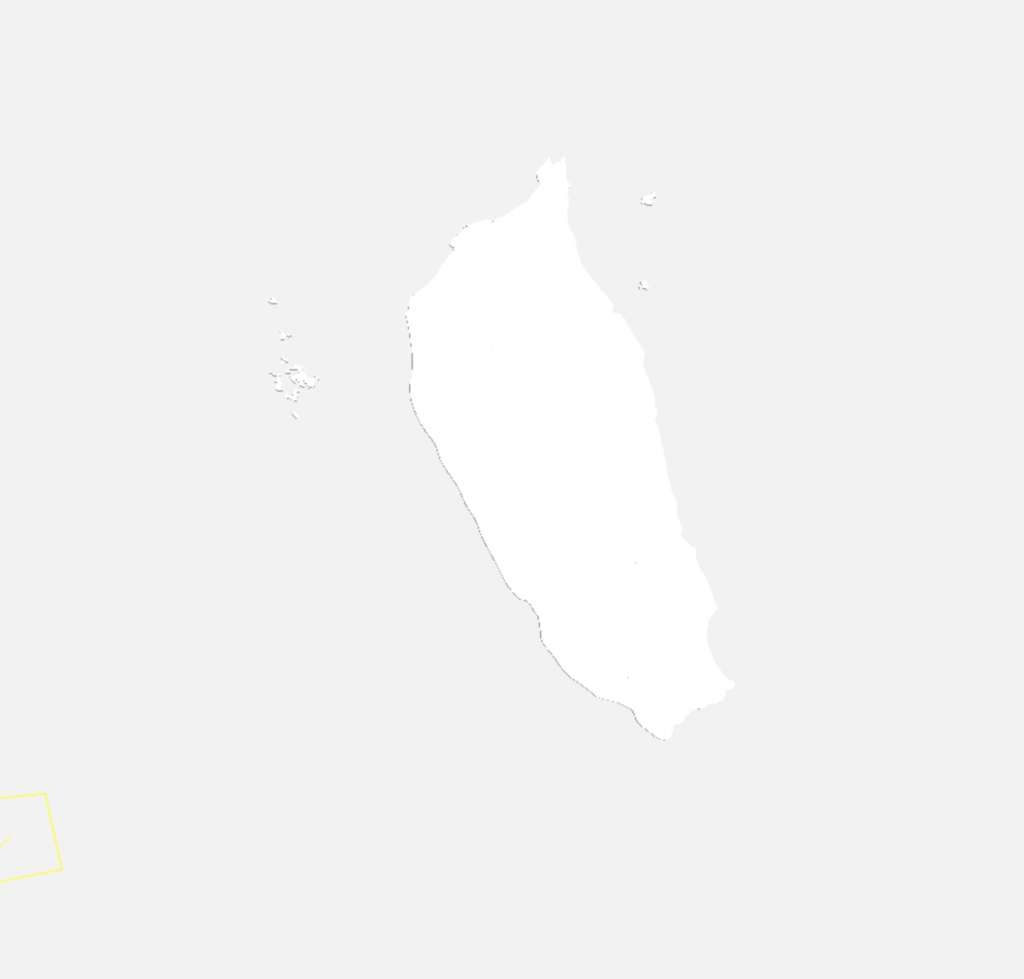
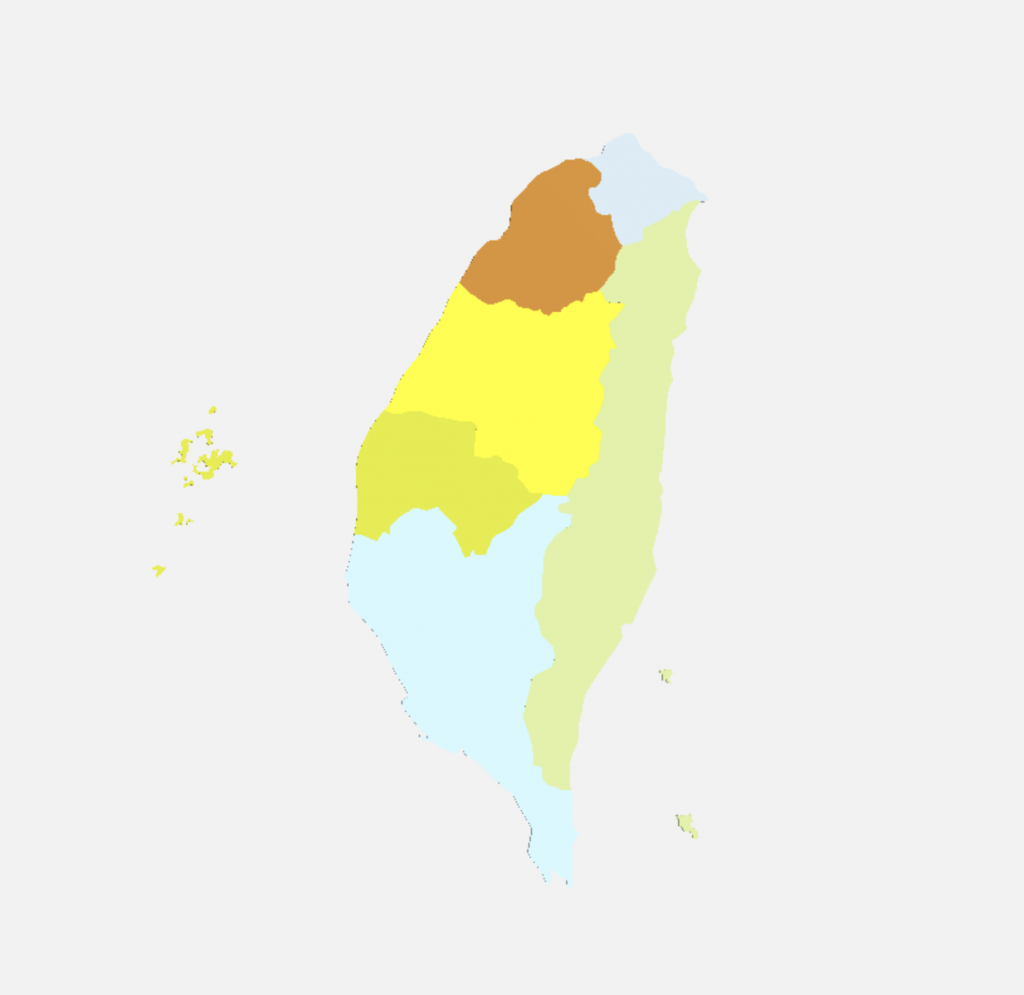
可以看到台灣已經跑出來了。
但現在遇到幾個問題:
我們一個一個解決:
畫面相當卡頓,如果我們把material的wireframe打開,可以看到這個SVG由相當多的點所組成。
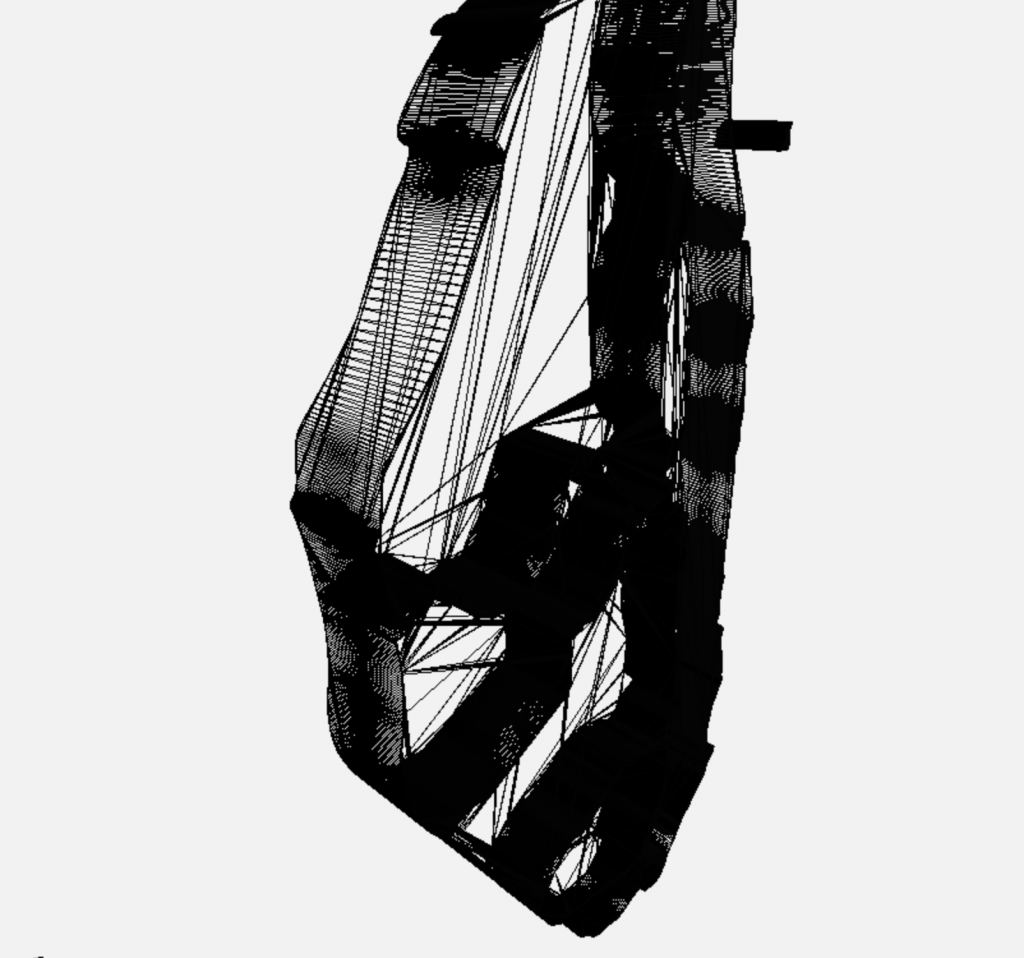
這造成很大的效能問題。為了解決這個問題,我們可以透過extrude的設定中,簡化路徑:
// const geometry = new THREE.ExtrudeGeometry(shape);
// 取消bevel、steps設成1
const geometry = new THREE.ExtrudeGeometry(shape, {
		steps: 1,
		bevelEnabled: false
});
之所以台灣是倒過來的,是因為SVG跟Three.js相容性問題,以下解釋:
Three.js的(0,0)原點為左下,而SVG的(0,0)原點為左上,導致在SVGLoader在匯入時,會顛倒。

為了解決這個問題,我們只要用.rotateX(Math.PI)把整個畫面旋轉即可。又或者將Perspectiveamera.up設置成-1 ,使得鏡頭方向上下顛倒。
(async () => {
	const svgData = await loadPathsFromSvg()
	const paths = svgData.paths
	const group = new THREE.Group();
	// 遞迴時,已經把台灣所有地區加入到group裡面
	paths.forEach( ... )
	// 旋轉3D物件即可
	group.rotateX(Math.PI)
	scene.add(group);
})()

設定之後,顛倒問題即解決。
每一個path,除了儲存id值、class值、路徑資料以外,還有它所儲存的CSS資料。如果我們看到SVG,可以發現它存有顏色,並統一在<style/>裡面管理了。
<?xml version="1.0" encoding="utf-8"?>
<svg version="1.1" xmlns="http://www.w3.org/2000/svg" xmlns:xlink="http://www.w3.org/1999/xlink" x="0px" y="0px"
	 viewBox="0 0 538 540" style="enable-background:new 0 0 538 540;" xml:space="preserve">
    <style type="text/css">
        .st0{fill:#D6DE23;}
        .st1{fill:#D0E299;}
        .st2{fill:#C6E9FA;}
        .st3{fill:#FFF100;}
        .st4{fill:#CE8A2D;}
        .st5{fill:#CCDDE6;}
    </style>
    <g id="澎湖">
        <path class="st0" d="..."/>
        <path class="st0" d="..."/>
        <path class="st0" d="..."/>
        <path class="st0" d="..."/>
        <path class="st0" d="..."/>
        <path class="st0" d="..."/>
        <path class="st0" d="..."/>
        <path class="st0" d="..."/>
        <path class="st0" d="..."/>
        <path class="st1" d="..."/>
    </g>
    <g id="宜花東">
        <path class="st1" d="..."/>
        <path class="st1" d="..."/>
    </g>
    <path id="南高屏" class="st2" d="..."/>
    <path id="雲嘉" class="st0" d="..."/>
    <path id="中彰投" class="st3" d="..."/>
    <path id="桃竹苗" class="st4" d="..."/>
    <path id="北北基" class="st5" d="..."/>
</svg>
樣式可能存在style,也可能存在行內屬性。無論如何,SVGLoader都可以輕易抓到樣式資料,相當方便,我們只要將顏色放到material即可。
// const material = new THREE.MeshStandardMaterial();
const color = path.color
const material = new THREE.MeshStandardMaterial({color});
這個作法已經有在上一篇「Day16: three.js 前端3D視覺特效開發實戰——3D儀表板:立體圓餅圖、extrude在three獨特差異」已經有提到。
然而不同的是,我們得在SVG裡面抓到ID值,然後對照在數據資料,藉此找到對應3D物件,調整其高度。
// 既有的數據資料
const data = [
	{ rate: 14.2, name: '雲嘉' },
	{ rate: 32.5, name: '中彰投' },
	{ rate: 9.6, name: '南高屏' },
	{ rate: 9.7, name: '宜花東' },
	{ rate: 21.6, name: '北北基' },
	{ rate: 3.4, name: '桃竹苗' },
	{ rate: 9.0, name: '澎湖' },
]

...

const color = path.color
// 除了顏色以外,我們還可以抓到id值
const name = path.userData.node.id
// 抓到ID值之後,對照數據資料
const dataRaw = data.find(row => row.name === name)
這個作法會有一個問題:如果path位在群組,那麼將抓不到群組ID
回顧我們的svg檔案,由於澎湖、宜花東有離島,導致它透過群組來命名
<?xml version="1.0" encoding="utf-8"?>
<svg version="1.1" xmlns="http://www.w3.org/2000/svg" xmlns:xlink="http://www.w3.org/1999/xlink" x="0px" y="0px"
	 viewBox="0 0 538 540" style="enable-background:new 0 0 538 540;" xml:space="preserve">
    <g id="澎湖">
        <path class="st0" d="..."/>
        <path class="st0" d="..."/>
        <path class="st0" d="..."/>
        <path class="st0" d="..."/>
        <path class="st0" d="..."/>
        <path class="st0" d="..."/>
        <path class="st0" d="..."/>
        <path class="st0" d="..."/>
        <path class="st0" d="..."/>
        <path class="st1" d="..."/>
    </g>
    <g id="宜花東">
        <path class="st1" d="..."/>
        <path class="st1" d="..."/>
    </g>
    <path id="南高屏" class="st2" d="..."/>
    <path id="雲嘉" class="st0" d="..."/>
    <path id="中彰投" class="st3" d="..."/>
    <path id="桃竹苗" class="st4" d="..."/>
    <path id="北北基" class="st5" d="..."/>
</svg>
舉例來說,澎湖有很多離島,每一個離島都是一個Path。我們該怎麼確定哪些path是澎湖呢?
如果沒有額外處理,那麼這些存在群組內的path是抓不到id值的。而我處理的方式,就是抓取parent的ID值。
- const name = path.userData.node.id
+ const parentName = path.userData.node.parentNode.id;
+ const name = path.userData.node.id || parentName
如此一來,就可以替每一個mesh抓到正確的名字,進而賦予高度的數值。
修改ExtrudeGeometry的參數即可。
-   const geometry = new THREE.ExtrudeGeometry(shape, {
-   		steps: 1,
-   		bevelEnabled: false
-   });
+   // 由ID抓取對應的數據資料,作為高度
+   const dataRaw = data.find(row => row.name === name)
+   const geometry = new THREE.ExtrudeGeometry(shape, {
+       depth: dataRaw.rate,
+       steps: 1,
+       bevelEnabled: false
+   });
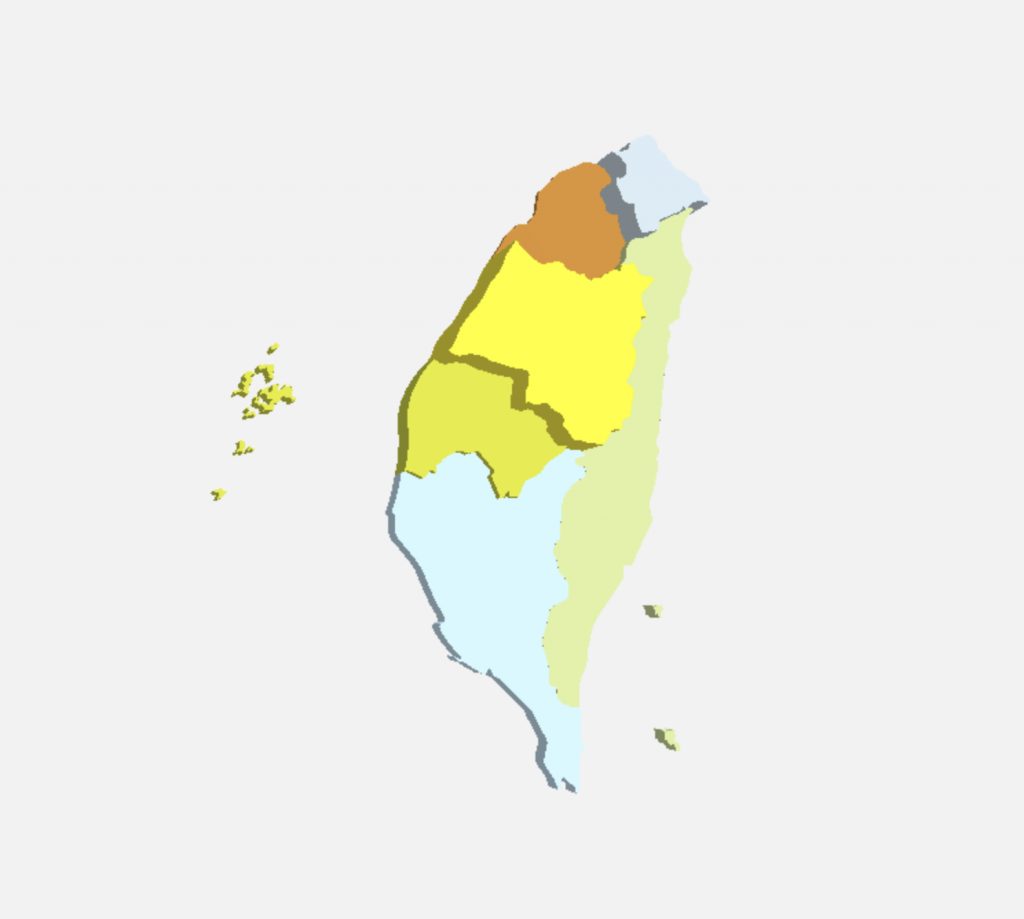
修改後,我們的模型就有了高度:
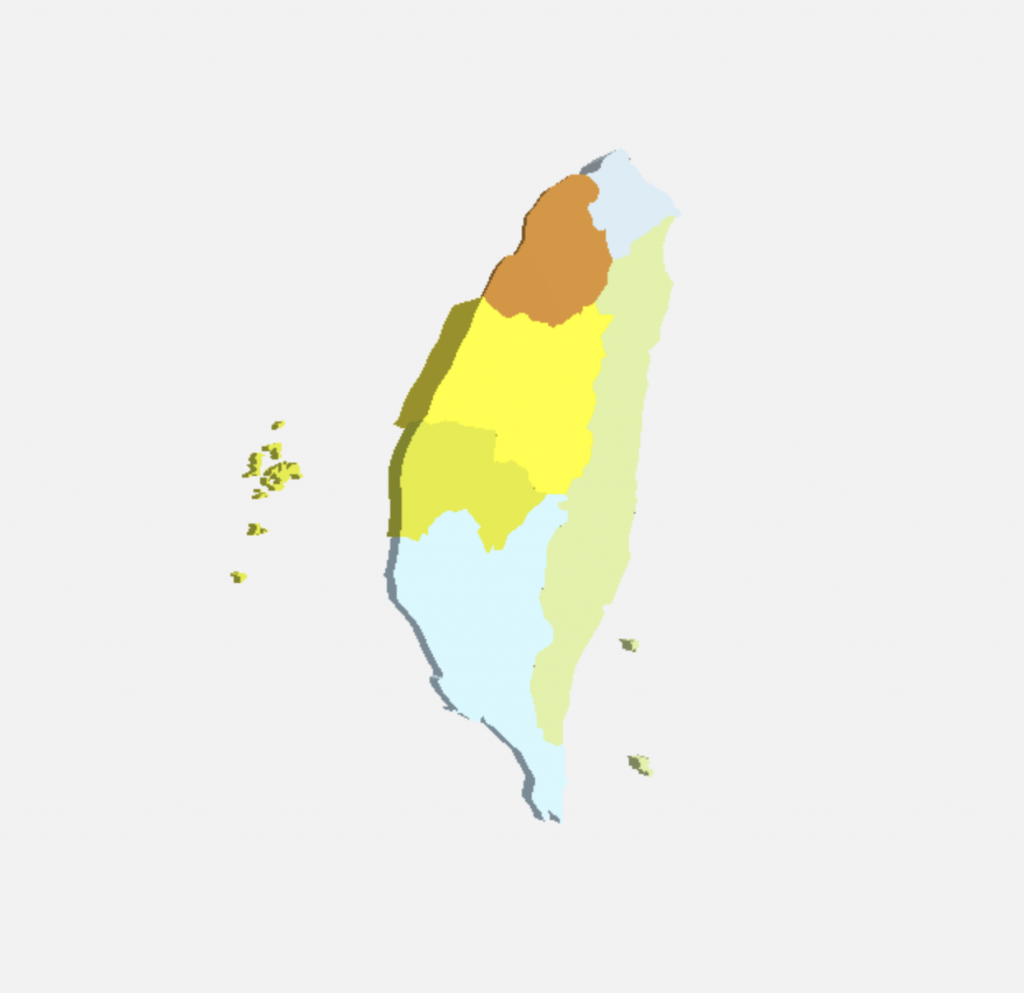
你會看到,它Extrude的方向跟我們想像的不同。
由於我們把模型用group.rotateX(Math.PI)翻到了背面,雖然這麼做使得台灣是面向鏡頭的,但實際上extrude是往背面長出來的。
為了解決問題,將depth改成負值即可:
const geometry = new THREE.ExtrudeGeometry(shape, {
-	depth: dataRaw.rate,
+	depth: -dataRaw.rate,
	steps: 1,
	bevelEnabled: false
});
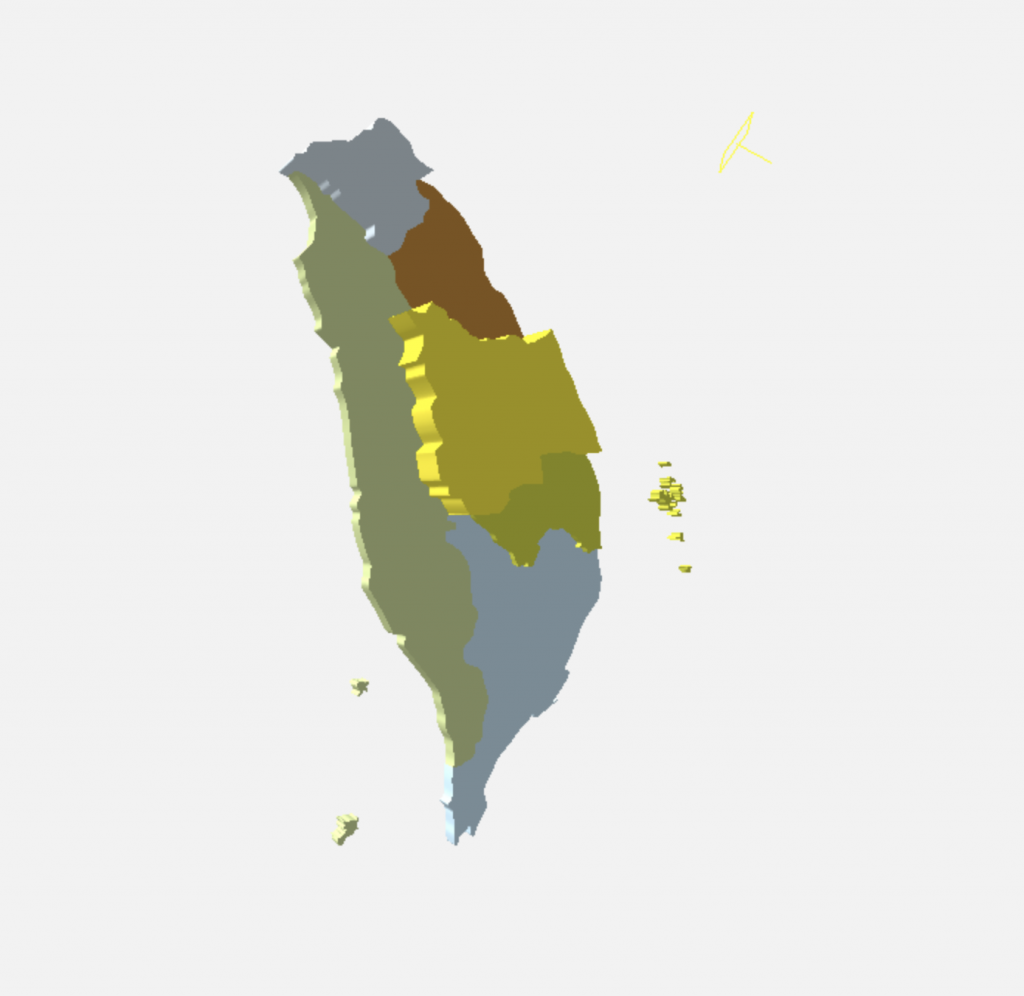
但又出現一個問題:雖然extrude方向雖然面對了鏡頭,但normal方向仍然錯誤。
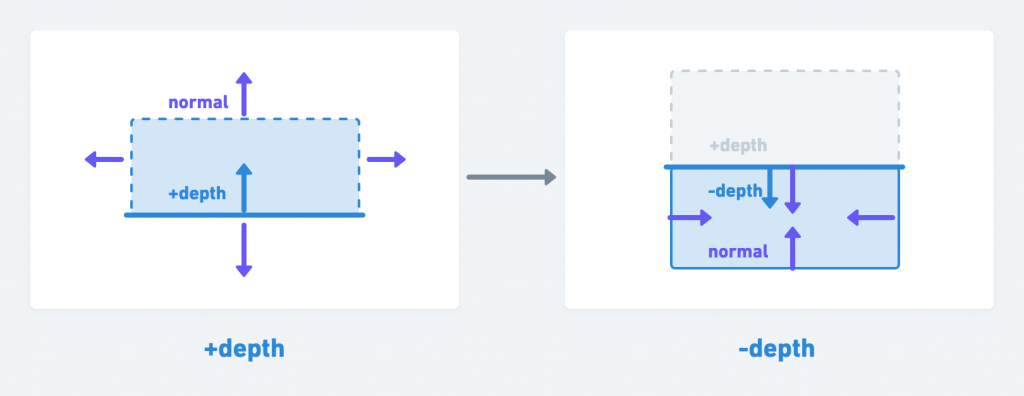
由圖可知,由於normal方向往內,導至畫面怪怪的。
為什麼normal跟這個有關?
一般來說,我們只看得到normal的正面,它的背面是不會自動渲染的。這個在Maya, 3ds Max, Blender, babylon.js都一樣,是普遍的預設渲染方式。畢竟我們看不到
.gif)
此這個動畫來看,你會發現,在「F」內側的面根本不沒要渲染,因為用戶根本就不會看到那面。(這張圖僅作為示意圖,實際上渲染順序不會是這樣)
為了節省渲染效能,3D引擎往往就得判斷該面是否為normal的正面。如果是背面就不用渲染。
因此,我們可以設定物件只渲染背面,如此一來就能夠正常顯示畫面。
  const color = path.color
- const material = new THREE.MeshStandardMaterial({color});
+ const material = new THREE.MeshStandardMaterial({color,side: THREE.BackSide,});
一個台灣的高度圖就做出來了。
.gif)
https://codepen.io/umas-sunavan/pen/eYrrVvy?editors=0010
多虧先前圓餅圖的練習,我們能夠很快速的建立3D物件。有了SVG讀入的功能,不僅可以自己透過SVG製作模型,也可以透過three.js製作3D的GIS網站。
如果有興趣認識更多這類GIS地圖的開發,可以到Districgraphic.tw,或是geostat.tw觀察原始碼。
.gif)
.gif)
