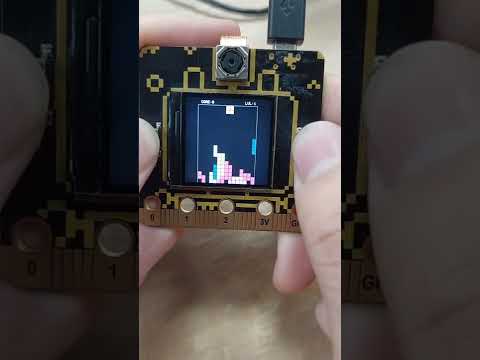
今天將會接續昨天的 PixelBit 俄羅斯方塊 Tetris(Part 1)程式解說,除了可以了解整個遊戲的運作方式、邏輯,在之後想要改遊戲規則、參數,甚至進階做成連線版本都會比較容易。
Arduino Setup 初始化
/* #region  Arduino Setup */
void setup(void)
{
    Serial.begin(UART_BAUDRATE);

    /* #region  註冊按鍵事件 */
    uart.on(ATM_EVN_BTN_A_PRE, '\0', [](const char *temp) {
        btn_a_state = ATM_BTN_PRE;
    });

    uart.on(ATM_EVN_BTN_B_PRE, '\0', [](const char *temp) {
        btn_b_state = ATM_BTN_PRE;
    });

    uart.on(ATM_EVN_BTN_A_REL, '\0', [](const char *temp) {
        btn_a_state = ATM_BTN_REL;
    });

    uart.on(ATM_EVN_BTN_B_REL, '\0', [](const char *temp) {
        btn_b_state = ATM_BTN_REL;
    });
    /* #endregion */

    /* #region  初始化 TFT */
    tft.init();
    tft.setRotation(3);
    tft.setSwapBytes(true);

    /* #endregion */
    /* #region  初始化 SPIFFS */
    if (!SPIFFS.begin()) {
        tft.fillScreen(TFT_BLACK);
        tft.setTextColor(TFT_RED);
        tft.drawString(String("SPIFFS FAILED"), 30, 55, 4);
        while (1)
            yield();
    }
    /* #endregion */

    /* #region  設定 TJpgDec 比例、解碼 Callback*/
    TJpgDec.setJpgScale(1);
    TJpgDec.setCallback(onTJpgDecoded);
    /* #endregion */

    /* #region  顯示遊戲開機畫面 */
    tft.pushImage(52, 0, 135, 240, tet);
    delay(3000);
    /* #endregion */

    /* #region TODO: 顯示遊戲左右 */
    // tft.fillScreen(TFT_BLACK);
    // TJpgDec.drawFsJpg(0, 0, "/tetris.jpg");
    // delay(3000);
    /* #endregion */

    /* #region  繪製遊戲邊框 */
    tft.fillScreen(TFT_BLACK);
    tft.drawLine(35, 19, 201, 19, GREY);
    tft.drawLine(35, 19, 35, 240, GREY);
    tft.drawLine(201, 19, 201, 240, GREY);
    /* #endregion */

    /* #region  繪製積木顏色 */
    make_block(0, TFT_BLACK);     // Type No, Color
    make_block(1, 0x00F0);        // DDDD     RED
    make_block(2, 0xFBE4);        // DD,DD    PUPLE
    make_block(3, 0xFF00);        // D__,DDD  BLUE
    make_block(4, 0xFF87);        // DD_,_DD  GREEN
    make_block(5, 0x87FF);        // __D,DDD  YELLO
    make_block(6, 0xF00F);        // _DD,DD_  LIGHT GREEN
    make_block(7, 0xF8FC);        // _D_,DDD  PINK
    /* #endregion */
    initGame();
}
/* #endregion */
Arduino loop 運行遊戲
/* #region  Arduino Loop */
void loop()
{
    static uint32_t update_timer = 0;
    // polling ATmega328P even
    uart.loop();

    if (gameover && btn_b_state == ATM_BTN_PRE) {
        initGame();
        return;
    }

    if (!gameover) {
        if (millis() > update_timer) {
            Point_t next_pos;
            int     next_rot = rot;
            GetNextPosRot(&next_pos, &next_rot);
            update_timer = millis() + 20;
            ReviseScreen(next_pos, next_rot);
        }
    }
}
/* #endregion */
取得下一個積木的位置、旋轉方向
/* #region  取得下一個積木位置、旋轉方向 */
void GetNextPosRot(Point_t *pnext_pos, int *pnext_rot)
{
    static uint32_t timer = 0;

    KeyPadLoop();

    if (btn_LEFT)
        // 遊戲開始
        started = true;
    if (!started)
        // 遊戲已結束
        return;

    pnext_pos->X = pos.X;
    pnext_pos->Y = pos.Y;

    if (millis() > timer) {
        timer = millis() + game_speed;
        pnext_pos->Y += 1;
    }

    if (btn_LEFT) {
        btn_LEFT = false;
        // 往左一格
        pnext_pos->X -= 1;
    } else if (btn_RIGHT) {
        btn_RIGHT = false;
        // 往右一格
        pnext_pos->X += 1;
    } else if (btn_AB) {
        btn_AB = false;
        // 往左旋轉
        *pnext_rot = (*pnext_rot + block.numRotate - 1) % block.numRotate;
    }
}
根據按鍵狀態設定 Flag,後續判斷動作將會需要
/* #region  根據按鍵狀態設定動作 flag */
bool KeyPadLoop()
{
    // 按 A 放 B
    if (btn_b_state == ATM_BTN_REL && btn_a_state == ATM_BTN_PRE) {
        if (pom == 0) {
            pom = 1;
            ClearKeys();
            btn_LEFT = true;
            return true;
        }
    } else {
        pom = 0;
    }
    // 按 B 放 A
    if (btn_a_state == ATM_BTN_REL && btn_b_state == ATM_BTN_PRE) {
        if (pom2 == 0) {
            pom2 = 1;
            ClearKeys();
            btn_RIGHT = true;
            return true;
        }
    } else {
        pom2 = 0;
    }
    // 按 A、B
    if (btn_a_state == ATM_BTN_PRE && btn_b_state == ATM_BTN_PRE) {
        if (pom3 == 0) {
            pom3 = 1;
            ClearKeys();
            btn_AB = true;
            return true;
        }
    } else {
        pom3 = 0;
    }

    return false;
}
/* #endregion */
修改 Sreen 內容
這裡是遊戲的主要運作規則,他將會檢查積木是否重疊、積木是否已經到底部、刪除消掉的行等等。
/* #region  修改 Screen */
void ReviseScreen(Point_t next_pos, int next_rot)
{
    if (!started)
        return;
    Point_t next_squares[4];
    // 清除積木四個區塊顏色
    for (int i = 0; i < 4; ++i)
        screen[pos.X + block.square[rot][i].X][pos.Y + block.square[rot][i].Y] = 0;

    if (GetSquares(block, next_pos, next_rot, next_squares)) {
        // 無重疊或超出邊界
        for (int i = 0; i < 4; ++i) {
            screen[next_squares[i].X][next_squares[i].Y] = block.color;
        }
        pos = next_pos;
        rot = next_rot;
    } else {
        // 重疊或超出邊界
        // 回填積木四個區塊顏色
        for (int i = 0; i < 4; ++i)
            screen[pos.X + block.square[rot][i].X][pos.Y + block.square[rot][i].Y] = block.color;
        // 檢查積木 Y 座標是否到底
        if (next_pos.Y == pos.Y + 1) {
            ChkDeleteLine();
            PutStartPos();
            if (!GetSquares(block, pos, rot, next_squares)) {
                // 設定新積木
                for (int i = 0; i < 4; ++i)
                    screen[pos.X + block.square[rot][i].X][pos.Y + block.square[rot][i].Y] = block.color;
                // 積木已重疊,遊戲結束
                GameOver();
            }
        }
    }
    Draw();
}
/* #endregion */
這個方法將會檢查積木是否重疊或超出邊界,重疊將會回傳 false
/* #region  檢查是否重疊或超出邊界 */
bool GetSquares(Block_t block, Point_t pos, int rot, Point_t *squares)
{
    bool overlap = false;
    for (int i = 0; i < 4; ++i) {
        Point_t p;
        p.X = pos.X + block.square[rot][i].X;
        p.Y = pos.Y + block.square[rot][i].Y;
        overlap |= p.X < 0 || p.X >= Width || p.Y < 0 || p.Y >= Height || screen[p.X][p.Y] != 0;
        squares[i] = p;
    }
    return !overlap;
}
/* #endregion */
這個方法將會檢查是否有消掉行數,並刪除該行
/* #region  檢查並消除整行 */
void ChkDeleteLine()
{
    // 尋訪 screen row
    for (int j = 0; j < Height; ++j) {
        bool Delete = true;
        //
        // 尋訪 screen col,檢整行是否都有積木
        for (int i = 0; i < Width; ++i)
            if (screen[i][j] == 0)
                Delete = false;
        if (Delete) {
            // 增加分數
            score++;
            // 難度升級,下降速度加快
            if (score % UpgradeThreshold == 0) {
                lvl++;
                game_speed = game_speed - SpeedReduction;
                tft.drawString("LVL:" + String(lvl), 167, 8, 1);
            }
            tft.drawString("SCORE:" + String(score), 38, 8, 1);
            // 從下到上更新積木
            for (int k = j; k >= 1; --k) {
                for (int i = 0; i < Width; ++i) {
                    screen[i][k] = screen[i][k - 1];
                }
            }
        }
    }
}
/* #endregion */
最後是 GameOver 方法,遊戲結束時將會呼叫它,它將會把所有積木設為相同顏色以表示遊戲結束。
/* #region  遊戲結束、將所有積木設為統一顏色 */
void GameOver()
{
    // 將所有區塊
    for (int i = 0; i < Width; ++i)
        for (int j = 0; j < Height; ++j)
            if (screen[i][j] != 0)
                screen[i][j] = 4;
    gameover = true;
}
/* #endregion */
經過以上說明,我們已經將整個遊戲程式流程與邏輯都看過一遍了,接著我們將會根據這些資訊嘗試增加可以互相連線競賽的功能,讓這個遊戲能更有趣更好玩,我們明天見。


 iThome鐵人賽