今天來整理一些在手機上的事件操作。
首先最常見的就是觸控螢幕
let can;
function setup() {
	can = createCanvas(windowWidth, windowHeight); //-- windowWidth -> window.innerWidth
	can.id("can1");
	background("lightyellow");
}

let touch_st = 0;
function touchStarted(e) {
	console.log("--touchStarted");
	console.log(e);
	touch_st = 1;
	return false;
}

function touchMoved(e) {
	if(touch_st==1){
	  console.log("--touchMoved");
	  console.log(e);
	  touch_st = 2;
    }
    console.log(e.touches[0]);
	ellipse(mouseX, mouseY, 6, 6);
	return false;
}

function touchEnded(e) {
	console.log("--touchEnded");
	console.log(e);
	touch_st = 0;
	return false;
}
event: TouchEvent
target: canvas#can1.p5Canvas
type: "touchstart"
event: TouchEvent
target: canvas#can1.p5Canvas
type: "touchmove"
event: TouchEvent
target: canvas#can1.p5Canvas
type: "touchend"
取得觸擊滑動的座標
e.touches[0] -> Touch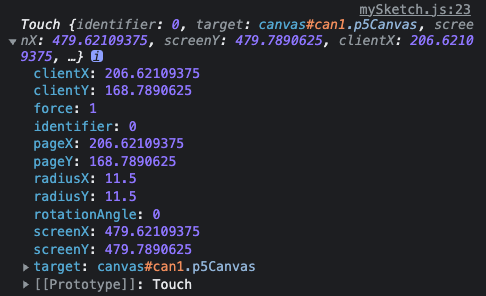
一般的觸擊滑動,有所謂的「點(touchstart),拖(touchmove),放(touchend)」的操作,相當於滑鼠的「點(mousedown),拖(mousemove),放(mouseup)」的操作,以及鍵盤的「點(keydown),放(keyup)」的操作。
這裡有2種常見的操作,
第1種是畫圖,直接取得座標,在Touch的物件中,主要是取得clientX,clientY
function touchMoved(e) {
	if(touch_st==1){
	  console.log("--touchMoved");
	  console.log(e);
	  touch_st = 2;
    }
    console.log(e.touches[0].clientX+", "+e.touches[0].clientY);
	console.log(touches[0].x+", "+touches[0].y);
	ellipse(touches[0].x, touches[0].y, 6, 6);
	return false;
}
這是第1個觸擊點的座標,以DOM Event的方式
e.touches[0].clientX
e.touches[0].clientY
以p5.js的方法則為
touches[0].x
touches[0].y
function touchMoved(e) {
	if(touch_st==1){
	  console.log("--touchMoved");
	  console.log(e);
	  touch_st = 2;
    }

    console.log(e.touches[0].clientX+", "+e.touches[0].clientY);
	console.log(touches[0].x+", "+touches[0].y);
	ellipse(touches[0].x, touches[0].y, 6, 6);
	textSize(32);
	textAlign(LEFT, TOP);

    noStroke();
	fill("lightyellow");
	rect(0, 0, width, 50);

	fill(0);
	text(int(touches[0].x)+", "+int(touches[0].y), 10, 10);
	return false;
}
執行結果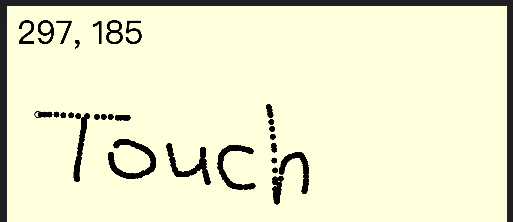
** 在 Safari中,沒有支援 touches,要用 MouseEvent來處理,同時也沒有支援多點觸擊事件。
若是畫線的話,需要暫存前一個觸擊點的座標
let p_touches = [];
function touchMoved(e) {
	if(touch_st==1){
	  p_touches = touches;
	  console.log(p_touches);
	  console.log("--touchMoved");
	  console.log(e);
	  touch_st = 2;
    }

    console.log(e.touches[0].clientX+", "+e.touches[0].clientY);
	console.log(touches[0].x+", "+touches[0].y);
    stroke(0);
	strokeWeight(4);
	line(p_touches[0].x, p_touches[0].y, touches[0].x, touches[0].y);
	p_touches = touches;

	textSize(32);
	textAlign(LEFT, TOP);

    noStroke();
	fill("lightyellow");
	rect(0, 0, width, 50);

	fill(0);
	text(int(touches[0].x)+", "+int(touches[0].y), 10, 10);
	return false;
}
以下是多點觸擊畫線的操作
let touch_st = 0;
function touchStarted(e) {
	console.log("--touchStarted");
	console.log(e);
	touch_st = 1;
	e.preventDefault();
	return false;
}

let p_touches = [];
let p5_touches = [];
function touchMoved(e) {
	if (touch_st == 1) {
		p_touches = e.touches;
		p5_touches = touches;
		console.log(touches);
		console.log("--touchMoved");
		console.log(e);
		touch_st = 2;
	}

	//--- DOM TouchEvent
	let i = 0;
	for (let p of e.touches) {
		let p0x = p_touches[i].clientX;
		let p0y = p_touches[i].clientY;
		let p1x = p.clientX;
		let p1y = p.clientY;
		console.log(p1x+", "+p1y);
		stroke(0);
		strokeWeight(4);
		line(p0x, p0y, p1x, p1y);
		i++;
	}

	//--- p5.js TouchEvent
	let i_p5 = 0;
	for (let p of touches) {
		let p0x = p5_touches[i_p5].x;
		let p0y = p5_touches[i_p5].y;
		let p1x = p.x;
		let p1y = p.y;
		console.log(p1x+", "+p1y);
		stroke(0);
		strokeWeight(4);
		line(p0x, p0y, p1x, p1y);
		i_p5++;
	}

	p_touches = e.touches;
	p5_touches = touches;
	e.preventDefault();
	return false;
}

function touchEnded(e) {
	console.log("--touchEnded");
	console.log(e);
	touch_st = 0;
	e.preventDefault();
	return false;
}
多點觸擊的操作,需要在手機模式下操作,才可以正確讀取到 touches 座標數據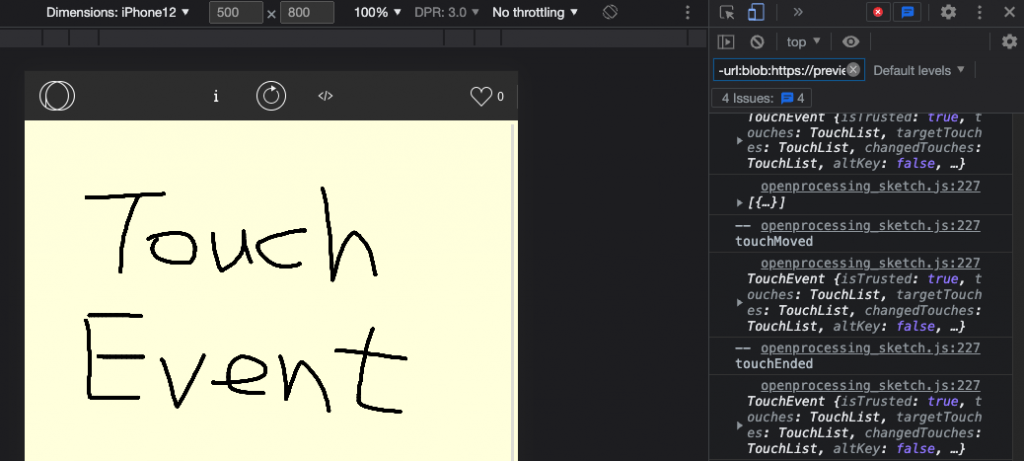
多點觸擊的操作 openprocessing demo
https://openprocessing.org/sketch/1686985
這是在手機上的多點觸擊的操作結果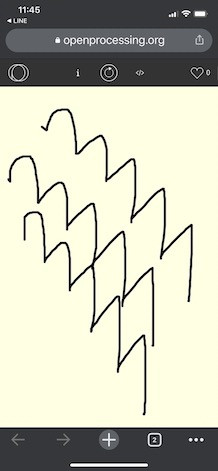
在手機上操作螢幕觸擊時,為了避免在滑動螢幕時,整個canvas被拖動的問題,
有下列2個設定要處理
先將css的設定如下
html, body {
	margin: 0;
	padding: 0;
	width: 100vw;
	height: 100vh;
}
接藉再將canvas的size設定為整個視窗的寬(100% width)x視窗的高(100% height)
windowWidth -> window.innerWidth
windowHeight -> window.innerHeight
let can = createCanvas(windowWidth, windowHeight);

function touchStarted(e) {
	e.preventDefault();
	return false;
}

function touchMoved(e) {
	e.preventDefault();
	return false;
}

function touchEnded(e) {
	e.preventDefault();
	return false;
}
以上利用 function touchMoved(e) 的方式,如果canvas的size不是設定成 windowWidth, windowHeight的話,會造成觸擊點座標值不相同。
以p5.js的方法,會以canvas的原點為基準,顯示正常。
touches[0].x
touches[0].y
以DOM Event的方式,會以body的原點為基準,顯示會有偏差。
e.touches[0].clientX
e.touches[0].clientY
改成以下程式就可以正常顯示了
e.touches[0].clientX-canvas.position().x;
e.touches[0].clientY-canvas.position().y;
程式碼如下
HTML:
<body>
	<div>一般的觸擊滑動,有所謂的「點(touchstart),拖(touchmove),放(touchend)」的操作,相當於滑鼠的「點(mousedown),拖(mousemove),放(mouseup)」的操作,以及鍵盤的「點(keydown),放(keyup)」的操作。</div>
</body>
CSS:
html, body {
	margin: 0;
	padding: 0;
	width: 100vw;
	height: 100vh;
}
JS:
let can;
function setup() {
	//can = createCanvas(windowWidth, windowHeight); //-- windowWidth -> window.innerWidth
	can = createCanvas(300, 300); //-- windowWidth -> window.innerWidth

	can.id("can1");
	background("lightyellow");
}

let touch_st = 0;
function touchStarted(e) {
	console.log("--touchStarted");
	console.log(e);
	touch_st = 1;
	e.preventDefault();
	return false;
}

let p_touches = [];
let p5_touches = [];
function touchMoved(e) {
	if(touch_st==1){
	  p_touches = e.touches;
		p5_touches = touches;
		console.log(touches);
	  console.log("--touchMoved");
	  console.log(e);
	  touch_st = 2;
  }

	//--- DOM TouchEvent
	let i = 0;
	for(let p of e.touches){
		let p0x = p_touches[i].clientX-can.position().x;
		let p0y = p_touches[i].clientY-can.position().y;
		let p1x = p.clientX-can.position().x;
		let p1y = p.clientY-can.position().y;
		console.log(p1x+", "+p1y);
		stroke(0);
	  strokeWeight(4);
	  line(p0x, p0y, p1x, p1y);
		i++;
  }


	//--- p5.js TouchEvent
	let i_p5 = 0;
	for(let p of touches){
		let p0x = p5_touches[i_p5].x;
		let p0y = p5_touches[i_p5].y;
		let p1x = p.x;
		let p1y = p.y;
		console.log(p1x+", "+p1y);
		stroke(0);
	  strokeWeight(4);
	  line(p0x, p0y, p1x, p1y);
		i_p5++;
  }

	p_touches = e.touches;
	p5_touches = touches;
  e.preventDefault();
	return false;
}

function touchEnded(e) {
	console.log("--touchEnded");
	console.log(e);
	touch_st = 0;
	e.preventDefault();
	return false;
}

function draw() {

}
參考資料
Touch events
https://developer.mozilla.org/en-US/docs/Web/API/Touch_events