今天來整理有關資料記錄與儲存的操作
在網頁中有時需要記錄操作的資訊,民眾的輸入,查詢的資料等等,
在p5.js中有提供一些有關儲存等功能,
save(),saveJSON(),saveStrings(),saveTable()
但是這些指令會引發儲存的對話框,主要是要讓使用者將資料存在使用者的電腦中。
現在的需求是要在背景中儲存檔案,一般有2種方式,
一種是利用session或是cookie,另一種是利用PHP儲存檔案。
先來看看PHP的方法
p5.js提供一個記錄的功能 createWriter()
writer.print(mouseX+","+mouseY); //-- 將滑鼠座標存到writer中,並且是一筆一筆儲存
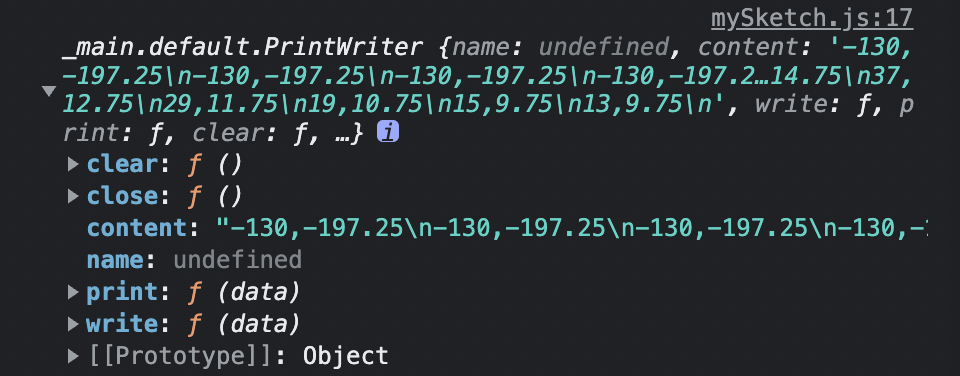
查看writer中的內容 writer.content
建立的物件是 PrintWriter
JS
let writer;
let fname;
function setup() {
	writer = createWriter();
	fname = "word3.txt";
}

function draw(){
  if(mouseIsPressed){
	writer.print(mouseX+","+mouseY); //-- 將滑鼠座標寫入writer中
  }
}

function keyPressed(){
  console.log(writer);
  console.log(writer.content);
  saveTxt(writer.content.trim()); //-- 將資料傳送到PHP網頁
}

function saveTxt(txt){
	let url = "upload_txt.php";
	const xhttp = new XMLHttpRequest();
	xhttp.onload = function() {
		console.log(this.responseText);
		console.log(this.getAllResponseHeaders());
	}
	xhttp.open("POST", url);
	xhttp.setRequestHeader("Content-type", "application/x-www-form-urlencoded");
	xhttp.send("fname="+fname+"&wordx="+txt);
}
writer = createWriter(); 建立writer物件
writer.print(mouseX+","+mouseY); 將資料寫入writer
writer.content.trim() 讀取writer中的內容,並去除多餘的空白字元
使用 XMLHttpRequest() 將資料上傳到 upload_txt.php
PHP (upload_txt.php)
<?php

  $wordx = $_POST["wordx"];
  $fname = $_POST["fname"];
  echo "from php: " . $wordx . "\n";

  if(strlen($wordx)>0){

    if(!file_exists($fname) || filesize($fname)==0){
        //-- 如果檔案不存在或是檔案大小為0,則直接寫入檔案
        $myfile = fopen($fname, "w") or die("Unable to open file!");
        fwrite($myfile, $wordx);
        fclose($myfile);
    } else {
        //-- 如果檔案已存在,則先將檔案讀出,加上新上傳的資料,再寫入檔案
        $myfile = fopen($fname, "r") or die("Unable to open file!");
        $txt = fread($myfile, filesize($fname));
        $txt = $txt . "\n" . $wordx;
        fclose($myfile);

        $myfile = fopen($fname, "w") or die("Unable to open file!");
        fwrite($myfile, $txt);
        fclose($myfile);

        //echo $txt;
    }
  }

?>
利用之前文章的範例,將網路讀取的資料儲存成csv檔
JS
let writer;
let fname;
function setup() {
	writer = createWriter();
	fname = "park_place.csv";

	let url = "https://tcgbusfs.blob.core.windows.net/blobtcmsv/TCMSV_alldesc.json";
	const xhttp = new XMLHttpRequest();
	xhttp.onload = function() {
		console.log(this);
		const json_obj = JSON.parse(this.responseText);
		console.log(json_obj.data.park);
		console.log(this.getAllResponseHeaders());

		let data1 = json_obj.data.park.filter( (x, i) => i<50 );
		console.log(data1);
		for(let x of data1){
			writer.print(x.id+","+x.area+","+x.name);
		}
	}
	xhttp.open("GET", url, true);
	xhttp.send();
}

function keyPressed(){
  console.log(writer);
  console.log(writer.content);
  saveTxt(writer.content.trim());
}

function saveTxt(txt){
	let url = "upload_csv.php";
	const xhttp = new XMLHttpRequest();
	xhttp.onload = function() {
		console.log(this.responseText);
		console.log(this.getAllResponseHeaders());
	}
	xhttp.open("POST", url);
	xhttp.setRequestHeader("Content-type", "application/x-www-form-urlencoded");
	xhttp.send("fname="+fname+"&wordx="+txt+"&start=\uFEFF");
}
其中
json_obj.data.park.filter( (x, i) => i<50 ); //-- 挑選前50筆資料
在傳送資料中多傳送了一個特別的字元 '\uFEFF'
xhttp.send("fname="+fname+"&wordx="+txt+"&start=\uFEFF");
主要是在儲存成csv檔時,若用Excel開啟時,會產生亂碼的狀況,
因此若在檔案開頭加上 '\uFEFF' 就不會有亂碼了。
不過只要在檔案開頭加一次就好了,
因此,特別分開上傳這個字元,要交由PHP判斷如果是新建立檔案,再在檔案開頭加上 '\uFEFF'
PHP (upload_csv.php)
<?php

  $wordx = $_POST["wordx"];
  $fname = $_POST["fname"];
  $start = $_POST["start"];  //--  當作csv檔案開頭字元
  echo "from php: " . $wordx . "\n";

  if(strlen($wordx)>0){

    if(!file_exists($fname) || filesize($fname)==0){
        $myfile = fopen($fname, "w") or die("Unable to open file!");
        $wordx = $start.$wordx;  //-- 如果是新建立檔案,就在檔案開頭加上 '\uFEFF'
        fwrite($myfile, $wordx);
        fclose($myfile);
    } else {
        $myfile = fopen($fname, "a") or die("Unable to open file!");
        fwrite($myfile, "\n".$wordx);
        fclose($myfile);
    }
  }

?>
其中
fopen($fname, "a") : "a"的參數是指直接加在檔案的結尾,不過加入前要先加上一個換行符號 "\n"
fopen($fname, "r") : "r"的參數是指讀取檔案內容
fopen($fname, "w") : "w"的參數是指重新寫入檔案中,因此如果原本檔案有資料的話會被清除掉
JS
let writer;
let fname;
function setup() {
	writer = createWriter();
	fname = "park_place.json";

	let url = "https://tcgbusfs.blob.core.windows.net/blobtcmsv/TCMSV_alldesc.json";
	const xhttp = new XMLHttpRequest();
	xhttp.onload = function() {
		console.log(this);
		const json_obj = JSON.parse(this.responseText);
		console.log(json_obj.data.park);
		console.log(this.getAllResponseHeaders());

		let data1 = json_obj.data.park.filter( (x, i) => i<30 );
		writer.print(JSON.stringify(data1));
	}
	xhttp.open("GET", url, true);
	xhttp.send();
}

function keyPressed(){
  console.log(writer);
  console.log(writer.content);
  saveTxt(writer.content.trim());
}

function saveTxt(txt){
	let url = "upload_json.php";
	const xhttp = new XMLHttpRequest();
	xhttp.onload = function() {
		console.log(this.responseText);
		console.log(this.getAllResponseHeaders());
	}
	xhttp.open("POST", url);
	xhttp.setRequestHeader("Content-type", "application/x-www-form-urlencoded");
	xhttp.send("fname="+fname+"&wordx="+txt+"&start=\uFEFF");
}
其中
let data1 = json_obj.data.park.filter( (x, i) => i<30 );
writer.print(JSON.stringify(data1));  //-- 將json物件或陣列「字串化」再上傳到PHP
PHP (upload_json.php)
<?php
  $wordx = $_POST["wordx"];
  $fname = $_POST["fname"];
  echo "from php: " . $wordx . "\n";

  if(strlen($wordx)>0){
    $myfile = fopen($fname, "w") or die("Unable to open file!");
    fwrite($myfile, $wordx);
    fclose($myfile);
  }

?>
參考資料
PHP Filesystem Functions
https://www.w3schools.com/php/php_ref_filesystem.asp
fopen
https://www.php.net/manual/zh/function.fopen