今天要分享 Element-plus 應用篇,主要先介紹 icon 引入,之後進入最重要的格線系統、最常使用的 flex 排版以及專案中常見的彈窗,準備好就來開始吧!
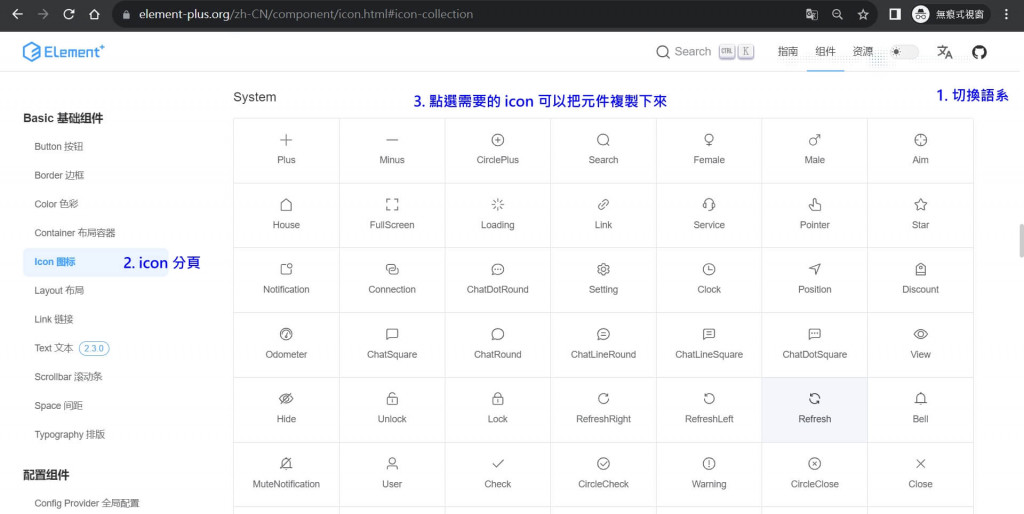
文件中提及:如果你想像用例一樣直接使用,你需要全局註冊組件,才能夠直接在項目裡使用。
本來以為是騙人的,我偏要用按需引入,試過結果沒有成功,最後只能乖乖用全局註冊組件,以下就是相關步驟:
npm install @element-plus/icons-vue
import './assets/all.scss'

import { createApp } from 'vue'
import { createPinia } from 'pinia'

import App from './App.vue'
import router from './router'

//注册所有图标:: 从 @element-plus/icons-vue 中导入所有图标并进行全局注册
import * as ElementPlusIconsVue from '@element-plus/icons-vue'

const app = createApp(App)

app.use(createPinia())
app.use(router)

//注册组件
for (const [key, component] of Object.entries(ElementPlusIconsVue)) {
    app.component(key, component)
}

app.mount('#app')
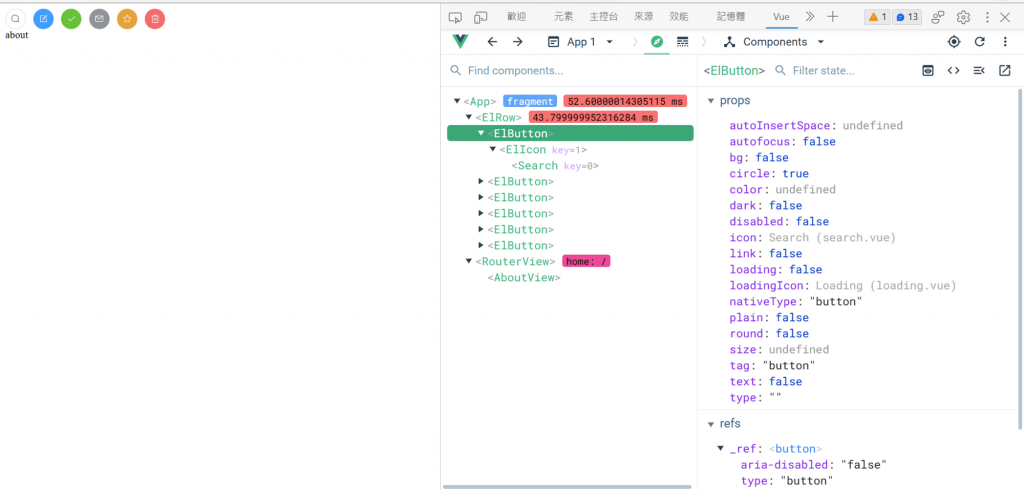
<script setup>
import { RouterView } from 'vue-router'
import { Check, Delete, Edit, Message, Search, Star } from '@element-plus/icons-vue'
</script>

<template>
  <header>
    <div class="wrapper">
      <el-row>
        <el-button :icon="Search" circle />
        <el-button type="primary" :icon="Edit" circle />
        <el-button type="success" :icon="Check" circle />
        <el-button type="info" :icon="Message" circle />
        <el-button type="warning" :icon="Star" circle />
        <el-button type="danger" :icon="Delete" circle />
      </el-row>
    </div>
  </header>

  <RouterView />
</template>
Element-plus 和 Bootstrap 的格線系統宗旨是一樣的,都有響應式,以下是 Element-plus 中實現彈性佈局的主要工具和元件: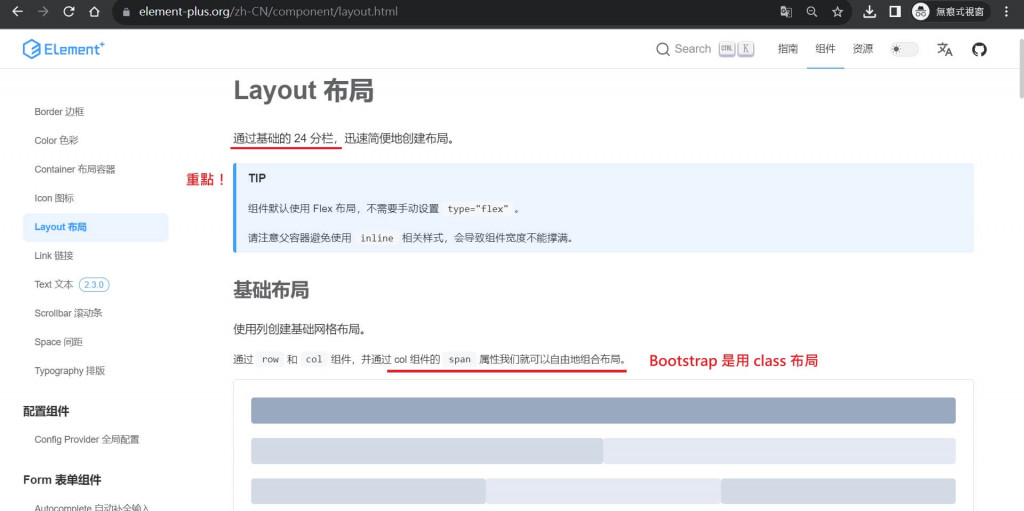
以下是 Element-plus 格線系統的雙核心元件:
<el-row> 用於包裝一組列<el-col> 用於定義每個列的內容和寬度重點一:順序
<el-row>→<el-col>。
重點二:運用格線系統<el-row>時,外層如果需要固定寬度需要自己用 scss 設定。
重點三:Element-plus 設計 24 欄位,所以在規劃的時候,<el-col :span="數字">的數字相加等於 24,超過就會換行。
重點四:使用格線系統後<el-col :span="數字">不用給寬度,盡量不要在 x 方向用 padding/ margin 調整避免換行。
重點五:Element-plus 提供了四個預設斷點,分別是小型設備(sm)、中型設備(md)、大型設備(lg)和超大型設備(xl),可以使用不同的屬性來指定在不同斷點下的佈局。
<template>
  <el-row>
    <el-col :span="12">
       <div class="grid-content ep-bg-purple" />
    </el-col>
    <el-col :span="12">
       <div class="grid-content ep-bg-purple-light" />
    </el-col>
  </el-row>
</template>
介紹完 Element-plus 的格線系統有沒有一種看似跟 Bootstrap 一樣,但是還是會有些不一樣的感覺...
基本布局:
| 項目 | Bootstrap | Element-plus |
|---|---|---|
| 佈局規劃 | 使用 class 布局 | 使用元件布局 |
| 佈局欄數 | 12 | 24 |
| 格線系統 | .container → .row → .col |
<el-row> → <el-col> |
| 程式碼 |  |
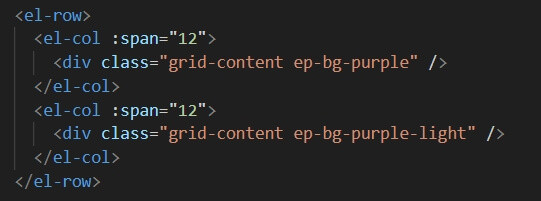 |
斷點
| Name | Bootstrap | Element-plus |
|---|---|---|
| xs | #N/A | <768px |
| sm | ≥576px |
≥768px |
| md | ≥768px |
≥992px |
| lg | ≥992px |
≥1200px |
| xl | ≥1200px |
≥1920px |
| xxl | ≥1400px |
#N/A |
說到排版,Element-plus 也有 flex 唷!
原理其實跟手刻的 css 是一樣的,只是顯示不一樣,這裡一樣先附上文件。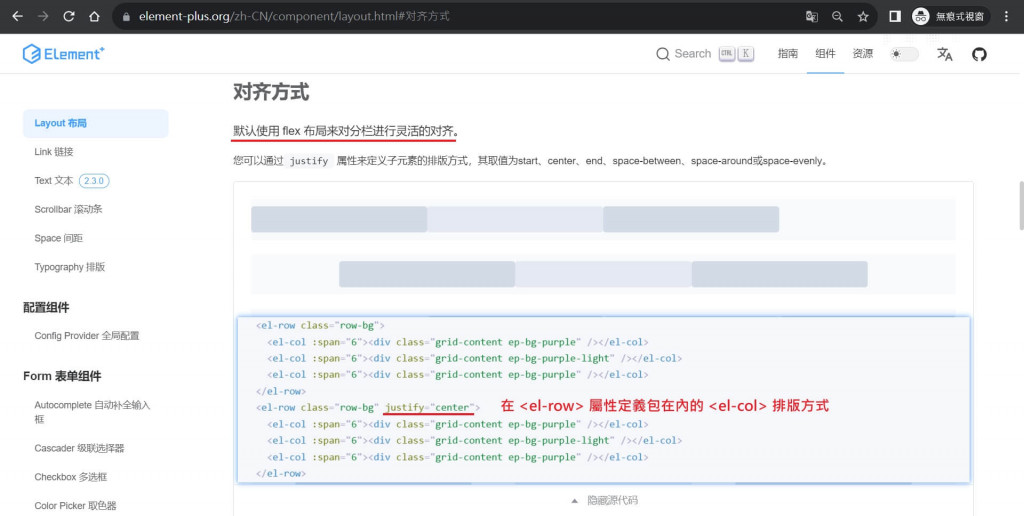
就像上圖說的一樣,Element-plus 的 flex 主要是靠屬性做對齊,詳細內容如下: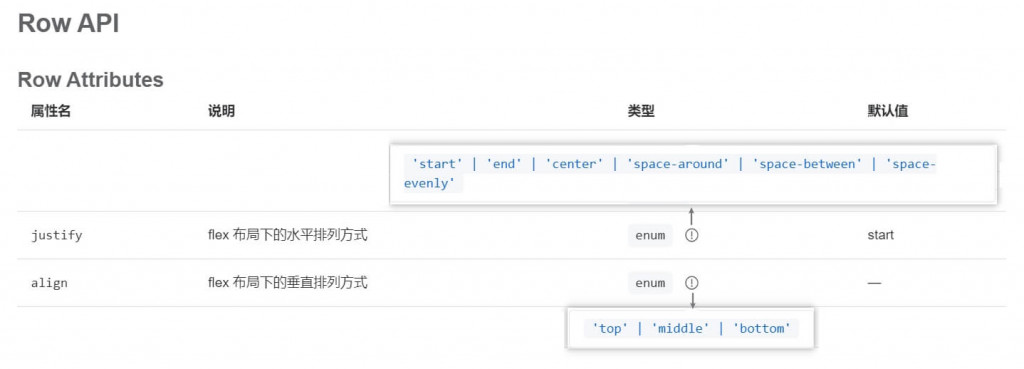
看完後有沒有感覺跟 Bootstrap 很像都一樣,真的只是顯示不一樣,以下以水平往兩邊排列和垂直置中比較一下:
| css | Bootstrap | Element-plus |
|---|---|---|
justify-content: space-between; |
<div class="d-flex justify-content-between">...</div> |
<el-row class="row-bg" justify="space-between">...</el-row> |
align-items: center; |
<div class="d-flex align-items-center">...</div> |
<el-row align="middle">...</el-row> |
Element-plus 的彈窗叫做 Dialog 對話窗,名字不一樣,用法也跟 Bootstrap 不太一樣,這邊用官網的範例說明使用方法:
首先在 <template> 中設置一個按鈕 <el-button>,當點擊觸發 click 事件並設置 dialogVisible 變數的值為 true 來顯示彈窗。
<template>
  <el-button type="primary" round plain @click="dialogVisible = true">
    click to open the Dialog
  </el-button>
</template>

<script setup>
import { ref } from 'vue'

const dialogVisible = ref(false)
</script>
安裝組件:v-model="dialogVisible" 將彈窗的可見性綁定到 dialogVisible 變數,控制彈窗的顯示和隱藏;另外,:before-close="handleClose" 設置了一個彈窗關閉前的處理函數 handleClose,用於確認是否要關閉彈窗。
<template>
  <el-button type="primary" round plain @click="dialogVisible = true">
    click to open the Dialog
  </el-button>

  <el-dialog
    v-model="dialogVisible"
    title="我是一個彈窗"
    width="30%"
    :before-close="handleClose"
  >
  <span>彈窗的身體</span>
  <template #footer>
    <span class="dialog-footer">
     <el-button @click="dialogVisible = false">關閉</el-button>
     <el-button type="primary" @click="dialogVisible = false">
       好,我知道了!
     </el-button>
    </span>
  </template>
  </el-dialog>
</template>

<script setup>
import { ref } from 'vue'

const dialogVisible = ref(false)
const handleClose = async () => {
 try {
   await ElMessageBox.confirm('你真的要關閉彈窗 dialog?');
   dialogVisible.value = false;
 } catch (error) {
   console.error(error);
 }
}
</script>
畫面展示: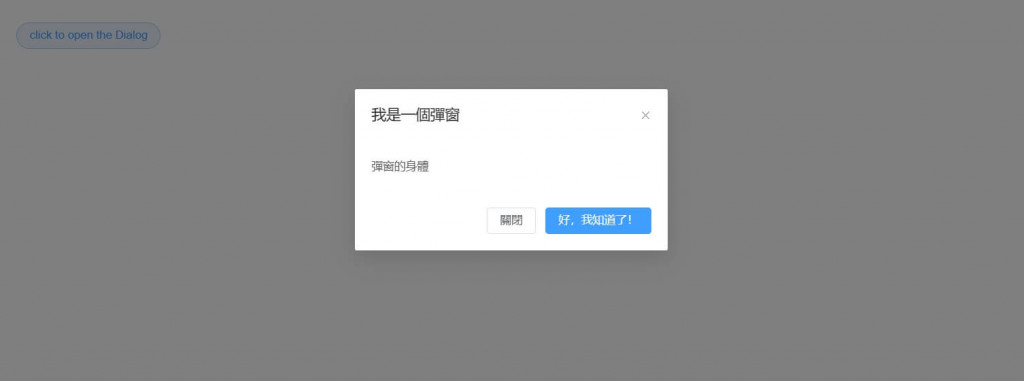
Element-plus 真的很漂亮,只是應用上需要比較多時間去摸索,加上需要加載的項目較多,所以優缺各半就看個人取捨,就像我會嫌棄她沒有 padding/ margin 的 class 可以用,但是當專案要求使用 Element-plus,此時就會去 Bootstrap 的變數表複製一份 scss 再引入 all.scss ,所以方法很多就看如何使用!
篇幅有點長,謝謝各位觀看!晚安!
