原本打算這篇直接部署個應用,但突然發現有 dashbaord 這東西!新手看圖形化介面應該會比較有感,不像 terminal 只有文字 🤣
因此今天就先建立一個 Pod & 利用 port-forwarding acccess, 然後再建個 dashboard 吧!
先來建立第一個 Pod 吧!
使用 kubectl 建立 kubernetes objects 有兩種方式:Imperative & Declarative
Imperative method 是利用指令描述 kubernetes resource,例如建立一個 pod,名字為 nginx-pod,裡面跑 nginx
kubectl run nginx-pod --image=nginx
如果成功,會看到 terminal 顯示 pod/<pod-name> created
利用 kubectl get pods 可以列出 default namespace 中的 pod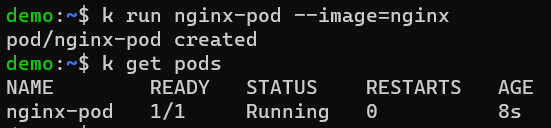
詳細指令及各種 options 可參考官方文件 → https://kubernetes.io/docs/reference/generated/kubectl/kubectl-commands#run
好處呢就是能夠一行指令建立 object,但很多設定會用 flag / option 去指定,只下指令在維護上較麻煩,更改也不好更改。因此通常會使用 declarative 的方式建立 object。
Declarative method 則是指利用檔案來描述資源的設定,一般會用 YAML 檔來建立 kubernetes objects。寫好 yaml 檔後可利用 kubectl apply -f <filename> 來建立資源。
(也可使用 kubectl create -f <filename> ,但利用 create 的方式建立資源是一次性的,無法更新 yaml 檔後更新到現有的資源。可參考 https://blog.miniasp.com/post/2022/10/24/Kubernetes-101-diff-between-kubectl-create-and-kubectl-apply )
yaml 檔要寫什麼呢? 建立 kubernetes objects 的 yaml file 有一定的格式,例如:
# pod.yaml
apiVersion: v1
kind: Pod
metadata:
  name: nginx-pod-yaml
spec:
  containers:
  - name: nginx
    image: nginx
超爆簡易的 yaml,有四個 fields: apiVersion , kind , metadata , spec
apiVersion : 定義是 kubernetes API 的哪個版本,以建立 kubernetes object,這邊 v1 是 Core API Group。不同的 object 會用不同的 API 建立,以另一種 object - Deployment 來說,使用的就是 apps/v1 才能建立,這代表 apps 這個 API group 的 v1 version。
API groups & versioning 規則可看這邊 → https://kubernetes.io/docs/concepts/overview/kubernetes-api/#api-groups-and-versioning
一些例子 → https://kubernetes.io/docs/reference/using-api/api-concepts/#resource-uris
API Overview,有各個資源使用的 API Group & Version 以及 yaml config example → https://kubernetes.io/docs/reference/generated/kubernetes-api/v1.28/
kind : 要建立的資源名稱
metadata : 幫助辨識這個 object 的 data,包括 name, labels , namespace , namespace 如果沒有指定就會是預設的 namespace,通常會是 default。namespace 是 k8s 用來隔離資源的一個概念。
spec : 設定檔中最重要的部分,可以想成是對這個 Object 的設定。以 Pod 來說 containers 為 required field,一個 Pod 裡面一定會跑至少一個 container,需定義要用哪個 image 以及 container name。其他還可以定義這個 container 需要多少 resource (cpu & memory)、要 expose 哪個 containerPort、設 env …
關於各個 Object spec 有什麼哪些是必要的可以看這邊 → https://kubernetes.io/docs/reference/kubernetes-api/workload-resources/pod-v1/
另外也可以使用 JSON 來寫 configuration,相較之下 YAML 還是稍微好寫一些些。如果用 VScode 可用 Prettier 幫排版。
{
  "apiVersion": "v1",
  "kind": "Pod",
  "metadata": {
    "name": "nginx-pod-json"
  },
  "spec": {
    "containers": [
      {
        "name": "nginx",
        "image": "nginx"
      }
    ]
  }
}
結果 -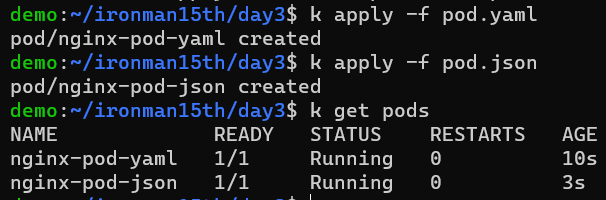
剛剛使用的指令 kubectl get pods or kubectl apply -f pod.yaml 即是透過 kubectl 跟 control plane 溝通來操作 k8s cluster objects
概念如下
kubectl [command] [TYPE] [NAME] [flags]
=對什麼東西做什麼事
例如要刪除當前 namespace 中名字是 nginx-pod-yaml 的 pod
kubectl delete pod nginx-pod-yaml
常用的一些指令
# list objects
kubectl get services # list all services in the current namespace (defined in config file or default)
kubectl get pods -A # list all pods in all namespace, -A = --all-namespaces
kubectl get pods -o wide # list all pods in the current namespace, with more details
kubectl get nodes -o wide # list all nodes with more details

# describe - view the details
kubectl describe pods my-pod
kubectl describe service mysql-service -n app # view the details of mysql-service service in app namespace

# delete
kubectl delete pod,service baz foo # delete pods and services with same names "baz" and "foo"

# view logs of pod
kubectl logs <pod name>
常用的指令可以看這篇 → https://kubernetes.io/docs/reference/kubectl/cheatsheet/
kubectl 介紹 → https://kubernetes.io/docs/reference/kubectl/
kubectl commands: 不曉得什麼指令有哪些 commands & 如何用就來這裡翻 → https://kubernetes.io/docs/reference/generated/kubectl/kubectl-commands
因 Pod 是在 k8s cluster 的內部網路,外部是無法訪問的。如果要讓外面的流量可以到達 Pod 可以利用一些方式,這邊先使用 port-forward 的方式讓主機能夠訪問 Pod 。但一般的作法會是建立 Service 這個 kubernetes object,Service 會是將流量導入 Pod 的接口,後續會再介紹。
kubectl port-forward nginx-pod-yaml 5000:80
這裡是將 host port (5000) 映射到 pod 80 port,因 nginx EXPOSE 80 port (可看dockerfile)
在瀏覽器輸入 localhost:5000 就能看到 nginx welcom page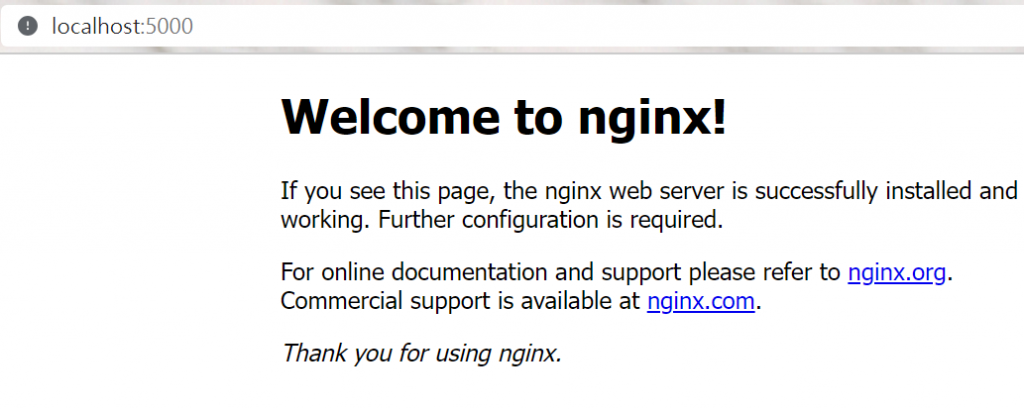
也可以嘗試進入不存在的頁面,會看到 404 page
這時我們再用 kubectl logs nginx-pod-yaml 來看 log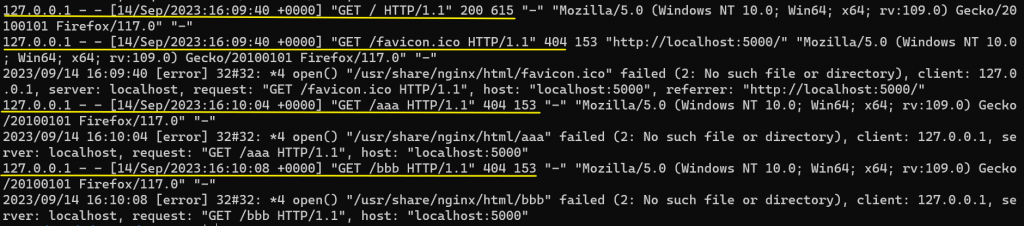
第一筆是成功的訪問 localhost:5000
第二筆是瀏覽器自動去找 favicon.ico,但找不到因此得到 404
第三筆及第四筆是我嘗試訪問 /aaa & /bbb 但它們都沒有定義在 nginx-pod-yaml 這個 pod 中,因此也是找不到
最後建個 dashboard 出來吧。
參考官網文件 - https://kubernetes.io/docs/tasks/access-application-cluster/web-ui-dashboard/
Dashboard 並非預設裝好的,透過以下方式啟用:
kubectl apply -f https://raw.githubusercontent.com/kubernetes/dashboard/v2.7.0/aio/deploy/recommended.yaml
Dashboard 預設沒有權限是沒辦法看的,這邊我們需建立一個 sample user。
在 kubernetes 中 RBAC 的執行是透過 Service Account / Role / Role Binding / Cluster Role / Cluster Role Binding 來實現的。以下簡述 kubernetes 如何實現 RBAC -
不過現在我們透過網頁想要訪問 Dashboard,k8s cluster 怎麼知道你是誰呢?
因此還需要產生 bearer token 來登入。
步驟參考這裡 → https://github.com/kubernetes/dashboard/blob/master/docs/user/access-control/creating-sample-user.md
apiVersion: v1
kind: ServiceAccount
metadata:
  name: admin-user
  namespace: kubernetes-dashboard
cluster-admin ClusterRole,通常這個 cluster role 在建立 cluster 時就會建立好,所以這邊直接綁定 cluster-admin 跟我們剛才建立的 Service Account admin-user
apiVersion: rbac.authorization.k8s.io/v1
kind: ClusterRoleBinding
metadata:
  name: admin-user
roleRef:
  apiGroup: rbac.authorization.k8s.io
  kind: ClusterRole
  name: cluster-admin
subjects:
	- kind: ServiceAccount
	  name: admin-user
	  namespace: kubernetes-dashboard
kubectl -n kubernetes-dashboard create token admin-user
啟動代理伺服器讓本機能夠 Access Kubernetes API
kubectl proxy
這邊 port 預設是 8081
指令文件: https://kubernetes.io/docs/reference/generated/kubectl/kubectl-commands#proxy
接下來就可以透過 http://localhost:8001/api/v1/namespaces/kubernetes-dashboard/services/https:kubernetes-dashboard:/proxy/ 訪問 Dashboard
貼上剛才的 Token

成功看到 Dashboard 啦
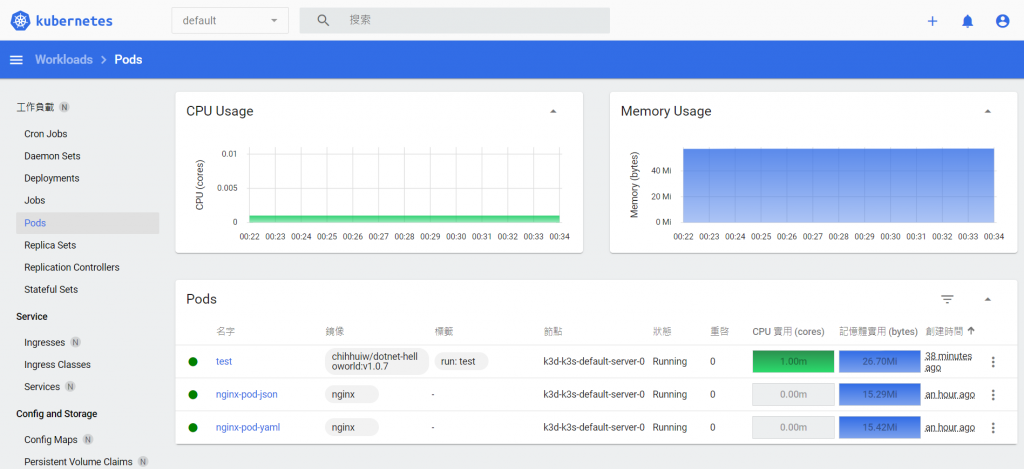
可以看到現在 default 這個 namespace (上方搜索欄左邊可選 namespace) 中,3 個 Pod 的狀態是 Running 以及 CPU & Memory 使用狀況。
排版好像有些悲劇。明天再來 Run App


 iThome鐵人賽