前言
這裡我要介紹EditText監聽器使用方法,功能如下當入輸入文字時可以看到文字會跟著變化,並且上方文字計數也會跟著被激活,等等我就會先介紹幾個函式給大家認識,好了上程式碼(code)。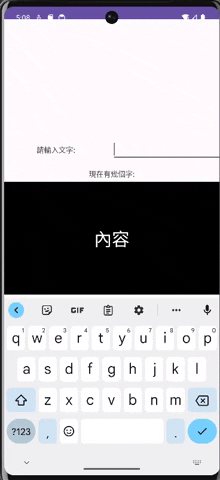
<?xml version="1.0" encoding="utf-8"?>
<androidx.constraintlayout.widget.ConstraintLayout xmlns:android="http://schemas.android.com/apk/res/android"
    xmlns:app="http://schemas.android.com/apk/res-auto"
    xmlns:tools="http://schemas.android.com/tools"
    android:layout_width="match_parent"
    android:layout_height="match_parent"
    tools:context=".MainActivity">

    <LinearLayout
        android:layout_width="420dp"
        android:layout_height="306dp"
        android:layout_marginTop="200dp"
        android:orientation="vertical"
        app:layout_constraintEnd_toEndOf="parent"
        app:layout_constraintHorizontal_bias="0.555"
        app:layout_constraintStart_toStartOf="parent"
        app:layout_constraintTop_toTopOf="parent">

        <LinearLayout
            android:layout_width="match_parent"
            android:layout_height="0dp"
            android:layout_weight="2"
            android:orientation="horizontal">

            <TextView
                android:id="@+id/textview1"
                android:layout_width="0dp"
                android:layout_height="match_parent"
                android:layout_weight="1"
                android:gravity="center"
                android:text="請輸入文字:
" />

            <EditText
                android:id="@+id/editTextText"
                android:layout_width="0dp"
                android:layout_height="wrap_content"
                android:layout_weight="1"
                android:ems="10"
                android:inputType="text" />

        </LinearLayout>

        <TextView
            android:id="@+id/textview3"
            android:layout_width="match_parent"
            android:layout_height="0dp"
            android:layout_weight="1"
            android:gravity="center"
            android:text="現在有幾個字:" />

        <TextView
            android:id="@+id/textView2"
            android:layout_width="match_parent"
            android:layout_height="0dp"
            android:layout_weight="7"
            android:gravity="center"
            android:background="@color/black"
            android:text="內容"
            android:textColor="@color/white"
            android:textSize="34sp" />
    </LinearLayout>

</androidx.constraintlayout.widget.ConstraintLayout>
package com.example.edittext_listener;

import androidx.appcompat.app.AppCompatActivity;

import android.os.Bundle;
import android.text.Editable;
import android.text.TextWatcher;
import android.util.Log;
import android.widget.EditText;
import android.widget.TextView;

public class MainActivity extends AppCompatActivity {
    private TextView textView;
    private TextView count_textView;
    private EditText editText;

    @Override
    protected void onCreate(Bundle savedInstanceState) {
        super.onCreate(savedInstanceState);
        setContentView(R.layout.activity_main);
        ById();//綁定元件
        EditTextListener();//EditText的監聽器
    }

    //綁定元件
    public void ById(){
        textView = findViewById(R.id.textView2);
        editText = findViewById(R.id.editTextText);
        count_textView = findViewById(R.id.textview3);
    }
    //EditText的監聽器
    public void EditTextListener(){
        editText.addTextChangedListener(new TextWatcher() {

            //數據變化前
            @Override
            public void beforeTextChanged(CharSequence charSequence, int i, int i1, int i2) {

            }
            //數據變化時
            @Override
            public void onTextChanged(CharSequence charSequence, int i, int i1, int i2) {
                textView.setText(editText.getText());
                count_textView.setText("現在字數是:" + Integer.toString(i+i2));
                Log.d("i",Integer.toString(i));
                Log.d("i1",Integer.toString(i1));
                Log.d("i2",Integer.toString(i2));
            }
            //數據變化後
            @Override
            public void afterTextChanged(Editable editable) {

            }
        });
    }
}
解說
在Android Studio中,可以使用EditText控件来获取用户输入的文本。为了监听用户在EditText中的输入变化,您可以使用TextWatcher接口提供的回调方法。以下是常用的EditText监听函数以及它们的介绍:
editText.addTextChangedListener(new TextWatcher() {
    @Override
    public void beforeTextChanged(CharSequence charSequence, int i, int i1, int i2) {
        // 在文字變化前呼叫
    }

    @Override
    public void onTextChanged(CharSequence charSequence, int i, int i1, int i2) {
        // 在文字變化時呼叫
    }

    @Override
    public void afterTextChanged(Editable editable) {
        // 在文字變化後呼叫
    }
});
editText.setOnEditorActionListener(new TextView.OnEditorActionListener() {
    @Override
    public boolean onEditorAction(TextView textView, int actionId, KeyEvent keyEvent) {
        if (actionId == EditorInfo.IME_ACTION_DONE) {
            // 在使用者完成輸入時呼叫
            return true; // 返回true表示已處理事件
        }
        return false;
    }
});
結語
通過這些監聽函式,您可以在使用者輸入文字時捕捉並處理相應的事件,從而實現對使用者輸入的即時監控和回應。在處理這些事件時,您可以根據需要執行各種操作,比如更新UI、校驗輸入、觸發搜索等。