本篇章會教你們怎麼使用Button和EditText的用法,這裡我們會用到四個元件,一個是EditText(文字輸入框),另一個上傳資料的(Button)按鈕,兩個TextView。
功能介紹
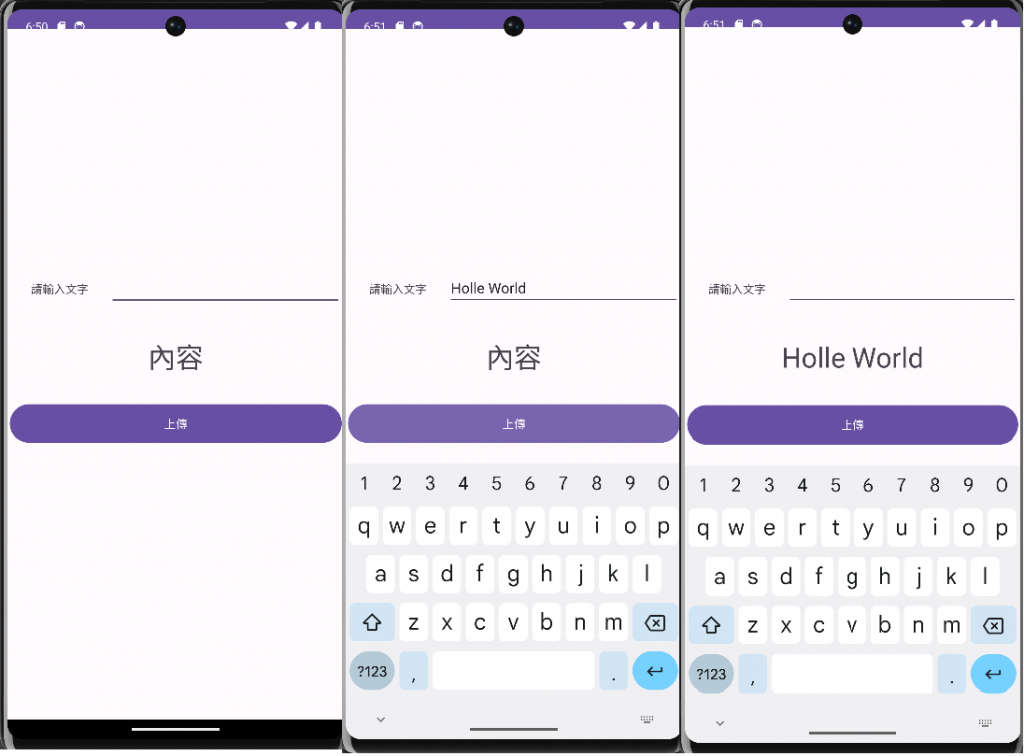
我們會做出一個輸入文字後按下確認的上傳按紐,會將文字上傳到負責內容部分TextView,變成我們剛剛輸入的文字並清除輸入框內部的文字。
我的UI介面Code
<?xml version="1.0" encoding="utf-8"?>
<androidx.constraintlayout.widget.ConstraintLayout xmlns:android="http://schemas.android.com/apk/res/android"
    xmlns:app="http://schemas.android.com/apk/res-auto"
    xmlns:tools="http://schemas.android.com/tools"
    android:layout_width="match_parent"
    android:layout_height="match_parent"
    tools:context=".MainActivity">

    <LinearLayout
        android:layout_width="406dp"
        android:layout_height="220dp"
        android:layout_marginTop="272dp"
        android:orientation="vertical"
        app:layout_constraintEnd_toEndOf="parent"
        app:layout_constraintStart_toStartOf="parent"
        app:layout_constraintTop_toTopOf="parent">

        <LinearLayout
            android:layout_width="match_parent"
            android:layout_height="0dp"
            android:layout_weight="2.5"
            android:orientation="horizontal"
            tools:layout_editor_absoluteX="-3dp"
            tools:layout_editor_absoluteY="81dp">

            <TextView
                android:layout_width="0dp"
                android:layout_height="match_parent"
                android:layout_weight="3"
                android:gravity="center"
                android:text="請輸入文字" />

            <EditText
                android:id="@+id/editTextText"
                android:layout_width="0dp"
                android:layout_height="wrap_content"
                android:layout_weight="7"
                android:ems="10"
                android:inputType="text" />
        </LinearLayout>

        <TextView
            android:id="@+id/textView"
            android:layout_width="match_parent"
            android:layout_height="0dp"
            android:layout_weight="5"
            android:gravity="center"
            android:text="內容"
            android:textSize="34sp" />

        <Button
            android:id="@+id/button"
            android:layout_width="match_parent"
            android:layout_height="0dp"
            android:layout_weight="2.5"
            android:text="Button" />
    </LinearLayout>

</androidx.constraintlayout.widget.ConstraintLayout>
MainCode
package com.example.buttonandedittext;

import androidx.appcompat.app.AppCompatActivity;

import android.os.Bundle;
import android.view.View;
import android.widget.Button;
import android.widget.EditText;
import android.widget.TextView;

public class MainActivity extends AppCompatActivity {
    //宣告變數
    private Button update_Button;
    private TextView data_textView;
    private EditText editTextText;
    @Override
    protected void onCreate(Bundle savedInstanceState) {
        super.onCreate(savedInstanceState);
        setContentView(R.layout.activity_main);
        //MainCode
        ById();//綁定元件
        UpdateData();//上傳資料到TextView
    }


    //綁定元件
    public void ById(){
        update_Button = findViewById(R.id.button);
        data_textView = findViewById(R.id.textView);
        editTextText = findViewById(R.id.editTextText);
    }

    //上傳資料到TextView
    public void UpdateData(){
        update_Button.setOnClickListener(new View.OnClickListener() {
            @Override
            public void onClick(View view) {
                String str = String.valueOf(editTextText.getText());//拿取EditText字串
                editTextText.setText(""); //清除輸入框的資料
                data_textView.setText(str);//設定文字到TextView
            }
        });
    }
}
在這裡用到了EditText內部常用到的方法(function)
結言
介紹了這一些功能後不曉得我的文章還可不可以,到這邊小弟我下次會在介紹EditText的監聽器使用方法給大家