今天要介紹怎麼從氣象局抓取Api以及如何抓取資料,其實也不只有天氣的Api可以使用,網路上還有很多的Open Api可以抓取,例如網路上也有旅遊相關的Api、公車相關的Api,由於這次的內容較多,本篇會從介紹怎麼申請Api到布局跟接取資料的設定,下一篇會介紹程式比較重要的部分。
首先要先註冊會員拿取金鑰,之後才可以成功抓取資料
點我註冊
點選登入/註冊
有兩種方式登入
以上兩種方法就自行判斷要使用哪個囉~
接著點選取得授權碼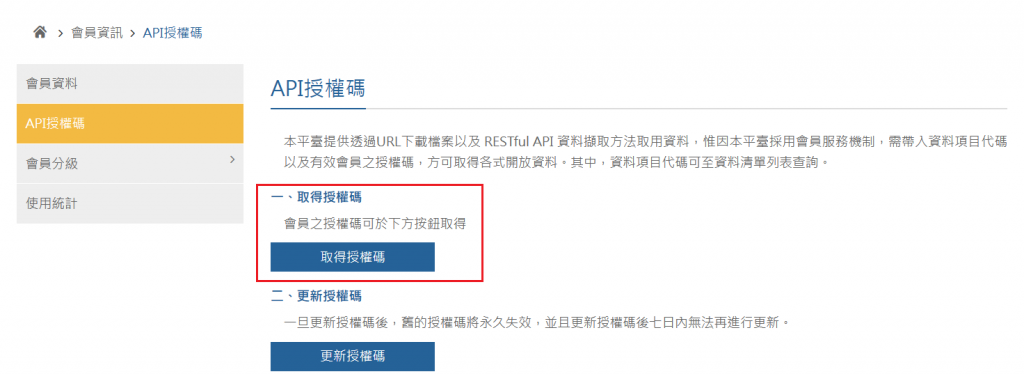
之後如果忘記自己的金鑰也是一樣點這個,除非你想要換一個金鑰才會用到下面的。
後面紅色框的就是你的金鑰,這個可以先記起來等一下會用到
氣象局的Open Api
這次會用到的是下面這個
將它點開後,再按右邊的try out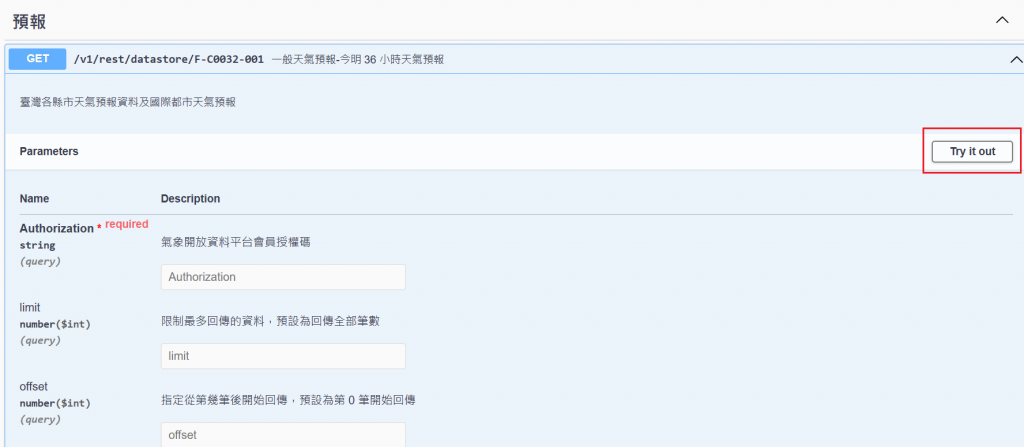
接下來就可以把剛剛拿到的金鑰填到Authorization 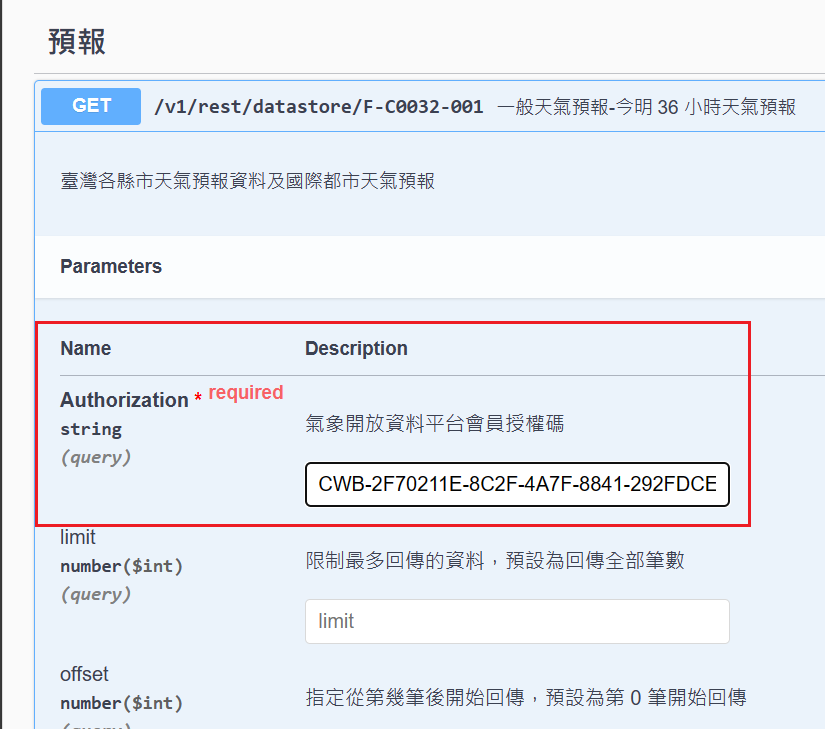
這次使用的天氣Api除了有金鑰這個參數要填入,還有另外兩個locationName、elementName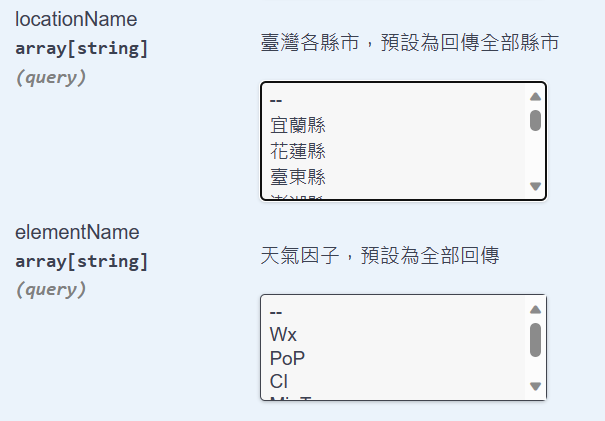
這次的設計就如上一篇提到的會使用一樣的模板去更改,所以這兩個參數就會分別寫在Spinner,用選取的方式抓取想要的資料。
接著往下看到這裡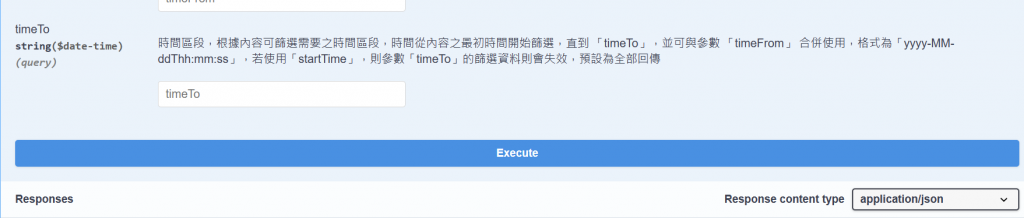
按下Execute就會跳出這個Api的網址跟Api的資料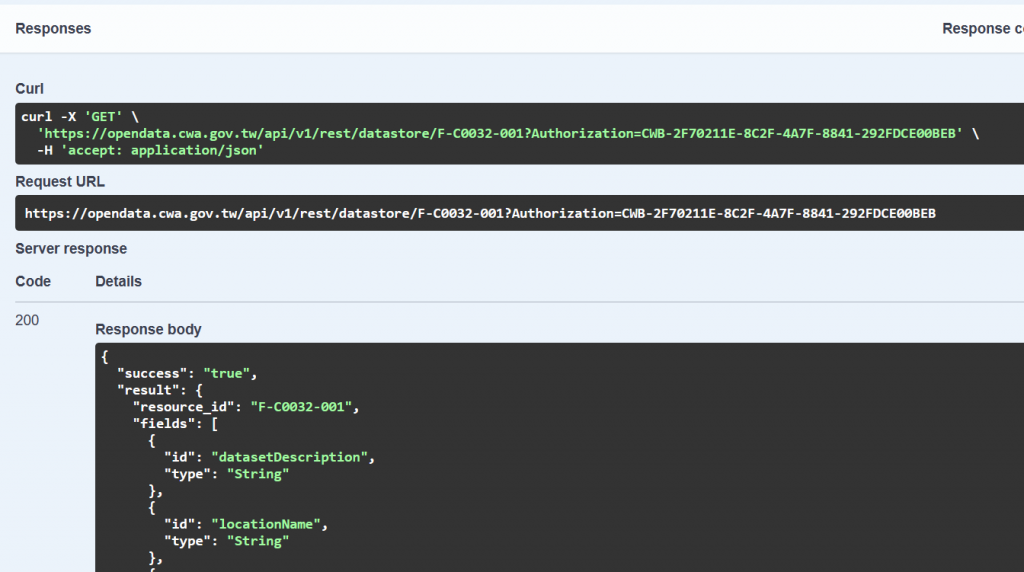
Request URL就是這次實作會用到的網址,Response body則是這次的api資料
可以往下看到records,在這個分類下的資料就是我們這次實作的重點,這邊稍微講解一下會用到的資料:
"records": {
    "datasetDescription": "三十六小時天氣預報",
    "location": [
      {
        "locationName": "嘉義縣",
        "weatherElement": [
          {
            "elementName": "Wx",
            "time": [
              {
                "startTime": "2023-09-16 18:00:00",
                "endTime": "2023-09-17 06:00:00",
                "parameter": {
                  "parameterName": "多雲",
                  "parameterValue": "4"
                }
              },
這次會用到的資料包在records下,可以看到datasetDescription寫著三十六小時天氣預報,從這裡就可以看到這次使用的Api資料的名字
往下看到 location > locationName > weatherElement > elementName > time,看到這邊就大概可以了解這次Api資料的架構:
所有的資料是包在records底下,接著所有地名包在location下,也就是這之後的資料會因為locationName這個參數而不同,接著看到weatherElement,一樣所有的有關這個地名的資料會包在這裡,再來又因應elementName這個參數的不同而抓取不同的資料,最後的time,則是在不同時間下有不同的資料,總共分成三筆資料,每筆資料以12小時間隔,所以可以看到第一筆資料是當天的晚上六點到隔天的早上六點,後面的資料就接著下去。
這邊統整一下Response要寫的資料名稱
<?xml version="1.0" encoding="utf-8"?>
<androidx.constraintlayout.widget.ConstraintLayout xmlns:android="http://schemas.android.com/apk/res/android"
    xmlns:app="http://schemas.android.com/apk/res-auto"
    xmlns:tools="http://schemas.android.com/tools"
    android:layout_width="match_parent"
    android:layout_height="match_parent"
    tools:context=".MainActivity">

    <Spinner
        android:id="@+id/time"
        android:layout_width="220dp"
        android:layout_height="35dp"
        android:background="@drawable/border"
        app:layout_constraintBottom_toBottomOf="parent"
        app:layout_constraintEnd_toStartOf="@+id/guideline"
        app:layout_constraintHorizontal_bias="0.486"
        app:layout_constraintStart_toStartOf="@+id/guideline2"
        app:layout_constraintTop_toBottomOf="@+id/result"
        app:layout_constraintVertical_bias="0.287" />

    <TextView
        android:id="@+id/result"
        android:layout_width="339dp"
        android:layout_height="368dp"
        android:text="TextView"
        android:gravity="center"
        android:textSize="20sp"
        android:textStyle="bold"
        android:textColor="@color/black"
        android:background="@drawable/border"
        app:layout_constraintBottom_toBottomOf="parent"
        app:layout_constraintEnd_toStartOf="@+id/guideline"
        app:layout_constraintHorizontal_bias="0.428"
        app:layout_constraintStart_toStartOf="@+id/guideline2"
        app:layout_constraintTop_toTopOf="@+id/guideline3"
        app:layout_constraintVertical_bias="0.069" />

    <Button
        android:id="@+id/search"
        android:layout_width="243dp"
        android:layout_height="160dp"
        android:backgroundTint="@color/nae"
        android:text="搜尋"
        android:textSize="30sp"
        app:layout_constraintBottom_toBottomOf="parent"
        app:layout_constraintEnd_toStartOf="@+id/guideline"
        app:layout_constraintHorizontal_bias="0.48"
        app:layout_constraintStart_toStartOf="@+id/guideline2"
        app:layout_constraintTop_toBottomOf="@+id/result"
        app:layout_constraintVertical_bias="0.9" />

    <Spinner
        android:id="@+id/elementName"
        android:layout_width="150dp"
        android:layout_height="35dp"
        android:background="@drawable/border"
        app:layout_constraintBottom_toBottomOf="parent"
        app:layout_constraintEnd_toStartOf="@+id/guideline"
        app:layout_constraintHorizontal_bias="0.91"
        app:layout_constraintStart_toStartOf="@+id/guideline2"
        app:layout_constraintTop_toBottomOf="@+id/result"
        app:layout_constraintVertical_bias="0.115" />

    <Spinner
        android:id="@+id/locationName"
        android:layout_width="150dp"
        android:layout_height="35dp"
        android:background="@drawable/border"
        app:layout_constraintBottom_toBottomOf="parent"
        app:layout_constraintEnd_toStartOf="@+id/guideline"
        app:layout_constraintHorizontal_bias="0.116"
        app:layout_constraintStart_toStartOf="@+id/guideline2"
        app:layout_constraintTop_toBottomOf="@+id/result"
        app:layout_constraintVertical_bias="0.115" />

    <androidx.constraintlayout.widget.Guideline
        android:id="@+id/guideline"
        android:layout_width="wrap_content"
        android:layout_height="wrap_content"
        android:orientation="vertical"
        app:layout_constraintGuide_percent="0.96107054" />

    <androidx.constraintlayout.widget.Guideline
        android:id="@+id/guideline2"
        android:layout_width="wrap_content"
        android:layout_height="wrap_content"
        android:orientation="vertical"
        app:layout_constraintGuide_percent="0.05109489" />

    <androidx.constraintlayout.widget.Guideline
        android:id="@+id/guideline3"
        android:layout_width="wrap_content"
        android:layout_height="wrap_content"
        android:orientation="horizontal"
        app:layout_constraintGuide_begin="20dp" />
</androidx.constraintlayout.widget.ConstraintLayout>
這次的布局設定跟上一篇相比多增加了一個spinner,因為這次的Api資料有分今天、明天以及後天,這個多出來的就是拿來選擇時間的,背景資源跟顏色的設定這邊就不多說了,可以去翻上一篇,或是找我這次的GitHub。
這次的資料型態比較複雜,因此這個介紹完再介紹其他程式的設定以及新增的地方,我覺得會讓文章太長,所以這篇就先講解到這個部分,剩下的會放到下一篇講解。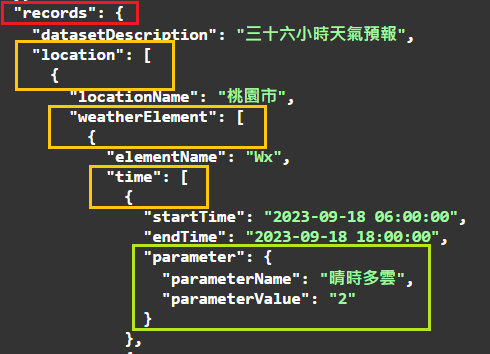
我將架構相同的用同個顏色框起來,下面就依序來講解
首先看到紅色框的地方,可以看到我們要的所有資料是在records底下,並且是用{}包起來,這個代表records要用class來撰寫,就要寫成下面這樣
    public Records records;

    public class Records{

    }
要像宣告的方式宣告records,並且寫一個records的class
接著看到第一個黃色框,可以看到location是寫在records{}裡面,因此這邊可以得知location要寫在records的class裡面,再來可以看到location後面是先[]之後才是{},這個代表location本身是一個List,然後裡面的資料是用class打包,這個時候就要這樣寫
    public class Records{
        public List<Location> location;

    }
    public class Location{

    }
可以看到我的location寫在Records裡面,然後List裡面的資料是Location的型態,而這個Location是一個class,第二、三個的概念也是相同的,這邊就把我這部分的寫法貼上來
    public class Location{
        public String locationName;
        public List<WeatherElement> weatherElement;
    }
    public class WeatherElement{
        public String elementName;
        public List<Time> time;
    }
    public class Time{
        public Parameter parameter;
    }
最後我們看到綠色框的部分,這部分的概念其實就跟紅色框一樣,都是底下的資料用{}包起來,差別在於綠色框的部分要寫在他上一層的{}裡面宣告
public class Time{
        public Parameter parameter;
    }
    public class Parameter{
        public String parameterName;
        public String parameterUnit;
    }
寫到這邊就大功告成囉~
另外這次實作我將WeatherResponse內部的資料都宣告成public,原因就是這樣比較方便測試跟使用其實就是懶,講到方便這邊也再分享另一個方法可以讓要取資料的步驟簡化,就是在這裡先把要取資料的步驟寫好包成一個方法給外面去調用
    public String getDataByTime(Integer index,Integer day){
        return records.location.get(0).weatherElement.get(index).time.get(day).parameter.parameterName;
    }
    public Integer getElementSize(){
        return records.location.get(0).weatherElement.size();
    }
這邊可以看到我寫了兩個方法,一個幫我把抓取資料的步驟都寫好,並且我還規定要往裡面傳入索引值跟指定是哪一天,另一個則是回傳這次資料的長度,會這麼設計的原因是因為如果在elementName傳入的是空值("")的話,那Api就會傳回五個element的資料,為了要能夠因應這個問題,所以在要抓取資料的地方,我會利用這兩個方法結合for迴圈將我的資料一一列出來。