本篇會將上篇未介紹的程式部分補上,本次的設計還用到了內建的strings(存放假資料的地方),這個可以用來儲存像是spinner選單內的選項這種假資料,到要使用的地方在引用就好,這樣做可以幫助主程式更加簡潔。
這邊一樣要建立一個interface
import io.reactivex.rxjava3.core.Observable;
import retrofit2.http.GET;
import retrofit2.http.Query;

public interface GetApi {
    @GET("F-C0032-001")
    Observable<WeatherResponse> getWeatherApi(
            @Query("Authorization") String Authorization,
            @Query("locationName") String locationName,
            @Query("elementName") String elementName
    );
}
這次的Api資料有三個參數要輸入,有一個以上的參數就要像上面一樣用,隔開
import retrofit2.Retrofit;
import retrofit2.converter.gson.GsonConverterFactory;

public class ApiClient {
    public Retrofit myWeatherApi(){
        return new Retrofit.Builder()
                .baseUrl("https://opendata.cwa.gov.tw/api/v1/rest/datastore/")
                .addConverterFactory(GsonConverterFactory.create())
                .addCallAdapterFactory(retrofit2.adapter.rxjava3.RxJava3CallAdapterFactory.create())
                .build();
    }
}
這裡就跟之前介紹的一樣
上面有提到這次實作有用到strings存放資料,而strings就在res底下的values,將values點開就可以看到strings了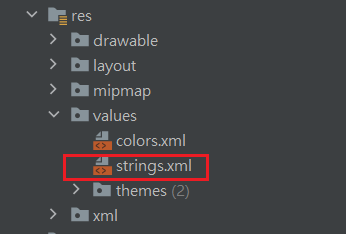
這次會用到string-array來寫spinner的假資料,寫法如下
    <string-array name="陣列的名字">
        <item>要存放的資料</item>
        <item name="item_1">也可以給item名字,但不是必要</item>
    </string-array>
如果不給予名字的話,就是只能用索引值抓取資料,有名字的話就可以透過讀取這個名字來指定該資料,我可以先在宣告的地方宣告Sting的陣列,或宣告一個String來抓取strings的假資料
private String[] list;
private String data;
然後在onCreate寫抓取假資料
list = getResource().getStringArray(R.array.陣列的名稱);
data = getResource().getString(R.string.假資料的名字)
像這樣是string-array的就用getStringArray去抓陣列,只是想抓陣列其中一個資料的話就用getString,這次假資料我總共寫了四個:「location、element、day、element各自代表的中文」
<string-array name="location_data">
        <item>宜蘭縣</item>
        <item>花蓮縣</item>
        <item>臺東縣</item>
        <item>澎湖縣</item>
        <item>金門縣</item>
        <item>連江縣</item>
        <item>台北市</item>
        <item>新北市</item>
        <item>桃園市</item>
        <item>臺中市</item>
        <item>臺南市</item>
        <item>高雄市</item>
        <item>基隆市</item>
        <item>新竹縣</item>
        <item>新竹市</item>
        <item>苗栗縣</item>
        <item>彰化縣</item>
        <item>南投縣</item>
        <item>雲林縣</item>
        <item>嘉義縣</item>
        <item>嘉義市</item>
        <item>屏東縣</item>
    </string-array>

    <string-array name="element_data">
        <item>Wx</item>
        <item>PoP</item>
        <item>MinT</item>
        <item>CI</item>
        <item>MaxT</item>
        <item>All</item>
    </string-array>

    <string-array name="time_data">
        <item>今天</item>
        <item>明天</item>
        <item>後天</item>
    </string-array>

    <string-array name="tw_element">
        <item>當日天氣氣象:</item>
        <item>當日降雨機率:</item>
        <item>當日最低溫度:</item>
        <item>當日舒適度:</item>
        <item>當日最高溫度:</item>
    </string-array>
一樣貼上這次的GitHub,詳細的可以翻GitHub這邊就講解一些重點就好
像上面寫的一樣,因為我是要整個陣列的資料,所以宣告的部分就是宣告成String[]
private String[] location_data,element_data,time_data,tw_element;
接著抓取strings的資料
 location_data = getResources().getStringArray(R.array.location_data);
        element_data = getResources().getStringArray(R.array.element_data);
        time_data = getResources().getStringArray(R.array.time_data);
        tw_element = getResources().getStringArray(R.array.tw_element);
        //將spinner的資料從strings抓過來
這次我將設定spinner的部分都寫在一起,沒有像上個實作一樣分開寫
setSpinner();
        search.setOnClickListener(view -> getWeather(selected_location,selected_element,selected_time));
並且可以看到按下搜尋的按鈕後,就呼叫抓取天氣的api資料的方法,然後因為在Response裡面我有寫一個可以幫我簡寫的方法,所以這裡要傳入被選到的location、element、time
三個spinner的寫法都是相同的,因此這裡就展示其中一個的寫法
ArrayAdapter location_adapter = new ArrayAdapter(
                this,
                android.R.layout.simple_spinner_dropdown_item,
                location_data
        );

location_spinner.setAdapter(location_adapter);

location_spinner.setOnItemSelectedListener(new AdapterView.OnItemSelectedListener() {
        @Override
        public void onItemSelected(AdapterView<?> adapterView, View view, int i, long l) {
            selected_location = location_spinner.getSelectedItem().toString();
        }
        @Override
        public void onNothingSelected(AdapterView<?> adapterView) {}
上面抓取的陣列可以直接填入,其他部分就跟上一個實作介紹的相同
首先看到開頭的部分
    private void getWeather(String selectedLocation, String selectedElement, String selectedTime) {
        String authorization = "CWB-2F70211E-8C2F-4A7F-8841-292FDCE00BEB";
        if (selectedElement.equals("All")) selectedElement = "";
        String finalSelectedElement = selectedElement;
        getApi.getWeatherApi(authorization,selectedLocation,selectedElement)
                .observeOn(Schedulers.io())
                .subscribeOn(AndroidSchedulers.mainThread())
                .subscribe(new DisposableObserver<WeatherResponse>()
為了程式的可讀性,在開頭我用authorization代表了我的金鑰
if (selectedElement.equals("All")) selectedElement = "";
        String finalSelectedElement = selectedElement;
再來這個部分,由於elementName這個參數是沒有All的,所以如果真的傳入All也只會取得空的資料而已,因此在這裡我才會寫一個if判斷式,判斷當spinner選擇的是All的話,就把element變成空值再傳入,下面的finalSelectedElement是在下面的onNext會用到
    @Override
    public void onNext(@NonNull WeatherResponse weatherResponse) {
        result.setText("");
        List time_list = Arrays.asList(time_data);
        List element_list = Arrays.asList(element_data);
        if(weatherResponse.getElementSize() != 1){
            for (int i = 0; i < weatherResponse.getElementSize(); i++) {
                result.append(tw_element[i] + weatherResponse.getDataByTime(i,time_list.indexOf(selectedTime))+"\n");
            }
        }
        else {
            result.setText(tw_element[element_list.indexOf(finalSelectedElement)] + weatherResponse.getDataByTime(0,time_list.indexOf(selectedTime))+"\n");
        }
    }
首先因為這次的設計有考慮到element為空值時會傳回五筆資料,因此再填入TextView的時候使用了append,使用append填入TextView的資料會留在TextView上面不會被下一筆資料覆蓋掉,因此才要在每次開始前將TextView清空
再來是這個部分
List time_list = Arrays.asList(time_data);
List element_list = Arrays.asList(element_data);
這裡把在strings的資料用成list型態,因為需要使用到indexof這個抓取索引值的方法,所以才會多這一道步驟
if(weatherResponse.getElementSize() != 1){
    for (int i = 0; i < weatherResponse.getElementSize(); i++) {
        result.append(tw_element[i] + weatherResponse.getDataByTime(i,time_list.indexOf(selectedTime))+"\n");
    }
}
else {
    result.setText(tw_element[element_list.indexOf(finalSelectedElement)] + weatherResponse.getDataByTime(0,time_list.indexOf(selectedTime))+"\n");
}
這邊我用if判斷式判斷這次的資料是否多於一筆(是否為All),tw_element[i]這個將不同element的中文先加在前面,然後呼叫Response寫好的方法weatherResponse.getDataByTime(i,time_list.indexOf(selectedTime)),因為有五筆資料,所以需要傳入索引值(i),接著因為不同天在Api資料中是以第一、二、三筆資料去劃分,所以才要去抓取選擇的天數是在假資料中的哪裡(index)
最後全部合在一起就是這樣
private void getWeather(String selectedLocation, String selectedElement, String selectedTime) {
        String authorization = "CWB-2F70211E-8C2F-4A7F-8841-292FDCE00BEB";
        if (selectedElement.equals("All")) selectedElement = "";
        String finalSelectedElement = selectedElement;
        getApi.getWeatherApi(authorization,selectedLocation,selectedElement)
                .observeOn(Schedulers.io())
                .subscribeOn(AndroidSchedulers.mainThread())
                .subscribe(new DisposableObserver<WeatherResponse>() {
                    @Override
                    public void onNext(@NonNull WeatherResponse weatherResponse) {
                        result.setText("");
                        List time_list = Arrays.asList(time_data);
                        List element_list = Arrays.asList(element_data);
                        if(weatherResponse.getElementSize() != 1){
                            for (int i = 0; i < weatherResponse.getElementSize(); i++) {
                                result.append(tw_element[i] + weatherResponse.getDataByTime(i,time_list.indexOf(selectedTime))+"\n");
                            }
                        }
                        else {
                            result.setText(tw_element[element_list.indexOf(finalSelectedElement)] + weatherResponse.getDataByTime(0,time_list.indexOf(selectedTime))+"\n");
                        }
                    }

                    @Override
                    public void onError(@NonNull Throwable e) {
                        Log.d("test", "onError: ");
                    }

                    @Override
                    public void onComplete() {
                        Log.d("test", "onComplete: ");
                    }
                });
    }