為了使OpenCV的運算可以更快,我們可以使用CUDA進行加速,由於OpenCV GPU模組是使用CUDA編寫的,擁有了CUDA社區的支持。具OpenCV官方的描述,使用GPU進行原始的影像處理可以提升30倍的速度,使用GPU抓取特徵點速度可以提升12倍,可說是大幅度的加速。CUDA
GPU 模組包括 cv::gpu::GpuMat Class,它是保存在 GPU 記憶體中矩陣的主要容器。它的介面與它的 CPU 版本 cv::Mat 幾乎一致。所有 GPU 函數都接收 GpuMat 作為輸入和輸出參數。 由於GPU模組介面也與CPU介面的API大致相同。如果你熟悉 CPU上的OpenCV,那你幾乎是可以無痛使用GPU上的OpenCV,畢竟API幾乎一致。
這次的主題估計需要花最多時間,需要花一些心力去安裝一些套件,像是CUDA、cuDNN等,並且要注意這兩個套件的版本是否支援你目前的作業系統、Visual Studio。
可以從CUDA Toolkit Archive下載CUDA Toolkit,本次使用CUDA 11.6.0,請依照你的系統以及Visual Studio參考Versioned Online Documentation,決定CUDA的安裝版本或是Visual Studio版本。
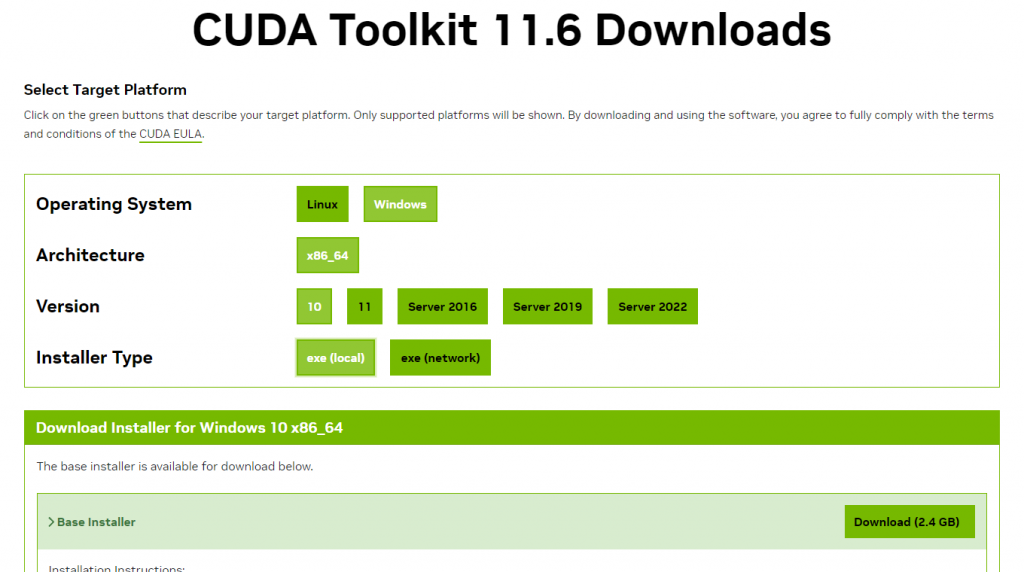
參考v11.6.0 CUDA Installation Guide for Microsoft Windows,CUDA 11.6.0可以安裝在Windows 10上,且可以使用Visual Studio 2022的MSVC 193x的C++開發工具。

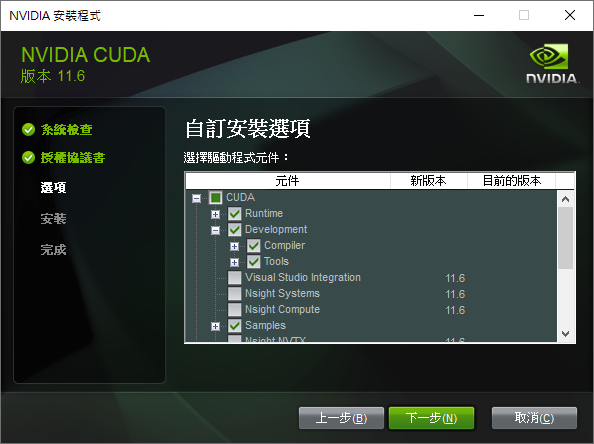
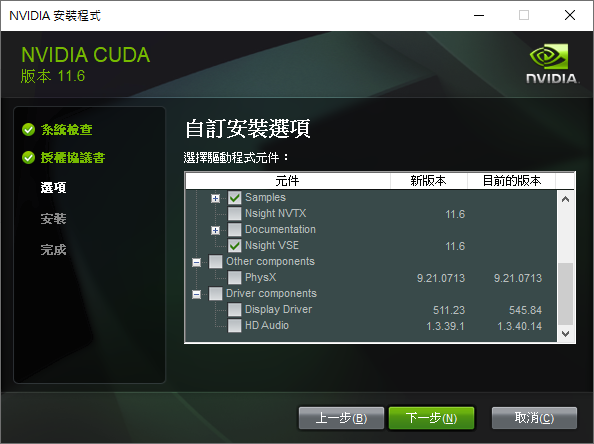
在安裝程式中,我們只需要自訂我們需要安裝的套件即可,要注意你的NVIDIA顯示卡驅動必須大於cuDNN最小支援版本,以下文舉例為>= 452.39,如果你的顯示卡驅動已經符合此條件,就不需要再安裝Display Driver。
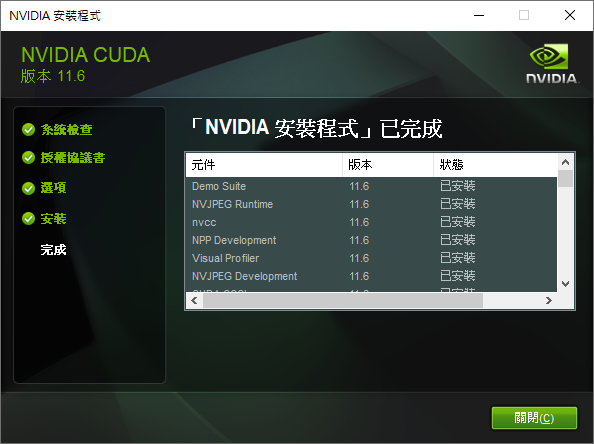
安裝完成後你會看到環境變數多了CUDA的動態連結庫和靜態連結庫。
開啟cmd,輸入nvcc -V,驗證是否安裝成功。
nvcc -V
nvcc: NVIDIA (R) Cuda compiler driver
Copyright (c) 2005-2021 NVIDIA Corporation
Built on Fri_Dec_17_18:28:54_Pacific_Standard_Time_2021
Cuda compilation tools, release 11.6, V11.6.55
Build cuda_11.6.r11.6/compiler.30794723_0
如果你還沒有嘗試過使用CMake生成OpenCV建置環境,請先參考這一篇【Day3】使用Visual Studio 建置OpenCV原始碼並安裝(Windows)的步驟。
在測試時我發現直接下載opencv_contrib上的 4.x分支會出現編譯錯誤,這邊選擇opencv_contrib 4.8.0版本,解決了編譯問題。
git clone --depth 1 --branch 4.8.0 https://github.com/opencv/opencv_contrib.git
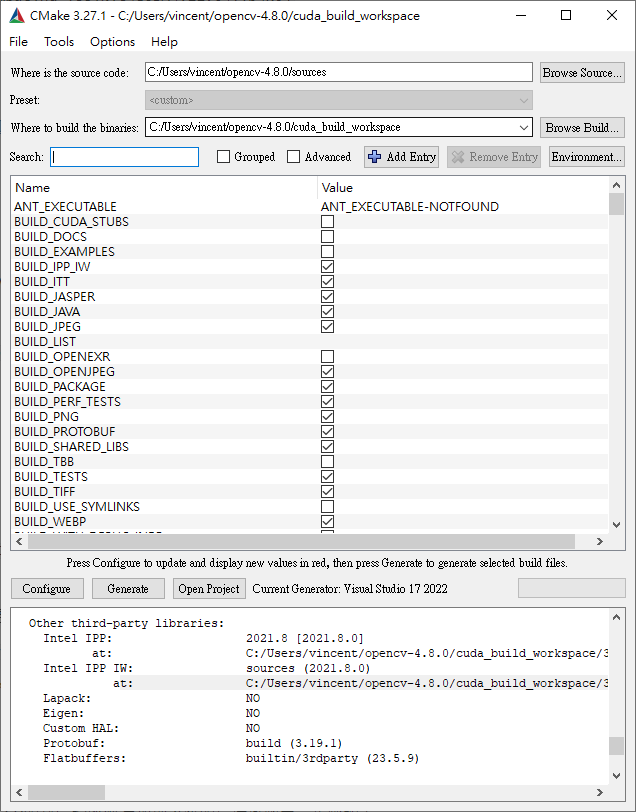
開啟CMake(cmake-gui),選擇Generator的Visual Studio版本,並選擇x64,並調整以下選項。
Debug。opencv-4.8.0/cuda_install。opencv-4.8.0/opencv_contrib/modules。8.6,請參照Your GPU Compute Capability。完整CMake配置項目請參考 OpenCV configuration options reference。
移動到cuda_build_workspace\,使用Visual Studio開啟OpenCV.sln。
CMAKE_BUILD_TYPE一樣。opencv-4.8.0\cuda_install資料夾下。opencv-4.8.0\cuda_install\x64\vc17資料夾,底下有lib靜態連結函式庫資料夾和bin動態連結函式庫。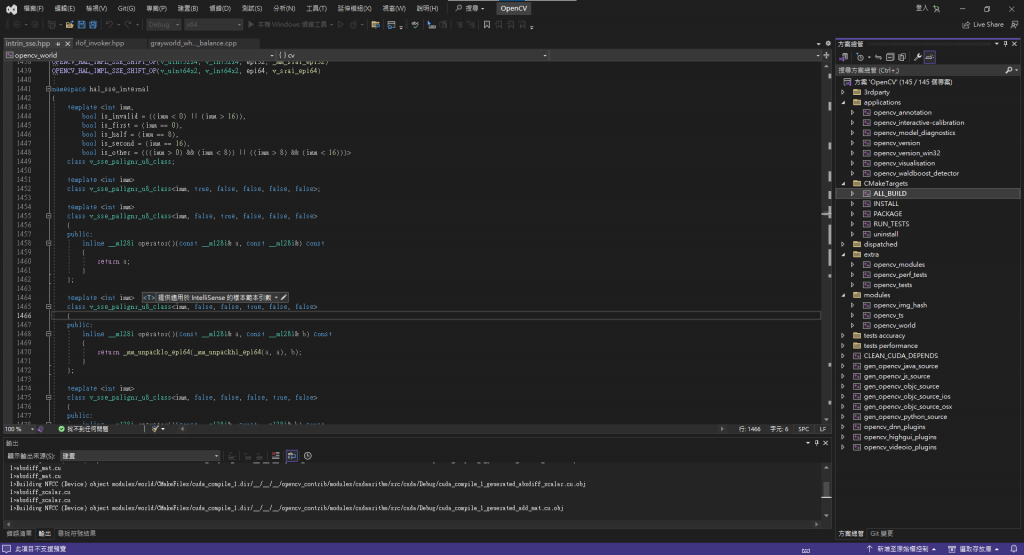
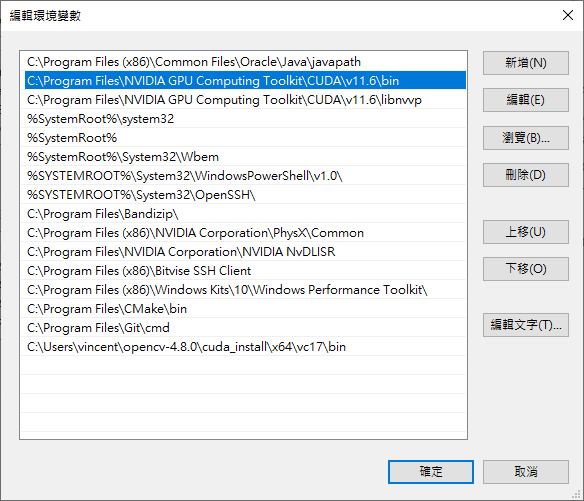
因為通常編譯器不會主動詢找OpenCV連結函式庫的安裝路徑,需要將OpenCV的執行檔路徑添加到系統的環境變數中。步驟如下:
opencv-4.8.0\cuda_install\x64\vc17\bin,然後保存變更。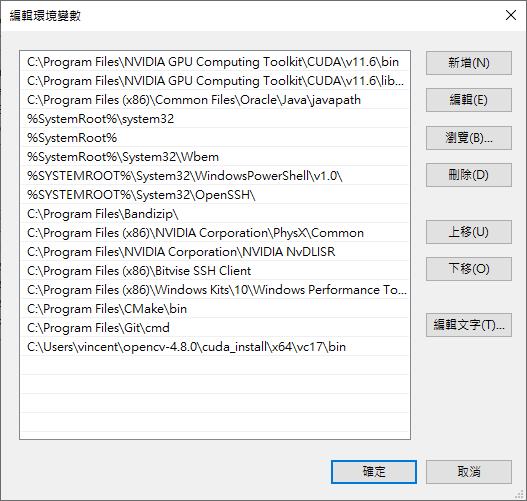
為了比較使用CPU運算以及使用GPU運算的效果,我們需要使用到chrono抓出精準的時間,分別在執行前的t1時間點以及執行後的t2時間點儲存當前時間,t2-t1就是運算所耗費掉的時間,最後透過std::chrono::duration_cast<std::chrono::microseconds>將輸出轉換成微秒(us)單位。
auto t1 = std::chrono::high_resolution_clock::now();
//運算....
auto t2 = std::chrono::high_resolution_clock::now();
auto int_us = std::chrono::duration_cast<std::chrono::microseconds>(t2 - t1);
printf("CPU Threshold:%dus\n",int_us);
在使用GPU做任何運算之前,需要先將Mat影像轉換為GpuMat。因此需要使用upload()函式將img上傳到gpu_img上。
cv::cuda::GpuMat gpu_img;
gpu_img.upload(img);
不管是在imread讀取圖片成為影像,或是使用imshow顯示圖片,都需要將GpuMat轉換為Mat。因此需要使用download()函式將gpu_dst上傳到dst上。
cv::Mat dst;
gpu_dst.download(dst);
這裡使用cv::cuda::threshold()進行二值化,函式的參數和使用CPU運算的二值化大同小異。只不過要注意cv::cuda::threshold()不能使用OTSU來進行二值化,否則會拋錯。
cv::cuda::threshold(gpu_img,gpu_dst,128,255,cv::THRESH_BINARY);
這裡的程式碼跟之前學到的高斯濾波有些差異,我們需要先透過cv::cuda::createGaussianFilter()建立一個高斯濾波器,在使用apply(gpu_img, gpu_dst)進行高斯濾波。而createGaussianFilter()各個參數的定義分別為輸入影像類型、輸出影像類型、高斯核大小、X方向標準差、Y方向標準差。
cv::cuda::GpuMat gpu_dst;
cv::Ptr<cv::cuda::Filter> filter=cv::cuda::createGaussianFilter(CV_8UC3, CV_8UC3, cv::Size(3, 3), 1.2, 1.2);
filter.get()->apply(gpu_img, gpu_dst);
gpu_dst.download(dst);
這裡和之前學到的顏色轉換函式大同小異,參數分別是輸入影像、輸出影像、色彩轉換方式,將BGR轉換成HSV。
cv::cuda::cvtColor(gpu_img, gpu_dst, cv::COLOR_BGR2HSV);
#include <iostream>
#include <chrono>
#include "opencv2/opencv.hpp"
#include "opencv2/cudaarithm.hpp"
#include "opencv2/cudafilters.hpp"
#include "opencv2/cudaimgproc.hpp"
#include "opencv2/core/utils/logger.hpp"

using namespace std;
cv::Mat img;
cv::cuda::GpuMat gpu_img;
void threshold_test() {
	auto t1 = std::chrono::high_resolution_clock::now();
	cv::Mat dst;
	cv::threshold(img,dst,128,255,cv::THRESH_BINARY);
	cv::imshow("CPU Threshold", dst);
	auto t2 = std::chrono::high_resolution_clock::now();
	auto int_us = std::chrono::duration_cast<std::chrono::microseconds>(t2 - t1);
	printf("CPU Threshold:%dus\n",int_us);


	auto t3 = std::chrono::high_resolution_clock::now();
	cv::cuda::GpuMat gpu_dst;
	cv::cuda::threshold(gpu_img,gpu_dst,128,255,cv::THRESH_BINARY);
	gpu_dst.download(dst);
	cv::imshow("GPU Threshold", dst);
	auto t4 = std::chrono::high_resolution_clock::now();
	auto int_us2 = std::chrono::duration_cast<std::chrono::microseconds>(t4 - t3);
	printf("GPU Threshold:%dus\n",int_us2);
	printf("-----------------\n");
}
void filter_test() {

	auto t1 = std::chrono::high_resolution_clock::now();
	cv::Mat dst;
	cv::GaussianBlur(img, dst, cv::Size(3, 3), 1.2, 1.2);
	cv::imshow("CPU Gaussian", dst);
	auto t2 = std::chrono::high_resolution_clock::now();
	auto int_us = std::chrono::duration_cast<std::chrono::microseconds>(t2 - t1);
	printf("CPU Gaussian:%dus\n",int_us);


	auto t3 = std::chrono::high_resolution_clock::now();
	cv::cuda::GpuMat gpu_dst;
	cv::Ptr<cv::cuda::Filter> filter=cv::cuda::createGaussianFilter(CV_8UC3, CV_8UC3, cv::Size(3, 3), 1.2, 1.2);
	filter.get()->apply(gpu_img, gpu_dst);
	gpu_dst.download(dst);
	cv::imshow("GPU Gaussian", dst);
	auto t4 = std::chrono::high_resolution_clock::now();
	auto int_us2 = std::chrono::duration_cast<std::chrono::microseconds>(t4 - t3);
	printf("GPU Gaussian:%dus\n",int_us2);
	printf("-----------------\n");

}

void color_conversion_test() {
	auto t1 = std::chrono::high_resolution_clock::now();
	cv::Mat dst;
	cv::cvtColor(img, dst, cv::COLOR_BGR2HSV);
	cv::imshow("CPU Color Convert", dst);
	auto t2 = std::chrono::high_resolution_clock::now();
	auto int_us = std::chrono::duration_cast<std::chrono::microseconds>(t2 - t1);
	printf("CPU Color Convert:%dus\n",int_us);


	auto t3 = std::chrono::high_resolution_clock::now();
	cv::cuda::GpuMat gpu_dst;
	cv::cuda::cvtColor(gpu_img, gpu_dst, cv::COLOR_BGR2HSV);
	gpu_dst.download(dst);
	cv::imshow("GPU Color Convert", dst);
	auto t4 = std::chrono::high_resolution_clock::now();
	auto int_us2 = std::chrono::duration_cast<std::chrono::microseconds>(t4 - t3);
	printf("GPU Color Convert:%dus\n",int_us2);
	printf("-----------------\n");

}

int main()
{
	cv::utils::logging::setLogLevel(cv::utils::logging::LOG_LEVEL_SILENT);
	img= cv::imread("C:\\Users\\vince\\Downloads\\Lenna.png", cv::IMREAD_COLOR);
	gpu_img.upload(img);
	threshold_test();
	filter_test();
	color_conversion_test();

	cv::waitKey(0);
	return 0;
}
可以看到測試的結果,使用GPU進行影像處理的確有小幅度的加速效果,尤其是高斯模糊的加速效果最好。
第一次測試..
CPU Threshold:46097us
GPU Threshold:39834us
-----------------
CPU Gaussian:40121us
GPU Gaussian:25963us
-----------------
CPU Color Convert:27768us
GPU Color Convert:25471us
-----------------
第二次測試..
CPU Threshold:43452us
GPU Threshold:26097us
-----------------
CPU Gaussian:39666us
GPU Gaussian:26927us
-----------------
CPU Color Convert:26388us
GPU Color Convert:26497us
-----------------
第三次測試..
CPU Threshold:43460us
GPU Threshold:26374us
-----------------
CPU Gaussian:40579us
GPU Gaussian:25784us
-----------------
CPU Color Convert:26834us
GPU Color Convert:39871us
-----------------