
接續上篇
在完成XCode建置Expo專案iOS App時
這時要來上架到App Store
讓你的App提供iOS使用者下載
首先進入App Store Connect網頁
https://appstoreconnect.apple.com/
登入Apple帳戶後,點選「App 分析」
再點選左上方「App」
會看到你新增過的App
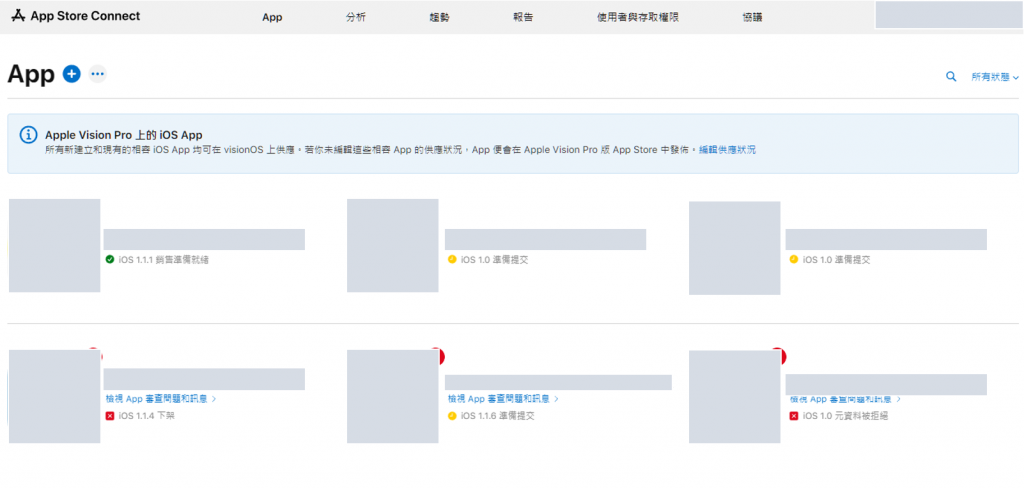
因為XCode 13後,只要上傳一次App就能幫你新增
若想自行新增App可參考Apple官方文件:加入新的 App
無論是第一次提交,或是日後上架
都需新增版本才能更新App
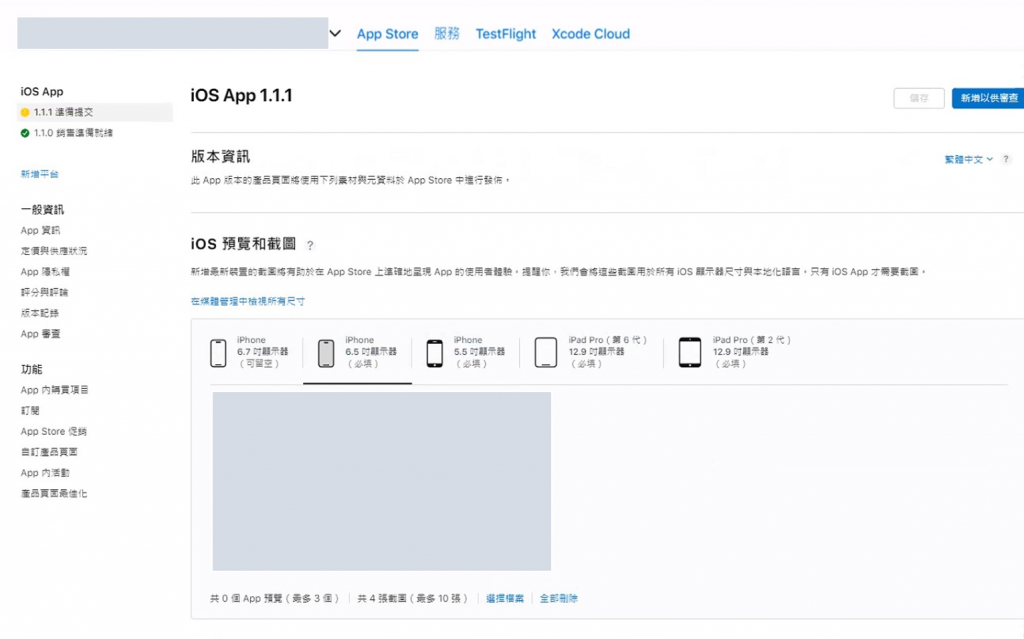
點進去你的App後,左上方會有個「+」號
將版本號輸入進去
接著會看到下圖內容
參考Apple開發者官方文件:建立新版本
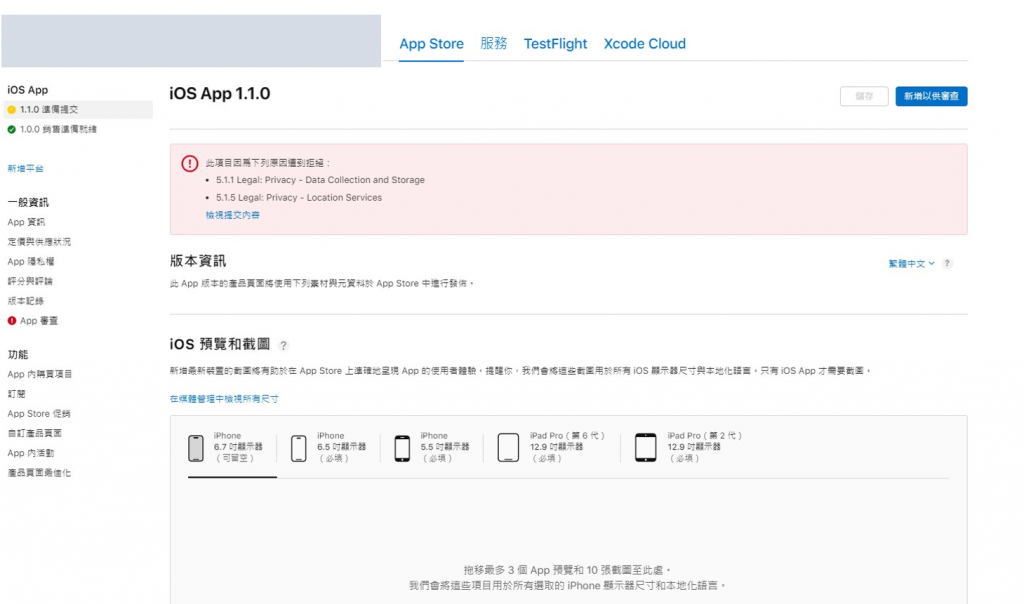
此項目為必填
參考上方圖片,必須上傳相對應吋數的圖片
同時在App Store要讓使用者看到你開發的App大略的主要功能
Apple開發者官方貼心提供了Screenshot specifications iOS螢幕尺寸比對器
假設Apple要求上傳6.5吋預覽圖
上傳的圖片就要縮放成對應大小(pixels)才能上傳完成
1242 x 2688 pixels
(portrait)
2688 x 1242 pixels
(landscape)
若在XCode有勾選iPad,Apple也會要求你強制上傳iPad預覽圖
參考Apple開發者官方文件:上傳 App 預覽與截圖
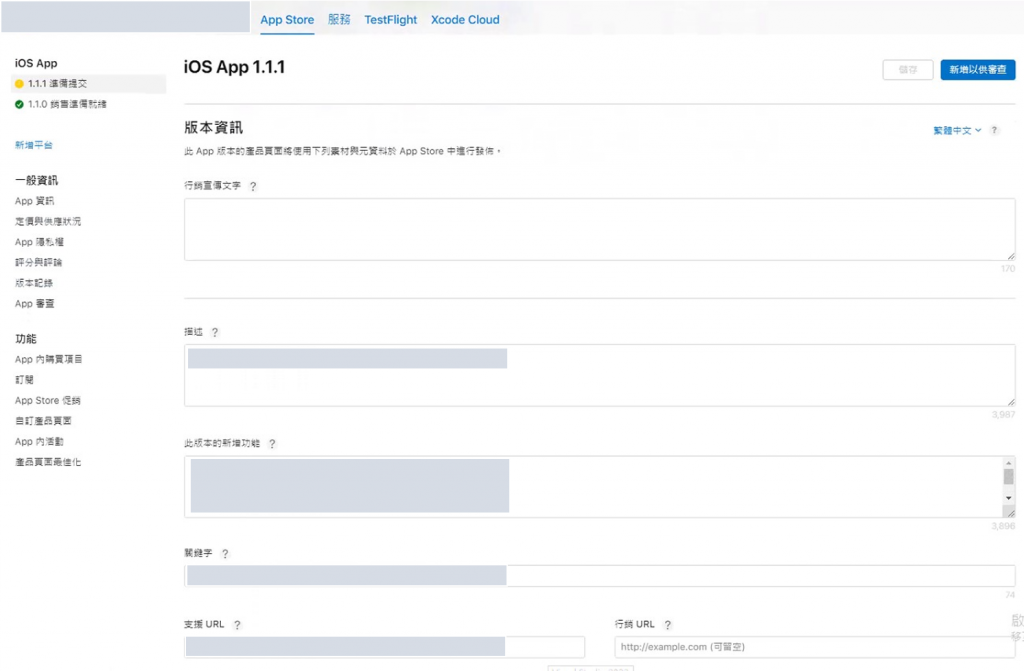
往下滑會看到此版本的版本資訊
目的是讓使用者知道
這個版本更新了什麼內容(可以讓行銷業務填寫為佳)
也可以透過新增「關鍵字」
讓你的APP更容易被搜尋到
參考Apple開發者官方文件:平台版本資訊
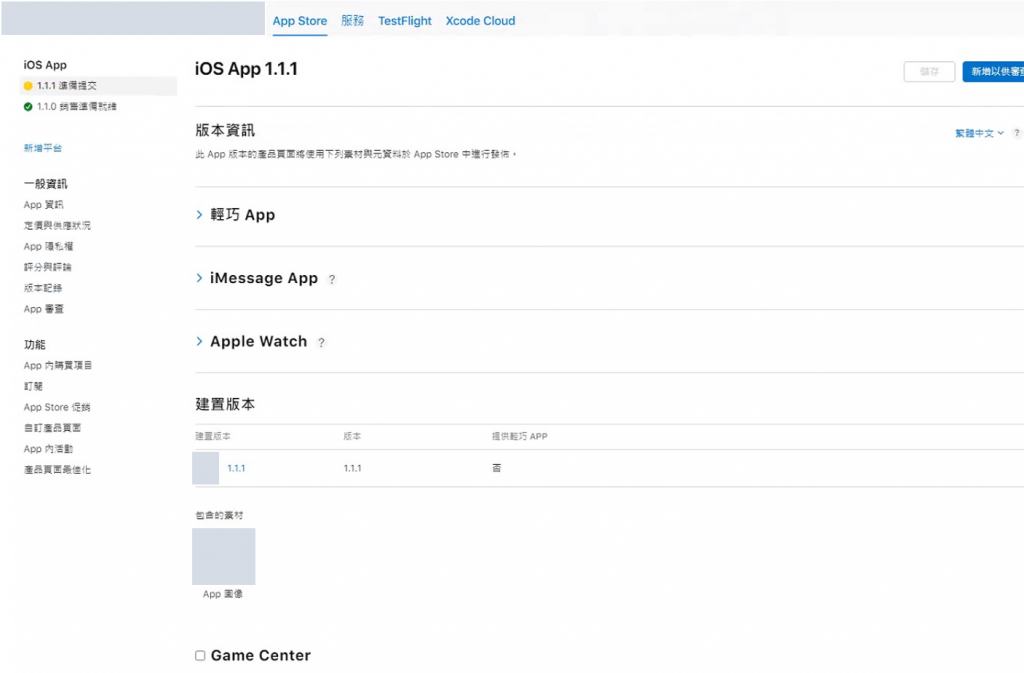
在上篇有使用XCode上傳iOS App到App Store
只要選擇正確的建置版本即可
參考Apple開發者官方文件:選擇要提交的建置版本
跟Android上架相似
因為系統需登入後才可使用
一樣是提供測試帳號給Apple審查人員做測試使用
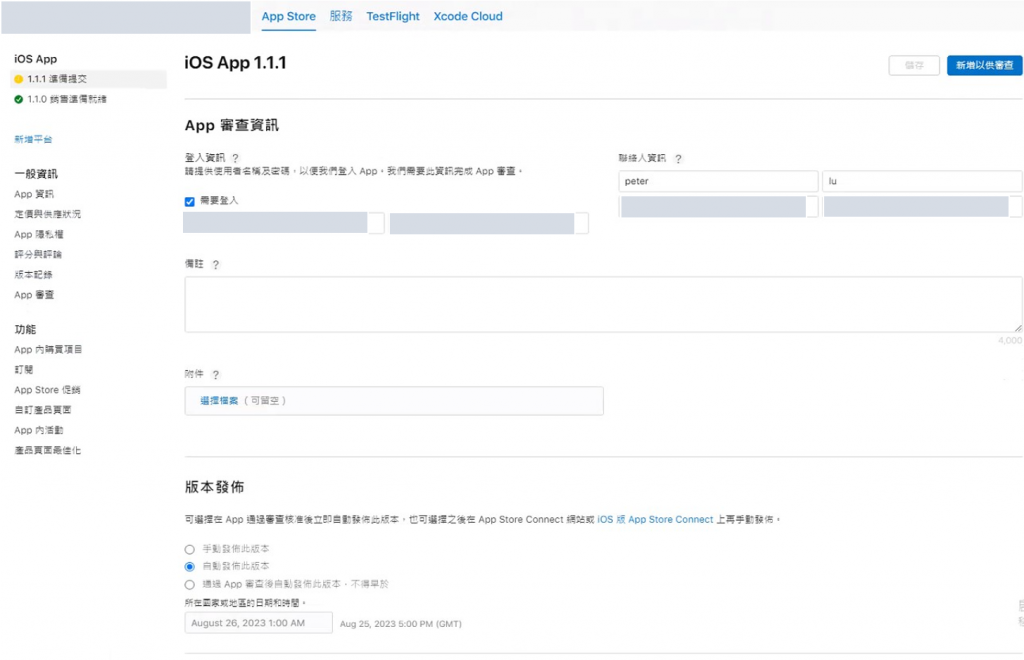
參考Apple開發者官方文件:App 審查資訊
點選左側「App 資訊」
同樣輸入主、副標題、年齡分級、類別...等
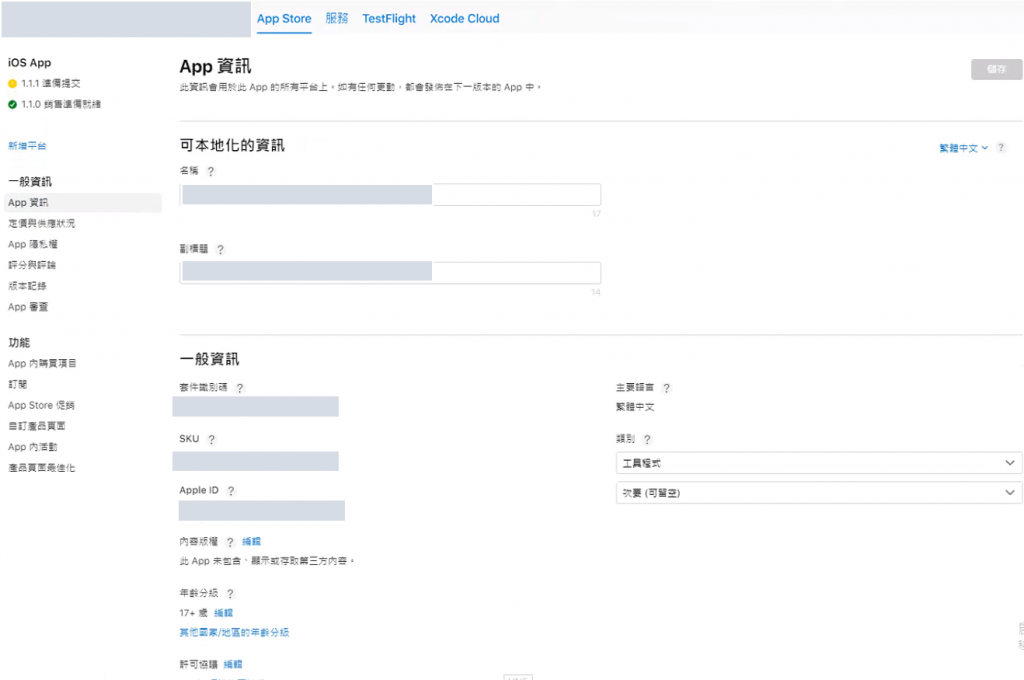
參考Apple開發者官方文件:App 資訊
點選左側「定價與供應狀況」
依照需求調整要供應的國家
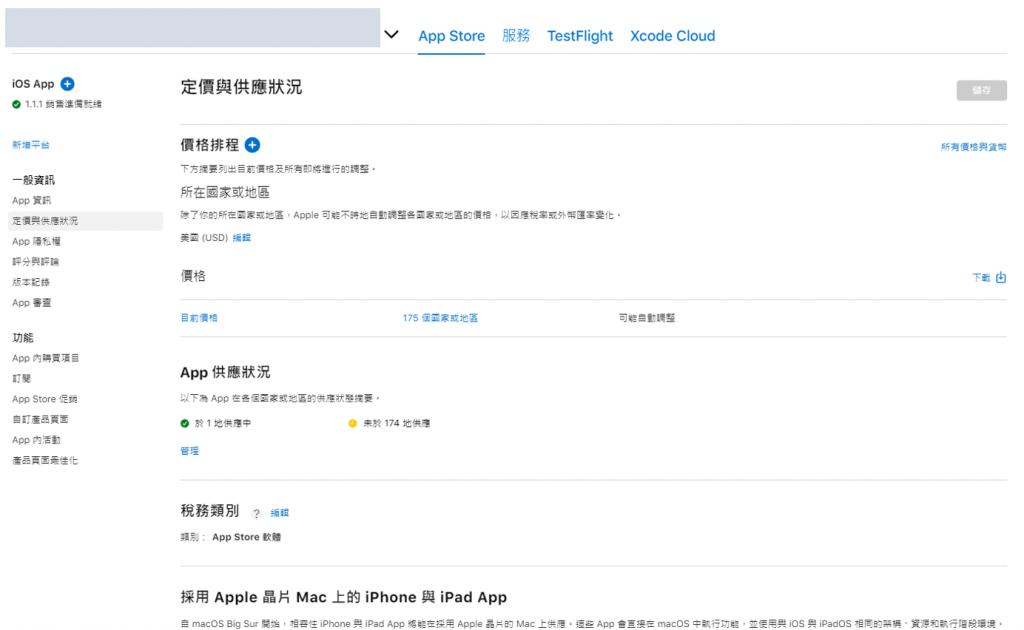
參考Apple開發者官方文件:定價與供應狀況
Apple 確保上架的App是否有取用隱私(相機、位置、麥克風、聯絡人...等)部分
開發者必須提供隱私權政策
產出方法參考 Day 26 - Android上架時提供隱私權政策
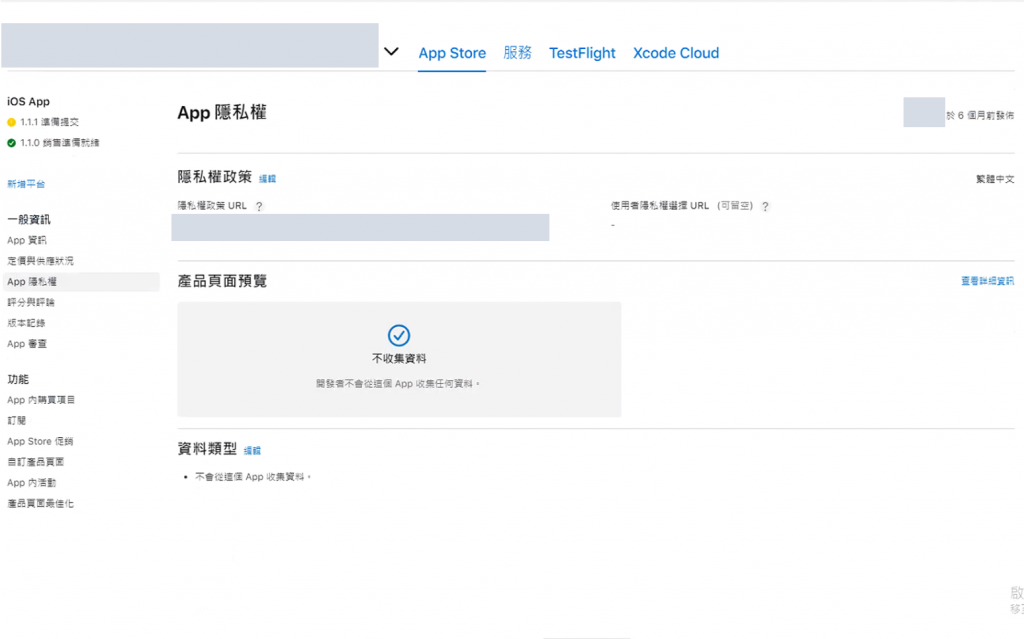
※若隱私權政策網址有更新,必須新增新的版本
「先別急著送出審查」
在網頁上方有一項TestFlight Beta版測試功能
TestFlight是蘋果公司的一種幫助開發者分發Beta版軟體的應用
開發者可透過此應用向高達10,100名「測試員」分發待測試應用
受測者需先安裝TestFlight才可進行iOS App測試
TestFlight App Store下載
邀請測試方法如下:
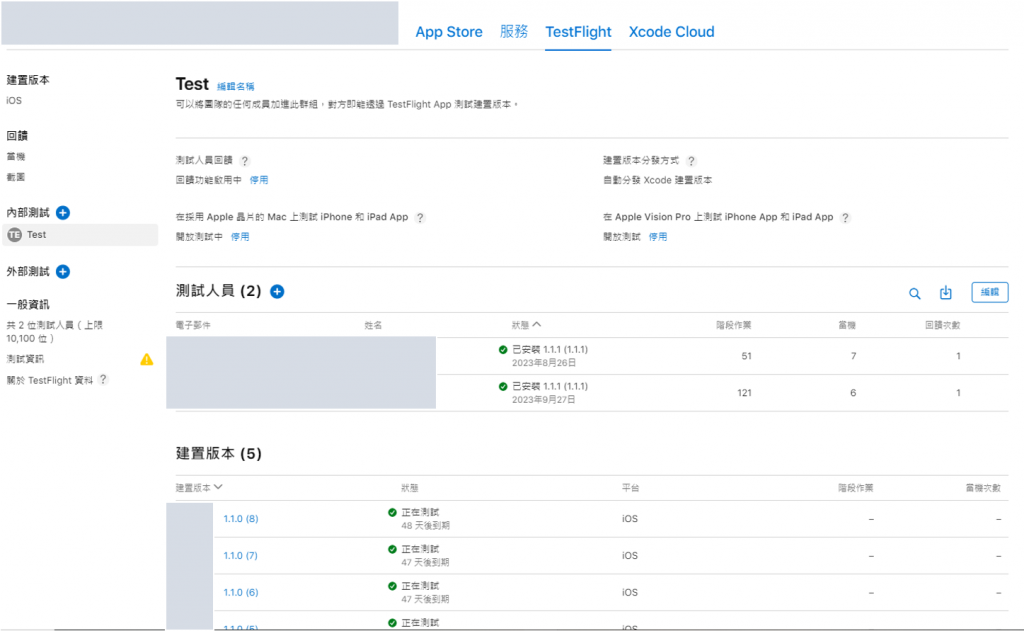
測試人員加入後,可以在TestFlight找到並安裝App
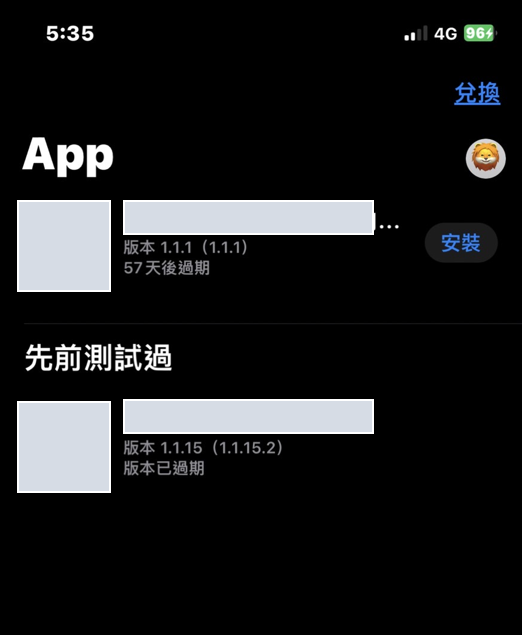
※在XCode建置後,可供測試的時間為90天,過期就得重新建置
TestFlight參考Apple開發者官方文件:TestFlight 概覽
若在TestFlight測試沒有其他問題
以及檢查其他App資訊填妥後
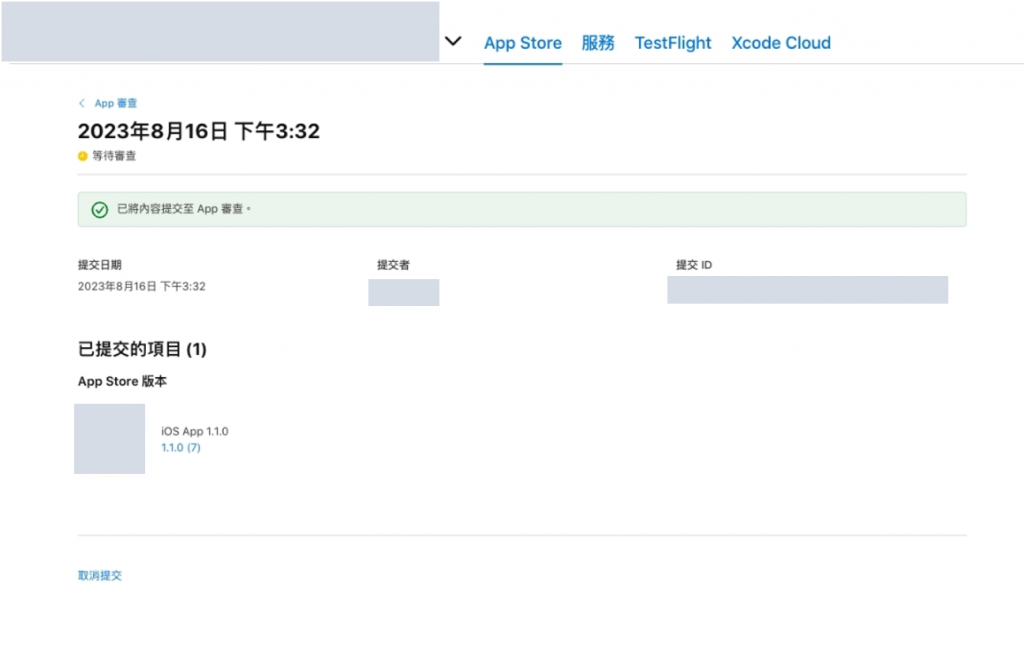
在畫面右上方按下「新增以供審查」,進入下方畫面

點選「提交至App審查」,看到打勾的樣子就是提交成功
接著會進入正在等待審查階段
初次上架審查約3-5天
再次上架審查約1-2天
參考Apple開發者官方文件:提交以供審查
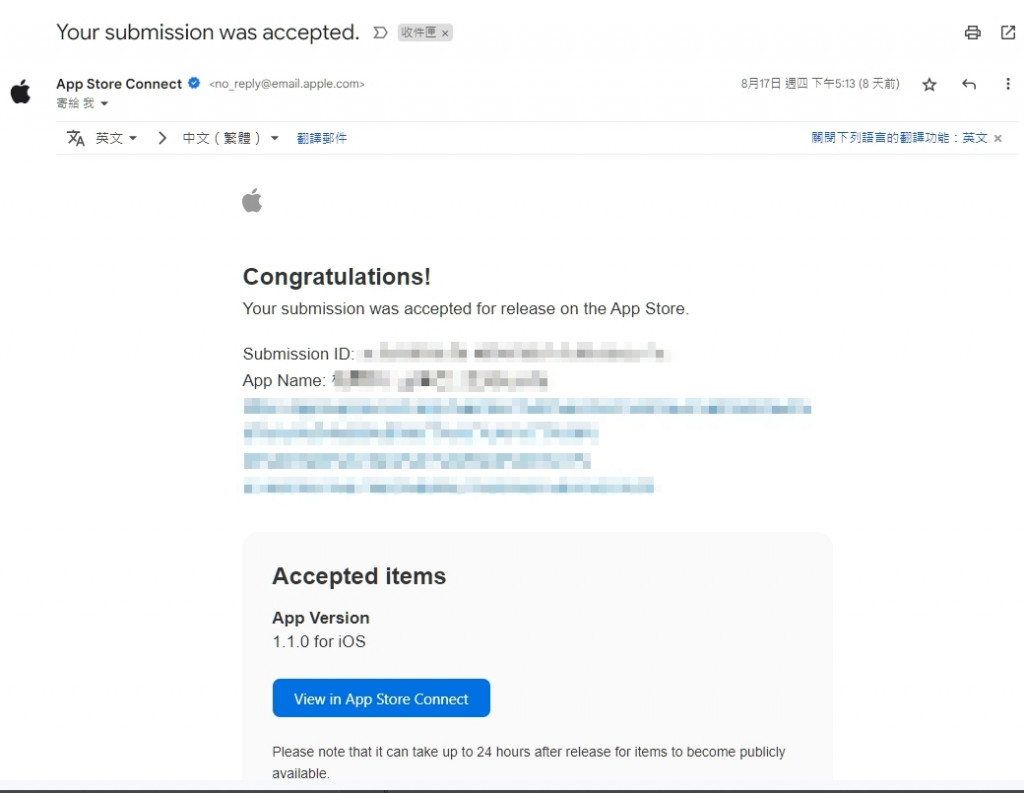
Apple Store在審查通過或不通過,都會寄信通知
通過後,只要點下信中的連結
就能到App Store 下載你的APP了✌️
由於Apple採用人工審查,因此App若違反了Apple審查規範
或是Apple覺得你的App提供說明不夠明確,會被Apple Store拒絕
此時要點選左側「App 審查」查看退件原因及Apple審查人員退件內容
Apple開發者對於審查App時所有流程參考:
https://developer.apple.com/app-store/review/guidelines/
修復你的App完成後,除了重新提交審查
也記得回覆審查人員相關訊息、截圖,加速進行審查進度
參考Apple開發者官方文件:回覆 App 審查訊息
以下也分享上架時,遭遇到退件的原因及解決辦法
會有此項目的原因,代表審查人員想多了解你的App到底在做什麼
或是在初次送審時,App描述太少
每個App被退件的原因不一定相同,僅供參考
- Is your app restricted to users belonging to one company? This may include users of company partners, employees and contractors.
- Is your application designed for a limited or specific group of companies?
- If yes, which companies use this application?
- If not, can any company become a customer and use this application?
- Which features, if any, of the application are available for public use?
- How does a user obtain an account?
- Is there any paid content in the app, and if so, who pays? For example, do users pay to open an account or use certain features within the app?
解決辦法:
依照審查人員的問題逐項簡單回覆就好
可以的話建議都翻譯成英文回覆
Hello,
Reply Guideline 2.1 - Information Needed Much detailed information
- No,
My app is used by more than one company- Yes,
My customer sources include OOO in OOO City, Taiwan- No,
All functions require login,
If you are not logged in, you will only see the login page- If the user wants to use,
Need to become a construction company in OOO City, Taiwan
And go to the website to apply for an account
It can only be used after being approved by the OOO City in Taiwan
Customer Application URL:...- No,
This app only provides customers with the functions of viewing information and sending electronic certificates,
No additional paid features
在本系列中,使用到了「相機」、「位置」相關隱私權限功能
那麼每一項使用權限描述,都要告知使用者其用途
不能讓使用者傻傻的按下允許
We noticed that your app requests the user’s consent to access the camera and location, but doesn’t sufficiently explain the use of the camera and location in the purpose string.
To help users make informed decisions about how their data is used, permission request alerts need to explain and include an example of how your app will use the requested information.
解決辦法:
回XCode檢查Info相關設定
權限取用部分是否有提供取用描述
Key值為Privacy標籤皆須檢查
例如:Privacy - Camera Uasge 指的是取用相機權限
可以修改描述為 允取${PRODUCT_NAME}啟用照相機權限,才能使用OOO功能
位置權限、其他權限描述修改依此類推
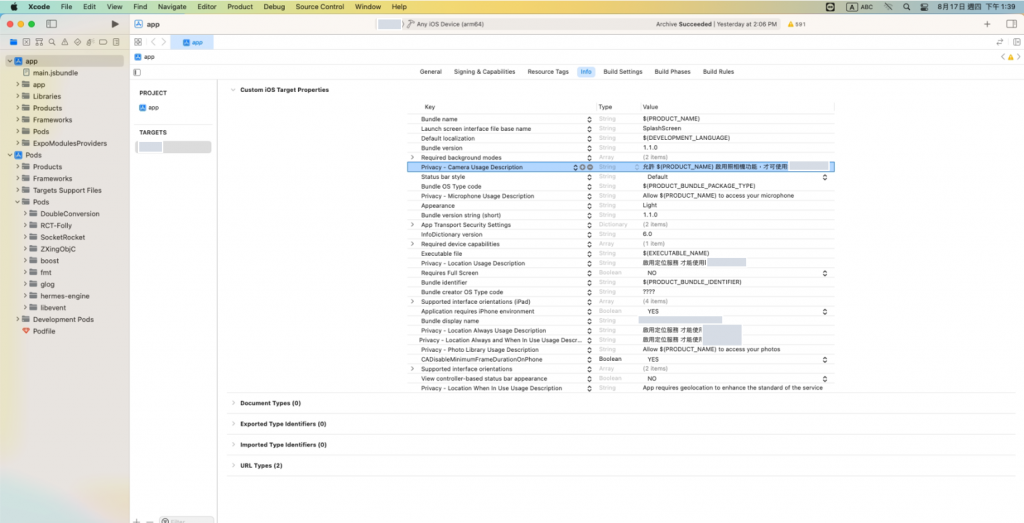
※如果plist檔弄丟,修改上其實要重新逐項設定,非常麻煩
建議在app.json->ios->infoPlist先行設定
例:"NSCameraUsageDescription" : "允取${PRODUCT_NAME}啟用照相機權限,才能使用OOO功能"
回覆Apple審查人員內容文字參考:
I Fix info.plist File and The location service is blocked when you log in And ReArchive To App Store
Camera:Allow $(PRODUCT_NAME) to enable the camera feature in order to use the scan-to-ship feature
Location:Enable location services to use the shipping function
See FixPrivacyText.PNG
這邊指的是,如果你不開啟定位功能
理應要讓App能正常向下執行
不是讓使用者就卡在登入口
Your app uses location data for features that are not relevant to a user's location.
Specifically, your app is not functional when Location Services are disabled.
解決辦法:
在修改之前,確認一下登入功能是否有檢查位置權限
之前因為希望使用者在使用APP一登入時
可以先將位置服務打開
不過Apple希望你在未開啟位置時,非位置功能要正常使用
回覆時附加一張
移除位置權限判斷的程式碼比對圖
並與Apple審查人員告知後,
解決此問題

回覆Apple審查人員內容文字參考:
Regarding the issue of login being hindered by location services, I have made modifications to the Login module. Users are no longer required to provide location access at this stage and can still use other functionalities of the app. Please see '登入判斷移除位置檢查.PNG' for a visual comparison in the Git repository.
每次回覆時,最後記得加敬語
感謝辛苦的審查人員們😉
Please have the reviewing personnel test and confirm. Thank you
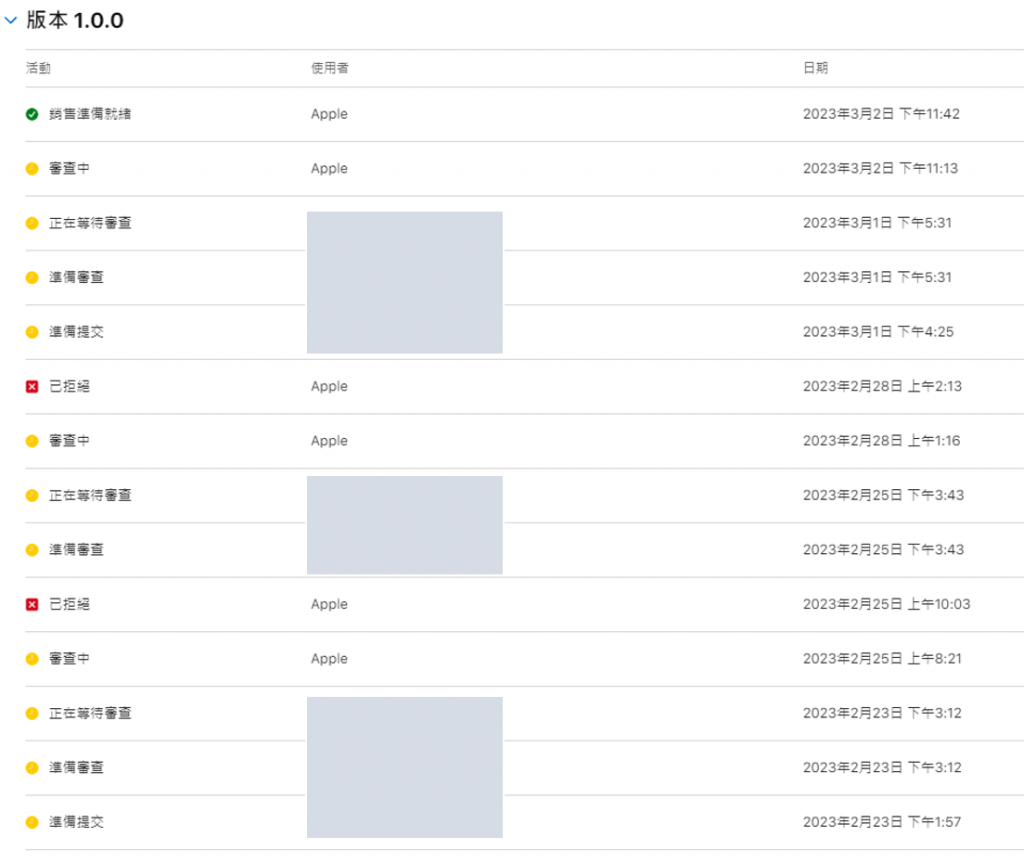
結語:
iOS上架的流程
其實比Android少很多(體感上)
不過最難的其實是審查階段
第一次上架就從2/23~3/2,苦戰8天
才終於看到那個綠色勾勾✅
那麼到這邊結束,就是整個雙平台上架系列的結尾了
下一篇要來分享,App上架結束後
React Native & Expo 專案整體性維護及交接。
