設定 DevOps Automation rules - When commit created → then send Slack message based on assignee
本文省略了 Jira 與 GitLab 連結練習,若想知道詳情可參考 Day19 - 工人智慧動手把 Jira 與 GitLab 連結,完成最後一哩路
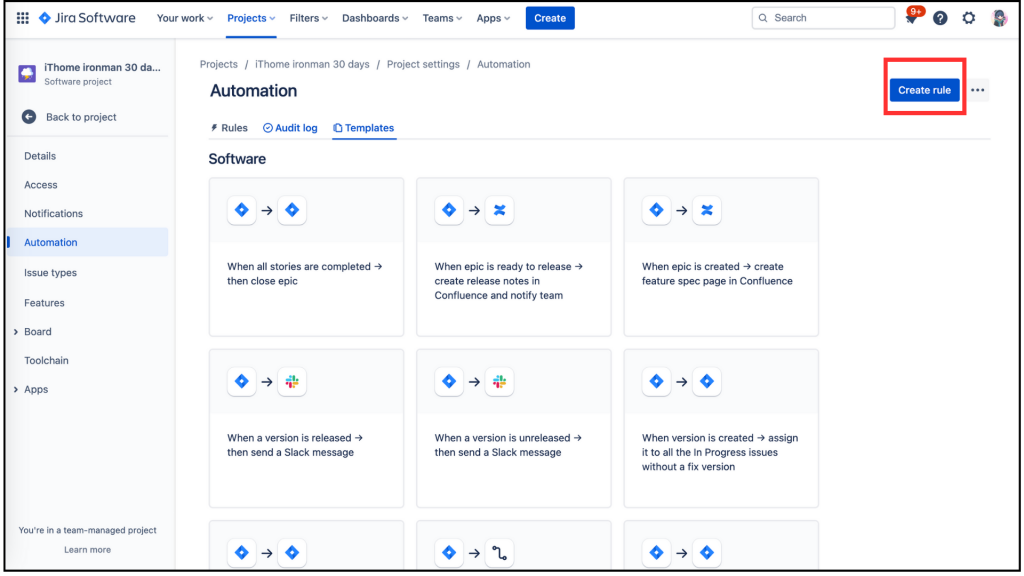
進到 When:Create a trigger,,我們把頁面向下拉。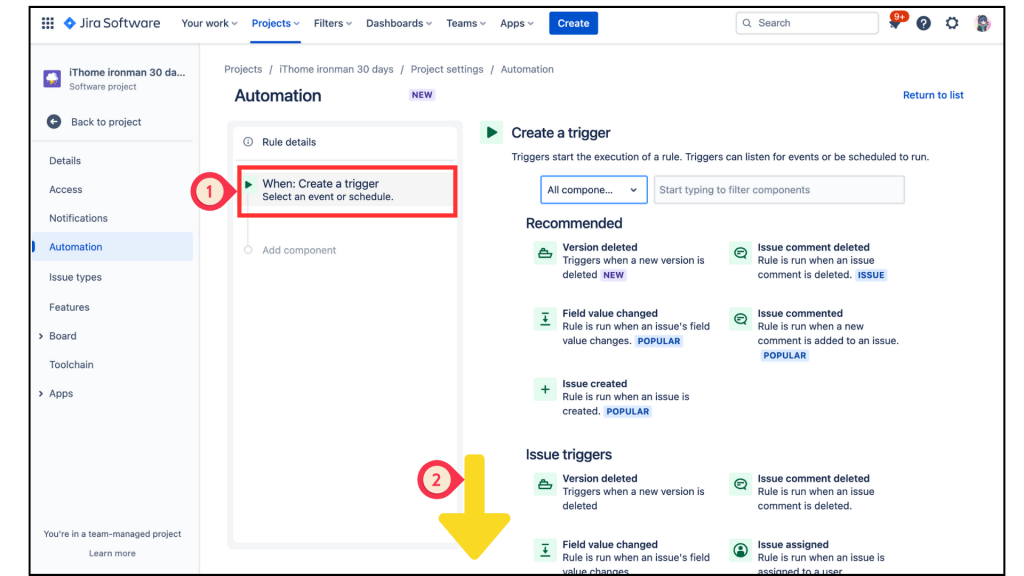
在 DevOps 分類中找到 Commit created 點擊進入。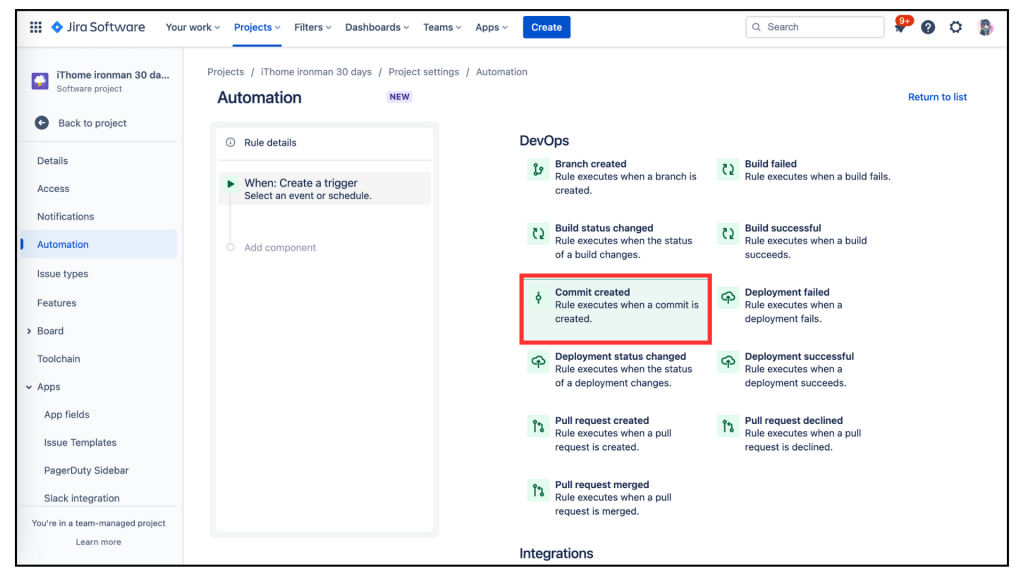
進入 Commit created 選單中,按下 [Save]。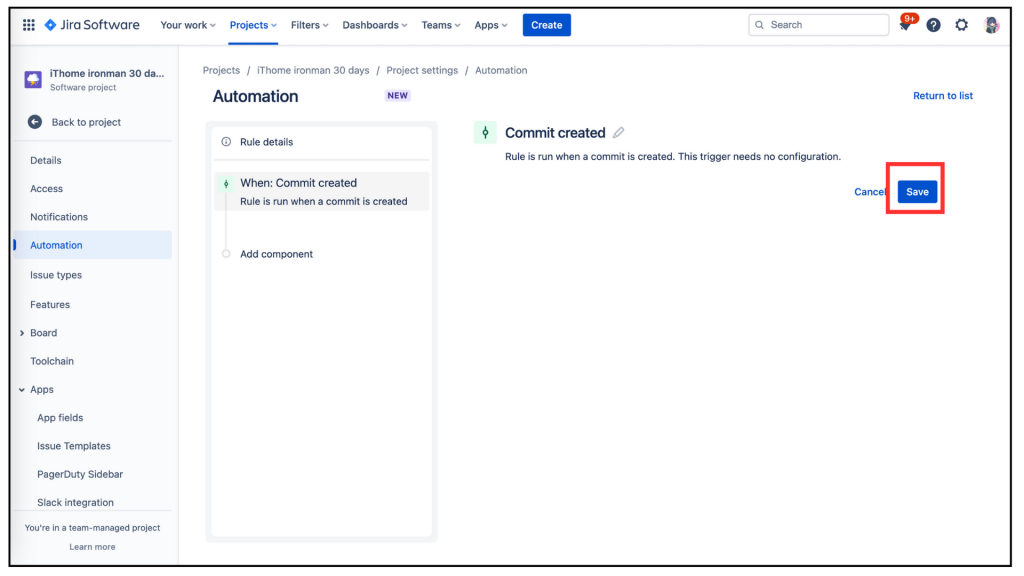
選取左邊的 Add component 變成 New component 後,選擇右邊的 IF:Add a condition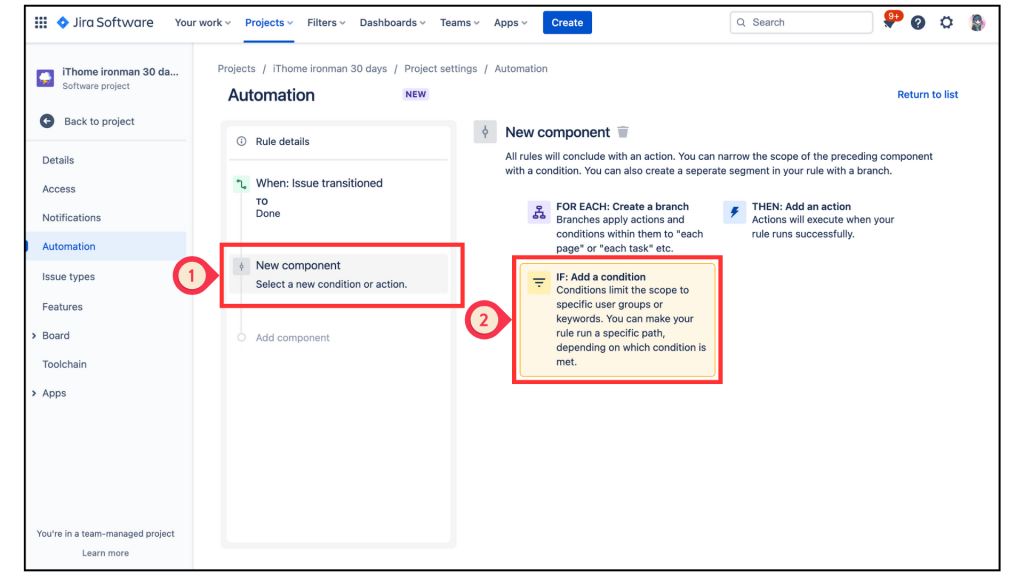
在 Add a condition 的選單中,找到 Issue fields condition,這個選項應該很好找,因為它是也會展示 POPULAR。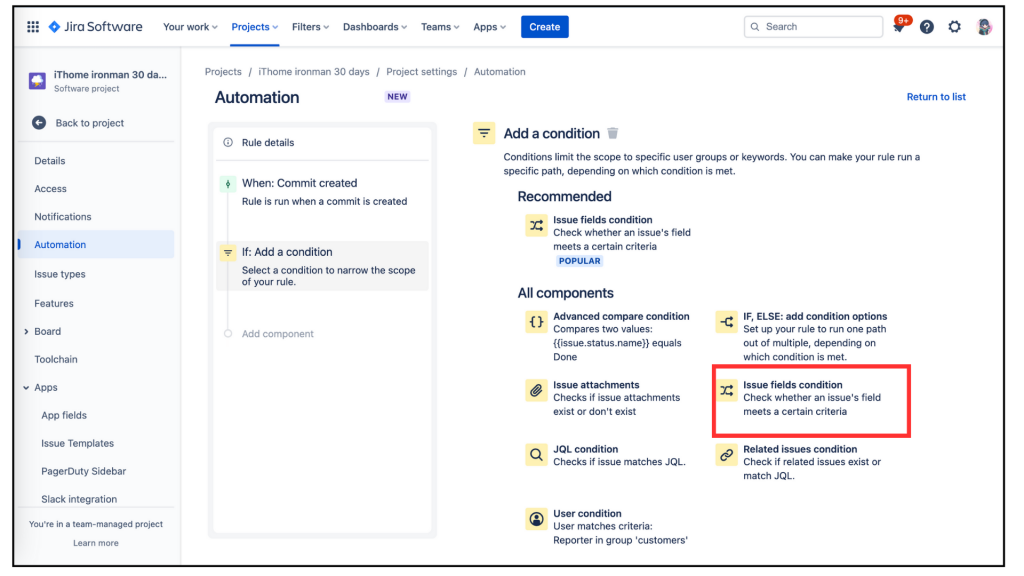
進入 Issue fields condition後,其下方的設定有 [Field]、[Condition]、[Value]因為我們要設定 IF 特定觸發條件,以下是我的設定內容。
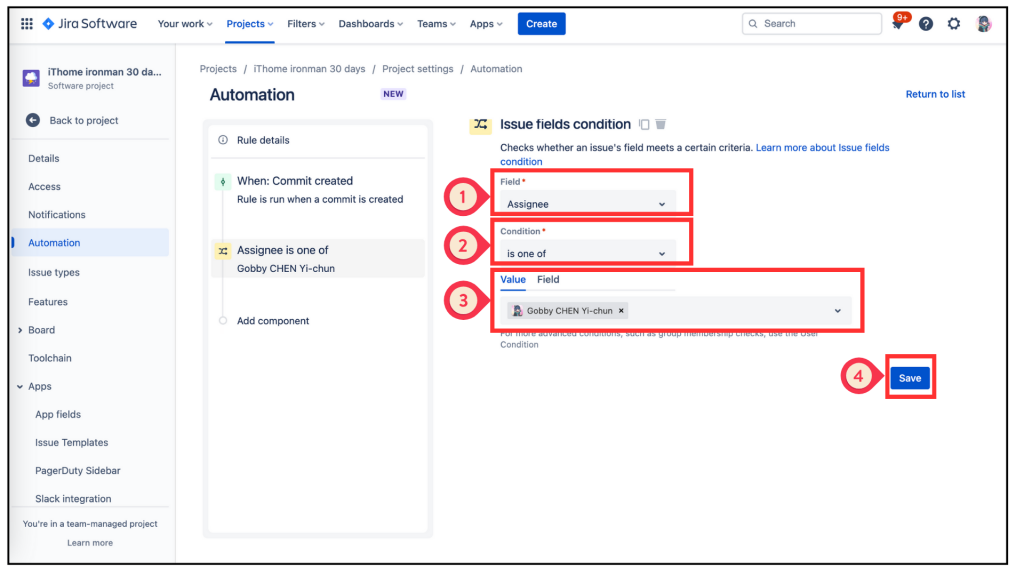
再回到左邊的欄位,選取 Add component 變成 New component 後,選擇右邊的 THEN:Add an action。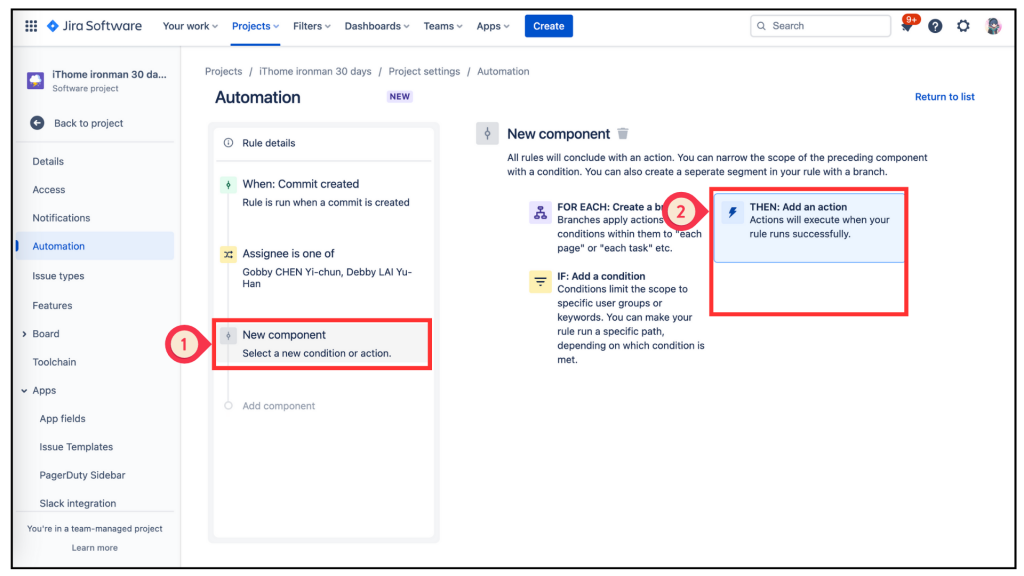
進入 Add an action 選單中把頁面向下拉。THEN:Add an action,進入 Add an action 選單中把頁面向下拉。找到 Notification 分類中的 Send slack message,大力的給他點下去!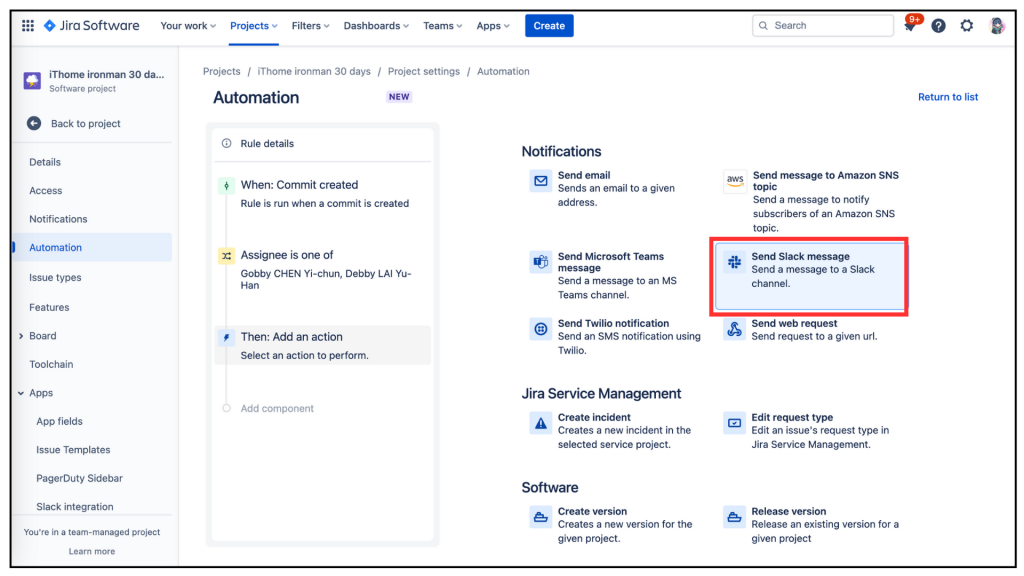
在填入資料前,我們要先取得 [Webhook URL],我在 Day15-慶祝鐵人賽文章完成一半,應景玩個 Jira Celebrate Milestones in Slack 第 17 點起有教學,可以詳看如何取得 [Webhook URL]。
回到 Send slack message 設定頁,把複製的[Webhook URL]貼上,也設定你預定要收到的訊息內容,選取你要的群組頻道或使用者,最後記得按 [Save]。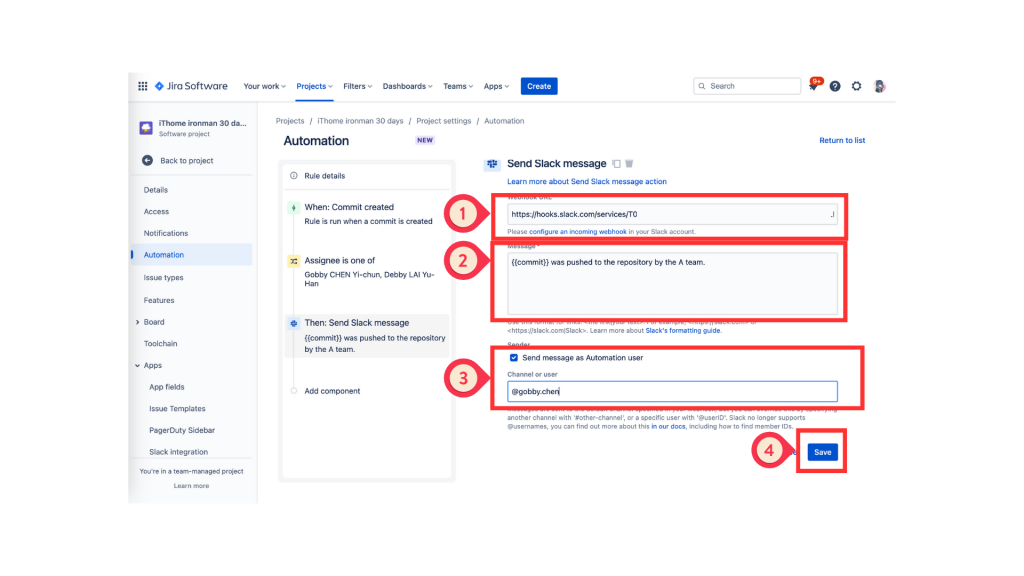
來到最後的步驟了,設定好 rule 的名稱,再按下 [Turn it on],就完成✅啦!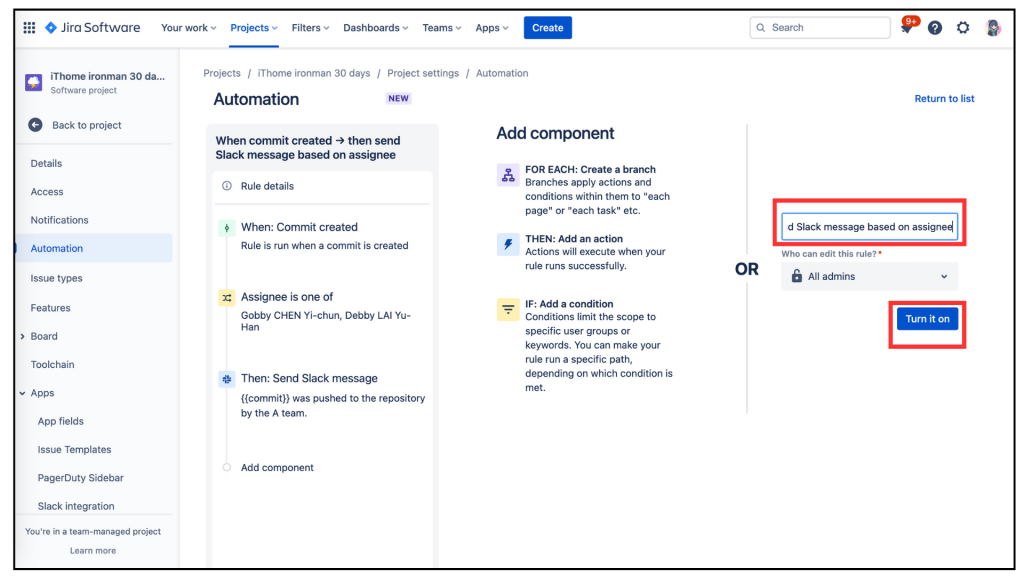
回到 Automation 設定頁,在 [Rule detial] 可以看到內容都自動設定好了 !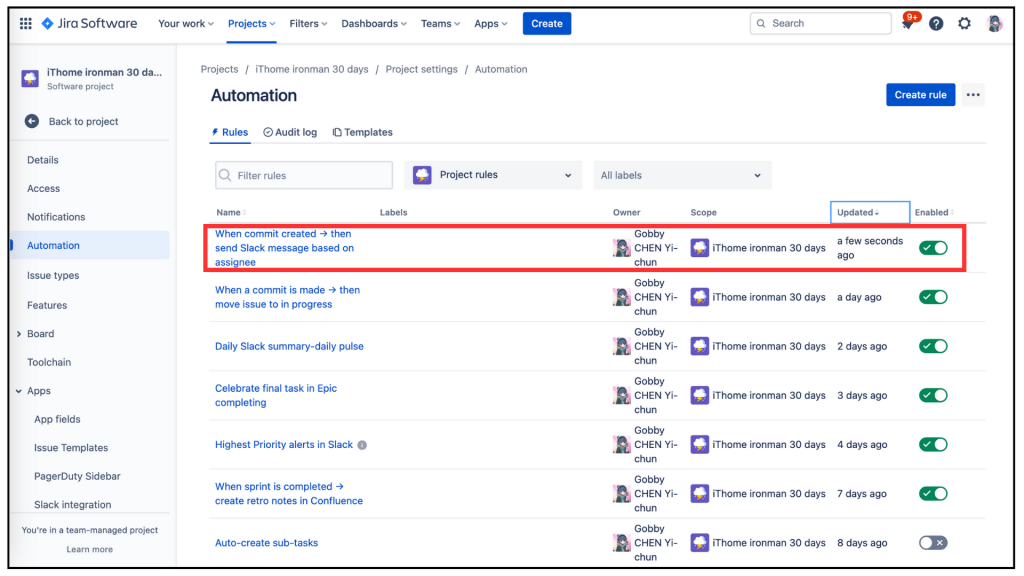
點開 [Audit log],發現此 rule 呈現 ** CONFIG CHANGE**,算是成功啦!(因為還未發生觸發條件,而且界面上沒有 [Run rule] 可以驗證。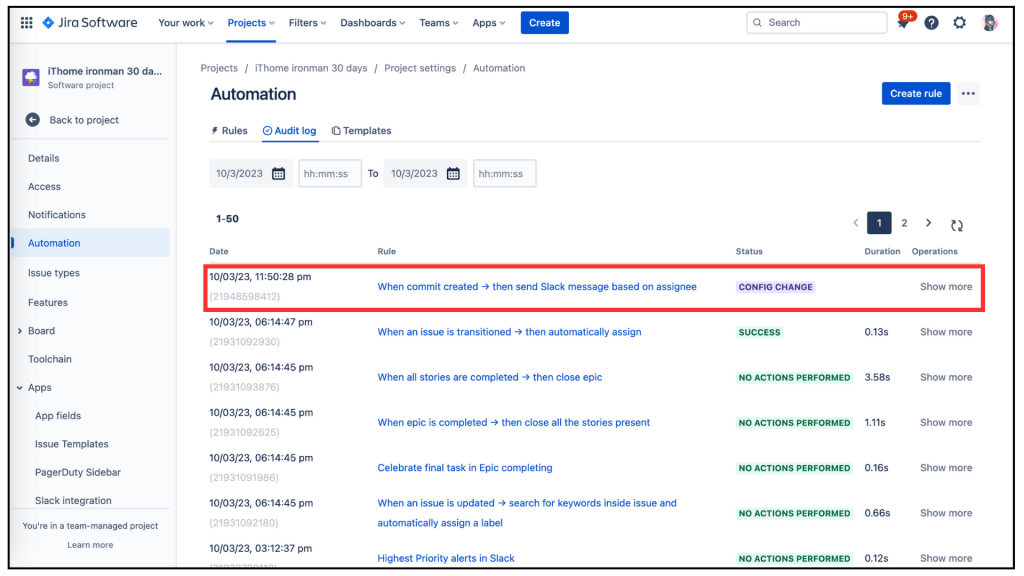
在 Jira 設定 自動化的部份完成✅了
