iT邦幫忙

2023 iThome 鐵人賽

DAY 17
1
IT管理

每天利用 Jira 開單時,練習一個密技,應該不是薪水小偷吧!?系列 第 17

Day17- 為了寫 DevOps Commit -->move issue to in progress 文章,我終於開始寫程式並使用 GitLab ,是不是有點瘋

  • 分享至 

  • xImage
  •  

今日分享:

  1. 不會寫程式的我,卻正在寫程式開發專案管理工具的使用文章!
  2. 為了寫文章,還真的開始學寫 Code 並 import 到 GitLab !
  3. 設定 DevOps Automation rules - When a commit is made → then move issue to in progress

不會寫程式的我,卻正在寫程式開發專案管理工具的使用文章!

兩年前我就一直喊著想學 Python,但有拖延癌的我,到現在都還沒開始,一直到現在我都還不會寫程式。
但是,我今年因為工作關係開始使用 Jira,而我最喜歡 Jira Automation 這個功能,也想挑戰自己是不是能連結 30 天都能寫出文章。所以在 20 天前報名了鐵人賽,在 16 天前開始寫 Jira 各種 Automation 的設定練習。
想要做這個挑戰的第一個原因,是為了能用寫文章的機制讓我有效的練習和玩耍 Automation ,第二個原因是我藉趁這個每日發文的機制,強迫我自己不只是在門外看,而是真的捲起袖子走過一次軟體工程師的工作日常。


為了寫文章,還真的開始學寫 Code 並 import 到 GitLab !

其實前 16 天的文章對我而言,都還可以應付,因為我工作本來就需要使用 Jira 做任務開單,公司使用 Slack 做溝通平台,所以前半段的文章都還算得心應用。

但今天,我終於要挑戰對我來說難度滿高的 Automation --> DevOps
為了寫文章,我真的開一個 GitLab 帳號,請朋友手把手帶我寫一些 code,並真的 upload 上去。

到底是什麼的 DevOps Automation rules ,讓我這麼想寫!
其實我在進行 Sprint 2 Plan 時,就列出下方幾個 rules,包括:

  • When a commit is made → then move issue to in progress
  • When commit created → then send Slack message based on assignee
  • When issue is moved to In progress → Create a branch in GitLab
  • When a branch is created → then move issue to in progress

我自己對於這四個練習是既期待又害怕受傷害,因為我怕卡關太久,幸好我的朋友 J(如果他願意具名我後面再一次感謝他),願意手把手教我。包括:

  • 建立 VS Code 和 iTerm 環境
  • 建立 venv 虛擬server
  • 一步一步教我用 Python 寫 Hello World
  • 開 GitLab 帳號
  • import Pyyhon 專案上 GitLab
    (以上經驗,之後再分享)

設定 DevOps Automation rules - When a commit is made → then move issue to in progress

  1. 下載 GitLab for Jira Cloud ,按下 [Get it now]。
    https://ithelp.ithome.com.tw/upload/images/20231002/20162673yAAgpPmM5u.png

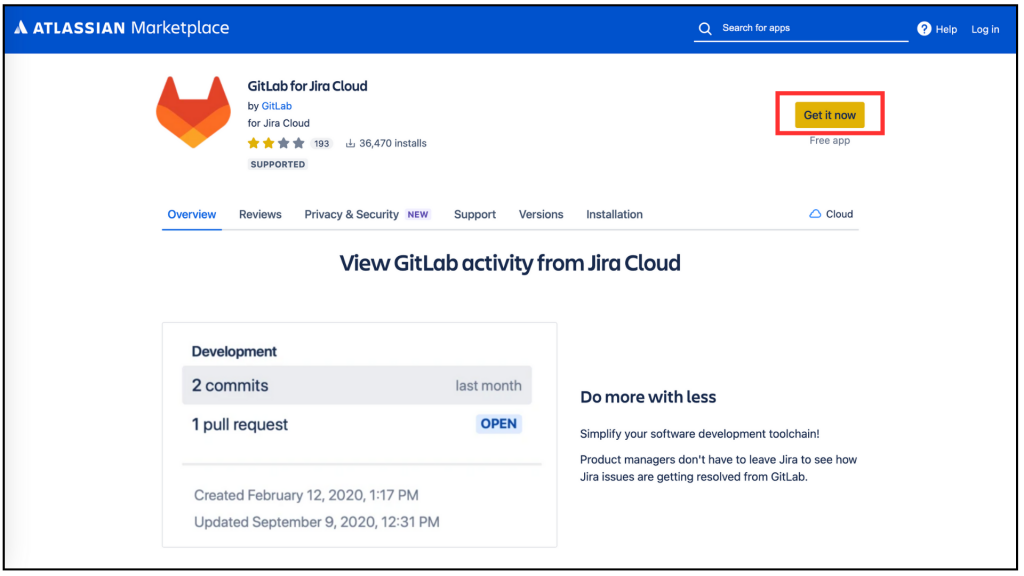
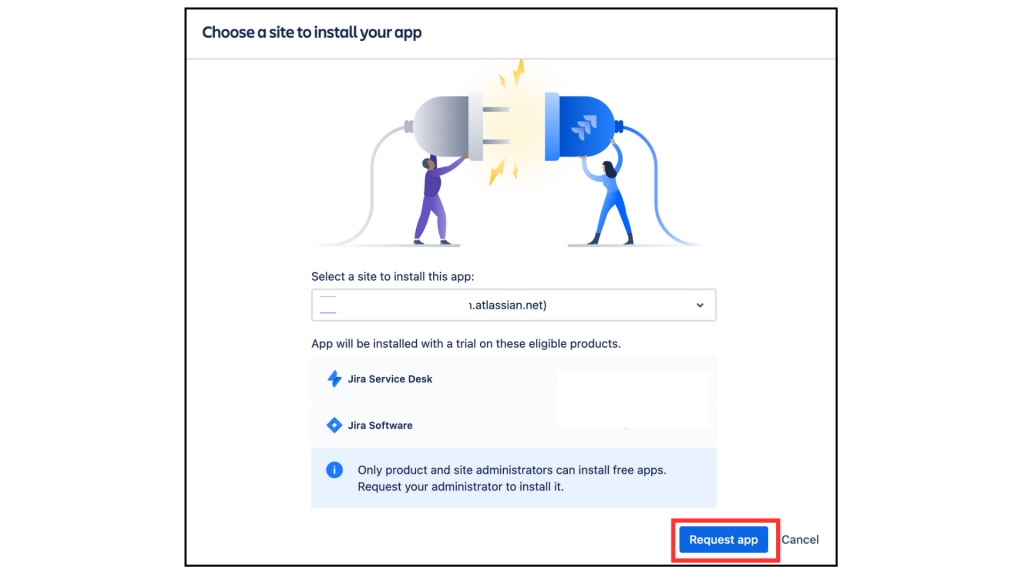
  2. Choose a site to install your App 的選單中,在 [Select a site to install the app] 的選單中,找到你的專案 URL,然後就完成插件的下載和連結囉。

https://ithelp.ithome.com.tw/upload/images/20231003/20162673lOYgE59Dfo.png

https://ithelp.ithome.com.tw/upload/images/20231002/20162673HFKwL1ZpQa.png

本文省略了 Jira 與 GitLab 連結完整練習,若想知道詳情可參考 Day19 - 工人智慧動手把 Jira 與 GitLab 連結,完成最後一哩路

  1. 回到 Jira Software II3D 專案中,找到 Automation Templates
  • 首先從專案 Board 點擊左邊功能區的 [Project setting]
  • 點擊左邊功能區的 [Automation]
  • 點擊右上角的 [Create rule]
    https://ithelp.ithome.com.tw/upload/images/20230928/20162673M4YkuOZMIr.png
  1. 進到 When:Create a trigger,,我們把頁面向下拉。
    https://ithelp.ithome.com.tw/upload/images/20230930/201626736T1hBEaL2e.png

  2. 在  DevOps 分類中找到 Commit created 點擊進入。
    圖 5
    https://ithelp.ithome.com.tw/upload/images/20231003/20162673F5OxiM1qtk.png

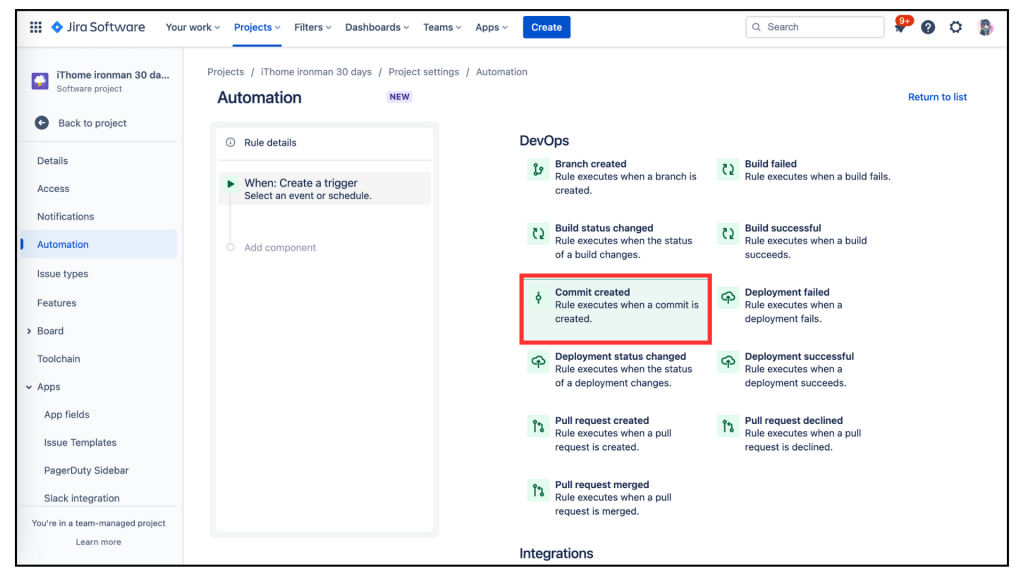
  3. 進入 Commit created 選單中,因為我們在 步驟 1. 和 2. 下載好 GitLab for Jira Cloud 插件,並跟該專案的 URL 做了連結,所以此處只需要按下 [Save]。
    https://ithelp.ithome.com.tw/upload/images/20231003/20162673qpaoNk2xTo.png

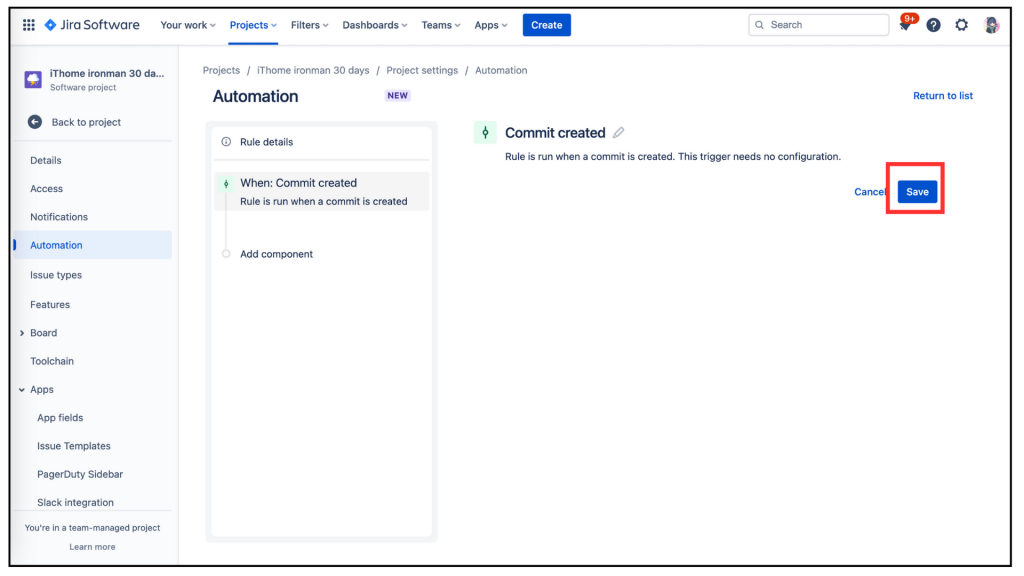
  4. 選取左邊的 Add component 變成 New component 後,選擇右邊的 IF:Add a condition
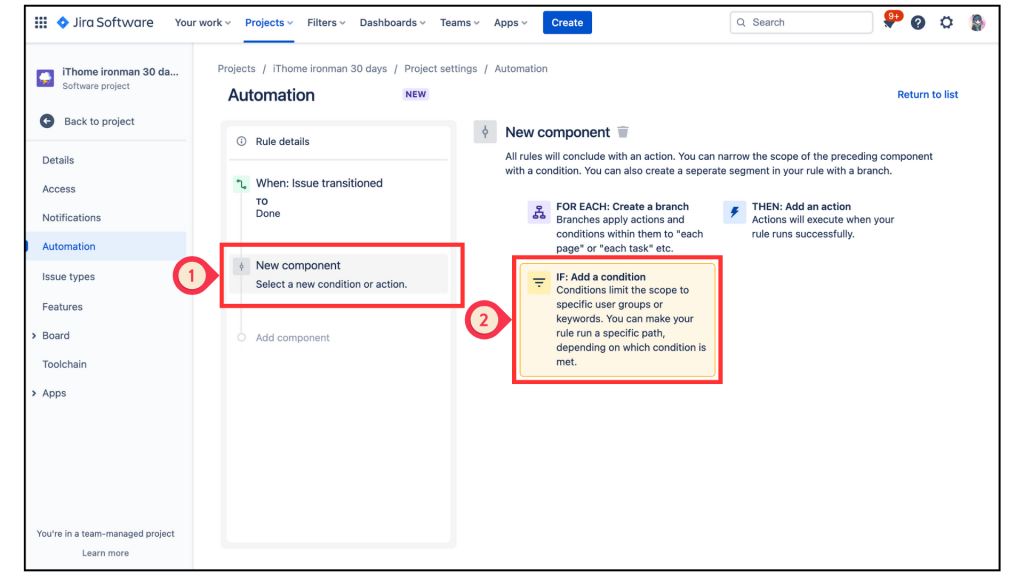
    https://ithelp.ithome.com.tw/upload/images/20230930/20162673KGc61UYVix.png

  5. Add a condition 的選單中,找到 Issue fields condition,這個選項應該很好找,因為它是也會展示 POPULAR
    https://ithelp.ithome.com.tw/upload/images/20231003/201626734djqLC9IQs.png

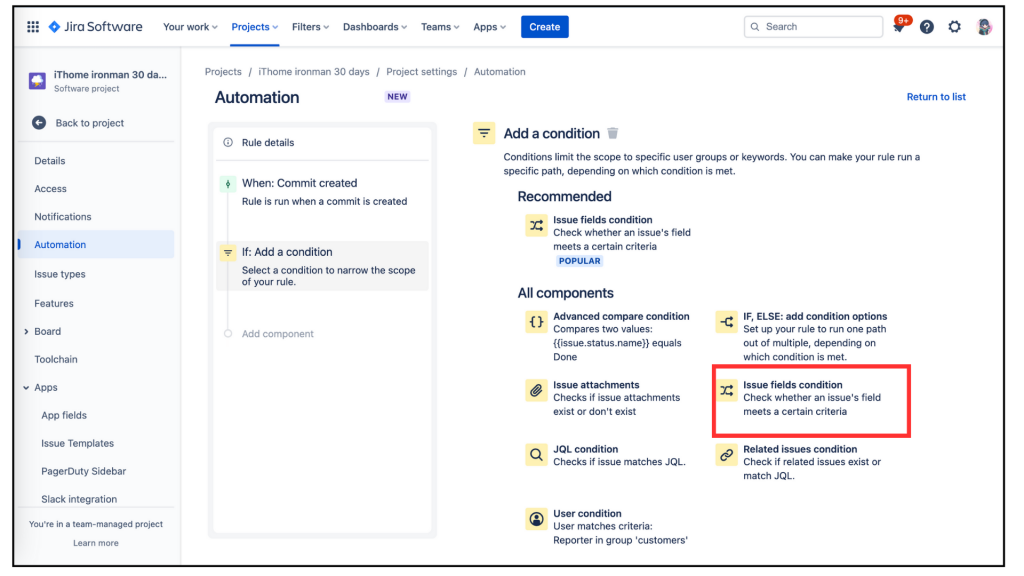
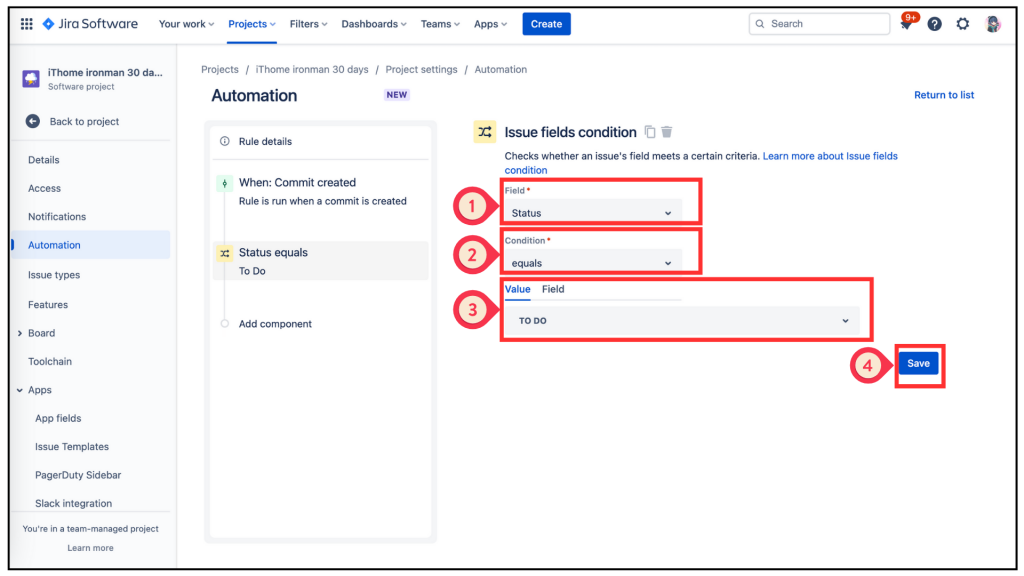
  6. 進入 Issue fields condition後,其下方的設定有 [Field]、[Condition]、[Value]因為我們要設定 IF 特定觸發條件,以下是我的設定內容。

  • [Field]:Status (Jira 要掃描的條件是 Status 的位置)
  • [Condition]:equals(Jira 要掃描的條件是單一條件,必須要等同此條件)
  • [Value]:TO DO (Jira 要掃描的條件是這張符合 commit 的 票開始Status 位置在 TO DO )
  • 再按下 [Save](記得一定要按下 save,不然你會哭哭)。
    https://ithelp.ithome.com.tw/upload/images/20231003/20162673AhGP5sYY1H.png
  1. 再回到左邊的欄位,選取 Add component 變成 New component 後,選擇右邊的 THEN:Add an action。進入 THEN:Add an action 的選單中,找到 Recommended 分類中的 Transition issuee,大力的給他點下去!
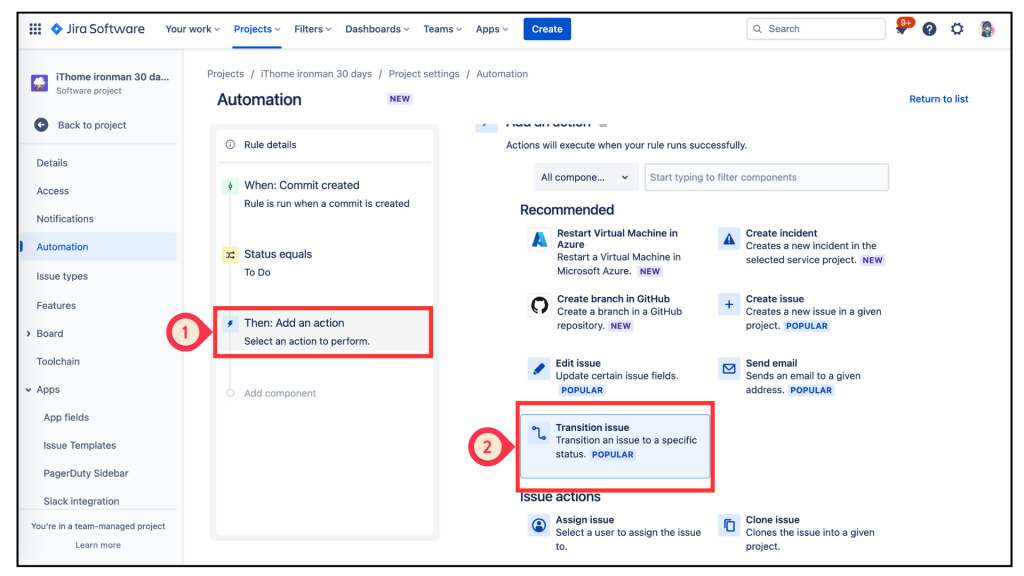
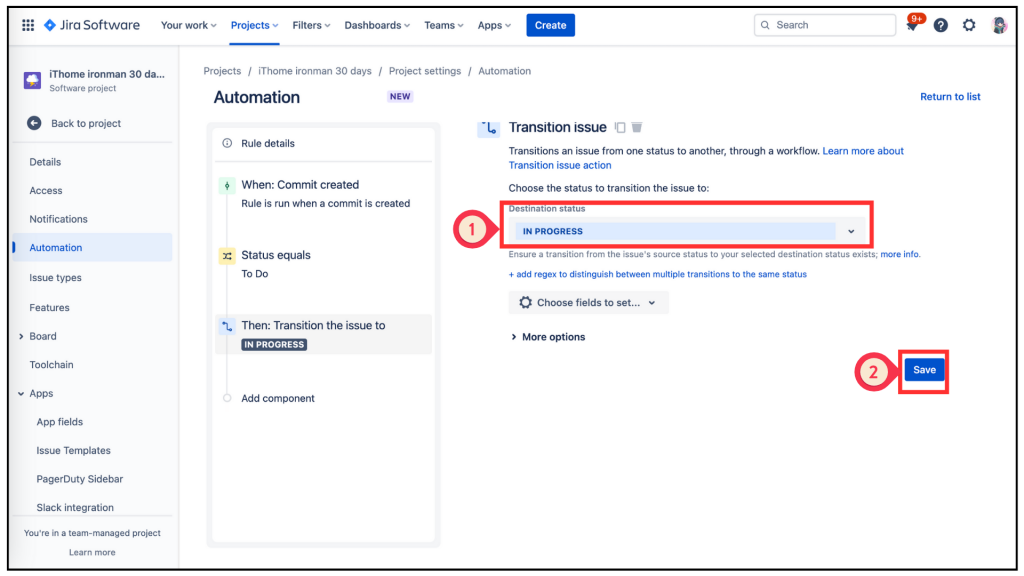
    https://ithelp.ithome.com.tw/upload/images/20231003/20162673iGbk4Mmutx.png

  2. Transition issuee 設定頁中,只有 [Destination status]的欄位需要做設定。
    https://ithelp.ithome.com.tw/upload/images/20231003/20162673s5iP6MFvof.png

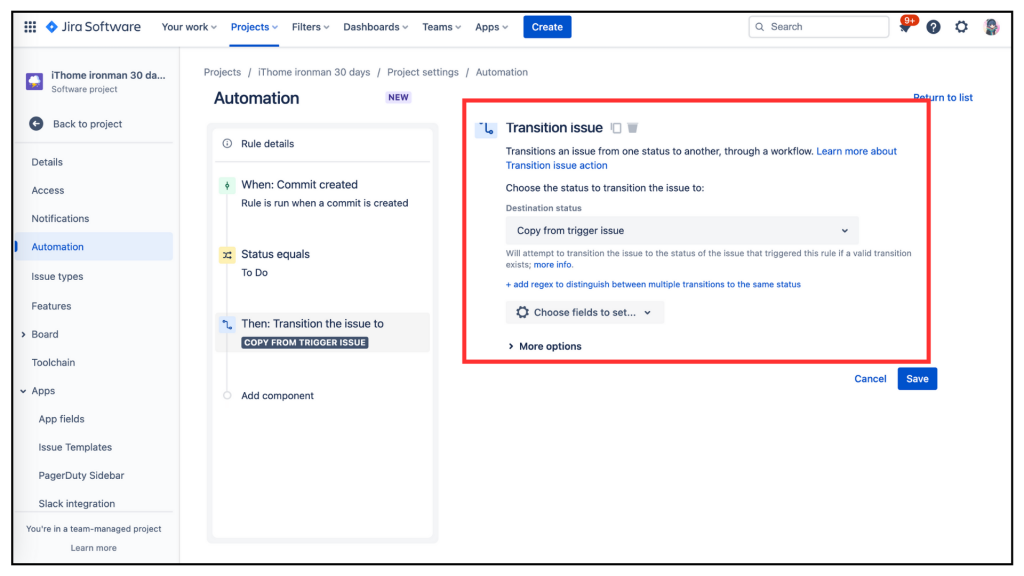
  3. 在 [Destination status] 下拉式選單中,我們選取 Same status (loop) 中的 IN PROGRESS,因為我們期望的當上述條件被成功觸發後,其 ticket 會從上面的 TO DO Transition 到 IN PROGRESS。最後,還有什麼事嗎?唉唉唉,不要忘記按下 [Save] 。
    https://ithelp.ithome.com.tw/upload/images/20231003/20162673DHSoLGRHga.png

https://ithelp.ithome.com.tw/upload/images/20231003/20162673a9D20T3cjC.png

  1. 來到最後的步驟了,設定好 rule 的名稱,再按下 [Turn it on],就完成✅啦!回到 Automation 設定頁,在 [Rule detial] 可以看到內容都自動設定好了 !
    https://ithelp.ithome.com.tw/upload/images/20231003/20162673H11RYBrshp.png

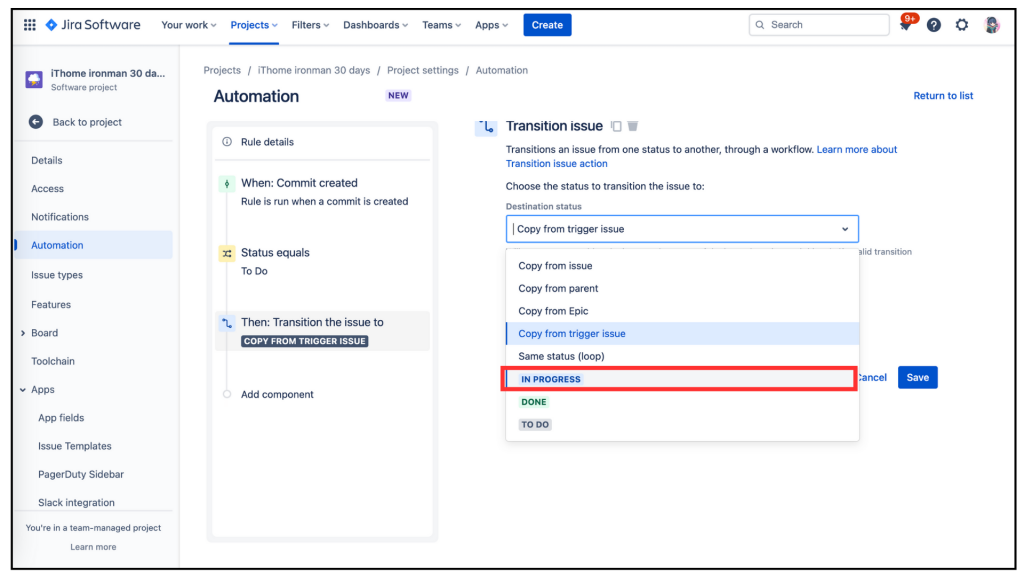
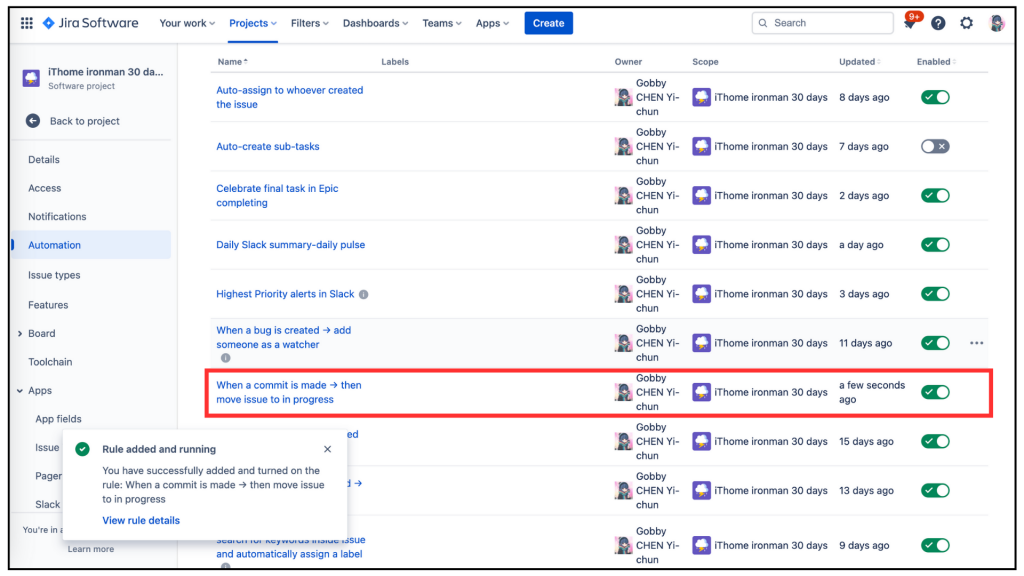
是不是很簡單呢?⋯⋯⋯⋯ 其實還有更簡單的喔~就是,這個 Automation rule

有 Template !!!! (⊙﹏⊙✿)

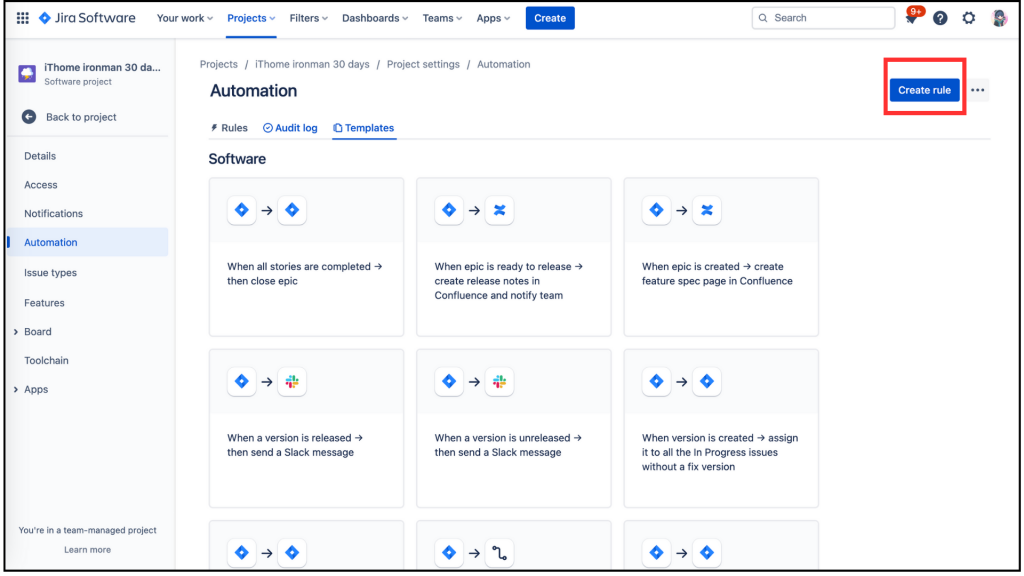
就是來到 [Automation]的設定頁,按上方的 [Template],在 DevOPs 分類中找到它再點擊進去 (如下圖所示)
https://ithelp.ithome.com.tw/upload/images/20231003/20162673t0Zpkybazg.png

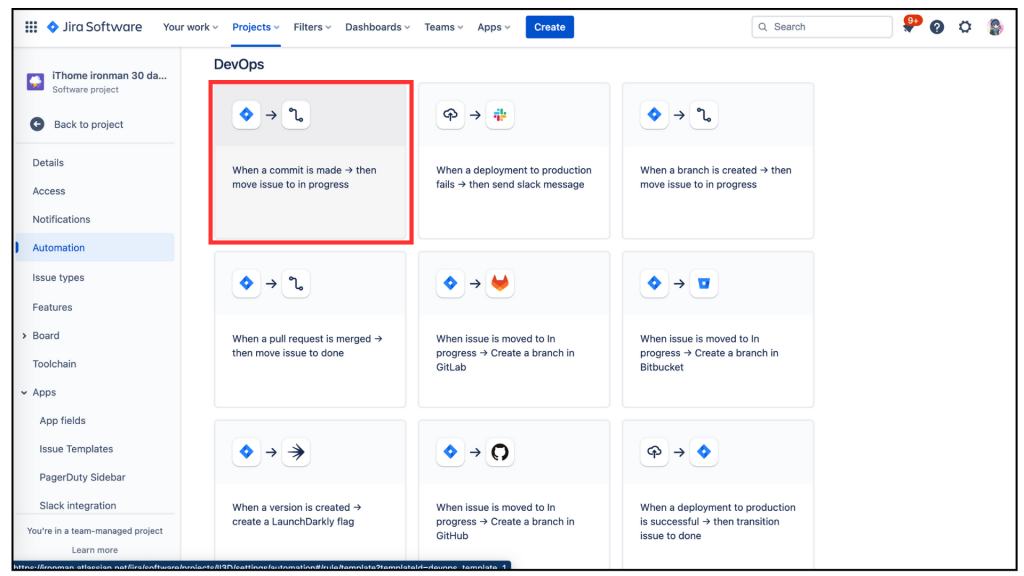
直接無腦按下 [Turn it on] 即可
https://ithelp.ithome.com.tw/upload/images/20231003/20162673jEZ2vP2i4K.png

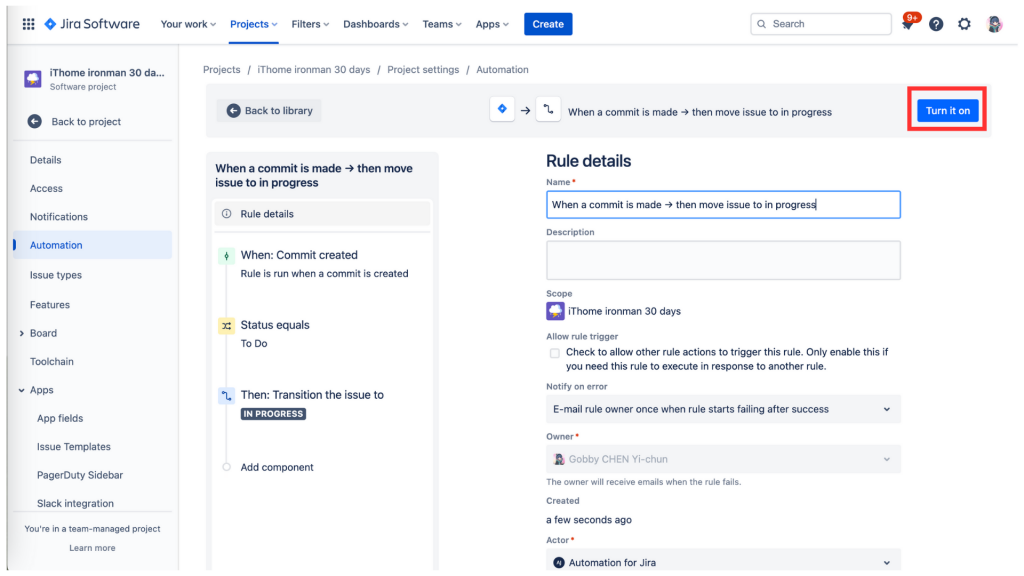
哈哈哈🤣,不要怪我啦,我只是覺得走一次手動設定可以了解更多,比起無腦是不是自己動手設定比較有腦呢!
https://ithelp.ithome.com.tw/upload/images/20231003/20162673jcFIbp1jOY.png

好啦,今天的設定就完成了。
(驗證待續~)


上一篇
Day16-不用一個一個設定,Jira 直接一鍵設定 Slack integration
下一篇
Day18 - DevOps - 在 GitLab 開 Commit,Slack 自動告訴你。
系列文
每天利用 Jira 開單時,練習一個密技,應該不是薪水小偷吧!?30
圖片
  直播研討會
圖片
{{ item.channelVendor }} {{ item.webinarstarted }} |
{{ formatDate(item.duration) }}
直播中

尚未有邦友留言

立即登入留言