今天要來設定地圖,實作的內容在這邊 :
筆者後來改用靜態的方式加入 MapFragment,直接選擇Google Maps Fragment :
fragment_maps.xml :
<?xml version="1.0" encoding="utf-8"?>
<fragment xmlns:android="http://schemas.android.com/apk/res/android"
    xmlns:tools="http://schemas.android.com/tools"
    xmlns:map="http://schemas.android.com/apk/res-auto"
    android:id="@+id/map"
    android:name="com.google.android.gms.maps.SupportMapFragment"
    android:layout_width="match_parent"
    android:layout_height="match_parent"
    tools:context=".MapsFragment"
    map:uiZoomControls="true"
    map:uiRotateGestures="true"
    map:cameraTilt="30" />
MapsFragment :
class MapsFragment : Fragment() {

    override fun onCreateView(
        inflater: LayoutInflater,
        container: ViewGroup?,
        savedInstanceState: Bundle?
    ): View? {
        return inflater.inflate(R.layout.fragment_maps, container, false)
    }
}
MainActivity,這邊要來取得 MapsFragment 的實例 :
private fun initView() {

    adapter = MainAdapter(mutableListOf())

    // TODO: MapFragment
    val mapFragment = supportFragmentManager.findFragmentById(R.id.fragment_container) as SupportMapFragment
    mapFragment.getMapAsync(this)
}
在 getMapAsync() 內傳入的參數為 OnMapReadyCallback,一樣要實作 onMapReady() 。
現在地圖初始化差不多了,再來是設定地圖的參數。
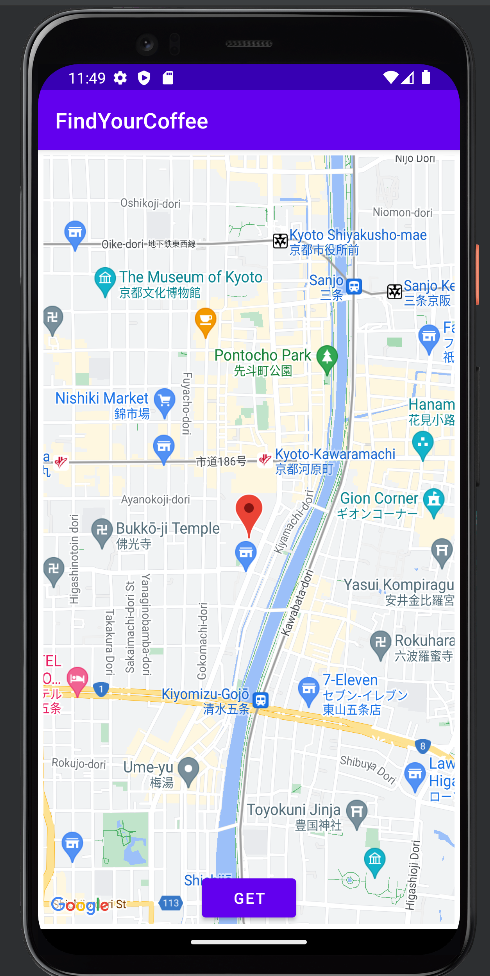
一樣實作 onMapReady() ,把昨天設定的虛擬島改成京都 :
// Update the map configuration at runtime.
override fun onMapReady(googleMap: GoogleMap) {

    // Set the map coordinates to Kyoto Japan.
    val kyoto = LatLng(35.00116, 135.7681)

    // Set the map type
    googleMap.mapType = GoogleMap.MAP_TYPE_NORMAL

    // Add a marker on the map coordinates.
    googleMap.addMarker(
        MarkerOptions()
            .position(kyoto)
            .title("Kyoto")
    )

    // Move the camera to the map coordinates and zoom in closer.
    googleMap.moveCamera(CameraUpdateFactory.newLatLng(kyoto))
}
none
normal
hybrid
satellite terrain
執行成功 :
接著來設定地圖的縮放大小,
// Move the camera to the map coordinates and zoom in closer.
googleMap.moveCamera(CameraUpdateFactory.newLatLng(kyoto))
googleMap.moveCamera(CameraUpdateFactory.zoomTo(15f))
透過移動相機可以調整縮放大小,官方文件的介紹在這邊。
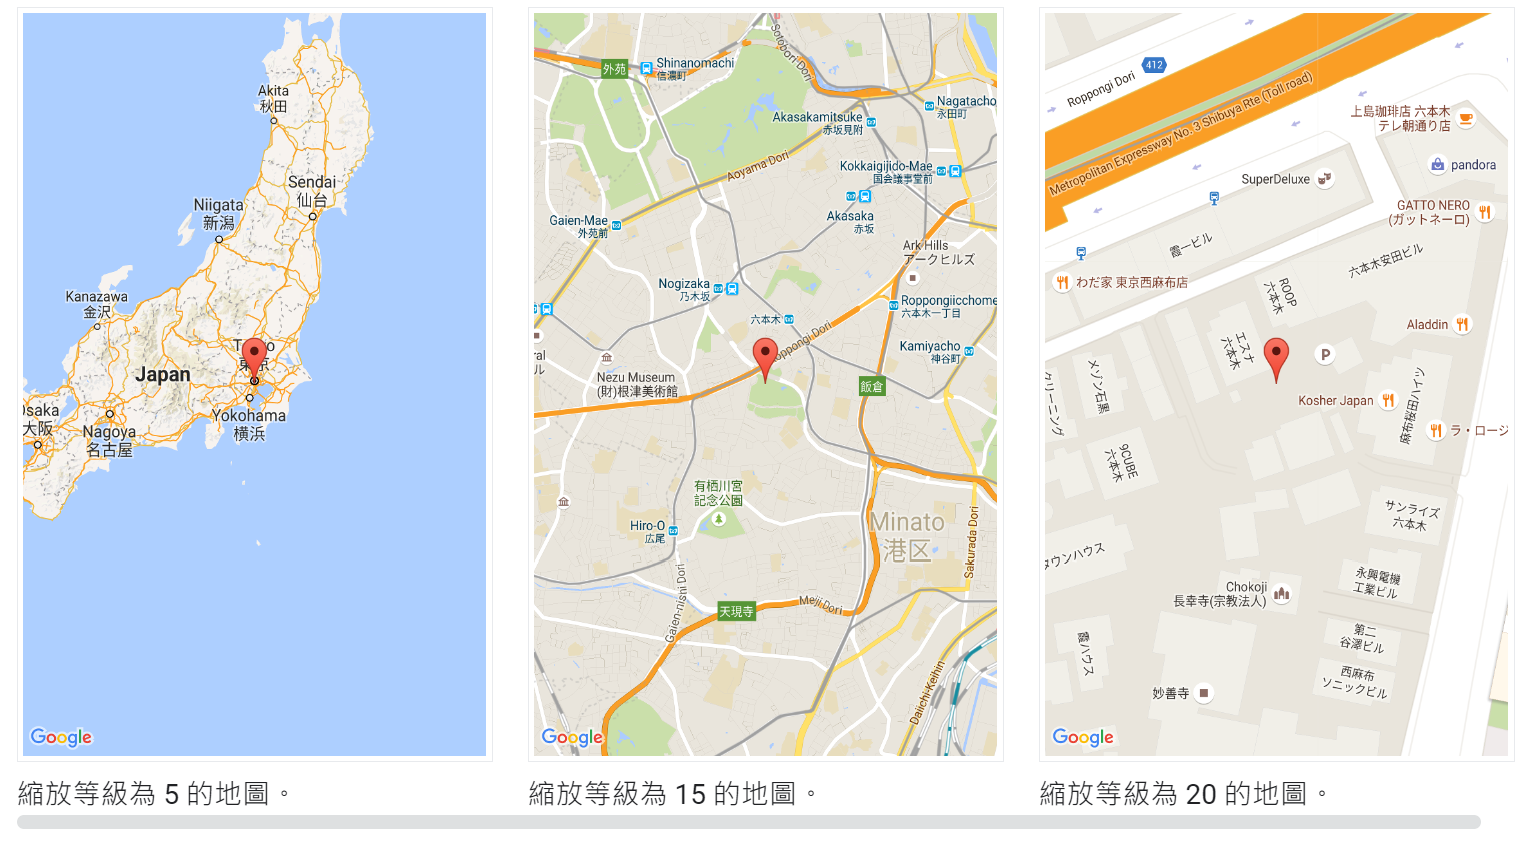
以下清單列出各縮放等級大致可顯示的精細程度:
下圖是文件上縮放大小的對照圖,讓大家有個概念 :
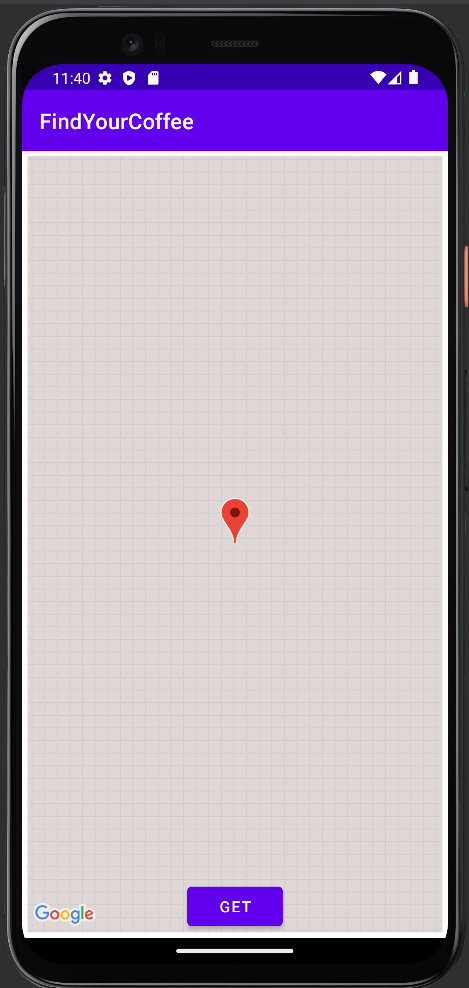
執行結果 : 失敗!
看了 log 居然有這個錯誤訊息 :

而且在執行成功的時候也有出現,好奇怪,已經有綁定了耶!
他說要我們先檢查 API Key 和 package name,package name 確定沒問題,結果在 Manifest.xml 發現我的 API KEY 從原先的 ${MAPS_API_KEY} 變成下面的 “YOUR_API_KEY”,太鬼了吧 :

調整完以下程式碼後就解決上述的錯誤 :
<meta-data
    android:name="com.google.android.geo.API_KEY"
    android:value="${MAPS_API_KEY}" />
再次運行,就成功顯示縮放後的地圖拉~~
還有幾種常用的功能,我們就都來玩看看。
現在換個地圖模式,並加入交通狀況以及顯示縮放大小的按鈕 :
// Set the map type
googleMap.mapType = GoogleMap.MAP_TYPE_HYBRID

// Display traffic.
googleMap.isTrafficEnabled = true

// 指南針
googleMap.uiSettings.isCompassEnabled = true

// 縮放按鈕
googleMap.uiSettings.isZoomControlsEnabled = true
地圖上介面都是透過 UiSettings 做設定,官方文件在這邊,Android 相關的 UiSettings 在這邊。
來看看對比 :
原圖
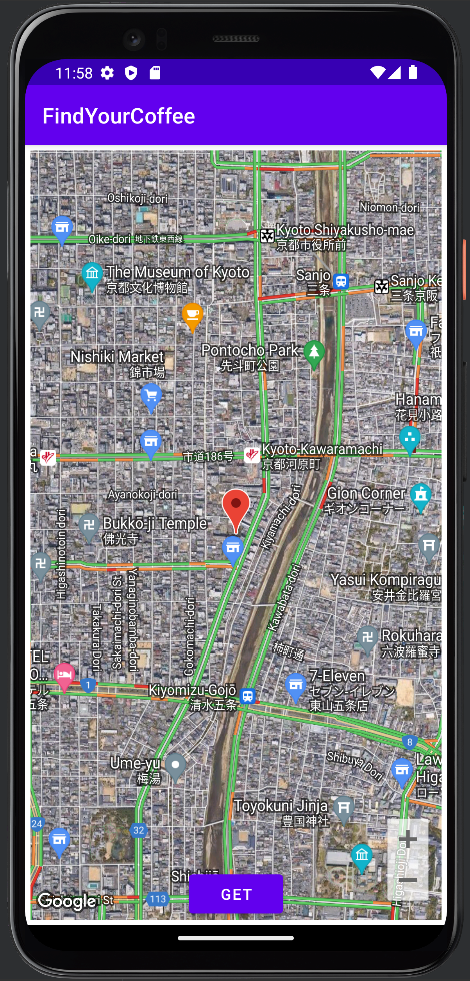
縮放後
好好玩~~~
明天來試著完成我們的專案需求 :