今天繼續來探討noise
我們從筆記本的 Loop starting from a noised version of the input
開始看
我們先回顧一下之前做了什麼
先前我們已經將圖像編碼成潛在表示形式,並向其添加了雜訊。我們使用的模型是 autoencoder,它可以壓縮圖像到一個更小的形式,然後再從這個壓縮的表示形式重建圖像。
而昨天的noise 的內容,我們在這個帶有雜訊的潛在表示上執行去噪操作並且觀察結果。這可幫我們了解模型如何從一個雜訊的起始點進行去噪,以及其去噪能力的強弱。
現在我們假設我們已經有了一個帶有雜訊的潛在表示,意思是我們從有雜訊的表示開始,而不是從一個完全隨機的雜訊表示開始
也就是說:
如果我們想要觀察當使用帶有雜訊的圖像作為起始點,並使用新的提示在循環中進行最後幾步的去噪操作時,會發生什麼呢?
接下來看code
流程如下:
我們會先做prompt 的文字處理,轉換為詞向量,並設定去噪過程,然後加入噪音,最後跑一個去噪loop
# Settings (same as before except for the new prompt)
prompt = ["A colorful dancer, nat geo photo"]
height = 512                        # default height of Stable Diffusion
width = 512                         # default width of Stable Diffusion
num_inference_steps = 50            # Number of denoising steps
guidance_scale = 8                  # Scale for classifier-free guidance
                                    # 決定了我們如何結合不帶文本指導和帶文本指導的雜訊預測。
generator = torch.manual_seed(32)   # Seed generator to create the inital latent noise
batch_size = 1
這邊我們起了一個新的prompt ,並且設定了50個去噪步驟。這模型將會進行50次迭代,每次都會嘗試去除一些雜訊。
# 轉為詞向量
text_input = tokenizer(prompt, padding="max_length", max_length=tokenizer.model_max_length, truncation=True, return_tensors="pt")
#將數值序列進一步轉換為嵌入向量
with torch.no_grad():
    text_embeddings = text_encoder(text_input.input_ids.to(torch_device))[0]

max_length = text_input.input_ids.shape[-1]
# 創建一個不帶有任何特定文本指導的版本,之後可以拿來對比和結合有指導和無指導的噪音預測。

uncond_input = tokenizer(
    [""] * batch_size, padding="max_length", max_length=max_length, return_tensors="pt"
)
with torch.no_grad():
# 我們要將這個無條件的文本輸入也轉換成嵌入
    uncond_embeddings = text_encoder(uncond_input.input_ids.to(torch_device))[0]

# 將無條件嵌入和有文本提示的嵌入連接在一起。這樣可以在同一批次中同時處理無條件和有條件的雜訊預測。這樣可以提高效率,並能夠在下一步更容易地結合兩者。
text_embeddings = torch.cat([uncond_embeddings, text_embeddings])
set_timesteps(scheduler, num_inference_steps) #設置去噪過程的步驟數。
接下來處理潛在空間的雜訊:
start_step = 10
start_sigma = scheduler.sigmas[start_step]
noise = torch.randn_like(encoded)
這裡的關鍵是torch.randn_like(encoded)。這將生成一個與我們的編碼圖像相同大小和形狀的隨機雜訊,這樣我們就可以將此雜訊添加到原始的潛在空間圖像中。
latents = scheduler.add_noise(encoded, noise, timesteps=torch.tensor([scheduler.timesteps[start_step]]))
latents = latents.to(torch_device).float()
這邊正式將雜訊添加到原始的潛在圖像中。
接下來進行去噪迴圈,在這個迴圈中,我們會透過loop 逐步還原圖片
,在之後的在每一步中,我們會使用調度器來決定加入多少雜訊,
然後使用模型來預測該步驟的雜訊,最後再根據預測的雜掀來更新當前的圖像潛在表示。
# Loop
for i, t in tqdm(enumerate(scheduler.timesteps), total=len(scheduler.timesteps)):
    # 這邊確保不是重頭開始,是從第start_step 開始去噪
    if i >= start_step: # << This is the only modification to the loop we do

        # expand the latents if we are doing classifier-free guidance to avoid doing two forward passes.
        latent_model_input = torch.cat([latents] * 2)
        sigma = scheduler.sigmas[i]
        latent_model_input = scheduler.scale_model_input(latent_model_input, t)
        #獲取當前時間步的sigma值,然後用它來縮放潛在的模型輸入。

        # predict the noise residual
        with torch.no_grad():
            noise_pred = unet(latent_model_input, t, encoder_hidden_states=text_embeddings)["sample"]
        #  使用模型來預測雜訊


        # perform guidance 將雜訊預測分成兩部分,然後使用指定的guidance_scale進行引導。
        noise_pred_uncond, noise_pred_text = noise_pred.chunk(2)
        noise_pred = noise_pred_uncond + guidance_scale * (noise_pred_text - noise_pred_uncond)

        # compute the previous noisy sample x_t -> x_t-1
        latents = scheduler.step(noise_pred, t, latents).prev_sample
# 更新潛在表示,根據預測的雜訊和當前時間步。

#將最後的潛在表示轉換成圖像。
latents_to_pil(latents)[0]

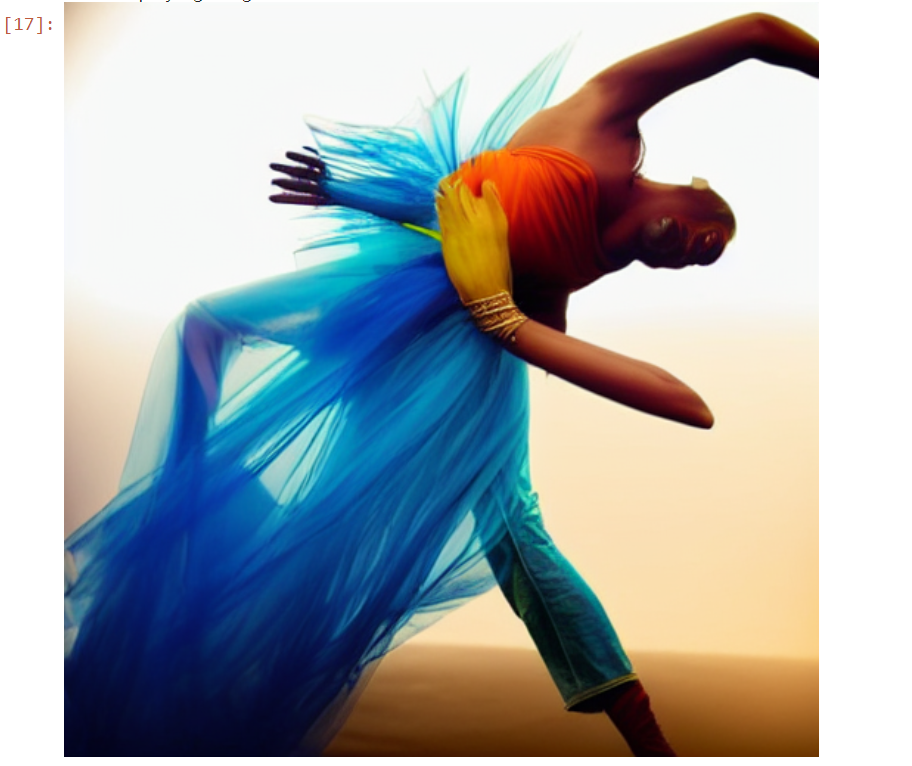
從這個案例我們可以發現,我們從原始圖像開始添加了噪音,但最終的圖像仍然保留了一些原始圖像的顏色和結構。但是新生成的圖片與原始圖片明顯不同;加入更多的噪音和執行更多的去噪步驟會使生成的圖片與原始圖片有更大的差異,所以不論是從純噪音開始還是從帶噪音的圖像開始,生成循環的核心都是相同的。只不過在後者的情況下,我們跳過了前幾個步驟。
這個流程被稱為img2img,因為它將一個圖像轉換成另一個圖像
所以讓我們來比較一下昨天與今天的2種做法,一個是從完全隨機的雜訊值開始,一個是從帶有雜訊的已存在圖像開始。
從完全隨機的雜訊值開始:
這種方法的目的是生成全新的、從未見過的圖像。由於我們從完全隨機的雜訊開始,這意味著我們可以創建出各種各樣的圖像。當我們想要生成全新的藝術品或其他原創內容時,這種方法特別有用。
從帶有雜訊的已存在圖像開始:
這種方法的目的是對現有的圖像進行某種轉換或變形。例如,我們可能希望根據某個主題或風格修改一個已存在的圖像。跳過初始的去噪步驟可以加快這一過程,因為我們已經有一個較接近目標的起始點。
