上一篇文章了解了 Pipeline、Tokenizer、Model 的應用,最後也整合成一個實戰。那了解了文本的部分,今天就試試看影像和語音的生成。
其實我原本沒有打算要做語音生成的部分,因為沒接觸過。但是我被主管要求寫一個投資策略,然後要以錄音的方式說明我的投資策略和程式碼。但是我真的是很不會當聲優,因為被要求要生出音檔,還是來求救 AI 了,因此玩了一下語音生成的部分,想說可以一併分享。
相比前幾天從 GitHub 直接下載 Stable Diffusion,今天我從 Hugging Face 上使用 Stable Diffusion 的預訓練模型。那我這次選的是 runwayml/stable-diffusion-v1-5。
# 記得先安裝 diffusers 套件
import torch
from diffusers import StableDiffusionPipeline

model_id = "runwayml/stable-diffusion-v1-5"
pipe = StableDiffusionPipeline.from_pretrained(model_id, torch_dtype=torch.float16)
pipe = pipe.to("mps")

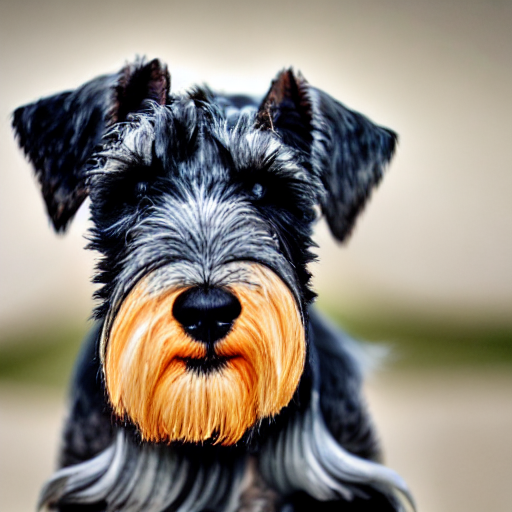
prompt = "a photo of a schnauzers"
image = pipe(prompt).images[0]
image.save("photo.png")

程式碼結果探討 🧐:
影像生成也是很酷的部分,原本也沒有想說要做,但是既然 Hugging Face 上面有,那就來分享一下,那我自己本機是跑不出來,還是得依賴 Colab 的 cuda。
import torch
from diffusers import AnimateDiffPipeline, MotionAdapter, EulerDiscreteScheduler
from diffusers.utils import export_to_gif
from huggingface_hub import hf_hub_download
from safetensors.torch import load_file

device = "cuda"
dtype = torch.float16

step = 4 # Options: [1,2,4,8]
repo = "ByteDance/AnimateDiff-Lightning"
ckpt = f"animatediff_lightning_{step}step_diffusers.safetensors"
base = "emilianJR/epiCRealism" # Choose to your favorite base model.

adapter = MotionAdapter().to(device, dtype)
adapter.load_state_dict(load_file(hf_hub_download(repo ,ckpt), device=device))
pipe = AnimateDiffPipeline.from_pretrained(base, motion_adapter=adapter, torch_dtype=dtype).to(device)
pipe.scheduler = EulerDiscreteScheduler.from_config(pipe.scheduler.config, timestep_spacing="trailing", beta_schedule="linear")

output = pipe(prompt="A schnauzer running on the grass", guidance_scale=1.0, num_inference_steps=step)
export_to_gif(output.frames[0], "animation.gif")

程式碼結果探討 🧐:
語音生成的部分目前 Hugging Face 的模型都是英文為主,沒有什麼中文的可以使用,所以都會使用英文來實戰。那我選了兩個模型,分別是 microsoft/speecht5_tts & parler-tts/parler-tts-mini-v1,後續再解釋為什麼要挑兩個。
# 記得安裝 soundfile 和 datasets 套件
# 匯入套件
import torch
import soundfile as sf
from datasets import load_dataset
from transformers import pipeline

# 指派 Pipeline 任務
synthesiser = pipeline(task = "text-to-speech", model = "microsoft/speecht5_tts", device = "mps")

# 從 datasets 載入 Speaker 聲音
embeddings_dataset = load_dataset(path = "Matthijs/cmu-arctic-xvectors", split = "validation")
speaker_embedding = torch.tensor(embeddings_dataset[7306]["xvector"]).unsqueeze(0)

# 輸入文本和指定前面設定好的 Speaker
speech = synthesiser("Hello, my dog is cute.", forward_params={"speaker_embeddings": speaker_embedding})

# 匯出結果
sf.write("speech.wav", speech["audio"], samplerate = speech["sampling_rate"])
程式碼結果探討 🧐:
音檔不知道怎麼放在 Markdown 分享 🤣
text-generation 類似這邊分享一個狀況,在 parler-tts/parler-tts-mini-v1 有寫說要安裝 Library,如下圖,然後就跟transformers 發生版本衝突的問題了。這時候 Poetry 的價值就出來了,如果沒用 Poetry 的話不知道這個 bug 要什麼時候才能解決,呼應到我 【Day 07】程式實戰前的準備 提到的部分!
# 安裝 git+https://github.com/huggingface/parler-tts.git
import torch
from parler_tts import ParlerTTSForConditionalGeneration
from transformers import AutoTokenizer
import soundfile as sf

device = "mps" if torch.cuda.is_available() else "cpu"

model = ParlerTTSForConditionalGeneration.from_pretrained("parler-tts/parler-tts-mini-v1").to(device)
tokenizer = AutoTokenizer.from_pretrained("parler-tts/parler-tts-mini-v1")

prompt = "Hey, The America men's basketball team won the gold medal at the 2024 Paris Olympics."
description = "A female speaker delivers a slightly expressive and animated speech with a moderate speed and pitch. The recording is of very high quality, with the speaker's voice sounding clear and very close up."
description = "Gary's voice is feel excited and happy, with a very close recording that almost has no background noise."

input_ids = tokenizer(description, return_tensors="pt").input_ids.to(device)
prompt_input_ids = tokenizer(prompt, return_tensors="pt").input_ids.to(device)

generation = model.generate(input_ids=input_ids, prompt_input_ids=prompt_input_ids)
audio_arr = generation.cpu().numpy().squeeze()

sf.write("parler_tts_out.wav", audio_arr, model.config.sampling_rate)
程式碼結果探討 🧐:
我真的不想要當聲優啦,為啥繁體中文的語音生成模型那麼少 🤬。要唸出來不像在念稿,又不呢有中國腔,對於我剛接觸屬實是有點難。希望 AI 可以解決我的問題,代替我完成聲優這個角色。

比較適合臺灣口音又有免費額度的,可以參考看看 TTSMaker 中文的 1601 Yt 雅婷
https://ttsmaker.com/zh-hk
我覺得合的比較漂亮的還是賽微,不過好像要花錢
https://vr2.cyberon.com.tw/cloud_tts_web_tool/pc_index.php
再來就是 Google 小姐了
https://pypi.org/project/gTTS/