現在有需求和規格了,讓我們開始開發吧。
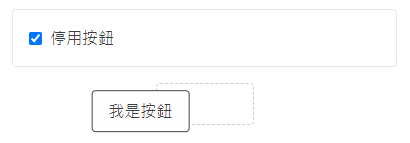
第一步先來建立基本樣式,需求提到「除了按鈕本體,在按鈕離開後,會有『拓印』留在原地」。
所以應該要有個容器,裡面裝「按鈕」與「拓印」,且「按鈕」疊在「拓印」上,如下圖所示。
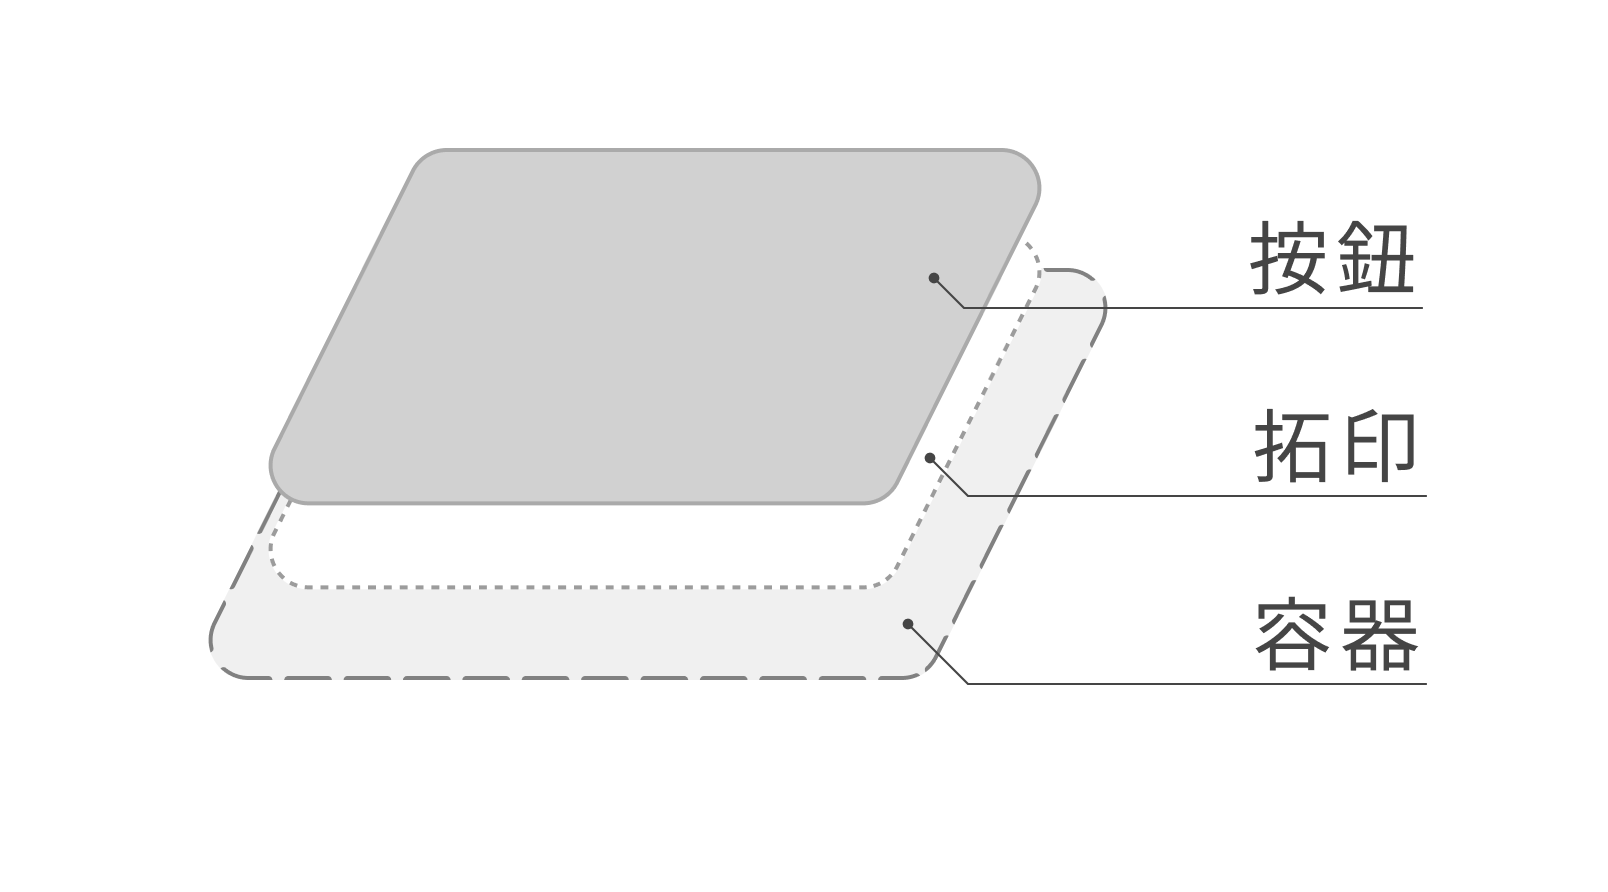
熟悉切版的讀者們,應該很快就能變出以下內容。
src\components\btn-naughty\btn-naughty.vue
<template>
  <!-- 容器 -->
  <div class="relative">
    <!-- 拓印容器 -->
    <div class=" absolute inset-0 pointer-events-none">
      <!-- 拓印 -->
      <div class="btn-rubbing" />
    </div>

    <!-- 按鈕容器 -->
    <div>
      <button class="btn">
        我是按鈕
      </button>
    </div>
  </div>
</template>

<script setup lang="ts">
...
</script>

<style scoped lang="sass">
.btn-rubbing
  width: 100%
  height: 100%
  border: 1px dashed rgba(black, 0.2)
  border-radius: 0.25rem

.btn
  width: 100%
  height: 100%
  padding: 0.5rem 1rem
  border: 1px solid #444
  border-radius: 0.25rem
  background: #FEFEFE
  transition-duration: 0.2s
  &:active
    transition-duration: 0.1s
    transform: scale(0.98)
</style>
目前外觀長這樣。
基本外觀有了,接著是「按鈕與拓印都需要可以客製化」,使用 slot 就可以輕鬆實現。
src\components\btn-naughty\btn-naughty.vue
<template>
  <!-- 容器 -->
  <div class="relative">
    <!-- 拓印容器 -->
    <div class=" absolute inset-0 pointer-events-none">
      <slot name="rubbing">
        <!-- 拓印 -->
        <div class="btn-rubbing" />
      </slot>
    </div>

    <!-- 按鈕容器 -->
    <div>
      <slot v-bind="attrs">
        <button class="btn">
          我是按鈕
        </button>
      </slot>
    </div>
  </div>
</template>

<script setup lang="ts">
import { useAttrs } from 'vue';

...

// #region Slots
defineSlots<{
  /** 按鈕 */
  default?: () => unknown;
  /** 拓印 */
  rubbing?: () => unknown;
}>();
// #endregion Slots

const attrs = useAttrs();

...
</script>

<style scoped lang="sass">
...
</style>
v-bind attrs 是為了要將從外部綁定的事件傳入到按鈕中,意思是你在使用元件時,假設綁定了 @click,例如:
  <div>
    <btn-naughty @click="handleClick" />
  </div>
@click 就會透過 attrs 綁定至按鈕上,這樣才能夠在點擊按鈕時觸發 click。
外觀有了,讓我們來實作程式邏輯吧。◝( •ω• )◟
先來調整一下 basic-usage 內容,按鈕先不要那麼寬。
src\components\btn-naughty\examples\basic-usage.vue
<template>
  <div class="flex flex-col gap-4 w-full border border-gray-300 p-6">
    <div class="flex justify-center">
      <btn-naughty />
    </div>
  </div>
</template>

...
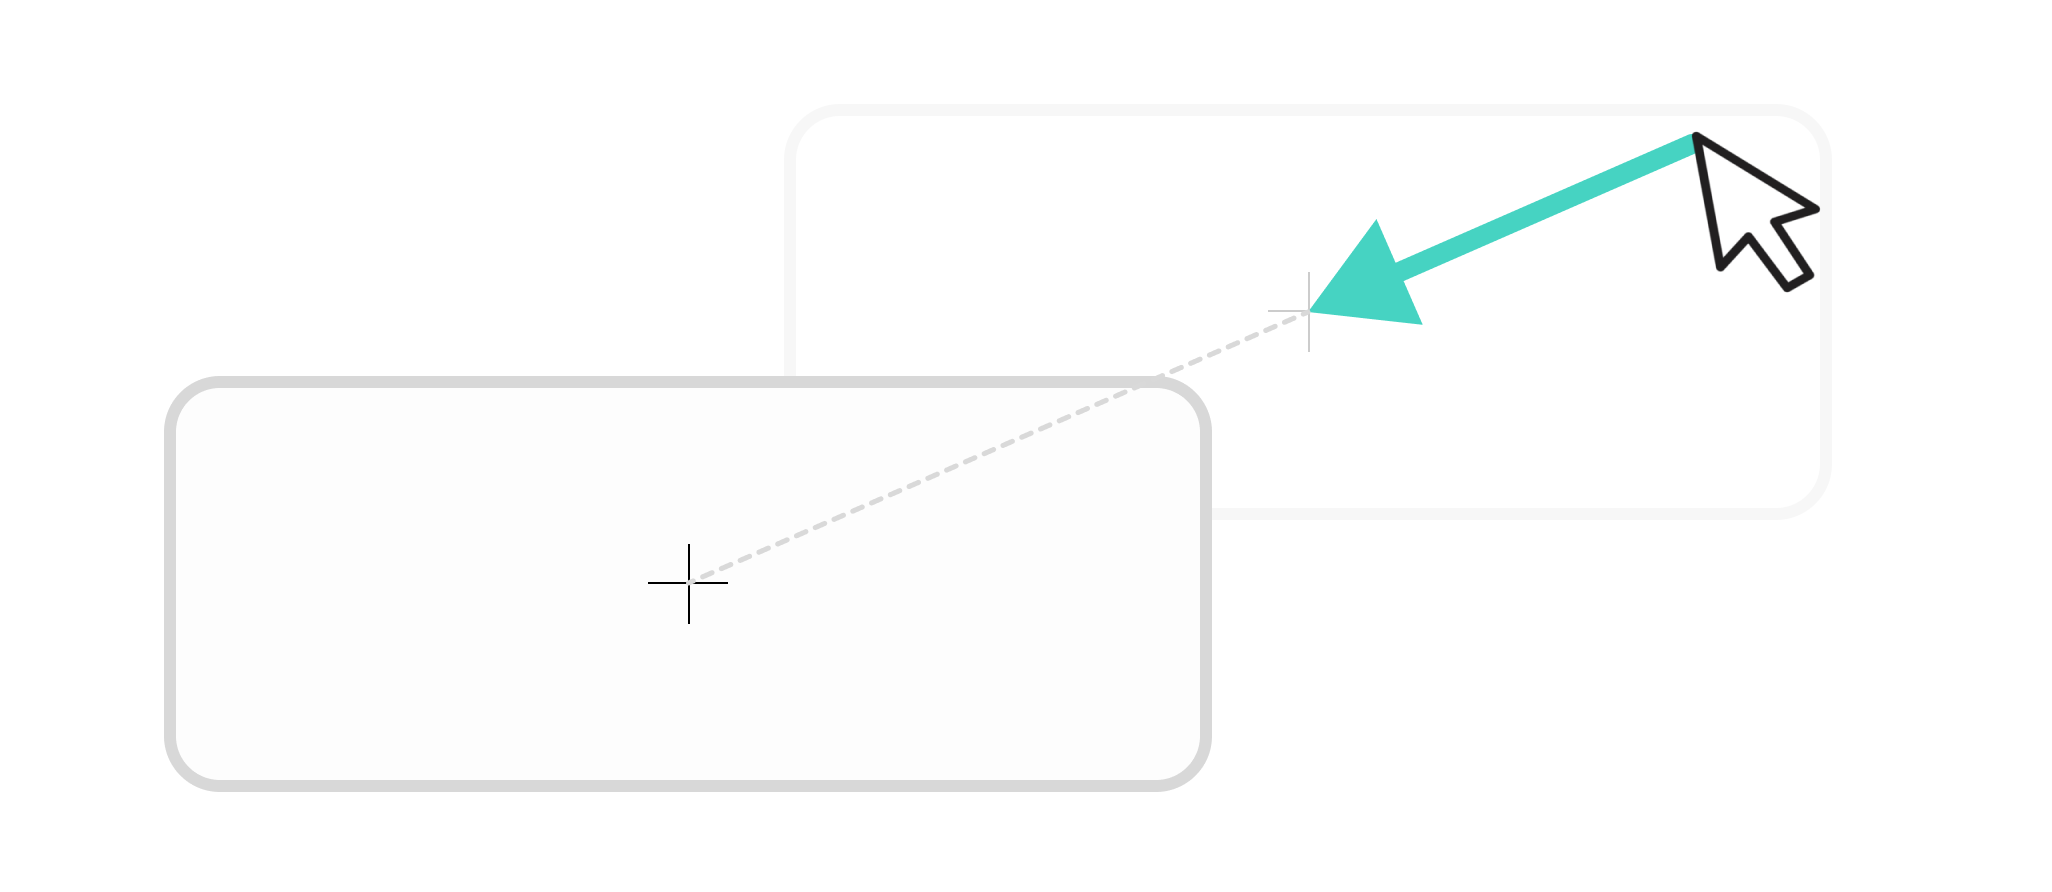
要實作「按鈕會朝向遠離滑鼠的方向移動」這個需求,我們只要計算觸發事件時,滑鼠位置到按鈕中心的方向向量(如圖箭頭),並移動一個按鈕的距離就行,如下圖概念。
第一步我們先來加上元件的 Prop 與 emit。
src\components\btn-naughty\btn-naughty.vue
...

<script setup lang="ts">
...

// #region Props
interface Props {
  /** 按鈕內文字 */
  label?: string;
  /** 是否停用 */
  disabled?: boolean;
  /** 同 CSS z-index */
  zIndex?: number | string;
  /** 最大移動距離,為按鈕尺寸倍數 */
  maxDistanceMultiple?: number;
  /** 同 html tabindex */
  tabindex?: number | string;
}
// #endregion Props
const props = withDefaults(defineProps<Props>(), {
  label: '',
  disabled: false,
  zIndex: undefined,
  maxDistanceMultiple: 5,
  tabindex: undefined,
});

// #region Emits
const emit = defineEmits<{
  (e: 'click'): void;
  /** 開始移動時 */
  (e: 'run'): void;
  /** 開始返回時 */
  (e: 'back'): void;
}>();
// #endregion Emits

...
</script>

...
最重要的部分就是取得「以按鈕中心為 0 點」的滑鼠位置座標,這裡使用 VueUse 的 useMouseInElement。
src\components\btn-naughty\btn-naughty.vue
<template>
  <!-- 容器 -->
  <div class="relative">
    ...

    <!-- 按鈕容器 -->
    <div ref="carrierRef">
      <slot v-bind="attrs">
        ...
      </slot>
    </div>
  </div>
</template>

<script setup lang="ts">
import { reactive, ref, useAttrs } from 'vue';
import { throttleFilter, useMouseInElement } from '@vueuse/core';

...

const carrierRef = ref<HTMLDivElement>();

/** throttleFilter 用來降低偵測滑鼠變化的更新速度,可以提升效能
 *
 * 設為 35(單位是 ms)是大概取個 30fps 左右的整數,也就是 1000ms / 30 = 33,這裡取 35。
 */
const mouseInElement = reactive(
  useMouseInElement(carrierRef, {
    eventFilter: throttleFilter(35)
  })
);

...
</script>

...
如 useMouseInElement 文件所述,其中的 elementX 與 elementY 是以元素的左上角為 0 點,如果要以元素中心為 0 點,需要自己轉換一下。
src\components\btn-naughty\btn-naughty.vue
<template>
  <!-- 容器 -->
  <div class="relative">
    ...

    <!-- 按鈕容器 -->
    <div ref="carrierRef">
      ...
    </div>
  </div>
</template>

<script setup lang="ts">
...

const mouseInElement = reactive(...);

/** 以按鈕中心為 0 點的滑鼠位置 */
const mousePosition = computed(() => ({
  x: mouseInElement.elementX - mouseInElement.elementWidth / 2,
  y: mouseInElement.elementY - mouseInElement.elementHeight / 2,
}))

...
</script>

...
實作讓按鈕偏移的邏輯,首先要儲存按鈕(容器)偏移量並利用 transform 產生偏移效果。
src\components\btn-naughty\btn-naughty.vue
<template>
  <!-- 容器 -->
  <div class="relative">
    ...

    <!-- 按鈕容器 -->
    <div
      ref="carrierRef"
      :style="carrierStyle"
    >
      ...
    </div>
  </div>
</template>

<script setup lang="ts">
...

const mousePosition = computed(...)

/** 按鈕容器偏移量 */
const carrierOffset = ref({ x: 0, y: 0 });
/** 利用 style 產生偏移效果 */
const carrierStyle = computed<CSSProperties>(() => {
  const { x, y } = carrierOffset.value;

  const cursor = props.disabled ? 'not-allowed' : 'pointer';

  return {
    zIndex: props.zIndex,
    transform: `translate(${x}px, ${y}px)`,
    cursor
  }
});

...
</script>

...
現在只差實作「移動」邏輯了,讓我們新增「移動」和「返回」的 function。
src\components\btn-naughty\btn-naughty.vue
<template>
  <!-- 容器 -->
  <div class="relative">
    ...

    <!-- 按鈕容器 -->
    <div
      ref="carrierRef"
      :style="carrierStyle"
    >
      ...
    </div>
  </div>
</template>

<script setup lang="ts">
...

const carrierStyle = computed<CSSProperties>(...);

/** 計算單位向量 */
function getUnitVector(
  { x, y, z = 0 }: { x: number; y: number; z?: number }
) {
  const magnitude = Math.sqrt(x * x + y * y + z * z);

  return {
    x: x / magnitude,
    y: y / magnitude,
    z: z / magnitude,
  };
}

function back() {
  carrierOffset.value.x = 0;
  carrierOffset.value.y = 0;

  emit('back');
}

function run() {
  /** 取得按鈕中心到滑鼠的單位方向 */
  const direction = getUnitVector(mousePosition.value);

  /** 往遠離滑鼠的方向移動一個按鈕的距離 */
  carrierOffset.value.x -= direction.x * mouseInElement.elementWidth;
  carrierOffset.value.y -= direction.y * mouseInElement.elementHeight;

  // 讓元素離開 focus 狀態
  carrierRef.value?.blur();

  emit('run');
}

...
</script>

...
把 run function 先綁定在 carrier click 事件上測試看看,並新增 carrier class,讓移動有動畫效果。
src\components\btn-naughty\btn-naughty.vue
<template>
  <!-- 容器 -->
  <div class="relative">
    ...

    <!-- 按鈕容器 -->
    <div
      ...
      class="carrier"
      @click="run"
    >
      ...
    </div>
  </div>
</template>

...

<style scoped lang="sass">
...

.carrier
  transition-duration: 0.3s
  transition-timing-function: cubic-bezier(0, 0.55, 0.45, 1)
</style>
現在點擊按鈕後,按鈕會移動了!ヾ(◍'౪`◍)ノ゙
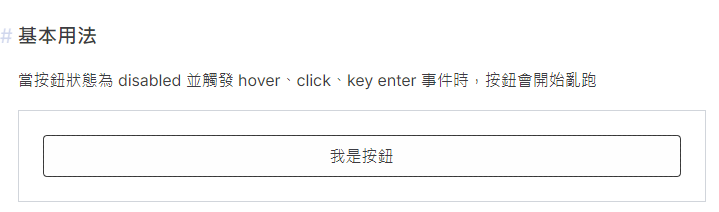
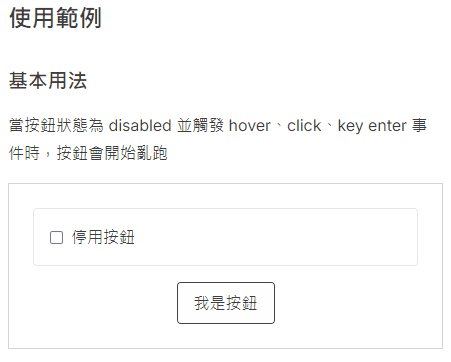
讓我們依照需求調整觸發方式,需求為「當按鈕狀態為 disabled 時,觸發 hover、click、key enter 事件,會讓按鈕離開原本位置」。
src\components\btn-naughty\btn-naughty.vue
<template>
  <!-- 容器 -->
  <div class="relative">
    ...

    <!-- 按鈕容器 -->
    <div
      ...
      @click="handleTrigger"
      @keydown.enter="handleTrigger"
    >
      ...
    </div>
  </div>
</template>

<script setup lang="ts">
...

function handleTrigger() {
  emit('click');

  if (!props.disabled) return;
  run();
}

/** disabled 解除時,回歸原位 */
watch(() => props.disabled, (value) => {
  if (props.disabled) return;
  back();
});

/** 滑鼠移動到按鈕上時 */
watch(() => mouseInElement.isOutside, (value) => {
  if (value || !props.disabled) return;
  run();
});

...
</script>

...
最後讓我們調整一下 basic-usage 範例,讓按鈕的 disabled 參數可以切換。
src\components\btn-naughty\examples\basic-usage.vue
<template>
  <div class="flex flex-col gap-4 w-full border border-gray-300 p-6">
    <label class=" flex items-center border p-4 rounded">
      <input
        v-model="disabled"
        type="checkbox"
      >
      <span class="ml-2">
        停用按鈕
      </span>
    </label>

    <div class="flex justify-center">
      <btn-naughty :disabled />
    </div>
  </div>
</template>

<script setup lang="ts">
import { ref } from 'vue';

import BtnNaughty from '../btn-naughty.vue';

const disabled = ref(true);
</script>
我們成功完成按鈕亂跑的邏輯了!✧*。٩(ˊᗜˋ*)و✧*。
回顧一下規格需求,其他會發現還有一些規格尚未實現,如:
鱈魚:「讓我們實現最後兩個規格吧。( ´ ▽ ` )ノ」
路人:「看起來好像有點複雜?(´・ω・`)」
鱈魚:「不會不會,有 VueUse 都不會太難。∠( ᐛ 」∠)_」
src\components\btn-naughty\btn-naughty.vue
...

<script setup lang="ts">
...

/** 計算向量長度 */
function getVectorLength(
  { x, y, z = 0 }: { x: number; y: number; z?: number }
) {
  return Math.sqrt(x * x + y * y + z * z);
}

/** 計算單位向量 */
function getUnitVector(...) {...}

...

function run() {
  ...
  carrierRef.value?.blur();

  /** 判斷是否超出限制距離 */
  const maxDistance = getVectorLength({
    x: mouseInElement.elementWidth * Number(props.maxDistanceMultiple),
    y: mouseInElement.elementHeight * Number(props.maxDistanceMultiple),
  });
  const distance = getVectorLength(carrierOffset.value);
  const outOfRange = distance > maxDistance;

  if (outOfRange) {
    back();
  } else {
    emit('run');
  }
}

...

/** 按鈕被遮擋時回歸原位 */
useIntersectionObserver(carrierRef, (value) => {
  if (value[0]?.isIntersecting) return;
  back();
});

...
</script>

...
以上我們完成所有規格了!(/≧▽≦)/
有興趣的話也可以來這裡實際玩玩看喔!੭ ˙ᗜ˙ )੭
以上程式碼已同步至 GitLab,大家可以前往下載:
  <div>
    <btn-naughty @click="handleClick" />
  </div>
@click 就會透過 attrs 綁定至按鈕上,這樣才能夠在點擊按鈕時觸發 click。
emit 有三個事件,click 很直覺,但是 run 和 back 事件傳遞的用途是什麼?
function back() {
  //......
  emit('back');
}
function run() {
  //......
  emit('run');
}
不要理所當然的省略呀><(吐槽)
不過,看著這調皮的孩子呱呱墜地的那一刻,還是讓人有點興奮(x
run 和 back 單純就是列了但沒用到 XD
整個就是被老爸遺忘的孩子(X


 iThome鐵人賽