元件測試完成後,讓我們新增更多範例吧!( ‧ω‧)ノ╰(‧ω‧ )
與其使用大量文字描述參數用途,不如提供情境完整的範例,可以讓使用者有更具體的理解。
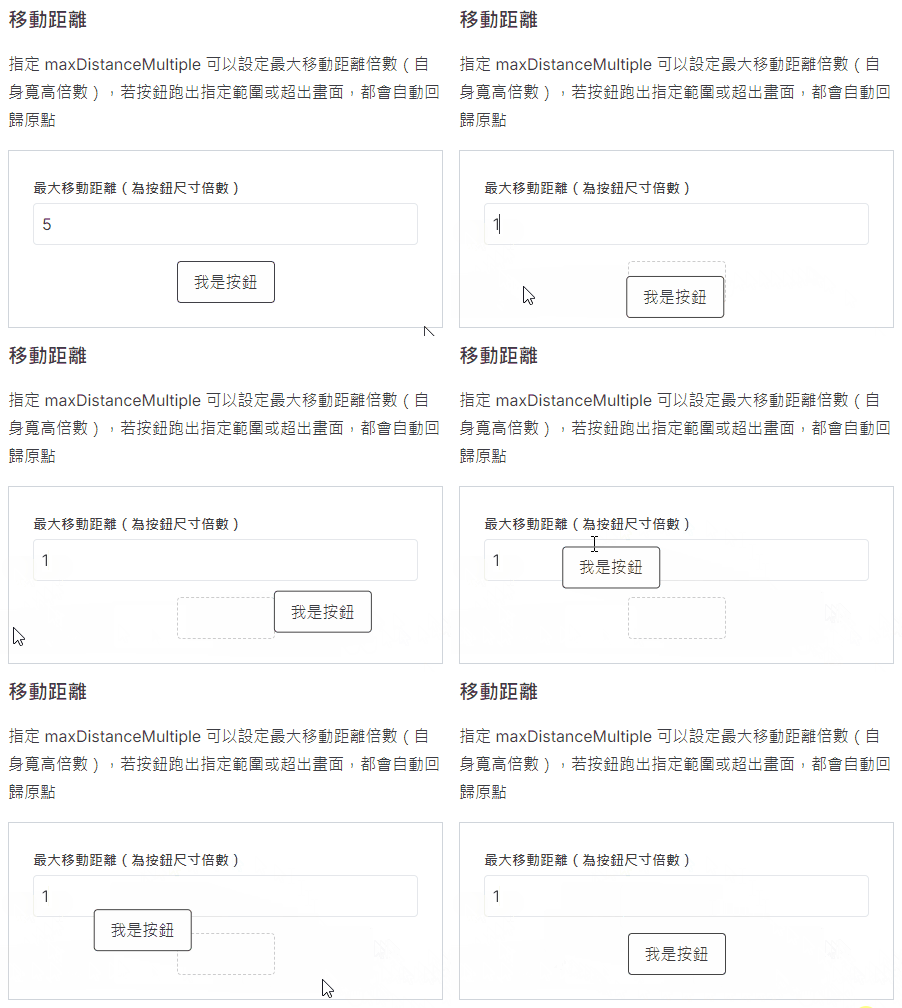
maxDistanceMultiple 參數用於限制按鈕偏移的最大範圍,基於按鈕自身尺寸的倍數。
src\components\btn-naughty\examples\moving-distance.vue
<template>
  <div class="flex flex-col items-start gap-4 w-full border border-gray-300 p-6">
    <input
      v-model="maxMultiple"
      type="number"
      outlined
    >

    <btn-naughty
      label="按鈕"
      class=" font-bold"
      disabled
      :max-distance-multiple="maxMultiple"
      z-index="30"
    />
  </div>
</template>

<script setup lang="ts">
import { ref } from 'vue';

import BtnNaughty from '../btn-naughty.vue';

const maxMultiple = ref(5);
</script>
接著在文件中引入此範例。
docs\components\btn-naughty\index.md
...

<script setup>
import BasicUsage from '../../../src/components/btn-naughty/examples/basic-usage.vue'
import MovingDistance from '../../../src/components/btn-naughty/examples/moving-distance.vue'
</script>

...

### 移動距離

指定 maxDistanceMultiple 可以設定最大移動距離倍數(自身寬高倍數),若按鈕跑出指定範圍或超出畫面,都會自動回歸原點

<moving-distance/>

::: details 查看範例原始碼
<<< ../../../src/components/btn-naughty/examples/moving-distance.vue
:::

## 原理

...
現在網頁上應該會跑出新增的範例。

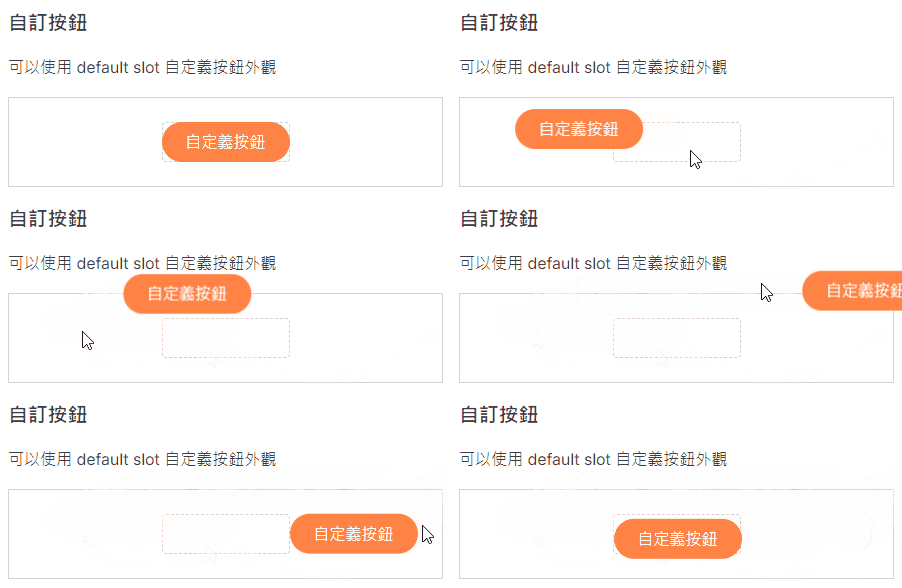
按鈕樣式可以使用自定義的 HTML 內容。
src\components\btn-naughty\examples\custom-button.vue
<template>
  <div class="flex justify-center border border-gray-300 p-6">
    <btn-naughty
      disabled
      z-index="30"
    >
      <div class="custom-button">
        自定義按鈕
      </div>
    </btn-naughty>
  </div>
</template>

<script setup lang="ts">
import BtnNaughty from '../btn-naughty.vue';
</script>

<style scoped lang="sass">
.custom-button
  background: #ff8345
  color: white
  padding: 0.5rem 1.5rem
  border-radius: 999rem
</style>
在文件中引入範例。
docs\components\btn-naughty\index.md
...

<script setup>
...
import CustomButton from '../../../src/components/btn-naughty/examples/custom-button.vue'
</script>

...

### 自訂按鈕

可以使用 default slot 自定義按鈕外觀

<custom-button/>

::: details 查看範例原始碼
<<< ../../../src/components/btn-naughty/examples/custom-button.vue
:::

## 原理

...
內容呈現如下。

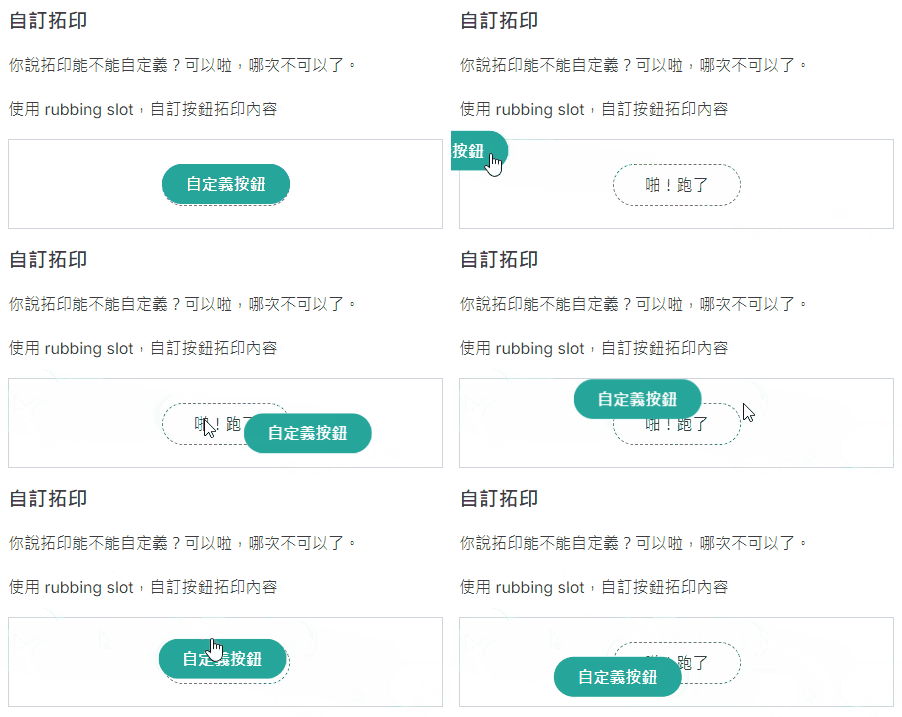
不只有按鈕,拓印也可以使用自定義的 HTML 內容。
src\components\btn-naughty\examples\custom-rubbing.vue
<template>
  <div class="flex justify-center border border-gray-300 p-6">
    <btn-naughty
      disabled
      z-index="30"
    >
      <template #rubbing>
        <div class="rubbing ">
          啪!跑了
        </div>
      </template>

      <template #default>
        <div class="btn">
          自定義按鈕
        </div>
      </template>
    </btn-naughty>
  </div>
</template>

<script setup lang="ts">
import BtnNaughty from '../btn-naughty.vue';
</script>

<style scoped lang="sass">
.btn
  padding: 0.5rem 1.5rem
  background: #26A69A
  border-radius: 999rem
  font-weight: bold
  color: white
  cursor: pointer

.rubbing
  padding: 0.5rem 1.5rem
  background: #FEFEFE
  border-radius: 999rem
  border: 1px dashed #777
  text-align: center
</style>
在文件中引入範例。
docs\components\btn-naughty\index.md
...

<script setup>
...
import CustomButton from '../../../src/components/btn-naughty/examples/custom-button.vue'
</script>

...

### 自訂拓印

你說拓印能不能自定義?可以啦,哪次不可以了。

使用 rubbing slot,自訂按鈕拓印內容

<custom-rubbing/>

::: details 查看範例原始碼
<<< ../../../src/components/btn-naughty/examples/custom-rubbing.vue
:::

## 原理

...
內容呈現如下。

以上我們新增了三個範例,大家還可以想想看能不能變出更多花樣!ヽ(●`∀´●)ノ
最後讓我們補上元件說明原理的部分吧。
docs\components\btn-naughty\index.md
...

## 原理

滑鼠碰觸按鈕時,計算滑鼠位置到按鈕中心的單位向量,並以此向量為基準,移動一個按鈕尺寸的距離。

如果按鈕移動到畫面外,則會自動返回原點,使用 IntersectionObserver 實作。

📚 [甚麼是 IntersectionObserver](https://developer.mozilla.org/zh-CN/docs/Web/API/IntersectionObserver)

::: danger 注意!Σ(ˊДˋ;)
請不要將 overflow 設定為 hidden,否則按鈕一移動就會啪沒了,消失的無影無蹤。
:::

...
以上程式碼已同步至 GitLab,大家可以前往下載:

// #region Slots
defineSlots<{
  /** 按鈕 */
  default?: () => unknown;
  /** 拓印 */
  rubbing?: () => unknown;
}>();
// #endregion Slots
原來 slot 的用途在這邊,學會了!當時完全看不懂,差點被嚇跑XD