所以我們要怎麼實現彩帶的效果呢?用大量的 div 嗎?
其實還真的可行,只是畫面可能會卡到爆炸。(›´ω`‹ )
為了效果與性能兼具,這裡使用 canvas 繪製彩帶。
讓我們透過 babylon.js 實現效果吧。( ´ ▽ ` )ノ
先來安裝 babylon。
npm i -D @babylonjs/core
babylon.js 產生一個場景最低限度至少需要以下物件:
讓我們建立第一個 3D 場景。
src\components\util-party-popper\util-party-popper.vue
...

<script setup lang="ts">
import { onMounted, ref, shallowRef } from 'vue';
import {
  Camera,
  Scene,
  Engine,
  Vector3,
  ArcRotateCamera,
} from '@babylonjs/core';

...

const canvasRef = ref<HTMLCanvasElement>();

const engine = shallowRef<Engine>();
const scene = shallowRef<Scene>();
const camera = shallowRef<Camera>();

function createScene(engine: Engine) {
  const scene = new Scene(engine);
  return scene;
}
function createCamera(scene: Scene) {
  const camera = new ArcRotateCamera(
    'camera',
    -Math.PI / 2,
    Math.PI / 2,
    10,
    new Vector3(0, 0, 0),
    scene,
  );

  return camera;
}

onMounted(() => {
  const canvas = canvasRef.value;
  if (!canvas) return;

  engine.value = new Engine(canvas, true, {
    alpha: true,
  });
  scene.value = createScene(engine.value);
  camera.value = createCamera(scene.value);

  /** 視窗尺寸變更時,呼叫 engine resize */
  window.addEventListener('resize', handleResize);

  /** 反覆渲染場景,這樣畫面才會持續變化 */
  engine.value.runRenderLoop(() => {
    scene.value?.render();
  });
});

/** 元件解除時,釋放資源 */
onBeforeUnmount(() => {
  engine.value?.dispose();
  scene.value?.dispose();

  window.removeEventListener('resize', handleResize);
});

function handleResize() {
  engine.value?.resize();
}

...
</script>
Engine 和 Scene 很單純,讓我們來說說 Camera。◝( •ω• )◟
這裡使用 ArcRotateCamera,他是一種可以圍繞著目標旋轉的相機,就像月球繞著地球跑那樣,主要有 3 個參數。
具體概念如下圖。
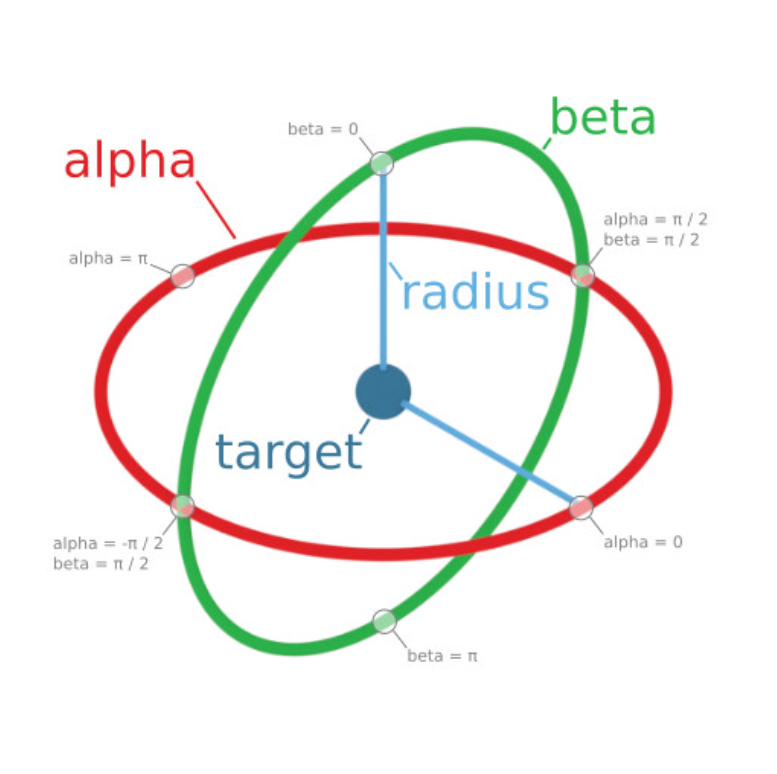
其他細節可以參考官方文件:Camera Introduction
會看到畫面跑出一片黑黑的東東。
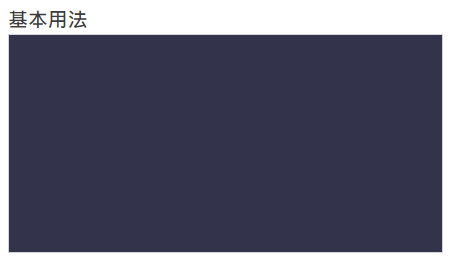
鱈魚:「恭喜我們產生了第一個 3D 場景!◝( •ω• )◟」
路人:「最好是有 3D 啦!Σ(ˊДˋ;)」
鱈魚:「那就來一個立方體證明一下。(´,,•ω•,,)」
src\components\util-party-popper\util-party-popper.vue
...

<script setup lang="ts">
...

onMounted(() => {
  ...
  camera.value = new ArcRotateCamera(...);

   const box = MeshBuilder.CreateBox('box', {}, scene.value);
  box.rotation.x = Math.PI / 4;
  box.rotation.z = Math.PI / 4;

  ...
});

...
</script>
產生一個方塊並旋轉一下。
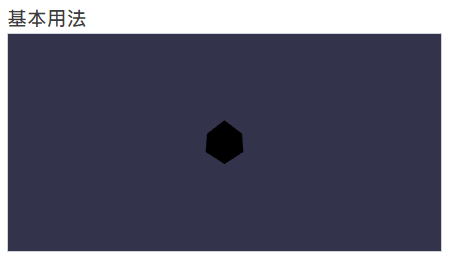
鱈魚:「鏘將!◝( •ω• )◟」
路人:「那個黑嚕嚕的東西是立方體?╭(°A ,°`)╮」
鱈魚:「哎呀,少了燈光。(´,,•ω•,,)」
src\components\util-party-popper\util-party-popper.vue
...

<script setup lang="ts">
...

onMounted(() => {
  ...

  const light = new HemisphericLight('light', new Vector3(-0.5, 1, -0.5), scene.value);

  const box = MeshBuilder.CreateBox('box', {}, scene.value);

  ...
});

...
</script>
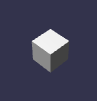
Hemispheric Light 是一種半球光,想像光的分布像天頂一樣的半球在環境中散射與漫射,有更自然、柔和的照明效果,是定義環境光最簡單的方式。
其他細節可以參考官方文件:Introduction To Lights
立方體出現了!(´,,•ω•,,)
現在我們確認場景可以正常運作了,來建立彩帶效果需要的粒子系統吧。( ´ ▽ ` )ノ
這裡使用 SolidParticleSystem,顧名思義就是一個基於 mesh 的粒子系統。
比起自行新增多個 mesh,使用 SolidParticleSystem 可以更有效率的繪製多個粒子,且方便統一管理。
讓我們新增 createParticleSystem。
src\components\util-party-popper\util-party-popper.vue
...

<script setup lang="ts">
...

const camera = shallowRef<Camera>();
const particleSystem = shallowRef<SolidParticleSystem>();

interface CreateParticlesParam {
  scene: Scene;
}
function createParticleSystem({ scene }: CreateParticlesParam) {
  const particleSystem = new SolidParticleSystem('particleSystem', scene);

  // 建立粒子 mesh
  const mesh = MeshBuilder.CreateBox('mesh', {
    width: 1, height: 1, depth: 0.02,
  })

  // 產生 100 個粒子
  particleSystem.addShape(mesh, 100);
  // 將 mesh 加入粒子系統後,就不需要原本的 mesh 了,所以釋放 mesh
  mesh.dispose();

  // 建構粒子系統
  particleSystem.buildMesh();

  // 定義初始化每個粒子用的 function
  particleSystem.initParticles = () => {
    particleSystem.particles.forEach((particle) => {
      // 隨機位置
      particle.position.x = Scalar.RandomRange(-5, 5)
      particle.position.y = Scalar.RandomRange(-5, 5)

      // 隨機旋轉
      particle.rotation.x = Scalar.RandomRange(0, Math.PI * 2);
      particle.rotation.y = Scalar.RandomRange(0, Math.PI * 2);
    });
  };

  // 執行初始化
  particleSystem.initParticles();
  // 設定所有粒子並更新網格
  particleSystem.setParticles();

  return particleSystem;
}

onMounted(() => {
  ...

  const light = new HemisphericLight('light', new Vector3(-0.5, 1, -0.5), scene.value);

  particleSystem.value = createParticleSystem({
    scene: scene.value
  });

  /** 視窗尺寸變更時,呼叫 engine resize */
  ...
});

/** 元件解除時,釋放資源 */
onBeforeUnmount(() => {
  engine.value?.dispose();
  scene.value?.dispose();
  particleSystem.value?.dispose();

  ...
});

...
</script>
Scalar.RandomRange 是 babylon 提供的隨機函數,可以簡單取出指定範圍的隨機值。
可以看到畫面跑出了一推紙片。
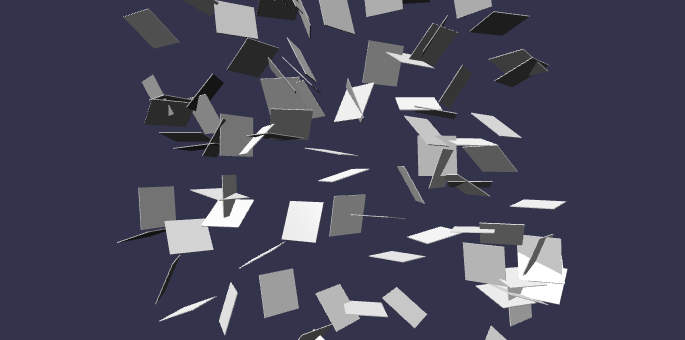
成功產生粒子了,現在讓粒子動起來吧!♪( ◜ω◝و(و
定義粒子更新邏輯。
src\components\util-party-popper\util-party-popper.vue
...

<script setup lang="ts">
...

function createParticleSystem({ scene }: CreateParticlesParam) {
  ...

  // 設定所有粒子並更新網格
  particleSystem.setParticles();

  particleSystem.updateParticle = (particle) => {
    // 重力對速度的影響
    particle.velocity.y += -0.01;

    // 速度對位置的影響
    particle.position.addInPlace(particle.velocity);

    return particle;
  }

  /** 播放動畫 */
  scene.onAfterRenderObservable.add(() => {
    particleSystem.setParticles();
  })

  return particleSystem;
}

...
</script>

現在讓我們把背景改為透明,不要一片黑。
src\components\util-party-popper\util-party-popper.vue
...

<script setup lang="ts">
...

function createScene(engine: Engine) {
  const scene = new Scene(engine);
  // 背景透明
  scene.clearColor = new Color4(0, 0, 0, 0);

  return scene;
}

...
</script>
取得 canvas 尺寸並計算場景邊界。
src\components\util-party-popper\util-party-popper.vue
...

<script setup lang="ts">
...

const canvasRef = ref<HTMLCanvasElement>();
const canvasBounding = reactive(
  useElementBounding(canvasRef),
);

/** 畫布邊界 */
const canvasBoundary = computed(() => {
  // 抓大一點的範圍,讓粒子可以飄到畫布外
  const x = canvasBounding.width / 3 * 2;
  const y = canvasBounding.height / 3 * 2;

  return {
    left: -x,
    right: x,
    top: y,
    bottom: -y,
  }
});

...
</script>
接著調整鏡頭距離與投影方式,因為這裡不需要透視變形效果,所以採用正射投影,以免彩帶有在邊界產生明顯的透視變形。
src\components\util-party-popper\util-party-popper.vue
...

<script setup lang="ts">
...

function createCamera(scene: Scene) {
  const camera = new ArcRotateCamera(
    'camera',
    -Math.PI / 2,
    Math.PI / 2,
    Math.max(canvasBounding.width, canvasBounding.height),
    new Vector3(0, 0, 0),
    scene,
  );
  camera.mode = Camera.ORTHOGRAPHIC_CAMERA;

  return camera;
}

...
</script>
最後調整一下彩帶尺寸與隨機範圍,不然看不到。XD
src\components\util-party-popper\util-party-popper.vue
...

<script setup lang="ts">
...

function createParticleSystem({ scene }: CreateParticlesParam) {
  ...

  // 建立粒子 mesh
  const mesh = MeshBuilder.CreateBox('mesh', {
    width: 10, height: 10, depth: 0.2,
  })

  ...

  particleSystem.initParticles = () => {
    particleSystem.particles.forEach((particle) => {
      // 隨機位置
      particle.position.x = Math.random() * canvasBounding.width - canvasBounding.width / 2;
      particle.position.y = Math.random() * canvasBounding.height - canvasBounding.height / 2;

      ...
    });
  };

  ...
}

...
</script>
現在看起來有點樣子了。( ´ ▽ ` )ノ
讓粒子的運動效果複雜一點,加上旋轉、空氣阻力與擾動並微調參數。
src\components\util-party-popper\util-party-popper.vue
...

<script setup lang="ts">
...

function createParticleSystem({ scene }: CreateParticlesParam) {
  ...

  // 定義初始化每個粒子用的 function
  particleSystem.initParticles = () => {
    particleSystem.particles.forEach((particle) => {
      ...

      // 隨機角速度。將角速度存在 particle 的 props 中
      particle.props = {
        rotationVelocity: new Vector3(
          Scalar.RandomRange(-0.1, 0.1),
          Scalar.RandomRange(-0.1, 0.1),
          Scalar.RandomRange(-0.1, 0.1),
        )
      };
    });
  };

  ...

  particleSystem.updateParticle = (particle) => {
    // 模擬空氣擾動
    particle.velocity.addInPlaceFromFloats(
      Scalar.RandomRange(-0.2, 0.2),
      Scalar.RandomRange(-0.2, 0.2),
      0
    );

    // 重力對速度的影響
    particle.velocity.y += -0.03;

    // 空氣阻力,讓粒子逐漸減速
    const airResistance = 0.985;
    particle.velocity.x *= airResistance;
    particle.velocity.y *= airResistance;

    // 速度對位置的影響
    particle.position.addInPlace(particle.velocity);

    // 角速度對旋轉的影響
    if (particle?.props?.rotationVelocity) {
      particle.rotation.addInPlace(particle.props.rotationVelocity);
    }

    return particle;
  }

  ...
}

...
</script>
現在看起來非常有模有樣了!◝(≧∀≦)◟
現在讓我們開始定義元件參數,順便上個顏色吧。ლ(´∀`ლ)
src\components\util-party-popper\util-party-popper.vue
...

<script setup lang="ts">
...

interface Color {
  /** 紅。0 ~ 1 */
  r: number;
  /** 綠。0 ~ 1 */
  g: number;
  /** 藍。0 ~ 1 */
  b: number;
}

// #region Props
interface Props {
  /** 粒子顏色,給 function 則可自訂顏色選擇邏輯 */
  color?: Color | ((index: number) => Color);
}
// #endregion Props
const props = withDefaults(defineProps<Props>(), {
  color: () => () => {
    const colors = [
      { r: 1, g: 0.4, b: 0, },
      { r: 1, g: 0.9, b: 0, },
      { r: 0.5, g: 1, b: 0, },
      { r: 0, g: 0.9, b: 1, },
    ] as const;

    /** 隨機取一個 */
    const [
      target = colors[0],
    ] = sample(colors, 1);

    return target;
  },
});

...

function createParticleSystem({ scene }: CreateParticlesParam) {
  ...

  // 定義初始化每個粒子用的 function
  particleSystem.initParticles = () => {
    particleSystem.particles.forEach((particle) => {
      // 設定粒子顏色
      const color = props.color instanceof Function
        ? props.color(particle.idx)
        : props.color;

      particle.color = new Color4(
        color.r, color.g, color.b, 1
      );

      ...
    });
  };

  ...
}

...
</script>
終於像彩帶了!ヾ(◍'౪`◍)ノ゙
不過看起來有點黑嚕嚕的,看起來很不派對,這是因為陰影的關係,讓我們調整燈光的陰影顏色。
src\components\util-party-popper\util-party-popper.vue
...

<script setup lang="ts">
...

onMounted(() => {
  ...

  const light = new HemisphericLight('light', new Vector3(-0.5, 1, -0.5), scene.value);
  light.groundColor = new Color3(0.9, 0.9, 0.9);

  ...
});

...
</script>
現在看起來好多了。◝( •ω• )◟

彩帶已就位,最後來實作發射彩帶的邏輯。( ´ ▽ ` )ノ🎉
我們先在元件上新增參數,用來控制連續發射數與每次發射的彩帶數量,同時調整初始化邏輯,一開始隱藏所有粒子並刪除原本的隨機位置邏輯
src\components\util-party-popper\util-party-popper.vue
...

<script setup lang="ts">
...

// #region Props
interface Props {
  /** 每次發射數量
   *
   * @default 20
   */
  quantityOfPerEmit?: number;

  /** 最大同時觸發次數。
   *
   * @default 10
   */
  maxConcurrency?: number;

  ...
}
// #endregion Props
const props = withDefaults(defineProps<Props>(), {
  quantityOfPerEmit: 20,
  maxConcurrency: 10,
  ...
});

...

function createParticleSystem({ scene }: CreateParticlesParam) {
  ...

  // 產生足夠數量的粒子
  particleSystem.addShape(mesh, props.maxConcurrency * props.quantityOfPerEmit);

  ...

  // 定義初始化每個粒子用的 function
  particleSystem.initParticles = () => {
    particleSystem.particles.forEach((particle) => {
      // 隱藏粒子
      particle.isVisible = false;
      particle.alive = false;

      ...
    });
  };

  ...
}

...
</script>
加上邊界邏輯,將超出邊界的粒子隱藏並略過更新,減少不必要的計算。
src\components\util-party-popper\util-party-popper.vue
...

<script setup lang="ts">
...

function createParticleSystem({ scene }: CreateParticlesParam) {
  ...

  particleSystem.updateParticle = (particle) => {
    if (!particle.isVisible) return particle;

    if (particle.position.y > canvasBoundary.value.top
      || particle.position.y < canvasBoundary.value.bottom
      || particle.position.x < canvasBoundary.value.left
      || particle.position.x > canvasBoundary.value.right
    ) {
      particle.isVisible = false;
      particle.alive = false;
      return particle;
    }

    // 模擬空氣擾動
    ...
  }
  ...
}

...
</script>
追加一下元件的事件定義。
src\components\util-party-popper\util-party-popper.vue
...

<script setup lang="ts">
...

// #region Emits
const emits = defineEmits<{
  'emit': [groupIndex: number];
}>();
// #endregion Emits

...
</script>
最後讓我們新增 emit,用來發射粒子。
src\components\util-party-popper\util-party-popper.vue
...

<script setup lang="ts">
...

/** 用來計算發射到第幾組,讓粒子輪流發射 */
let groupIndex = 0;

/** 發射位置與速度向量 */
interface EmitParam {
  x: number;
  y: number;
  velocity?: Vector
}
/** 發射彩帶,如果提供 function,可以針對每個粒子調整 */
function emit(param: EmitParam | ((index: number) => EmitParam)) {
  if (!particleSystem.value) return;

  for (let i = 0; i < props.quantityOfPerEmit; i++) {
    const { x, y, velocity } = pipe(param,
      (data) => {
        if (data instanceof Function) {
          return data(i);
        }

        return data;
      },
      (data) => ({
        /** babylon 的 0 點是畫面中心,網頁 0 點是左上角,
         * 而且 y 軸方向相反,讓我們轉換一下座標系統
         */
        x: data.x - canvasBounding.width / 2,
        y: -(data.y - canvasBounding.height / 2),
        velocity: data.velocity,
      }),
    );

    /** 根據 groupIndex 取得正確 index  */
    const index = i + groupIndex * props.quantityOfPerEmit;
    if (index === undefined) continue;

    const particle = particleSystem.value.particles[index];
    if (!particle) continue;

    /** 顯示粒子 */
    particle.isVisible = true;
    particle.alive = true;

    /** 設定位置與速度 */
    particle.position = new Vector3(x, y, 0);

    if (velocity) {
      particle.velocity = new Vector3(
        velocity.x, velocity.y, 0
      );
    }
  }

  emits('emit', groupIndex);

  groupIndex++;
  groupIndex %= props.maxConcurrency;  'emit': [groupIndex: number];
}

// #region Methods
defineExpose({
  emit,
});
// #endregion Methods
</script>
現在讓我們調整一下 basic-usage,讓滑鼠點擊位置發射粒子。
src\components\util-party-popper\examples\basic-usage.vue
<template>
  <div
    ref="containerRef"
    class="flex flex-col gap-4 w-full border border-gray-300"
    @click="emit()"
  >
    <util-party-popper ref="popperRef" />
  </div>
</template>

<script setup lang="ts">
import { reactive, ref } from 'vue';

import UtilPartyPopper from '../util-party-popper.vue';

import { useMouseInElement } from '@vueuse/core';

const popperRef = ref<InstanceType<typeof UtilPartyPopper>>();
const containerRef = ref<HTMLDivElement>();

/** 取得滑鼠在容器的位置 */
const mouse = reactive(useMouseInElement(containerRef))

function emit() {
  // 彩帶在滑鼠點擊處發射,並隨機給予 -5~5 之間的速度
  popperRef.value?.emit(() => ({
    x: mouse.elementX,
    y: mouse.elementY,
    velocity: {
      x: Math.random() * 10 - 5,
      y: Math.random() * 10 - 5,
    },
  }));
}
</script>
效果看起來超棒!✧⁑。٩(ˊᗜˋ*)و✧⁕。

有興趣的話也可以來這裡實際玩玩看喔!੭ ˙ᗜ˙ )੭
以上程式碼已同步至 GitLab,大家可以前往下載:


 iThome鐵人賽