在上一篇我們學到用matrix策略自動建立多個做一樣事的job
這篇我們會來會來看一下如何使用fail-fast、continue-on-error
在上一篇中提到使用matrix自動建立多個job,不知道大家有沒有想過如果某一個job失敗時,若想自動停下後面的job能怎麼做
fail-fast策略常和matrix一起用就可以達成這個目的,當然它也單獨使用
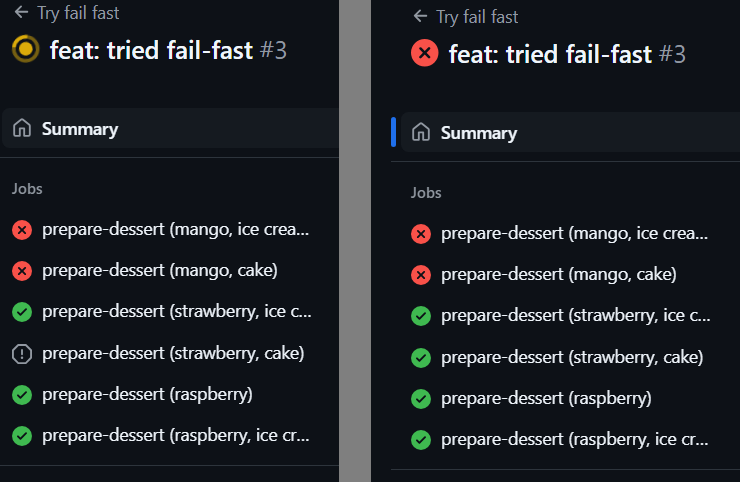
在多個job中有任一job失敗時,不管其餘job是否進行中,直接停止整個workflow
舉例來說deploy前會跑test、build code,如果這兩者中有任何一個失敗了,那也不必執行deploy了,這種情況就可以用fail-fast策略
好處是節省資源和時間
  prepare-dessert:
    runs-on: ubuntu-latest
    strategy:
      fail-fast: true
      matrix:
        fruit: [mango, strawberry]
        dessert: ['ice cream', cake]
        include:
          - size: small
          - size: large
            dessert: 'ice cream'
          - fruit: mango
            decoration: chocolate
          - fruit: raspberry
          - fruit: raspberry
            dessert: 'ice cream'
    steps:
      - name: throw error
        if: ${{ matrix.fruit == 'mango'}}
        run: |
          # 故意拋錯
          echo "Throw error on purpose"
          exit 1

不過需要注意,因為matrix jobs 是並行執行的,執行順序不會每次都相同,而且也無法強制設定執行順序,所以每次被停掉執行的job也會不同
continue-on-error策略可以和matrix一起用,也可以單獨使用
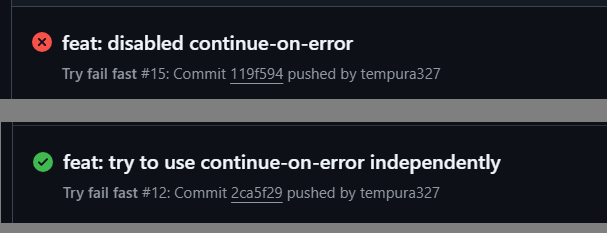
它和 fail-fast策略相反,在某個matrix job中即使發生錯誤,只要使用continue-on-error策略,其餘的matrix job就會繼續執行
好處是因為就算出錯還是會繼續執行,所以可以一次查看是否有其他錯誤,會讓debug變得較方便
  prepare-dessert:
    runs-on: ubuntu-latest
    strategy:
      # 就算故意拋錯,還是會每個matrix job都執行
      continue-on-error: true
      matrix:
        fruit: [mango, strawberry]
        dessert: ['ice cream', cake]
        include:
          - size: small
          - size: large
            dessert: 'ice cream'
          - fruit: mango
            decoration: chocolate
          - fruit: raspberry
          - fruit: raspberry
            dessert: 'ice cream'
    steps:
      - name: throw error
        if: ${{ matrix.fruit == 'mango'}}
        run: |
          # 故意拋錯
          echo "Throw error on purpose"
          exit 1
  next-job:
    runs-on: ubuntu-latest
    # 移除這行的話,exit 1會將整個workflow結束掉,使第二個step不執行,整個workflow仍被視為失敗
    continue-on-error: true
    steps:
      - name: throw error
        run: |
          echo "Throw error on purpose"
          exit 1
        # 雖然exit 1會將整個workflow結束掉,使第二個step不執行,但整個workflow仍被視為成功完成
      - name: after throw error
        run: |
          echo "This is after throw error"

