在上一篇我們學到如何建立Slack APP,並在workflow中呼叫Slack APP傳訊息到頻道
這篇我們會來會來看一下如何整合lighthouse到CI
Lighthouse 是用來分析和網站效能、best practice、SEO等的指標的工具
它會能夠對網頁進行自動測試,並生成改善建議的報告,根據報告中的分數能幫助開發者了解網站在不同裝置下的效能,這能更快檢查到問題
Lighthouse 可以作為 Chrome 插件,也可以透過在node環境下指令執行,如果你有自已的LHCI server(Lighthouse CI,可架設在AWS、GCP、Azure之類的地方),甚至能整合到CI中
整合到CI的方式有在發版前build時檢查、在每次PR時做檢查(只要每次push就會重跑),如果產品很重視效能、SEO的話建議可以採取後者
1.準備一個前端repo
2.把repo內容發到github page或vercel之類託管服務
到Lighthouse CI安裝Github APP
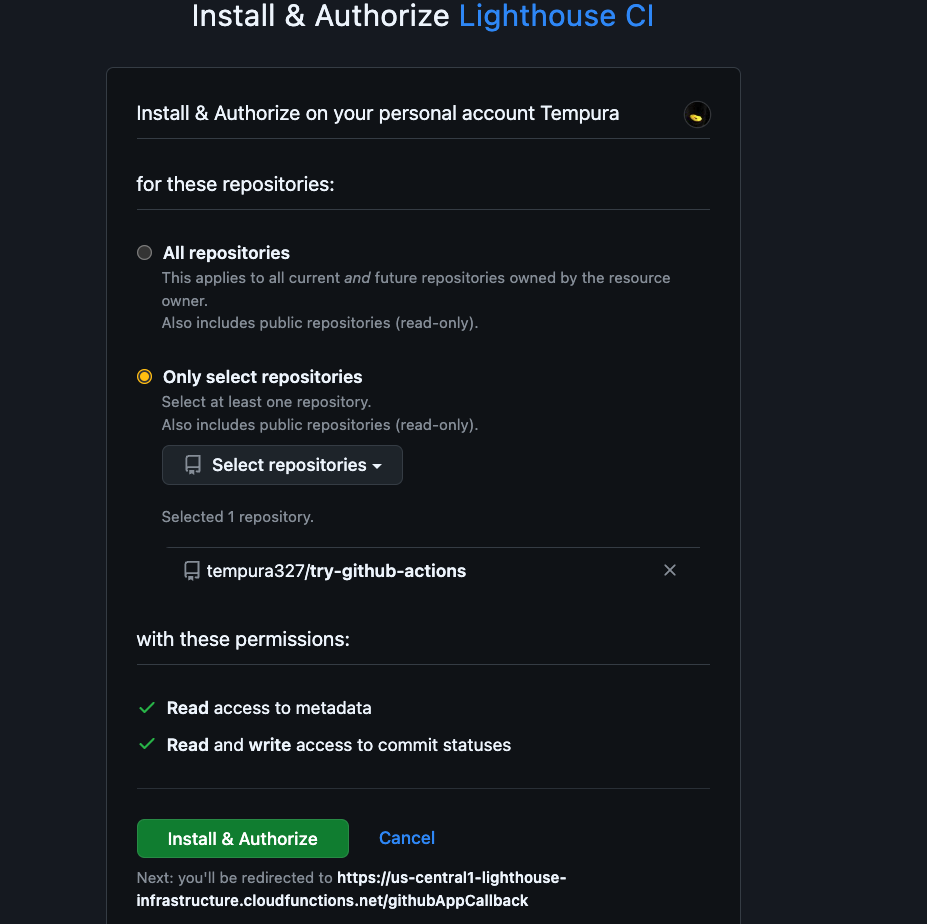
選擇你要裝這個APP的repo
如果你的帳號是歸在組織底下的,那一開始會先看到有個人跟組織兩個選項可以選,之後一樣選要裝在哪個repo,如果選組織的repo那會需要admin去按approve
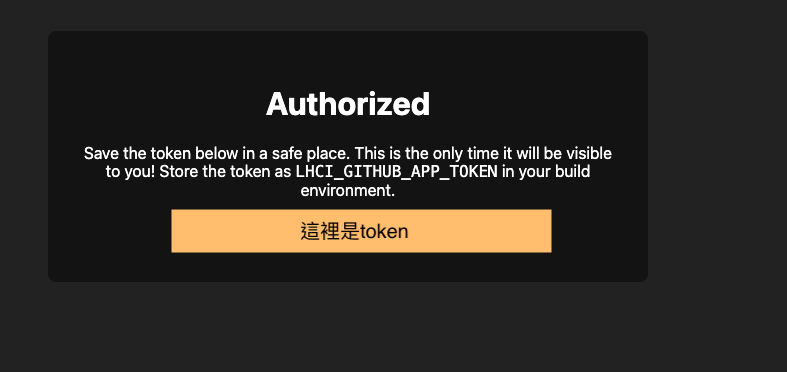
之後你會得到一個token,把它設置到剛剛安裝了Lighthouse CI的repo的secret
等等會在workflow中使用這個secret
在repo根目錄新增lighthouserc.js,如果你的package.json中有type:"module"的話,則副檔名要改成.cjs,不然會報錯[ERR_REQUIRE_ESM]: require() of ES Module
內容如下
module.exports = {
  ci: {
    upload: {
      target: 'temporary-public-storage',
    },
  },
};
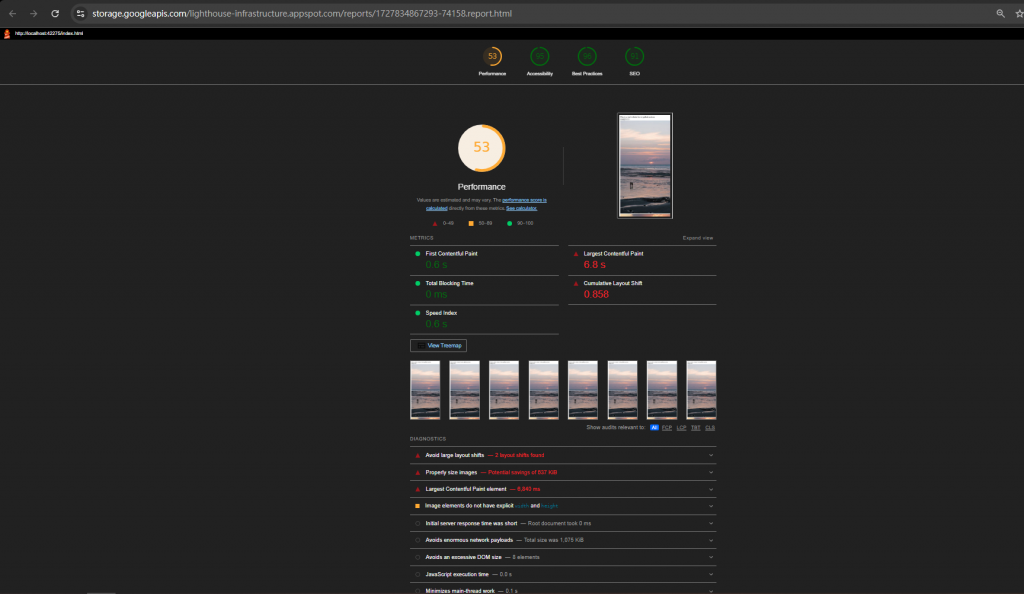
這會設定代表把檢查結果發到一個暫時性的儲存網站上,網址為https://storage.googleapis.com/ 開頭,所有人都可以進來看
如果你有LHCI server,也可以考慮report存到那邊,這樣的話就只有部分的人看得到,而且儲存的時間也會較久
如果符合以下某些條件要再多設定staticDistDir
SSG網站module.exports = {
ci: {
collect: {
// 根據各個專案的情況修改路徑
staticDistDir: './dist',
},
upload: {
target: 'temporary-public-storage',
},
},
};
反之則設定local run server的指令
module.exports = {
  ci: {
    collect: {
      // port視各為的情況自行修改
      url: ['http://localhost:3000/'],
      // run server的指令,視各個專案去修改
      // 舉例來說若repo中的package.json中有一個指令"dev": "npm run build && nodemon ./dist/app.js",
      startServerCommand: 'npm run dev',
    },
    upload: {
      target: 'temporary-public-storage',
    },
  },
};
name: Lighthouse CI
on: [push]
jobs:
  lhci:
    name: Lighthouse
    runs-on: ubuntu-latest
    steps:
      - uses: actions/checkout@v4
      - name: Use Node.js
        uses: actions/setup-node@v4
        with:
          node-version: 20
      # 如果是SSG,就不需要build,所以要把這個step移除
      - name: install packages and build
        run: |
          npm install
          npm run build
      - name: run Lighthouse CI
        run: |
          npm install -g @lhci/cli@0.14.0
          lhci autorun
        env:
          LHCI_GITHUB_APP_TOKEN: ${{ secrets.LHCI_GITHUB_APP_TOKEN }}
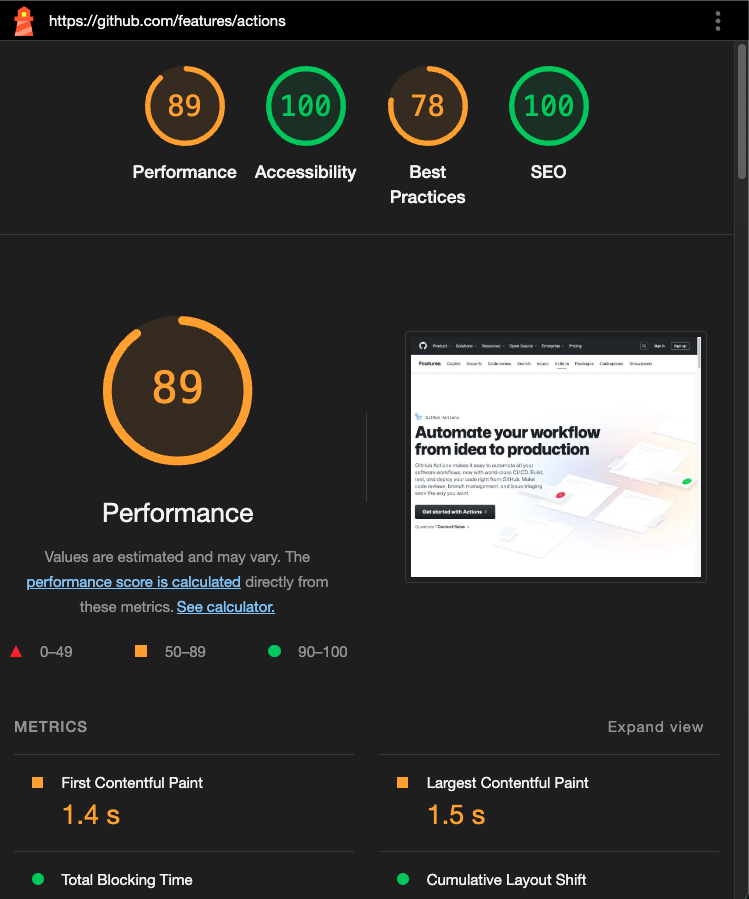
完成以後只要當你發了個PR,就會自動去做檢查並把分數列在PR資訊區囉
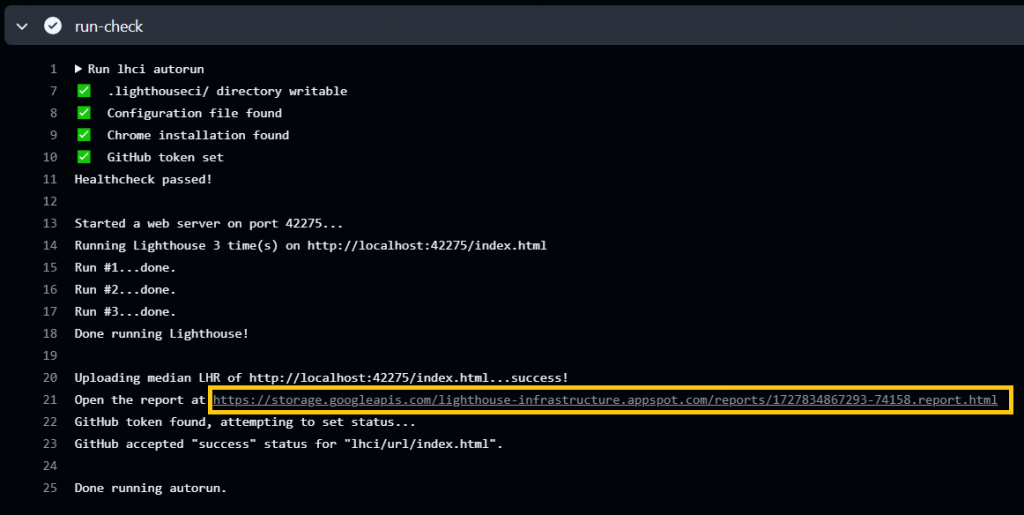
點detail進去會看到Lighthouse CI的Github APP產生的report
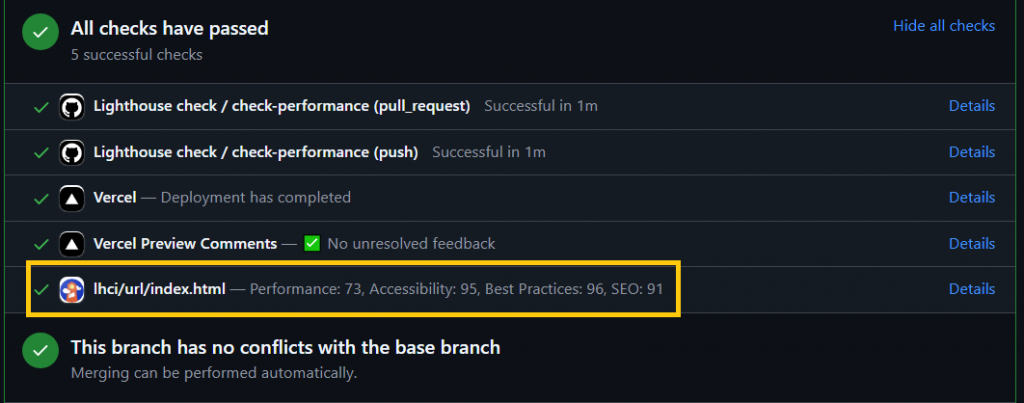
此外在log中還會看到一個@lhci/cli產出的report連結,點進去可以看到存在暫存網站的report