在上一篇我們學寫了一個根據tag來deploy到Github Pages的workflow
這篇我們會來會利用Jira API來寫一個自動更新Jira release note狀態的workflow
在.github/actions下建立get-jira-project-version資料夾,然後建一個index.js
import core from '@actions/core';

const jiraDomain = core.getInput('jiraDomain');
const jiraToken = core.getInput('jiraToken');
const projectKey = core.getInput('projectKey');
const versionName = core.getInput('versionName');

const getAllVersions = async () => {
  await fetch(`https://${jiraDomain}.atlassian.net/rest/api/3/project/${projectKey}/versions`, {
    method: 'GET',
    headers: {
      'Authorization': `Basic ${new Buffer.from(
        jiraToken
      ).toString('base64')}`,
      'Accept': 'application/json'
    }
  })
    .then(response => {
      console.log(
        `Response: ${response.status} ${response.statusText}`
      );

      return response.json();
    })
    .then((text) => {
      // 不需要在metadata file特別定義outputs,在這裡設置就好
      core.setOutput('versionId', text.find(({name}) => name === versionName)?.id);
    })
    .catch(err => console.error(err));
}

await getAllVersions();
在.github/actions下建立update-release-note資料夾,然後建一個index.js
import core from '@actions/core';

const today = new Date();
const releaseDate = `${today.getFullYear()}-${today.getMonth()+1}-${today.getDate()}`

const versionId = core.getInput('versionId');
const projectId = core.getInput('projectId');
const jiraToken = core.getInput('jiraToken');
const jiraDomain = core.getInput('jiraDomain');

const bodyData = `{
  "id": "${versionId}",
  "projectId": "${projectId}",
  "releaseDate": "${releaseDate}",
  "released": true
}`;

// node環境底下也可以不包在function中,直接在top level直接await fetch
await fetch(`https://${jiraDomain}.atlassian.net/rest/api/3/version/${versionId}`, {
  method: 'PUT',
  headers: {
    'Authorization': `Basic ${Buffer.from(
      jiraToken
    ).toString('base64')}`,
    'Accept': 'application/json',
    'Content-Type': 'application/json'
  },
  body: bodyData
})
  .then(response => {
    return response.text();
  })
  .then(text => console.log(text))
  .catch(err => console.error(err));
因為我們有兩個JS action,所以也要建立兩個action.yml,放在跟同一組的JS action同個資料夾
當然不放在同個資料夾也是可以的,只要metadata file中main屬性指向的路徑正確即可
name: Get id of release version
inputs:
  jiraDomain:
    required: true
  jiraToken:
    required: true
  projectKey:
    required: true
  versionName:
    required: true

runs:
  using: node20
  main: './index.js'
name: Update Jira release note
inputs:
  jiraDomain:
    required: true
  jiraToken:
    required: true
  versionId:
    required: true
  projectId:
    required: true

runs:
  using: node20
  main: './index.js'
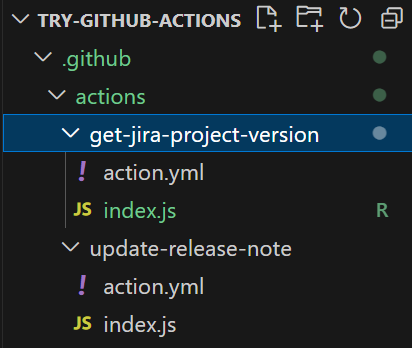
完成這一步以後我們的檔案旁放位置如下
修改一下上一篇寫的workflow,並在當中使用上一個步驟建立的actions
name: Deploy to github page

on:
  push:
    tags:
      # tag的規則視需求更改
      - 'trial@\d+.\d+.\d+'
  workflow_dispatch:

jobs:
  build:
    runs-on: ubuntu-latest
    steps:
      - uses: actions/checkout@v4
      - name: Upload artifact
        uses: actions/upload-pages-artifact@v3
        with:
          path: ./src
          name: github-pages

  deploy:
    runs-on: ubuntu-latest
    needs: build
    environment:
      name: github-pages
      url: https://<使用者名>.github.io/<repo名>/
    permissions:
      pages: write
      id-token: write
    steps:
      - name: Deploy to GitHub Pages
        id: deployment
        uses: actions/deploy-pages@v4

  # 新增job
  update-jira-release-note:
    runs-on: ubuntu-latest
    steps:
      - name: Check out repo
        uses: actions/checkout@v4
      - uses: actions/setup-node@v4
        with:
          node-version: '20'
      - run: |
          npm install
          npm list
        shell: bash

      - name: get id of release version
        id: get_version
        uses: ./.github/actions/get-jira-project-version
        with:
          jiraDomain: ${{secrets.JIRA_DOMAIN}}
          jiraToken: ${{secrets.JIRA_TOKEN}}
          projectKey: TGA
          versionName: ${{github.ref_name}}


      - name: update jira release note
        uses: ./.github/actions/update-release-note
        with:
          jiraDomain: ${{secrets.JIRA_DOMAIN}}
          jiraToken: ${{secrets.JIRA_TOKEN}}
          versionId:  ${{steps.get_version.outputs.versionId}}
          projectId: 你的project的id
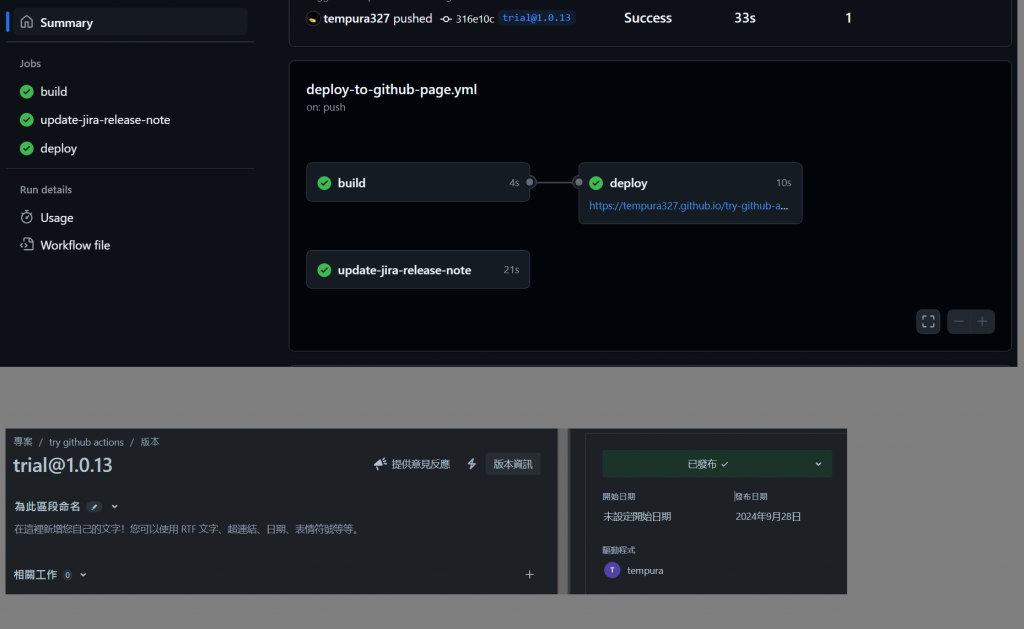
完成後會像這樣