
上一篇我們提到了到JSON Web Token(JWT)的流程以及如果要進行實踐的話可能需要考量的因素
我們就在這邊進行實作吧
程式碼:https://github.com/class83108/drf_demo/tree/jwt
今日重點:
建立客戶端:在5501端口上建立前端模擬跨域的場景
有以下功能:
技術細節:
poetry add djangorestframework-simplejwt
poetry add django-cors-headers
poetry add django-redis
django-cors-headers幫我們添加對應的CORS (Cross-Origin Resource Sharing, 跨來源資源共用)標頭,讓後端響應時包含允許前端網域的標頭而不被擋下
djangorestframework-simplejwt則讓我們能快速建立JWT相關認證邏輯
如果要在Django中使用Redis需要額外安裝django-redis
基礎配置
INSTALLED_APPS = [
    ...
    # DRF
    "rest_framework",
    "rest_framework.authtoken",
    "rest_framework_simplejwt",
    "corsheaders",
    # 自定義 app
    "note",
]

MIDDLEWARE = [
    "corsheaders.middleware.CorsMiddleware",  # 放在最前面
    ...
]

REST_FRAMEWORK = {
    "DEFAULT_AUTHENTICATION_CLASSES": [
        # "rest_framework_simplejwt.authentication.JWTAuthentication", # 這是預設的 JWT 驗證器
        "drf_demo.custom_authentication.CustomJWTAuthentication",  # 使用自定義的 JWT 驗證器
    ],
}

# 進行JWT的基礎設定
SIMPLE_JWT = {
    "AUTH_HEADER_TYPES": ("Bearer",),
    "ACCESS_TOKEN_LIFETIME": timedelta(minutes=60), # 這邊可以設置更短的時間
    "REFRESH_TOKEN_LIFETIME": timedelta(days=1),
    "ROTATE_REFRESH_TOKENS": False,
    "BLACKLIST_AFTER_ROTATION": True,
    # 用於認證令牌的類別
    "AUTH_TOKEN_CLASSES": ("rest_framework_simplejwt.tokens.AccessToken",),
    "AUTH_COOKIE": "access_token",  # 設定 cookie 名稱
    "TOKEN_OBTAIN_SERIALIZER": "drf_demo.serializers.CustomTokenObtainPairSerializer",
}

# CORS 設定 允許跨域請求
CORS_ALLOWED_ORIGINS = [
    "http://localhost:5501",
    "http://127.0.0.1:5501",
]

CORS_ALLOW_CREDENTIALS = True

# 配置Redis當作快取
CACHES = {
    "default": {
        "BACKEND": "django_redis.cache.RedisCache",
        "LOCATION": f"redis://:{REDIS_PASSWORD}@{REDIS_HOST}:{REDIS_PORT}/1",
        "OPTIONS": {
            "CLIENT_CLASS": "django_redis.client.DefaultClient",
        },
    }
}

# SMTP Configuration
EMAIL_BACKEND = "django.core.mail.backends.smtp.EmailBackend"
EMAIL_HOST = "smtp.gmail.com"  # SMTP伺服器
EMAIL_PORT = 587  # TLS通訊埠號
EMAIL_USE_TLS = True  # 開啟TLS(傳輸層安全性)
EMAIL_HOST_USER = EMAIL_USER
EMAIL_HOST_PASSWORD = EMAIL_PASSWORD
DEFAULT_AUTHENTICATION_CLASSES中我們自定義的認證器可以等完成再補上SIMPLE_JWT中設定了使用djangorestframework-simplejwt 的基本設定
TOKEN_OBTAIN_SERIALIZER也可以在序列化器中指定,可以等完成後再補上首先在跟目錄下建立serializers.py
from rest_framework_simplejwt.serializers import TokenObtainPairSerializer
from django.contrib.auth import get_user_model
from rest_framework import serializers
from django.core.cache import cache

User = get_user_model()

class OTPRequestSerializer(serializers.Serializer):
    username = serializers.CharField()

class CustomTokenObtainPairSerializer(TokenObtainPairSerializer):
    username_field = "username"
    otp = serializers.CharField(max_length=6, write_only=True)

    def __init__(self, *args, **kwargs):
        super().__init__(*args, **kwargs)
        self.fields["password"] = serializers.CharField(required=False, write_only=True)

    @classmethod
    def get_token(cls, user):
        token = super().get_token(user)
        token["username"] = user.username
        return token

    def validate(self, attrs):
        username = attrs.get("username")
        otp = attrs.get("otp")

        try:
            user = User.objects.get(username=username)
        except User.DoesNotExist:
            raise serializers.ValidationError("Invalid username")

        # 驗證OTP
        stored_otp = cache.get(f"otp_{username}")
        if not stored_otp or stored_otp != otp:
            raise serializers.ValidationError("Invalid or expired OTP")

        # OTP驗證成功,刪除存儲的 OTP
        cache.delete(f"otp_{username}")

        refresh = self.get_token(user)
        data = {}
        data["refresh"] = str(refresh)
        data["access"] = str(refresh.access_token)

        return data
OTPRequestSerializer很單純就是驗證用戶名是不是字符串形式CustomTokenObtainPairSerializer :
TokenObtainPairSerializer 方便我們調用現成的方法__ini__中先把password取消掉required屬性,因為我們沒有要透過密碼驗證,因為不想傳輸敏感資訊在根目錄下建立custom_authentication.py
import logging
from rest_framework_simplejwt.authentication import JWTAuthentication
from django.conf import settings

logger = logging.getLogger(__name__)

class CustomJWTAuthentication(JWTAuthentication):
    def authenticate(self, request):
        logger.debug(f"Headers: {request.headers}")

        header = self.get_header(request)
        if header is None:
            logger.debug("No Auth header found, checking cookies")
            raw_token = request.COOKIES.get(settings.SIMPLE_JWT['AUTH_COOKIE'])
        else:
            logger.debug("Auth header found")
            raw_token = self.get_raw_token(header)

        if raw_token is None:
            logger.debug("No token found")
            return None

        logger.debug("Token found, validating")
        try:
            validated_token = self.get_validated_token(raw_token)
            user = self.get_user(validated_token)
            logger.debug(f"Token validated, user: {user}")
            return user, validated_token
        except Exception as e:
            logger.error(f"Token validation error: {str(e)}")
            return None
雖然我們繼承了JWTAuthentication,但是其實我們寫的認證方法跟原本方法基本一致
都是先拿到請求頭後,確認裡面有沒有對應的Access Token,以及用戶有沒有註冊
但是我為了確認跨域有沒有成功等因素,我添加比較多debug的過程方便調適
因為需要引入的套件較多,可以直接看github
我們需要配置幾個視圖:
OTPRequestSerializer 序列化器驗資料def generate_otp():
return "".join(random.choices(string.digits, k=6))
class OTPRequestView(APIView):
def post(self, request):
serializer = OTPRequestSerializer(data=request.data)
if serializer.is_valid():
username = serializer.validated_data["username"]
try:
user = User.objects.get(username=username)
except User.DoesNotExist:
return Response(
{"error": "User not found."}, status=status.HTTP_404_NOT_FOUND
)
otp = generate_otp()
# 將OTP存儲在redis中,設置5分鐘過期
cache.set(f"otp_{username}", otp, timeout=300)
# 發送OTP郵件
send_mail(
"Your OTP for Authentication",
f"Your OTP is: {otp}. It will expire in 5 minutes.",
settings.EMAIL_HOST_USER,
[user.email],
fail_silently=False,
)
return Response(
{"message": "OTP sent successfully."}, status=status.HTTP_200_OK
)
return Response(serializer.errors, status=status.HTTP_400_BAD_REQUEST)
TokenObtainPairView然後改寫POST方法httponly=True
class CustomTokenObtainPairView(TokenObtainPairView):
    serializer_class = CustomTokenObtainPairSerializer

    def post(self, request, *args, **kwargs):
        serializer = self.get_serializer(data=request.data)

        try:
            serializer.is_valid(raise_exception=True)
        except Exception as e:
            return Response({"error": str(e)}, status=status.HTTP_400_BAD_REQUEST)

        access_token = serializer.validated_data["access"]
        refresh_token = serializer.validated_data["refresh"]

        response = Response(
            {"access": access_token, "message": "Authentication successful"},
            status=status.HTTP_200_OK,
        )

        try:
            response.set_cookie(
                "refresh_token",
                refresh_token,
                httponly=True,
                samesite="None",  # 對於跨域請求,使用 'None'
                secure=False,  # 在生產環境應該設為 True
                domain=None,  # 如果需要,指定域名
                max_age=3600 * 24 * 14,  # 14 days
            )
        except Exception as e:
            print(f"Error: {str(e)}")
        return response
RefreshToken 方法做驗證from rest_framework_simplejwt.tokens import RefreshToken
class CustomTokenRefreshView(APIView):
def post(self, request):
refresh_token = request.COOKIES.get("refresh_token")
if not refresh_token:
return Response(
{"error": "No refresh token provided"},
status=status.HTTP_400_BAD_REQUEST,
)
try:
token = RefreshToken(refresh_token)
access_token = str(token.access_token)
response = Response(
{"access": access_token, "message": "Token refreshed successfully"}
)
new_refresh_token = str(token)
response.set_cookie(
"refresh_token",
new_refresh_token,
httponly=True,
samesite="Lax",
path="/",
max_age=3600 * 24, # 1天
)
return response
except TokenError:
return Response(
{"error": "Invalid or expired token"},
status=status.HTTP_401_UNAUTHORIZED,
)
class ProtectedView(APIView):
    authentication_classes = [CustomJWTAuthentication]
    permission_classes = [IsAuthenticated]

    def get(self, request):
        print(f"User authenticated: {request.user.is_authenticated}")
        print(f"User: {request.user}")
        return Response(
            {
                "message": "You have accessed a protected view!",
                "user": (
                    request.user.username
                    if request.user.is_authenticated
                    else "Anonymous"
                ),
            }
        )
from .views import (
    OTPRequestView,
    CustomTokenObtainPairView,
    ProtectedView,
    CustomTokenRefreshView,
    DebugView,
)

urlpatterns = [
    ...
    path("otp/", OTPRequestView.as_view(), name="otp_request"),
    path("token/", CustomTokenObtainPairView.as_view(), name="token_obtain_pair"),
    path("token/refresh/", CustomTokenRefreshView.as_view(), name="token_refresh"),
    path("protected/", ProtectedView.as_view(), name="protected_view"),
]
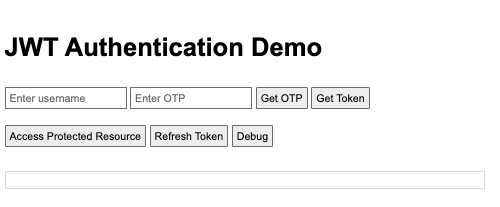
index.html
<!DOCTYPE html>
<html lang="en">
  <head>
    <meta charset="UTF-8" />
    <meta name="viewport" content="width=device-width, initial-scale=1.0" />
    <title>JWT Authentication Demo</title>
    <style>
      body {
        font-family: Arial, sans-serif;
        max-width: 600px;
        margin: 0 auto;
        padding: 20px;
      }
      input,
      button {
        margin: 10px 0;
        padding: 5px;
      }
      #output {
        margin-top: 20px;
        padding: 10px;
        border: 1px solid #ddd;
      }
    </style>
  </head>
  <body>
    <h1>JWT Authentication Demo</h1>
    <input type="text" id="username" placeholder="Enter username" />
    <input type="password" id="otp" placeholder="Enter OTP" />
    <button onclick="getOTP()">Get OTP</button>
    <button onclick="getToken()">Get Token</button>
    <button onclick="accessProtectedResource()">
      Access Protected Resource
    </button>
    <button onclick="refreshAccessToken()">Refresh Token</button>
    <button onclick="debugRequest()">Debug</button>
    <div id="output"></div>

    <script src="/drf_demo/demo_html/main.js"></script>
  </body>
</html>
const API_BASE_URL = "http://localhost:8000";
const output = document.getElementById("output");
我們分別有幾個按鈕處發不同方法,但是記得發送請求一定要包含credentials: "include" ,告訴瀏覽器在跨域請求中包含 cookies。默認情況下,跨域請求不會發送 cookies
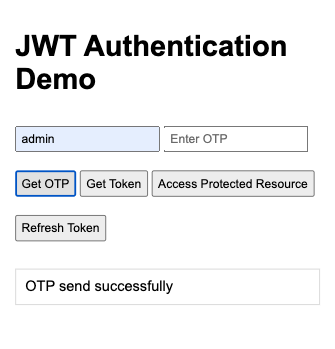
getOTP方法對應OTPRequestView視圖
async function getOTP() {
  const username = document.getElementById("username").value;
  if (!username) {
    output.innerHTML = "Please enter username";
    return;
  }
  try {
    const response = await fetch(`${API_BASE_URL}/otp/`, {
      method: "POST",
      headers: { "Content-Type": "application/json" },
      body: JSON.stringify({ username: username }),
      credentials: "include",
    });

    const otpRespData = await response.json();

    output.innerHTML = "OTP send successfully";
  } catch (error) {
    output.innerHTML = `Error: ${error.message}`;
  }
}
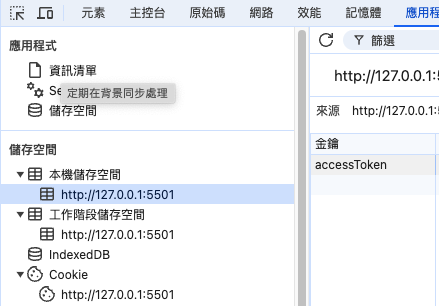
localStoreage
async function getToken() {
  const username = document.getElementById("username").value;
  const otp = document.getElementById("otp").value;

  if (!username || !otp) {
    output.innerHTML = "Please enter username and OTP";
    return;
  }

  try {
    const response = await fetch(`${API_BASE_URL}/token/`, {
      method: "POST",
      headers: { "Content-Type": "application/json" },
      body: JSON.stringify({ username: username, otp: otp }),
      credentials: "include",
    });

    const tokenRespData = await response.json();

    if (tokenRespData.access) {
      // Store the access token in localStorage
      localStorage.setItem("accessToken", tokenRespData.access);
      output.innerHTML =
        "Successfully got tokens. Access token stored in localStorage.";
    } else {
      output.innerHTML = "Access token not received from the server.";
    }

    // Note: The refresh token should be automatically stored as an HttpOnly cookie by the server
  } catch (error) {
    output.innerHTML = `Error: ${error.message}`;
  }
}
localStoreage
async function refreshAccessToken() {
try {
const response = await fetch(`${API_BASE_URL}/token/refresh/`, {
method: "POST",
credentials: "include", // 重要:允許發送和接收 cookies
headers: {
"Content-Type": "application/json",
"X-Requested-With": "XMLHttpRequest",
},
});
if (!response.ok) {
throw new Error("Failed to refresh token");
}
const data = await response.json();
if (data.access) {
localStorage.setItem("accessToken", data.access);
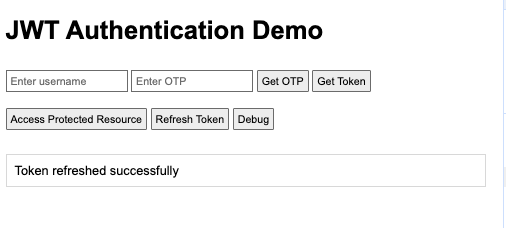
output.innerHTML = "Token refreshed successfully";
} else {
throw new Error("No access token received");
}
} catch (error) {
console.error("Error refreshing token:", error);
throw error;
}
}
refreshAccessToken更新Access Token然後再重新請求一次async function accessProtectedResource() {
async function fetchWithToken(token) {
const response = await fetch(`${API_BASE_URL}/protected/`, {
method: "GET",
credentials: "include",
headers: {
Authorization: `Bearer ${token}`,
},
});
if (!response.ok) {
throw response;
}
return response.json();
}
try {
// 首先嘗試使用存儲的 access token
let accessToken = localStorage.getItem("accessToken");
try {
const data = await fetchWithToken(accessToken);
output.innerHTML = `Protected Resource: ${JSON.stringify(data)}`;
} catch (error) {
if (error.status === 401) {
// Token 可能已過期,嘗試刷新
accessToken = await refreshAccessToken();
// 使用新的 token 重試
const data = await fetchWithToken(accessToken);
output.innerHTML = `Protected Resource (after refresh): ${JSON.stringify(
data
)}`;
} else {
throw error;
}
}
} catch (error) {
console.error("Error accessing protected resource:", error);
output.innerHTML = `Error: ${
error.message || "Failed to access protected resource"
}`;
}
}
既然程式碼都寫好了,就來試試看功能是否都沒有問題
Your OTP is: 936765. It will expire in 5 minutes.
document.cookie,確認不會被惡意腳本取得Refresh Token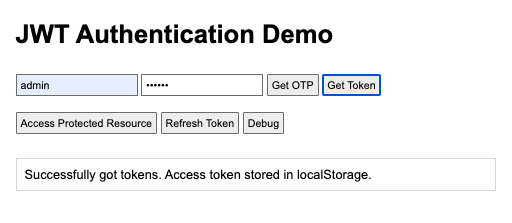
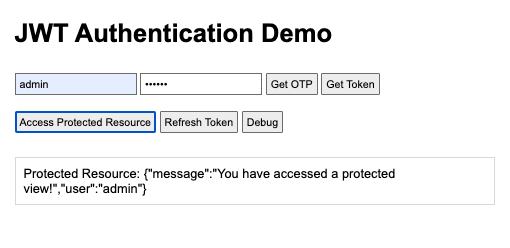
User authenticated: True
User: admin
我們根據上一篇對於JWT的探討,了解可能用哪些方式使用JWT是更適合的實踐方式
並且在這個章節中進行實現:
因為是每天日更沒有任何庫存,加上近期加班,每一天包含週末都是被寫文章還有寫demo佔滿
今天(應該說昨天)意外的遇到蠻多bug,的確我對於整個流程整握度還不夠高,導致最後還是中斷
了無法成功完賽,不過我還是會在10/14前把整個系列完成
有看到這裡的讀者,對我來說真的心懷感激XD 如果覺得這樣的內容跟其他網路上千篇一律介紹DRF JWT的文章有所不同,對你有啟發或是任何想法的話,給我一個LIKE就是最大的鼓勵!
